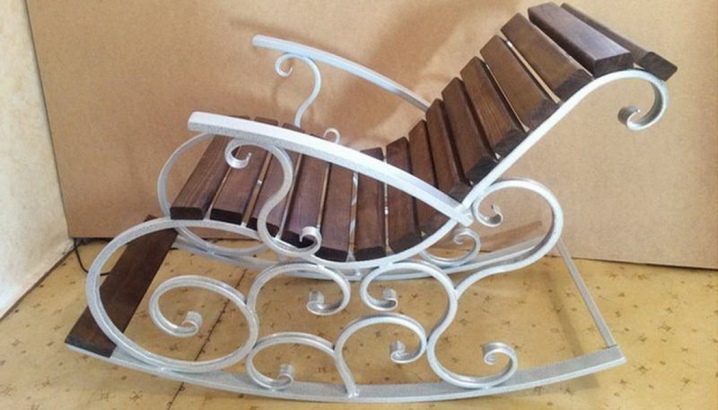
Do-it-yourself rocking chair from a profile pipe: drawings and work progress

Looking to build a rocking chair that is comfortable, durable and cheap? In this situation, the rocking chair must be created from a shaped pipe. In this publication, you will receive tips for creating metal furniture and a detailed guide on how to build a simple and comfortable chair with your own hands.
Drafting a project
If you are making metal furniture for the first time, it is better to opt for simpler designs, since such furniture is much easier to create than a chair with a pendulum mechanism or a suspended cocoon chair. For example, it will not be difficult at all to assemble a rocking chair on ordinary bent runners... In this case, you will need to bend 2 skis and fix a separately assembled iron chair with a back on them. At the same time, it is also impractical to oversimplify the device of the chair at the expense of convenience of use.

You can use one of the huge number of ready-made drawings for your own purposes., which have already been tested in real-life pieces of furniture. When creating a project on our own, we take into account individual requests for the design of the seat and skis. The rocking chair you designed should be comfortable and reliable. And both of these conditions are achieved by well-chosen dimensions.
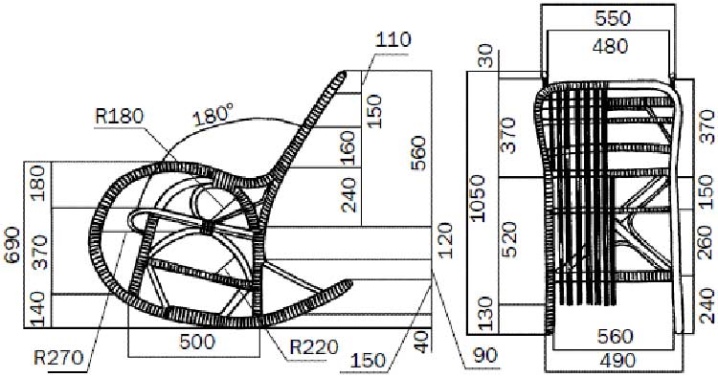
You can set the correct dimensions using the following method. Find a ready-made chair or chair that is extremely comfortable to sit in. Take measurements from this furniture and transfer them to your own drawing.
The situation is somewhat more problematic with skis. Their length should be consistent with the radius, so that the assembled structure can swing with little effort, but in extreme positions it does not overturn. A general rule: a ski measuring 1.2 meters along the edge must turn upward from the floor surface by no more than 20-25 centimeters. It is natural that the arch of the ski should be measured without obvious creases that can provoke uneven rocking.
Materials and tools
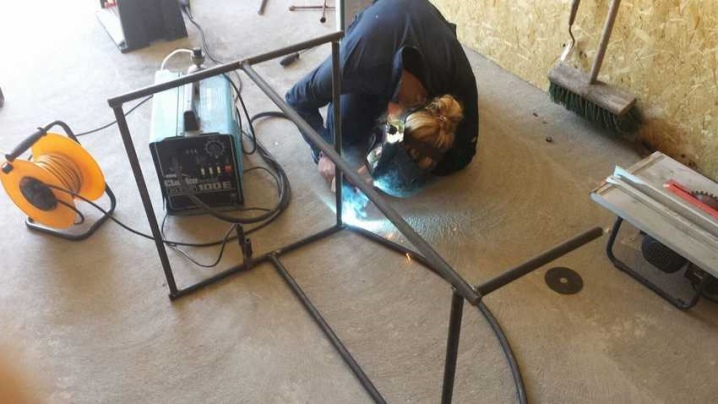
To work with a professional pipe you will need the following tools:
- pipe bender with rollers for rectangular pipe;
- welding machine with related accessories;
- clamps for metal;
- angle grinder with cutting disc and attachment for grinding metal;
- electric drill with a set of drills for metal;
- measuring instruments (tape measure, square, marker and others).
Of the materials for creating skis, only a pipe with a cross section of 40 × 25 millimeters is needed. For the manufacture of the chair, we will adopt a pipe of 30 × 30 millimeters or so. The seat and backrest after the assembly is completed, it would be desirable to sheathe a board made of wood, since sitting on bare iron is not very comfortable.
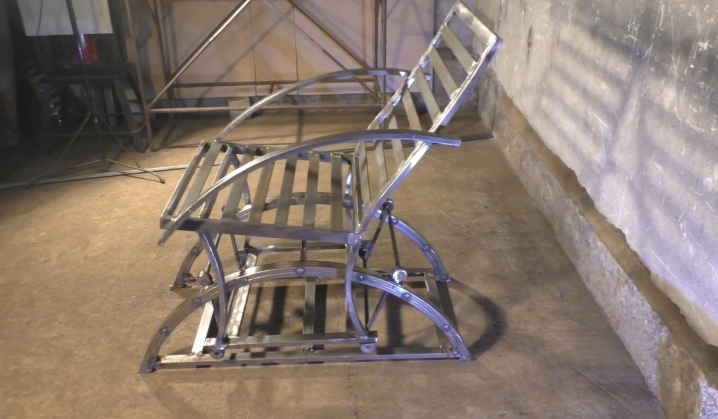
Step-by-step instruction
Let's take a look at the assembly procedure point by point.
- We make skis. According to the overwhelming majority, this is the most difficult stage. In practice, if there is a pipe bender, there is no problem. Simply cut 2 pieces of 1.3 meters and roll until you get a suitable radius and distance between the edges of the skis of 96 centimeters. The skis must be completely aligned, otherwise the chair will sway unevenly. You can compare the correspondence of skis by placing them to each other.

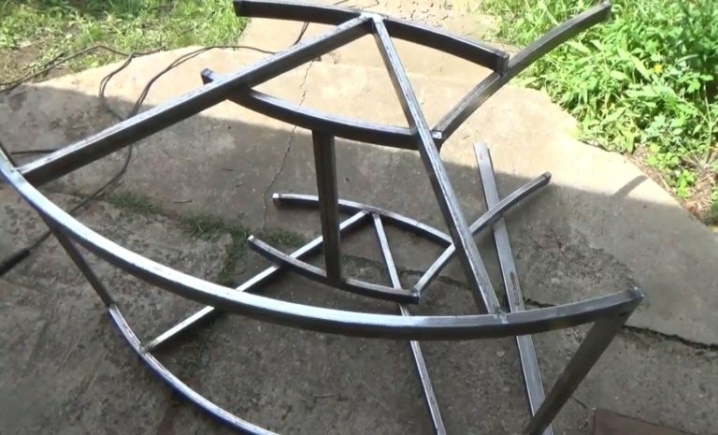
- Sidewall assembly. According to the sketch, we weld the diagonal racks to the ski. In the middle of the struts, a cross member is fixed - the seat guide.At the top of the diagonal struts, we weld the armrest.
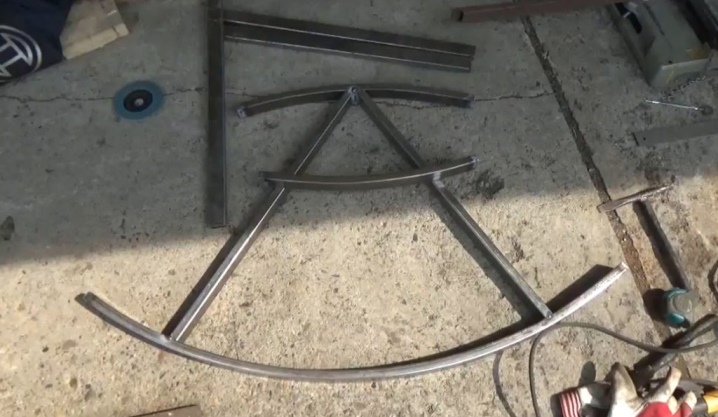
- Assembling 2 sidewalls. Its assembly is carried out in the same way as the assembly of the first one, only during assembly, we attach the structural elements to the previously manufactured part and make sure that they are the same.
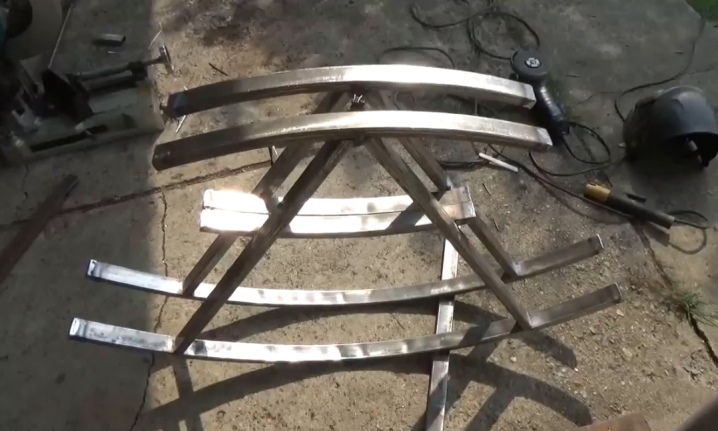
- We connect the assembled sidewalls. In the front area of the skis, we weld horizontal crossbars. At this stage, we will certainly use a square and control that the angle between the crossbars and runners is 90 degrees.
- We weld the next cross member at the top of the rackslocated diagonally. The angle between this cross member and the diagonal posts should be 90 degrees.
- We weld on the backrest guides. We weld two pieces of a curved pipe to the seat frame and to the armrests. The guiding backrests should be parallel to each other, so that in the future, when cladding with wood, the structure does not lead.
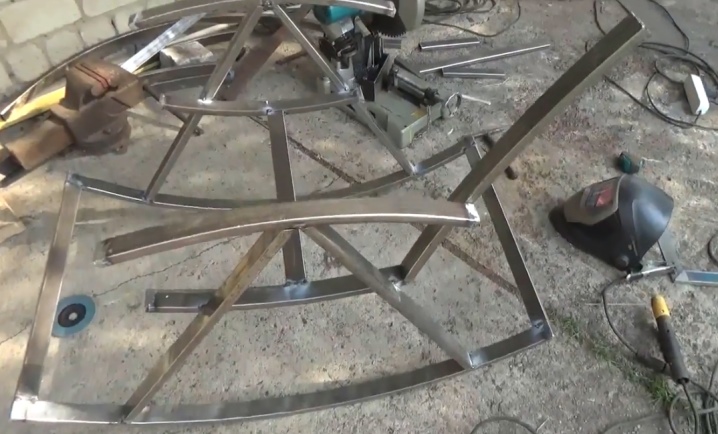
- Painting of the supporting structure. We clean the assembled frame from visible traces of rust and prime it. After the primer has completely dried, apply 2 layers of paint with a break to dry the previous layer.

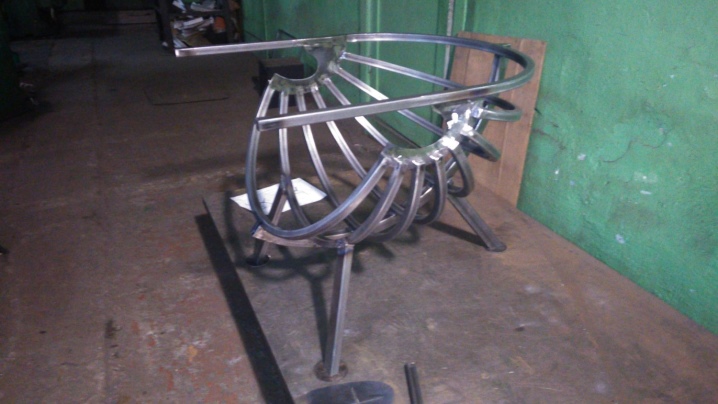
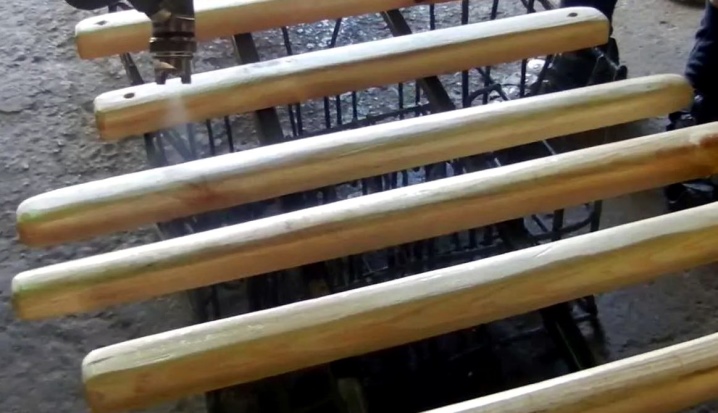
So, the base is ready, only the frame, despite the fact that it is soundly assembled, is an armchair. What to do with the iron frame so that it turns into a comfortable piece of furniture? There are a number of possibilities for finishing iron furniture. For example, you can cut steel strips from sheet steel and weld them to the frame in the form of lamellas that will hold the mattress or pillows. The second, the best option is the cladding of the metal frame with wood planks.
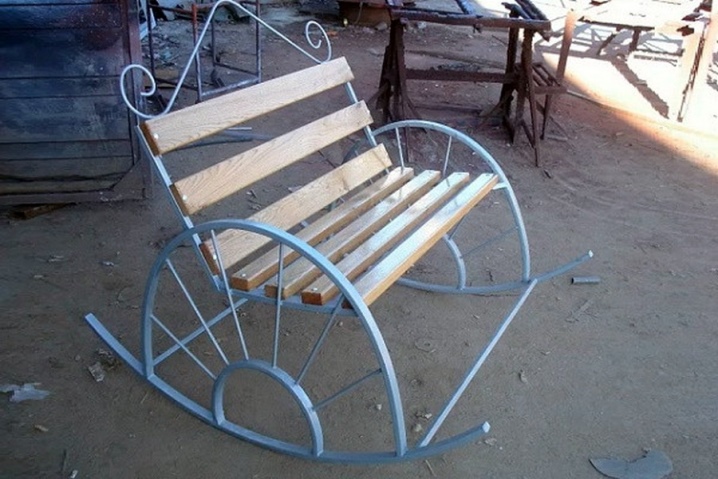
Lamellas are cut from a stitched wooden board, which are fixed across to the frame. For installation in a metal frame, holes with a diameter of 3 millimeters are first drilled. On top of the prepared holes, lamellas are laid and fixed to the pipe with metal screws. After complete assembly of the chair, the covering of the supporting structure must be painted or varnished. The choice of finishing technique depends on the materials used for the cladding.
What to do if there is no professional pipe, but you need to assemble a reliable and comfortable chair? As an alternative to a profile pipe, you can use the most affordable round section to create furniture. In fact, a steel pipe with a circular cross-section is as strong as a pipe with a rectangular profile. Therefore, a simple water supply iron pipe can be practiced to create a rocking chair. Another issue is that the circular cross section makes assembly difficult, since the elements are more difficult to connect together.
For information on how to make a rocking chair from a profile pipe, see the next video.


The comment was sent successfully.