All About I-Beams
A metal I-beam, unlike a wooden one, does not burn, it is initially ready and available for the process of erecting floors in all its characteristics. However, when its acquisition is too expensive, an alternative is used - an I-beam made of wood materials.
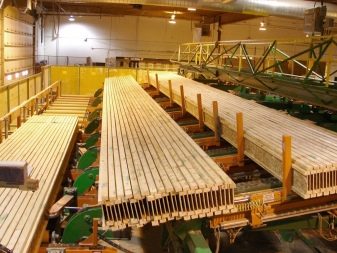
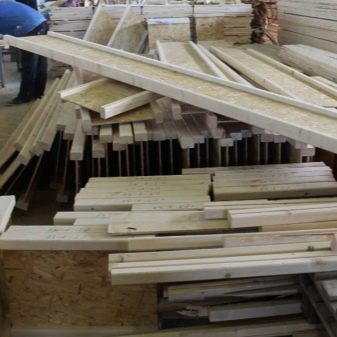
Features of production
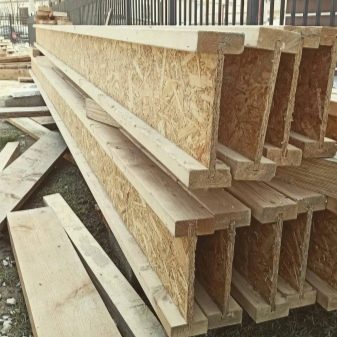
A wooden I-beam is presented by its manufacturers in Russia in the same way as a metal one (steel, aluminum). The process of making this product from solid wood is as follows. The base of the beams is considered to be a timber made of natural wood. Chipboard, OSB and other derivatives made from pressed and glued sawdust are not allowed - their strength is not suitable for supporting the main bearing load. Sawdust building materials can be used only as an underlying layer (sub-floor), and not for the application of the main force of gravity, which they would balance with their elastic force.
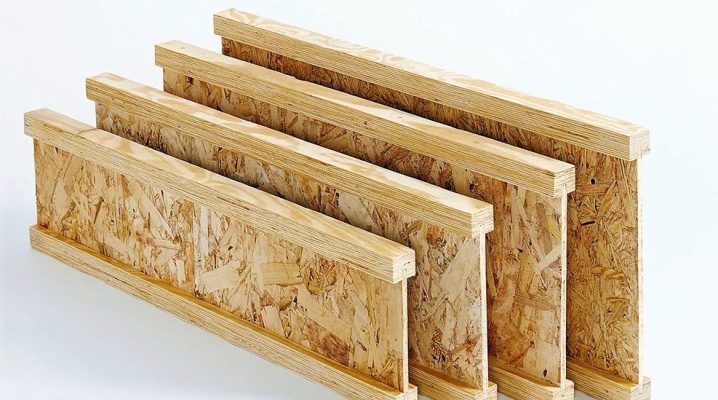
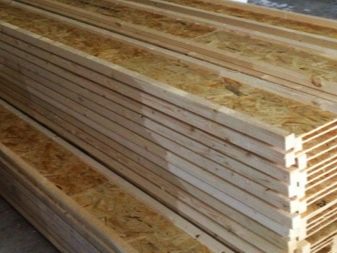
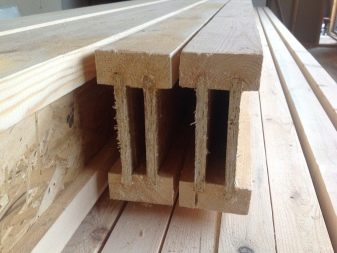
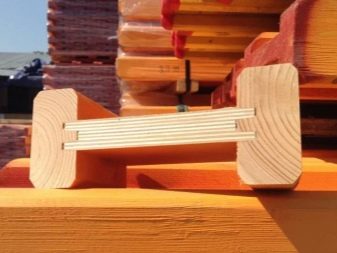
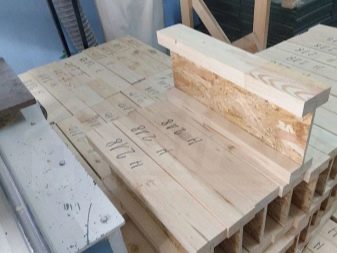
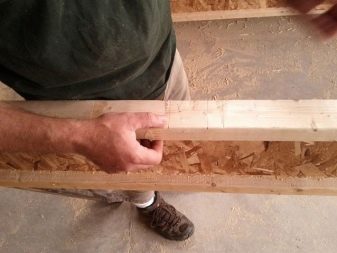
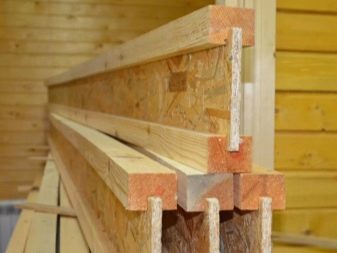
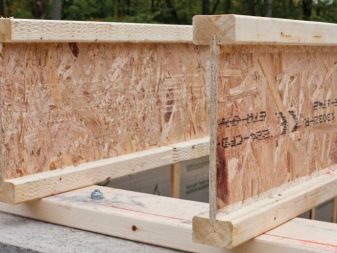
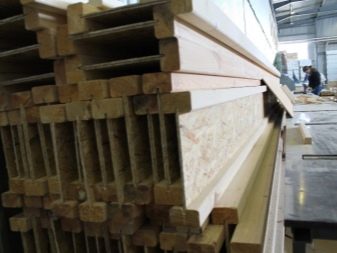
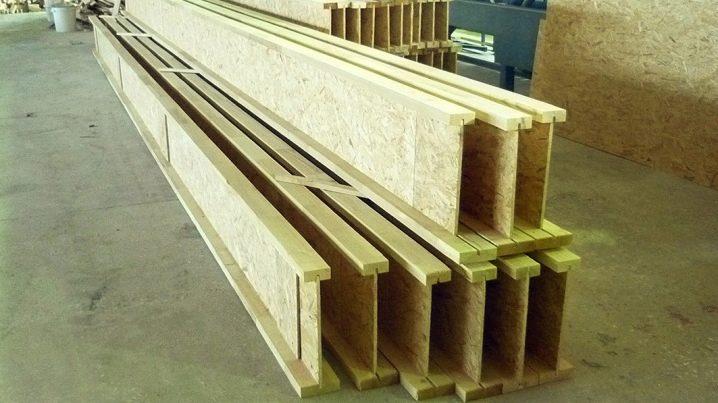
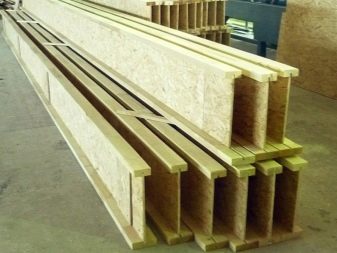
Dried edged and planed boards are sawn through according to the drawing. From the resulting blanks, an I-beam is exposed - a vertical jumper (it is the thickest in the structure here), upper and lower horizontal beams (shelves). The master drills the holes in the shelf for fastening the flooring independently. To do this, in the upper and lower slats, using a milling machine, they cut through the thickness of the rack (adjoining wall).
The grooves are filled with an adhesive - for example, wood glue, in the role of which epoxy works, since it is the cheapest. It is unsafe to use Moment-1 type glue - it is made of strong-smelling and flammable oil products, whose vapors form an explosive space with air and have a harmful effect on people who are installing such floors (ceilings), and subsequently living in this place, and this method is expensive in construction. In this case, the width of the groove is selected in such a way that the jumper post goes into it with some effort, and does not walk freely. The central wall is inserted all the way into the lower groove. A second horizontal "shelf" is placed on top of the mirror.

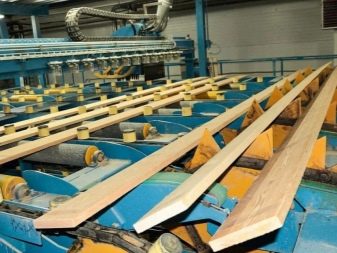
Using a press or clamps, the structure is clamped, and left until the glue (epoxy) hardens. Installation can be carried out only a day after the end of the assembly of the last glued I-beam. For guaranteed adhesion in a timely manner, a heated air chamber is used, the temperature of which does not exceed 40 degrees.
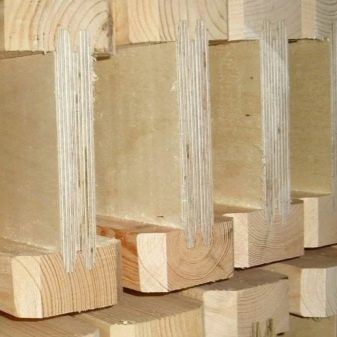
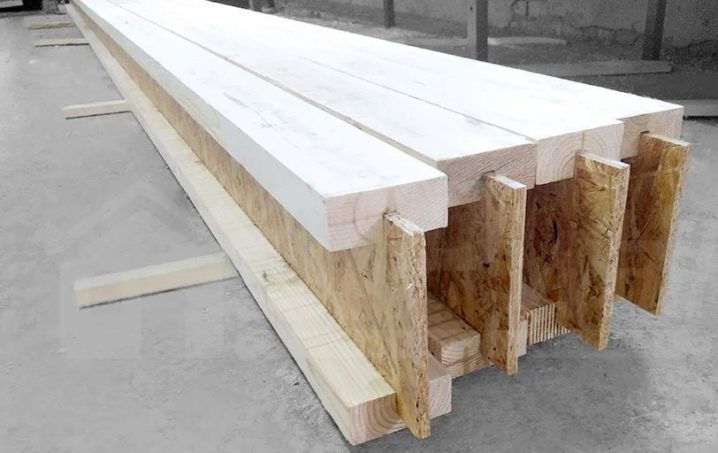
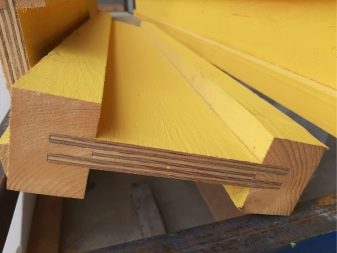
To increase the value of the bearing load, longitudinal thin strips are additionally glued - from all four sides: two on top on opposite sides of the lintel, and the same two in the bottom. All elements of the I-beam are strictly parallel to each other, equal in length and rigidly fixed. Composite differs from simple construction in the following features. You can use glued beams. It is more expensive, since it is itself glued from strips of solid solid wood (for example, a board or a flat strip with a rectangular section). Thanks to the glued longitudinal seams, such a building material significantly resists the twisting deformation that occurs in the resulting wood material over time.
Saving wood in the manufacture of structural elements and during installation of the floor is obvious - the timber does not have to be "completed", thin pieces of wood and pieces of plywood are placed under it under the areas that have risen from warpage, trying to fill the gaps. In addition, floors with logs made of I-beams, in which glued beams or plywood were used, do not creak, do not transmit sounds and unnecessary vibrations down to the ceiling of the previous floor, especially when the entire ceiling is made of wood.
The scheme of actions when making a wooden I-beam is as follows.
- Plywood sheets or glued sawn timber using a circular saw on the elements, checking the drawing of such a design.
- With the help of a milling cutter, a cut is carried out in the bar along its entire length. It, as in the previous instruction, corresponds to the thickness of the lintel wall. The cuts are filled with epoxy glue.
- The wall, as in the previous case, is introduced into the cut of the lower structure, then - on the contrary - put the top on it, turning it over with the sawn side down.
The resulting elements are placed under a press or clamps, then the assemblies are left to dry at a moderately elevated temperature. In both cases, the resulting I-beam finds its application.
Species overview
An I-beam made of wood is subdivided - as a type of beam compared to a bar, a log and vertically placed planks - for the following varieties.
-
Plywood-all-bar... Pine and spruce species are used for manufacturing. They effectively resist mold and fungal infections. Must be dried, otherwise gradual warpage is possible. The length of the workpieces is no more than 6 m. If the span is longer, then lining with fastening on stud-nut connections with grover and pressing washers are used. The diameter of the latter exceeds the radius of the hairpin by at least 8 times.
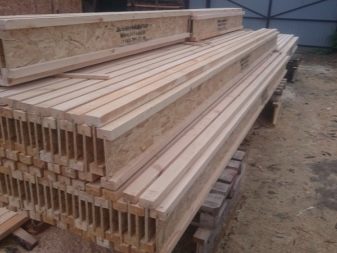
- Homemade items are assembled mainly from glued beams - it does not "sit down" over the years of operation. This bearing element is glued from components according to the assembly instructions already described. The disadvantage of an I-beam is less effective moisture removal, but this flaw is compensated for by the preservation of geometric shapes for decades. The length of the finished product reaches 12 m. The I-beam is easily sharpened, trimmed, securely fixed in the places assigned to it according to the project.
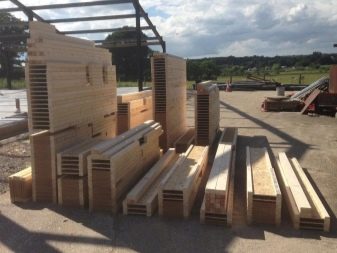
By design and size, I-beams are divided into separate varieties.
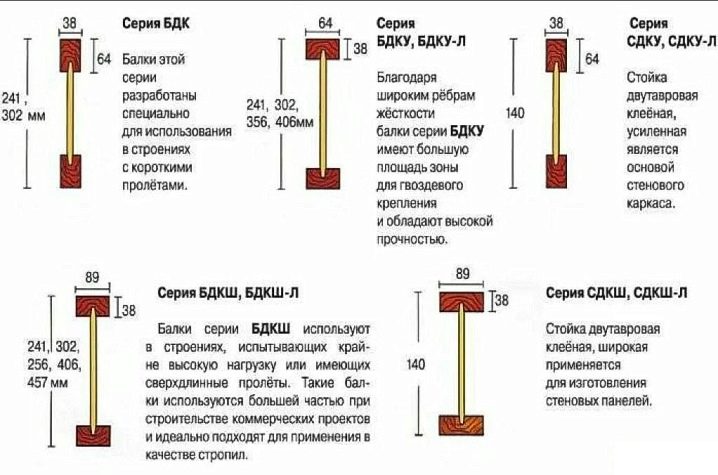
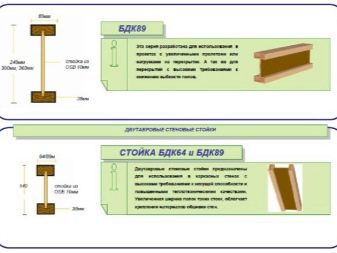
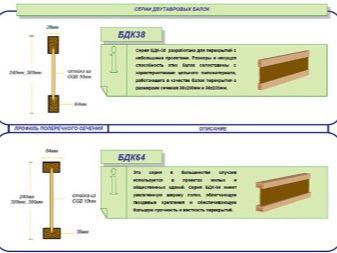
- BDK - I-beam for small spans.
- BDKU - the same design, but reinforced by slightly wider upper and lower sides. It is used on extended spans due to its higher permissible load.
- BDKSH - I-beam for especially extended spans. Wide horizontal sidewall of the H-shaped structure - from 8.9 cm. The load capacity is high.
- SDKU - Reinforced I-beam with a thickened strut. It takes the load from vertical, not horizontal (overlapping) partitions.
- SDKSH - the same as the previous version, but with a wider horizontal crossbar. Fully suitable for partitions between rooms.
Now that you know how to make I-beams of any of the above varieties, you have the right to repeat it yourself. Expensive and special equipment is not required for this. To do this, buy boards, glued beams, possibly plywood, as well as epoxy glue - and, guided by the drawing (even from the description in the building store), assemble these elements yourself.
Nuances of calculation
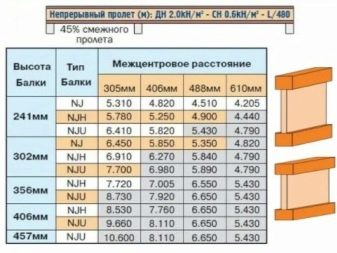
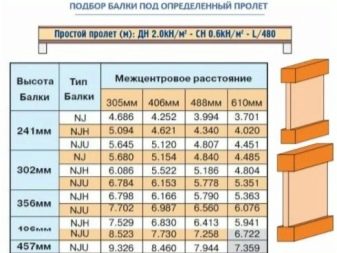
Rough calculation will not work. Despite the recommendations, appeals to professional builders, the calculation can be made independently - especially when an auxiliary or one-story small living room is being built. For a non-residential attic, the initial load weight does not exceed 50 kg / m2. When placing something in the attic that is not included in the project, the total value of the specific load will already reach 150 or 250 kg / m2.To use the attic as a living area, the floor load increases up to 6 times - 300 kg / m2. For the interfloor overlap, it is better to take the load tenfold - up to half a ton per square meter. The thickness of the ceiling - with the floor and ceiling - between the floors is taken equal to half a meter.
Buying Tips
Before buying a ready-made - or assembling an I-beam building material from a purchased wood mass on your own, calculate the floor load according to the above recommendation. The use of laminated veneer lumber and plywood will eliminate shrinkage, but will provide rigidity and strength, reliability, similar to those used to assemble an I-beam from a solid solid wood. This is achieved by the mutually perpendicular arrangement of the fibers of different layers of plywood - if they were glued together by the same layers mutually parallel, then shrinkage and warpage would be inevitable. The thickness of the central partition ranges from 24 to 27 mm - this is comparable to a board placed on the edge. When buying an I-beam, this indicator is also worth paying close attention to. After gluing in the factory, the finished wooden I-beam must be treated with antiseptic and water-resistant compounds, similar to parquet elements.
The dimensions of factory products are regulated on the basis of the standards set forth in GOST 30244-1994 and 8486-1986, point "e", and are confirmed by indicators in the corresponding SNiP. The height of the factory I-beam is 117.6 ... 1013 mm, such dimensions are in demand for low and high-rise construction. The width of the upper and lower sidewalls is 64 ... 320 mm, the thickness of the walls is 3.8 ... 19.5 mm, the mass of one I-beam is 8.7 ... 314.5 kg. According to the state standard, the use of too "knotty" boards with a grade lower than the second is not allowed for I-beam production.
If you do not buy ready-made I-beams, but assemble them yourself, then you cannot use "sawdust" and composite (for example, MDF) materials. The moisture content of the wood should not exceed 12% during assembly. This is noticeably higher than the natural absolute moisture content of the tree, equal to 21%. At high humidity, the beams are not covered with trim. Make sure that the company from which you purchase this building material stores products in a closed warehouse. It is not recommended to build long floors from homemade I-beams. When self-manufacturing, before gluing, the elements are impregnated with antiseptic additives.
Pressing, squeezing after bringing together the elements impregnated with an adhesive composition is mandatory, otherwise the calculated dimensions of the products (and with them the errors in assembling the floor based on the I-beam) will become noticeable by eye. Instead of a press, clamps, ties, clamps are used, as well as a heavy steel channel - all these devices will thoroughly clamp your man-made structures. Skewing during assembly is unacceptable. To prevent this, do not delay the process of making a homemade I-beam for many days. With imperfect horizontality and verticality of the assembled structure, the strength and load tolerance of the overlap will noticeably deteriorate. If you still have doubts about the high quality of self-assembly of an I-beam, then it is better to abandon this venture and purchase ready-made factory I-beams.
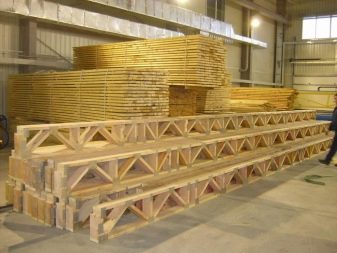
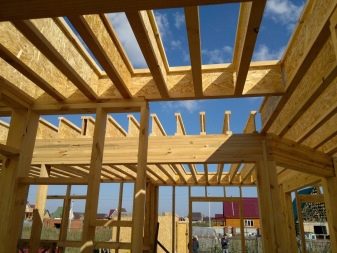
Where are they used?
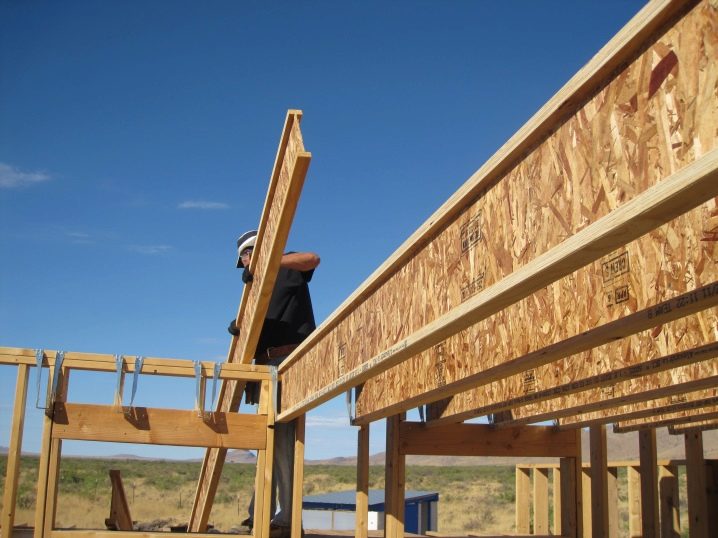
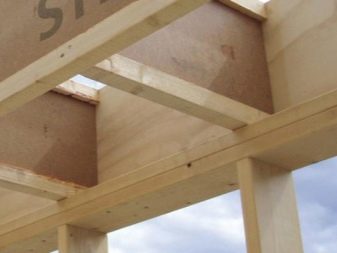
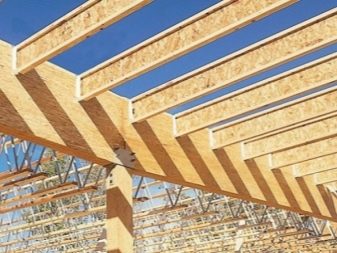
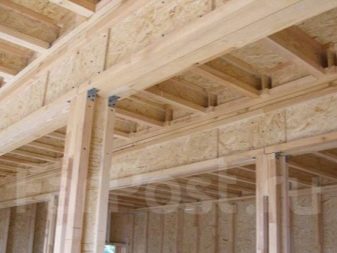
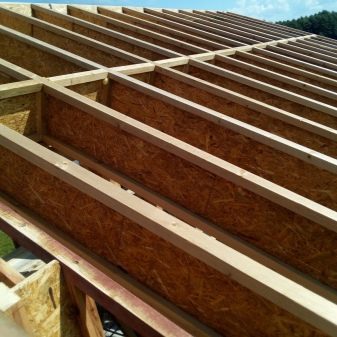
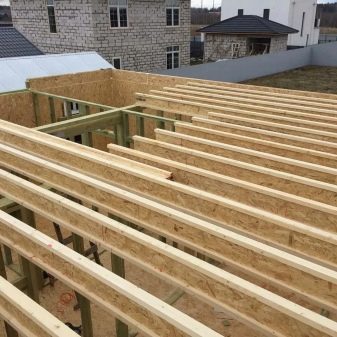
I-beams are used to organize the floor, roof truss system (attic-roof structure)... I-beam rafters have a good load bearing capacity, in contrast to solid timber, which is prone to cracking and twisting due to the natural movement of its own fibers. However, laminated veneer lumber rafters compete successfully with a similar I-beam roof structure made from the same lumber (and plywood). The same applies to the construction of a frame house (not to be confused with a reinforced-monolithic structure made of reinforced concrete). The I-beam greatly facilitates the construction of the roof - more advanced technologies are worth the money invested in them.
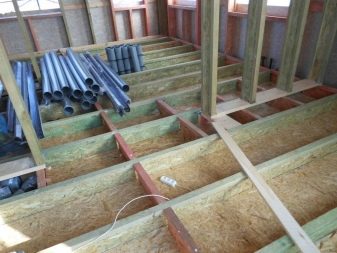
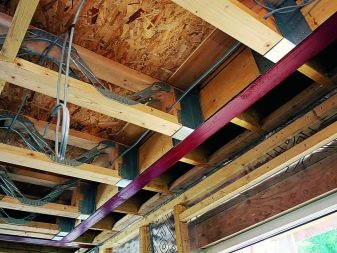
In addition to arranging the roof, the I-beam in the ceilings and the frame leaves room for laying communications, for example, all kinds of "weak current" (signal networks and communication lines) in the frame - the owner of the building, the building hides all the wires and cables inside the building, away from prying eyes of observers. Interfloor floors made of wooden I-beams are much cheaper than steel ones; the load on the foundation of the building is also noticeably reduced.

Mounting
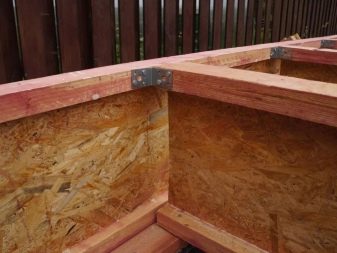
Future blocks and assemblies of the assembled system must be prepared before assembly. Purchase, in addition to wood materials, hardware - without them, the assembly of assembled I-beams is difficult.
Preparation
Before gluing the structural elements, they are thoroughly dried and then impregnated. Drying in the summer is carried out in a back room with metal walls, preferably painted black - they heat up to +80 in the sun, and a 60-degree heat is created inside the room. The wood is laid out so that, thanks to the spacers, a gap is provided between the beams and the boards, which is well ventilated. This will prevent mold and mildew from forming on the surface of untreated wood. After drying the wood material to 12% absolute humidity, transfer it to an open space and soak it with an antiseptic. Prepare fasteners... Fasteners, for example, self-tapping screws, are produced from hardened steel - this will provide not only additional strength, but over time will allow a part to be unwound and remade when something has ceased to suit the owners.
Technology
In order for the beam to fit into the wall, a technological gap must be left in it in advance (during construction)... If the walls of the house are wooden, then cutting of these gaps is used. To block them from moisture impregnation, these gaps are insulated with roofing material. This will make it possible to waterproof the wall and the ceiling from each other, preventing their possible destruction over time. Roofing material can be replaced with other bituminous impregnations.
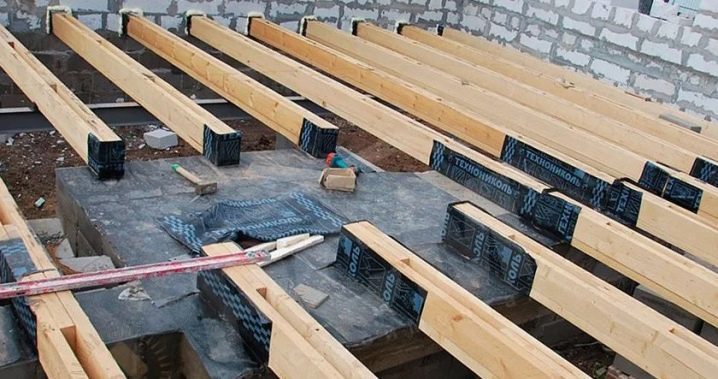
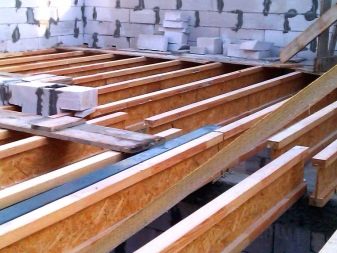
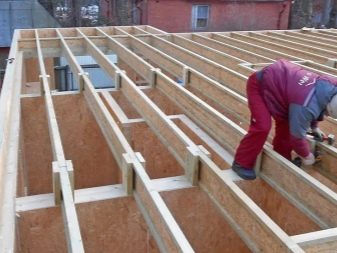
The ends of the beam for the organization of the support should be at least 15 cm in length - this is necessary so that the interfloor or ceiling-attic floor does not fall due to the insufficient support area of the resulting floor. Similar distances are also used when supporting reinforced concrete slabs against walls. Mounting of I-beams is carried out from one of the edges, then the extreme opposite is installed at the opposing wall. Then the rest are installed (intermediate or span).
After the installation of the I-beam, the floor and ceiling are clad with boards. The ceiling can be insulated with plasterboard or chipboard, OSB boards.
Possible mistakes
Achieve the horizontal position of the plane in which the I-beams lie... Otherwise, the floor and ceiling covering will be uneven, they will have to be adjusted later, upon completion of construction. If the horizontality and parallelism to the ground are somewhere not fully observed - for example, the foundation is slightly drowned down when the house under construction is heavier, then the horizontal arrangement of the beams (when viewed from either side) is leveled by placing additional plywood or other wooden spacers. To prevent the structure from sagging, every second I-element is fixed with anchors. This approach is used when installing a finished floor on logs made of I-beams. Unoccupied space on the ground floor can be insulated with mineral wool, or expanded clay concrete can be used. Otherwise, such a floor may turn out to be cold in winter.
For information on why you need to use I-beams, see the next video.


The comment was sent successfully.