All about wood vise
For the processing and assembly of various products, fixing devices have long been used. There are many types of vise, the main ones being locksmith and carpentry. In the article we will talk about wood options.

Peculiarities
Wood vise is essential in the DIY workshop. Locksmiths are not suitable for working with wood blanks, as they leave scratches or dents on surfaces. The dimensions of the products play an important role: they are usually much larger than metal ones.
There are three main types of vise:
- stationary are intended for a workbench;
- portable fit in a bag, which is especially convenient for working on the road;
- removable easily mounted and dismantled if necessary.

Work principles
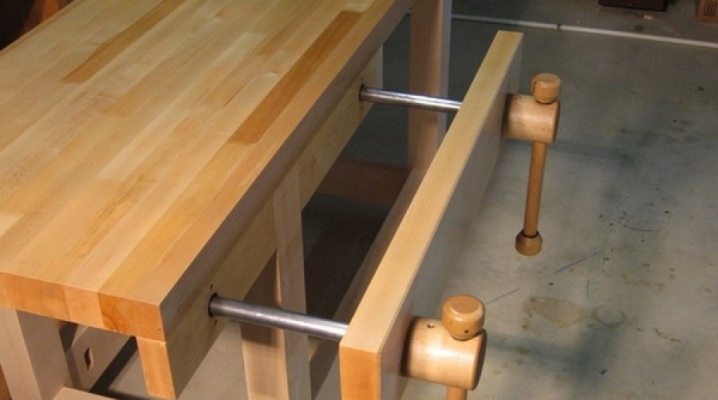
The purpose of a vise of any type is to fix the workpiece to be processed so that the necessary technological operations can be carried out, which determines the set of device nodes:
- bed - table, workbench;
- support - a fixed part, other nodes are attached to it;
- fixed jaw for clamping the part;
- movable sponge;
- two or one guide pins;
- lead screw with handle.

How to assemble?
It is very easy to fix a wooden part for simple processing at home. For example, to scold a board, you just need to rest its end against some obstacle. This is good, but clearly not suitable for more complex cases where quality and precision are required. It is in such cases that a vice is needed.
The first thing that comes to mind is to use standard locksmiths. Many do-it-yourselfers have them, but not in one copy - installed and ready to go. You just need to protect the wood of the workpiece from the impact of the metal cheeks of the yews.
It is very simple to do this: insert spacers made of non-traumatic material, for example, plywood.
Buying the right model of wooden vise is a good choice. There are a lot of models, for every taste, and the prices are different - from hundreds of rubles. High-quality ones cost many thousands. If you do not want to spend money and there is no suitable locksmith vice at hand, then the only way out is do it yourself wooden homemade according to the attached drawings.
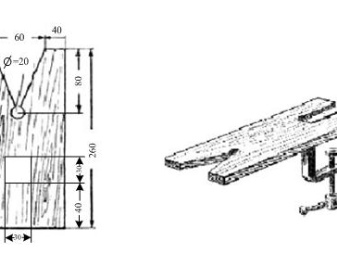
We will start making a vice with the design shown in the figure. Note that, using these drawings, it is easy to make a vice from both woodand from plywood... Moreover, of various scales, for example, to work with a jigsaw on thin plywood, all dimensions should be reduced by the required number of times. In addition to the ones shown, there are two more clamps that attach the device to the workbench.

The peculiarity of this vice in mobility: took and carried, assembled and work, which is very convenient for performing work in different places. Stationary vise for fixing to a workbench or table. They have only two screws, which also act as guides.
The design is uncomplicated, easily scalable.
Materials required:
- wooden bar;
- plywood;
- mortise nuts 10-12 mm, 4 pcs .;
- 2 studs (М10-М12) Х250 mm;
- self-tapping screws;
- wire;
- wood glue;
- sandpaper.
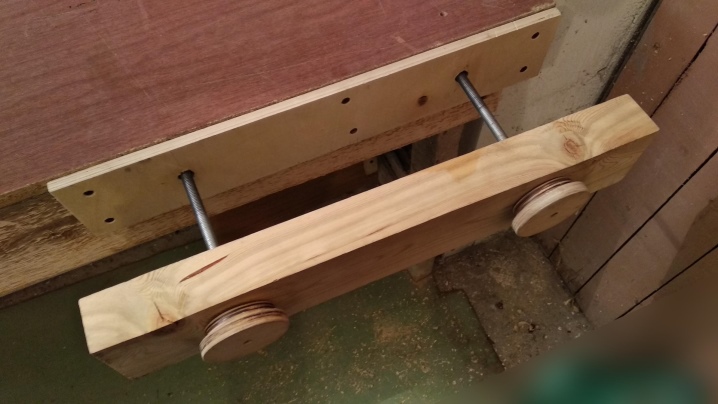
We cut from timber and plywood jaw blanks... Drilling two holes for studs... We perform these two operations simultaneously on both parts, clamping them with clamps. In plywood we drill 6 holes for self-tapping screws (d = 3 mm), with a 10 mm drill we remove chamfers to hide the heads. We attach the finished sponge to the workbench with self-tapping screws.

Through large holes punching the workbench board under the hairpins. On the back of the board we press in the M10 mortise nuts... The support jaw is ready. We make handles.
Using a drill and ring crowns of large and small sizes (arbitrary), we cut 4 circles from a piece of plywood, two for each.

In large circles with a feather drill we make small notches in order to hide the heads of the mortise nuts. Into small circles we press in these nuts and screw in the studs on the smooth sides of the nuts without going out. Drilling a hole (d = 2-3 mm) between the nut and the thread to lock the stud. We drive the pieces of wire into these holes.

Big circle glue side with a notch to the small, hiding the teeth of the nut. We fasten both circles with self-tapping screws. We connect a second pair of circles. The handles are ready.
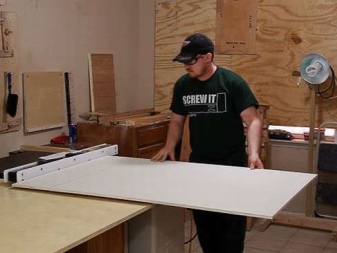
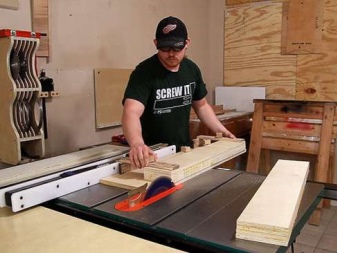
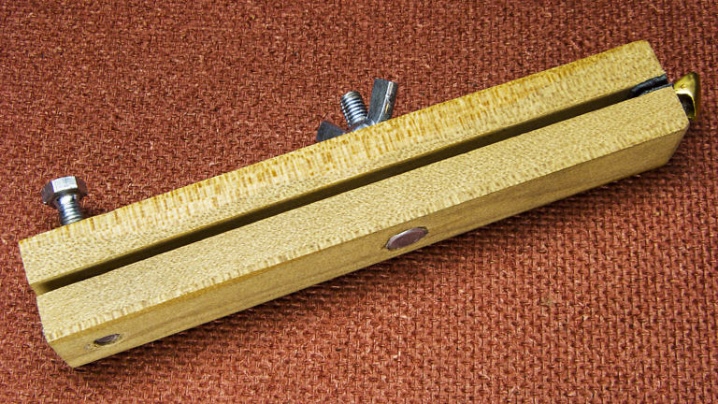
We assemble our homemade products from ready-made parts. The jigsaw sawing table is another interesting example of yews. Both blanks can be made from any material: plywood, chipboard, boards. The main thing is that their thickness is greater than the thickness of the upper part of the clamp.
We cut out both parts according to the drawings. We process with sandpaper from a burr. After gluing, we reinforce the connection with screws, so as not to interfere with the work. Insert the clamp and screw it to the edge of the table. Ready.

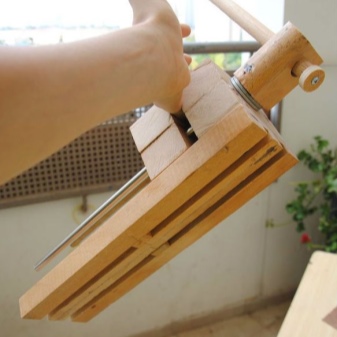
Next, we give homemade vise, allowing you to handle very small items such as jewelry.
What is used:
- two pieces of hardwood (old beech clothes hanger);
- a pair of bolts;
- two nuts, one with a wing;
- a piece of suede;
- several washers;
- shoe glue;
- sandpaper.
The diameters of bolts, nuts and washers are determined by the size of the bars.


- Saw off workpieces of the same length, convenient for work, from bars. We process them with sandpaper.
- On the ends of one side of each we glue pieces of suede with shoe glue so as not to scratch the products.
- Approximately in the middle and from one edge in both bars we simultaneously drill holes.
- We insert into the extreme bolt, screw on a simple nut. We also thread a bolt into the middle ones, put on a nut with a wing - an adjusting nut. The vise pliers are ready.
When working with relatively thick objects, you can increase the downforce by putting washers between the bars on the rear bolt.
See a video on how you can make a wooden vise.


I especially liked the fact that almost no machining is needed.
The comment was sent successfully.