What is a rafter leg and how to fix it?
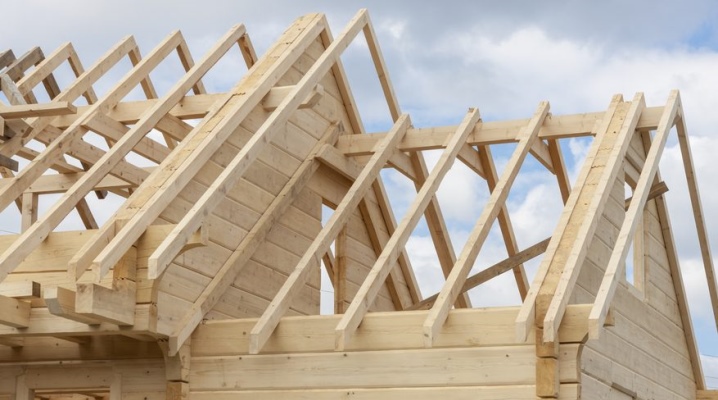
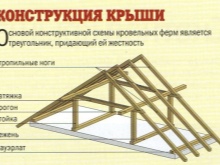
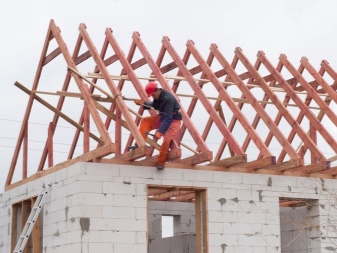
The rafter system is a multi-element structure, one of the important parts of which is the rafter leg. Without rafter legs, the roof would bend from snow, load during the passage of people serving the roof, wind, hail, rain and structures installed above the roof.

What it is?
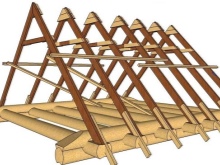
Diagonal rafter leg - a sheer prefabricated element, the number of copies of which is selected along the length of the roof, and the building, structure as a whole... This is a one-piece or prefabricated inclined beam, on which the lathing elements perpendicular to it lie. To them, in turn, a waterproofing layer and roofing (prof) sheets are attached.
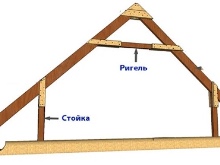
In the system, which is a roof with an attic in complete and final assembly, the slant rafter legs, along with the Mauerlat and internal horizontal, diagonal and vertical racks, complete a solid and reliable structure for decades to come. As a result, it protects the premises in the house and the attic from rain, snow, hail and wind.
Calculation features
The step of the rafter legs is no more than 60 cm. If you build large spans between them, the roof will "play" from wind, hail and rain. From the snow, the roof with the crate will bend. Some craftsmen place rafters much more often. The above does not mean that thick boards or beams need to be placed too close - the weight of the roof together with the overlap, horizontal, vertical and diagonal beams can be overestimated, and walls made of foam or aerated blocks can begin to crack and sag.
One board for a rafter leg - extended or solid - reaches a mass of up to 100 kg. 10-20 extra rafter legs can add a ton or two to the entire structure, and this leads to accelerated cracking of the walls during hurricanes, during the passage of teams of workers serving the roof, during showers and snowfalls.
The choice of safety factor should provide, for example, up to 200 kg of snow per square meter of profiled steel, with which the roof is lined.
Suppose, as an example, a small country house is being built from foam blocks with the following parameters.
- Foundation and wall perimeter (external) - 4 * 5 m (occupied area of the site - 20 m2).
- The thickness of the foam blocks, of which the walls were erected, like the strip foundation outside, is 40 cm.
- The structure is missing partitions - the internal area of the house is similar to a studio apartment (one room, zoned into a kitchen, a bathroom and a living block).
- In the House one entrance and four windows - by a window in each of the walls.
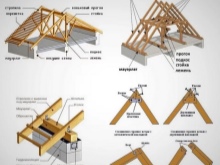
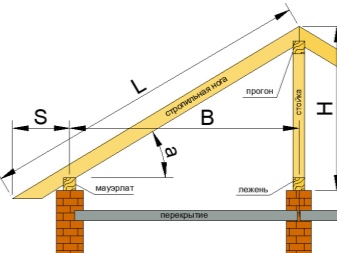
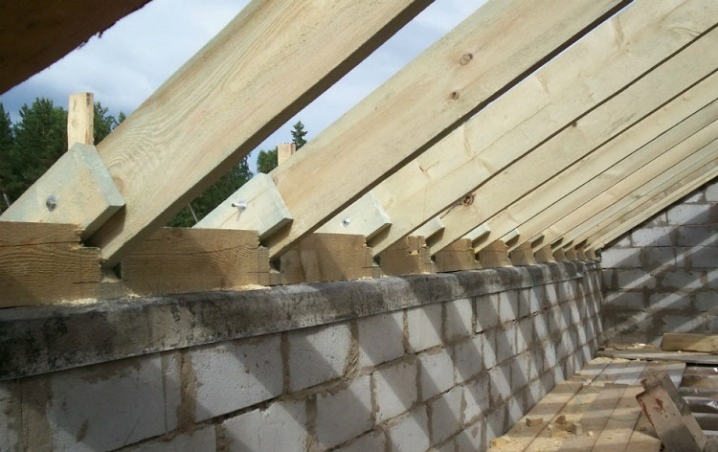
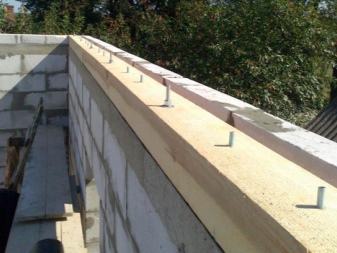
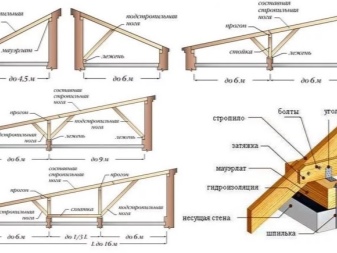
- As mauerlata - a wooden element encircling the top of the wall along the perimeter, a beam of 20 * 20 cm was used.
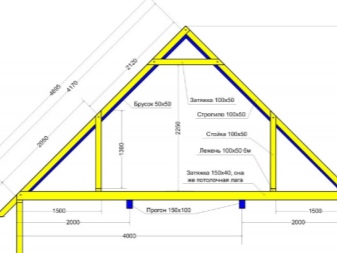
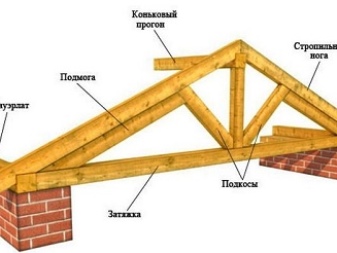
- As horizontal floor beams - a board 10 * 20 cm, placed horizontally on the edge. Vertical stops and diagonal reinforcing spacers ("triangles") are made of the same board, preventing them from squinting. All elements are connected with studs and bolts of at least M-12 (nuts, press and lock washers are included). A similar board is laid out under ridge (horizontal) spacers - also with "triangles" (diagonals).
- The same board - dimensions 10 * 20 cm - rafter legs are laid out.
- Lathing made with a board of 5 * 10 cm or a bar, for example, a section of 7 * 7 or 8 * 8 cm.
- Roofing sheet thickness - 0.7-1 mm.
- Completed steel sheathing around the perimeter and installed rain gutters.
Conclusion - the cross-section of the rafter leg should be 1.5-2 times less than that of the Mauerlat... For the final calculation, the density of the wood species used in the construction of the ceiling, attic and roof structures is taken. So, according to GOST, larch has a specific weight of 690 kg / m3. The total tonnage of the assembled roof is calculated by cubic meters of planks and beams, calculated during the project and ordered at the nearest timber yard.
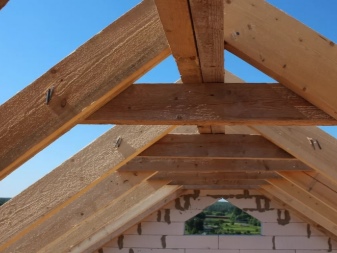
In this case, the rafters are divided at half the width of the structure - 2 m from the edge of the longer walls to the middle of the ridge support. Let the ridge of the roof be raised above the level of the upper edge of the Mauerlat to a height of 1 m.
You need to calculate the following.
- Subtracting the height of the beams from the meter, we get 80 cm - the length of the ridge stops. We do the markup in the course of further work.
- By the Pythagorean theorem, we consider the length of the rafters from the ridge to the edge of the front or rear wall is 216 cm. With the removal (to exclude rainfall on the walls), the length of the rafters is, say, 240 cm (24 are the allowance), on which the roof will go beyond the perimeter of the structure.
- A board with a length of 240 cm and a section of 200 cm2 (10 * 20 cm) occupies a volume of 0.048 m, taking into account a small stock - let it be equal to 0.05 m3. It will take 20 such boards per cubic meter.
- The gap between the middle of the rafters is 0.6 m. It turns out that for a structure 5 m long, 8 rafters will be required on each side. This is equal to 0.8 m3 of timber.
- Larch with a volume of 0.8 m3, spent purely on rafters, weighs 552 kg. Taking into account the fasteners, let the weight of the rafter subsystem - without additional supports - be 570 kg. This means that a weight of 285 kg presses on the Mauerlat from either side. Taking into account a small margin of safety - let this weight be equal to 300 kg per Mauerlat crossbar. That is how much the rafter legs will weigh.
But the calculation of the safety factor of the walls is not limited only by the weight of the rafter legs. This includes all additional spacers, fasteners, roofing iron and a water vapor barrier, as well as possible snow and wind loads during a blizzard accompanied by a hurricane.
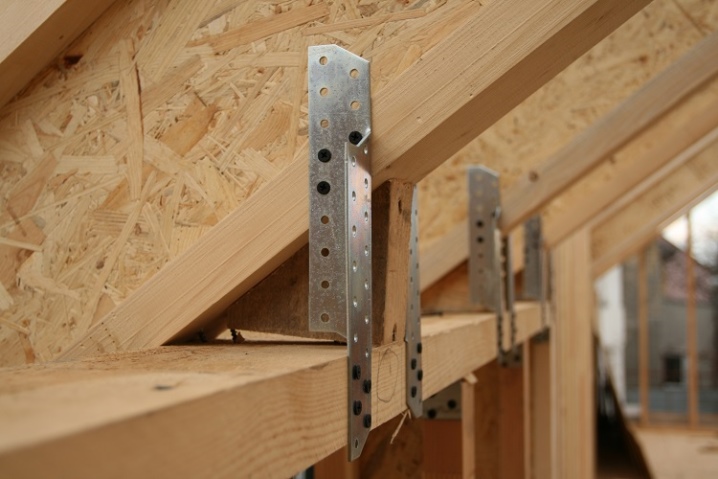
Mounting methods
The supporting elements connecting the Mauerlat with the rafters have varying degrees of mobility in the range from 0 to 3 units. The value "0" is the hardest degree, which does not allow elements to move to either side, even by a millimeter.
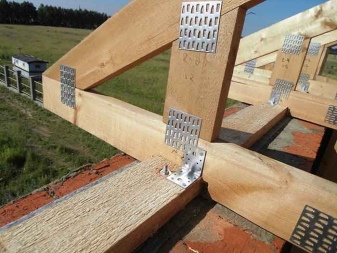
Hard
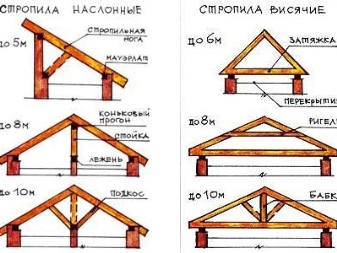
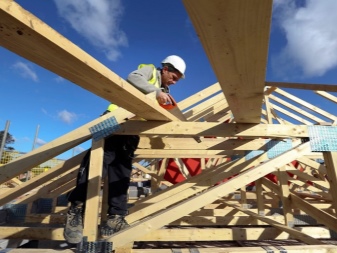
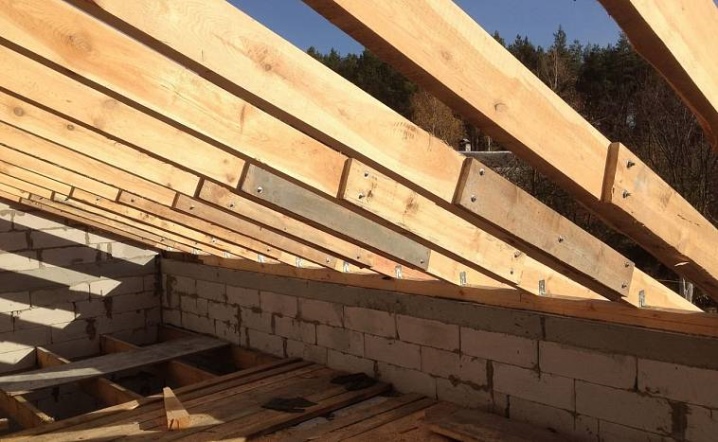
Completely fixed support along the length is used in the case of transmission of the expanding effect from the rafters to the load-bearing walls. This method is used in houses built exclusively from bricks, panel boards and blocks. The gradual shrinkage of the roof is completely eliminated so that the load on the load-bearing walls does not shift. Most experienced builders strongly advise making cuts at the junction points of the rafters with the floor beams.
This will give increased strength and immobility to each node at the junction with the Mauerlat. To give the strength of the structure an additional margin, studs, bolts, press washers and plates, as well as anchor fasteners, are used. In the least loaded places, long self-tapping screws with a thread diameter of 5-6 mm and with a screw length of at least 6 cm are also used.
Dimensions washed down a bar - no more than a third of its total section... Otherwise, the rafter legs will simply shift, which does not exclude them from slipping and falling down. Rigid joints without filing the rafters provide a method of fastening by means of a hemming bar used in layered rafters.
In this case, the latter are filed according to a stencil and beveled so that the roof takes the desired angle of inclination at the points of attachment to the Mauerlat. From the inside, the rafters are tightened by means of supporting beams and are fixed by means of corners on both sides of the supporting part of the base.
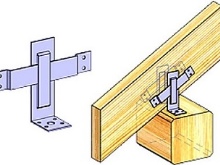
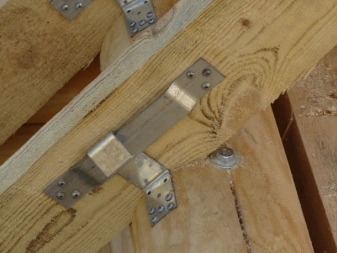
A non-joint support point can be performed by rigidly fastening the rafters with reinforcement with laths on both sides.
- A pair of pieces of boards - each with a length of 1 m - is fixed on both sides of the rafter leg.
- At one end, the saw cut is performed at an angle of inclination of the slope.
- The segments are turned with a saw cut to the Mauerlat. They are fixed at pre-marked points - one at a time.
- Rafter legs are screwed to the overlays on one side... The master reinforces them with overlays on the opposite side. Brackets and brackets can be used instead of corners.
Of course, you can do the other way around - first install the lining boards, and insert the rafters between them. This method requires preliminary adjustment - the leg may not enter the gap or gaps will remain, and this is unacceptable.
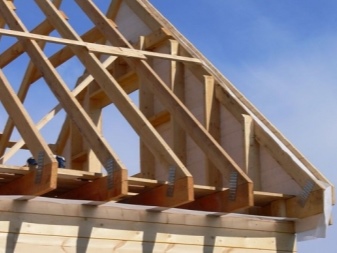
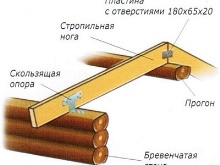
Sliding
The movable joint is used when, depending on the temperature, the elements change their length and thickness (verification range of temperature fluctuations). As an example, a rail and sleeper grate: a continuous track bends in the heat and straightens back in the cold. In summer, crooked rails cause trains to derail. Rafters, Mauerlat, stops and crate, installed in winter in frost, can heave and bend in summer.
And vice versa - installed in the heat in the cold, it stretches, cracks and grinds, therefore construction work is carried out in spring and autumn. For the sliding connection, the rafters are supported on a high-strength ridge bar. The lower nodes are dynamic - they can deviate within a few millimeters along the length of the rafters, but the ridge with all its joints is fixed rigidly.
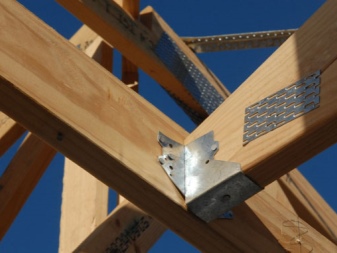
Additional reinforcement is performed using a transom joint... The dynamic connection of the rafters gives them a small degree of freedom. In other words, only the upper, not the lower, end of the rafters is rigidly filed and joined. Such an opportunity will make it possible to better insulate the roof of the attic type, to reduce the pressure on the Mauerlat beam.
The saw of the upper end is used mainly for wooden houses - for brick-monolithic and composite-block walls, including buildings from experimental materials, the Mauerlat bar is made solid, uniform along the entire length.
Elongation and strengthening
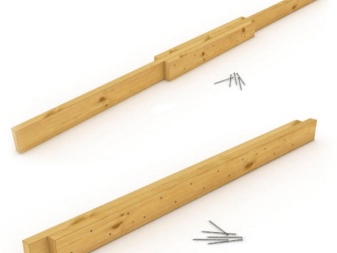
For splicing rafters, two methods are used.

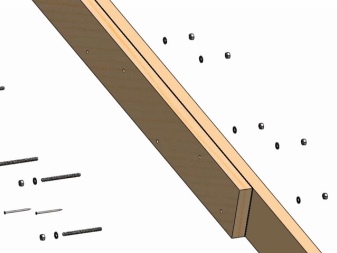
With overlay boards (double-sided reinforcement with joining)
The lengths of the extension pieces are joined and aligned with the rafters to be lengthened. At the ends of the rafter beams or boards, holes are pre-drilled for bolts or hairpin pieces. The linings are drilled at the same time. The length of the end to be drilled is at least half a meter of the total length of the rafter element (half the length of the overlays). The length of the pad is at least one meter.
The holes are arranged in a row or staggered, adjacent ones are equidistant from each other. Places of screed plates and boards (or beams) are securely tightened with a bolt-nut connection, with the installation of grover and press washers on both sides.
By screwing in a bar or log with the ends
Deep longitudinal holes are drilled in the center of the ends - for example, to a depth of 30-50 cm.The hole diameter should be 1-2 mm less than the diameter of the stud - for tight screwing it into a bar or log. Having screwed half the hairpin (in length) into one log or bar, the second log is screwed onto it. The method is very labor intensive - it is recommended to use a calibrated, ideal round log, so that it is more convenient to rotate it on a belt block, like the gate of a well.
The beam is harder to screw on - it needs perfect rounding in places where the block belt turns it, or the coordinated help of a dozen workers rotating this bar. The slightest misalignment during screwing can lead to the appearance of a longitudinal crack, and the rafters built up in this way will lose their original strength.
Experience shows that overlays are a preferable, more modern and lighter option than screwing onto a M-16… M-24 pin or hairpin.
In the next video, you will find a step-by-step process for installing rafter legs.


The comment was sent successfully.