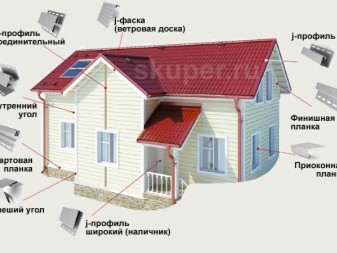
Description and installation of siding finishing planks
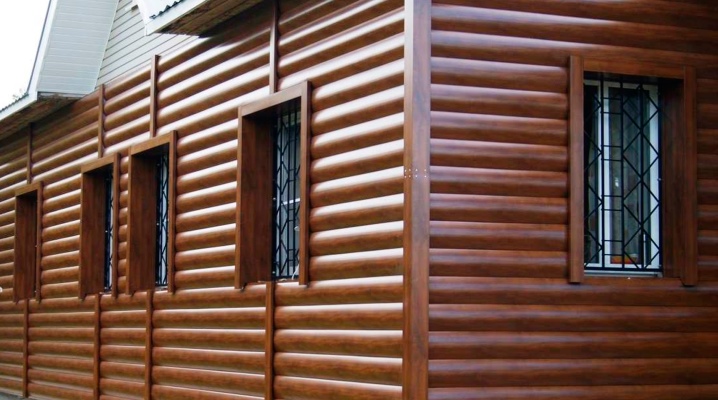
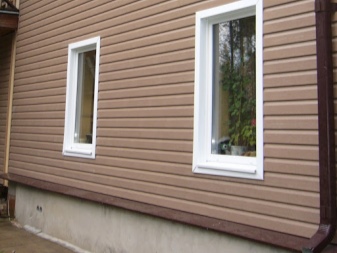
The finishing strip is one of those additional (additional) elements, without which the installation of siding will not lead to a neat and finished look of the load-bearing walls. Incompletely assembled siding is fraught with inadequate protection of the walls from moisture and wind. From this, the wall deteriorates faster than without siding.
Peculiarities
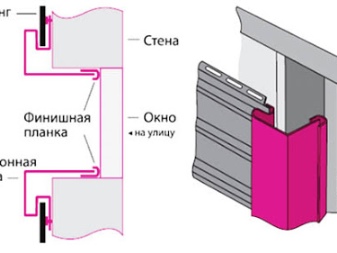
Siding finishing planks are the final profile, without which slanting rain in high winds will lead to rainwater flowing under the main (panel) sheets of improperly laid siding. Facade panels of plastic and metal siding are most often made for a universal size of starting, finishing, corner and window strips.... Since siding came to us from America, the requirements for it, including size compatibility, were developed by American engineers. They were finalized and confirmed by experts from Europe.
Compatibility is the main requirement for siding accessories: the departure of one of the varieties away from the universal dimensions of the panels will immediately lead to the appearance of unnecessary gaps and gaps, allowing rain, spray and snow to pass to the wall. For both metal siding and vinyl flooring, the distance between protruding and concave parts of different types and types of parts can be the same to the nearest millimeter.
The finishing strip is purchased simultaneously with the starting, intermediate and corner pieces in the required quantity. If there are windows, and they take up space to the ceiling, without leaving a single centimeter for an allowance, then the finishing and window strips can be combined.
The second one has hooks of the first one for the main sheets.
Varieties and sizes
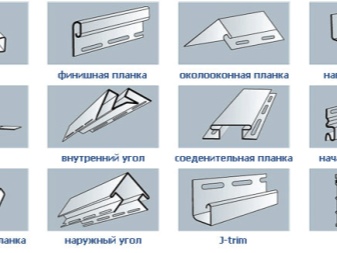
The type of finish strip depends on the type of siding. For metal and plastic siding sheets, it is recommended to use finishing planks of the same material as the base sheets. The fact is that dents on the metal after an incident or careless work will prevent the siding sheets from sticking into each other and / or into the additional strips. Plastic, when dents appear on the additional plates, will also be inserted with great difficulty, and there is still a risk of damaging the plastic in case of significant defects in the metal part. In addition, metal sheets and plastic strips that protrude outward in corners and transitions look inappropriate.
Finishing strips are produced in two types.
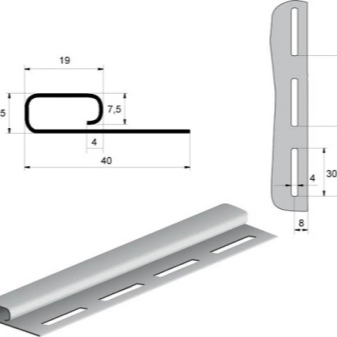
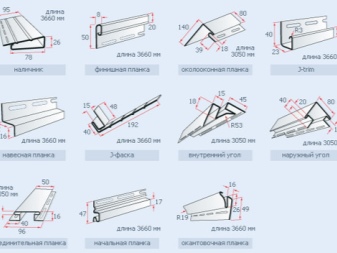
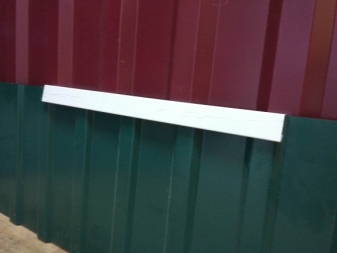
- Galvanized steel, bar length - 2-3 mm. The width of the entire plank is about 45 mm. The width of the folded part is about 25 mm. This is, for example, the standard size 46x25 mm. Some companies, possessing factory technologies, produce slats according to the individual order of each individual client.
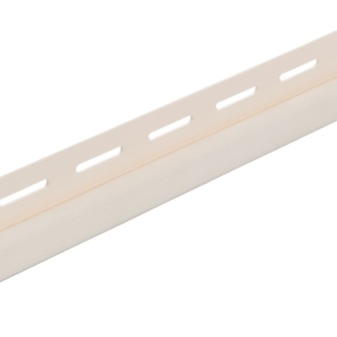
- PVC or vinyl planks. The length ranges from 300-366 cm. The width is similar to that of metal products.
The length of the siding sheet, and with it the length of the starting and finishing strips, is not equal to a value that is noticeably greater than 3-4 m.The fact is that a deformed sheet of excessive length (for example, 11.75 m), which has lost its shape, changes its profile bulges and concavity, and it is impossible to "whip in" it without mounting blades and a rubber hammer. ...
But even if it is possible to regularly insert it into the seat, the appearance of the assembled siding coating will immediately demonstrate all the irregularities obtained during careless delivery and work.
Popular brands
For the convenience of targeting the end user, a rating of the world's leading firms has been compiled. Most of the goods are produced, of course, in China, but under the strictest control of the founding companies of production in this country.
|
Döcke |
popular brand among the general public |
|
Mitten |
color and weather resistance |
|
"Alta-Profile" |
huge supplies, active sale |
|
Nordside |
price adequate to the quality level |
|
FOUNDRY |
original design |
|
Grand line |
high impact resistance (for example, from hail in a hurricane) |
|
TEKOS |
high lightfastness |
|
Profile Vox |
frost resistance and good strength, suitable for northern buildings |
|
Fine ber |
rich color choice |
|
"Yu-Plast" |
special style of decoration |
Prepare the necessary tools for the job. Use those devices and tools with which the work with your own hands is of high quality and promptly.
Required tools
The user will need the following items.
- Construction weight with nylon rope. Provides precise alignment of guides (corner and window strips). At the place of work, you can tie a piece of hollow brick or several nails / screws to a thick thread or fishing line - the vertical will not suffer from this at all.
- Building level. You can use a simple bubble or hydro level, into the hose of which water is poured. Experienced installers align the horizontal and vertical lines with the laser hydrometer.
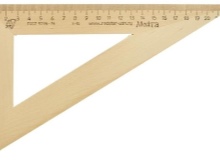
- Roulette and square ruler. Bilateral rulers are available with strictly right angles.
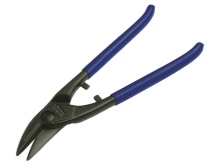
- Scissors for metal: they cut both each of the siding elements and the metal profile.
- A universal option is a grinder with cutting discs for wood and metal. Both types of disc are suitable for vinyl, acrylic and other polymers from which non-metallic siding is made.
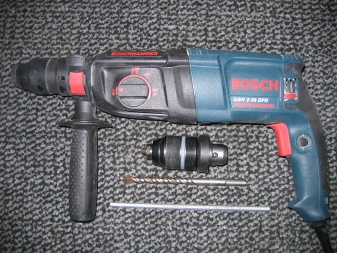
- Hammer drill or drill with a set of drills for metal and concrete.
- Screwdriver. Suitable for workers whose custom work is put on a constant flow, and organizational and technical details are extremely fine-tuned. This makes it possible to carry out more than one order per day (when working in a team of several people).
From hand tools, you will need a hammer, perforating pliers and ordinary pliers, flat and curly screwdrivers.

To screw anchors (where they are used due to the high porosity of foam and gas blocks), an adjustable wrench or a screwdriver with a wrench head is used.
Stages
To attach a siding that includes a finish bar, do the following.
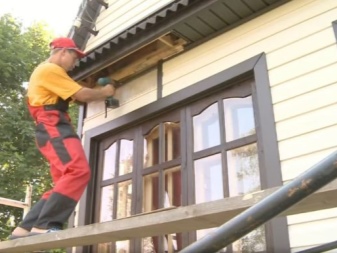
- Mark the metal profile for the height of the wall and the dimensions of the window and door openings (one of these) and cut it into the required lengths.
- Mark the locations of the holes for the fasteners on the obtained sections of the metal profile. Drill them at the marked points.
- Try each of the segments against the wall and mark the position of the holes into which the fastening holes will be pressed in according to the drilled elements. The work is carried out with the preliminary exposure of each section of the metal profile vertically. Drill these holes in the walls. Press plastic dowels into them.
- Screw the metal profile with self-tapping screws. It is recommended to lay horizontal sections of the metal profile around the window openings, approximately equal to the width of the openings. This will allow the siding not to "walk" from the wind in these places.
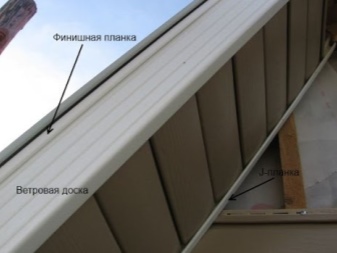
- Mark and drill holes in the metal profile from the side of its outer edges, far from the plane of the wall, under the starting bar. Secure it around the entire perimeter of the house or building. Before drilling, be sure to check the reference point on the earth's horizon using a level gauge. If necessary, install a drain bar: it is placed when the wall (in particular, its fundamental part) is not waterproofed together with the concrete blind area poured along the perimeter of the house.
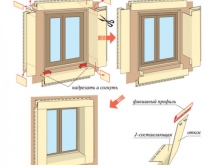
- Mount the side (corner and intermediate) strips, making sure they are vertical. Connect them with self-tapping screws to the drilling end.Install the window and window strips in the same way. Do not tighten all self-tapping screws all the way: slotted holes in the parts provide for their movement depending on real temperature fluctuations. If all the screws are tightened, then the siding will bend in an arc in the heat, it will be ugly.
- Slide in the siding panels, checking each one horizontally. The grooves of the hooks are designed for temperature fluctuations during the season, so that the siding sheets do not buckle in the heat and do not stretch like a string in the cold. Installation is made from bottom to top. Make sure the previous one is inserted before mounting the next sheet. Fasten the panels with self-tapping screws - one for each section of the metal profile. Sheets should not slip spontaneously.
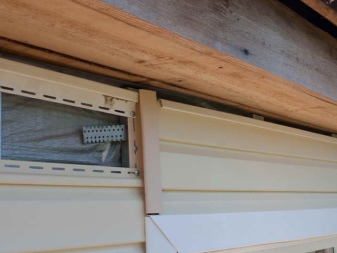
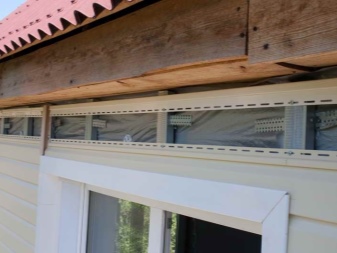
- Install the finishing strip before installing the last, very top panel. It is required.
- At the end, the top siding sheets will need to be joined with the ones below.

Having installed siding, you can, for example, mount a drain gutter and downpipes at the corners of the building.
Description of siding finishing planks and their installation in the video below.


The comment was sent successfully.