DIY Candy Washing Machine Repair
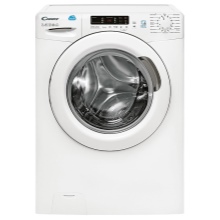
For a moderate combination of price and quality, washing machines from the Italian manufacturer Candy were able to win their audience. But even the most reliable and durable mechanisms fail sooner or later. The good news is that most of the faults can be fixed at home. We will talk about how to repair a Candy washing machine with your own hands in this article.
Design features of Candy washing machines
The first product of the described company was exactly a washing machine called "Model 50", released in the 45th year of the last century. This simple household appliance did its job well, for which it received universal recognition. The following year, after the successful launch of its products, the company received the name "Candy", and 10 years later the company sold its products throughout the European territory.
Modern models of washing machines from this manufacturer have an extensive set of useful functions with convenient control.
The following positive qualities of these devices can be noted:
- energy saving, most of the devices have an energy consumption class A ++ or A +++;
- good washing quality regardless of the selected process and temperature;
- the use of modern technologies such as NFC - the ability to control the washing machine via a smartphone;
- a large selection of models with different sets of functionality and modes;
- the ability to select a device in size, of which there are a lot;
- the appearance is also pleasing - the design attracts attention with its laconism and elegance.
Special attention should be paid to the development of the company's engineers, who are constantly introducing new technical solutions and improving the existing ones.
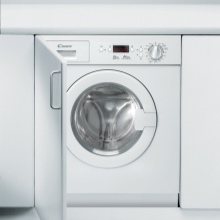
Front-loading models have an improved control screen, on which all indications and codes have a bright and large font, and their information component is intuitive. This screen displays complete information about the running program, water temperature and other parameters. If the buyer does not need such a set of options and add-ons, then the assortment will always include models with a minimum set of functions.
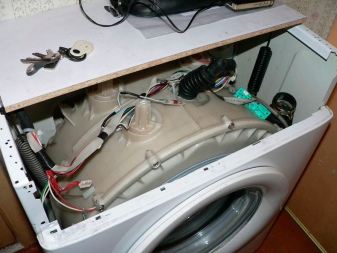
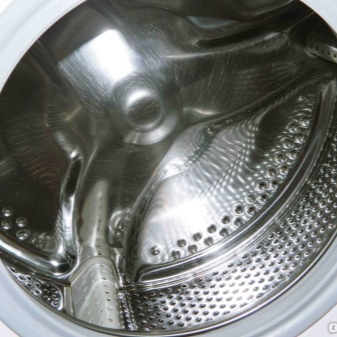
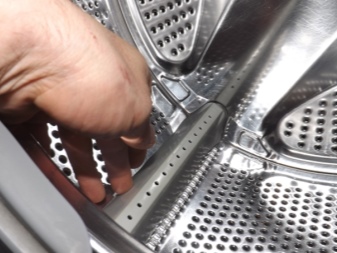
Most Candy washing machine models are equipped with a plastic tub. Usually, it is non-separable, therefore, when disassembling the machine, it must be cut. Also in the design of Candy machines there are high-quality drums with a textured surface for better care of things.
Causes of breakdowns
As mentioned earlier, the washing machines of the described brand have a large set of functions. It so happens that the equipment cannot cope with the loads and therefore breaks down or simply does not fully fulfill a certain task. "Quick wash" does not justify its quality and loses at the rinsing stage.
Manufacturers also save on components, so the following malfunctions often occur:
- breakdowns in the electrical part due to voltage drops (it is necessary to additionally install a stabilizer and a filter);
- breakdowns of individual moving parts (hatch, cuvette, cover) appear;
- due to the fact that some models do not have a pressure switch, the sump may be flooded.
Occasionally a crash in the program selector may occur, but this is resolved by restarting the device.
Candy washing machines, like many others, have their advantages and disadvantages, but due to their economy and low cost, these household appliances are still popular.
Breakdown diagnostics
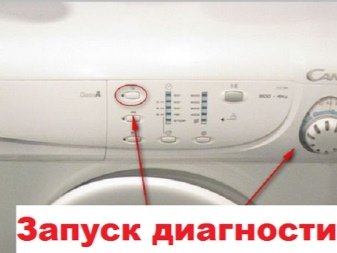
The company's machines are equipped with a self-diagnosis facility. Such a system finds problems, can help in fixing them, and also check the correctness of command execution. In order to start this operation, you will need to perform the following steps:
- make sure there is no water or laundry in the drum, then close the door;
- during the self-test, the drum balancing function will be disabled;
- now the button for turning on the washing machine must be rearranged to "OFF";
- the knob for switching programs also needs to be rearranged to turn off.
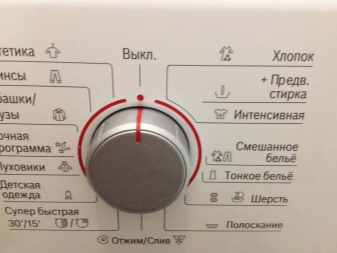
After completing the steps, you can turn on the self-diagnosis mode, the switching circuit is as follows:
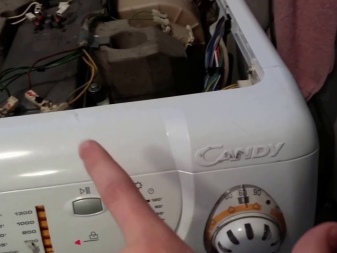
- press and hold the first button that starts the wash;
- now you need to turn the knob 2 clicks forward to set it to 60 degrees and pre-wash;
- now all the attention is on the screen: if the number 1 is highlighted on it, it means that everything has been done correctly, and you can release the button.
Self-test activation will be successful even if all indicators start to glow. On the right side of the panel, the triangular LEDs should alternate. Next, the number 60 should appear on the screen. After a while, you will see the following symbols:
- g 01 - this is an indication of the sequence of the settings buttons;
- 1.49 - this value is a date indicator, it informs when the firmware was written (the first digit indicates the year, and the steel ones - the week).
This stage is intended to test the operation of the blocks and displays. When you press any button, all indicators should go out, pressing again will return the process to the same place. After a complete check, the backlight must be left on.
To continue diagnostics, you need to press the inclusion of the washing machine, after which the last digits will light up on the screen. After that, the self-test will start. This process can be interrupted at any time. To do this, press the mains button and turn the switch to the "OFF" position.
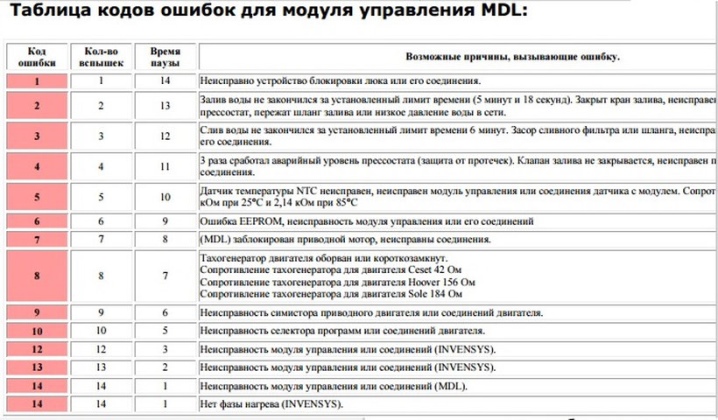
At the end of the process, breakdown codes may appear on the screen. To decipher them, you will need to use the table of malfunctions given in the operating instructions for a particular machine. In it you will find not only the very designation of the problem, but also the ways to fix it.
Required tools and spare parts
For repairs, you will need a minimum set of tools that can be found in almost any garage and, of course, new parts that need to be installed in place of the old ones. Depending on the problem, you will need a specific tool - you will need screwdrivers and pliers to replace the pump, and only a screwdriver to replace the belt. There is a tool for every situation.
Let's designate a complete set of inventory with which you can disassemble and repair the entire washing machine:
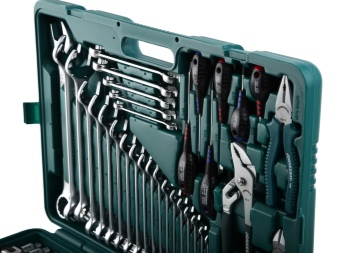
- set of wrenches;
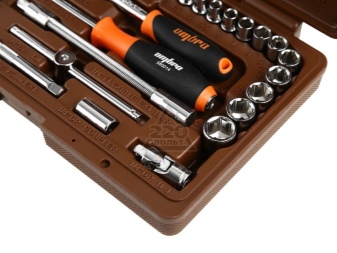
- set of socket heads;
- flat and Phillips screwdrivers;
- pliers or pliers;
- hammer;
- drift or chisel;
- bearing puller.
How to disassemble?
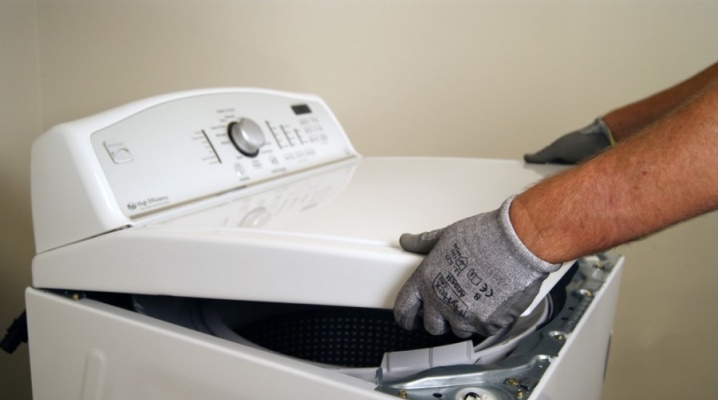
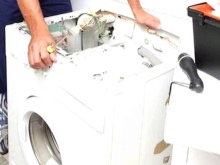
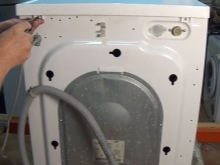
Before starting the repair, prepare everything you need for this, namely the tools and spare parts that need to be changed. Before starting any repair work related to electrical household appliances, it must be disconnected from all communications (power supply, inlet hose, sewerage). After that, you can start disassembling.
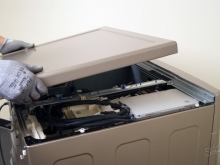
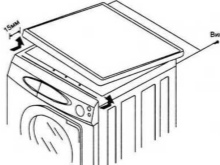
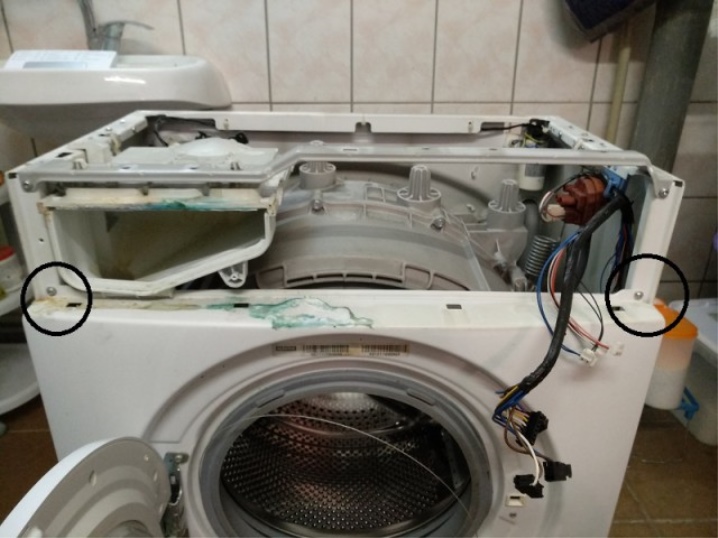
- The first step is to remove the top cover. It is fastened with 2 bolts with a 7 key. The fasteners are located on the rear panel of the device. After removing the lid, we can see the metal bar on which the tank hangs. Now we unscrew all the bolts securing the rear panel and remove it.We got access to the main components and assemblies of this device, you can start to turn them off one by one.
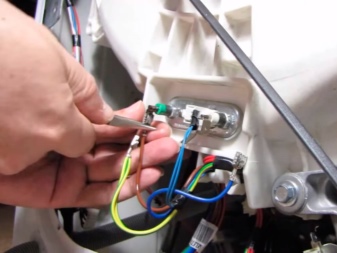
- Remove the drive belt. In case of severe wear, it is advisable to replace it. We disconnect all terminals from the engine, heating element and tachometer. The heating element can be dismantled immediately so as not to damage it during further disassembly. It is secured with one bolt and nut.
To facilitate the design, you can immediately remove the engine so that you do not return to it later or forget about it. The tachogenerator does not need to be removed - it will not interfere with further disassembly.
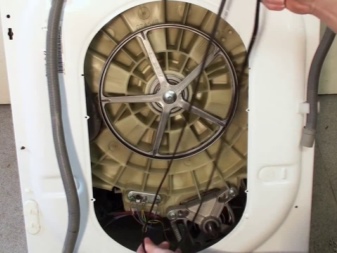
- Now you can unscrew the pulley from the drum shaft. With a 24 key, unscrew the fixing nut, then remove the pulley from the shaft with swinging movements. Next, you need to disconnect the ground wire from the shaft. The difficulty lies in the fact that the wire is soldered into the tank, and you cannot simply remove it. It will have to "have a bite" so that later you can connect back.

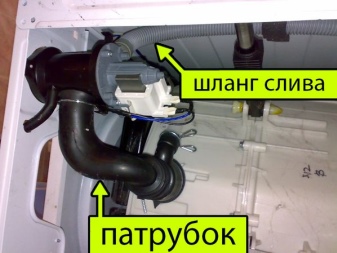
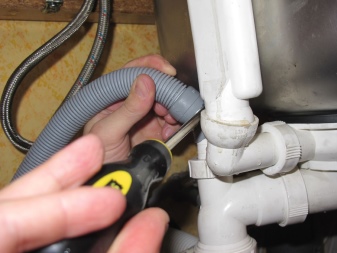
- Disconnect the drain pump and drain pipe. They are connected to each other with a self-clamping clamp. It must be unclenched with pliers. When the drain pump is removed, there is space under the tank - there will be enough space to unscrew the shock absorbers. They are located on both sides of the tank.

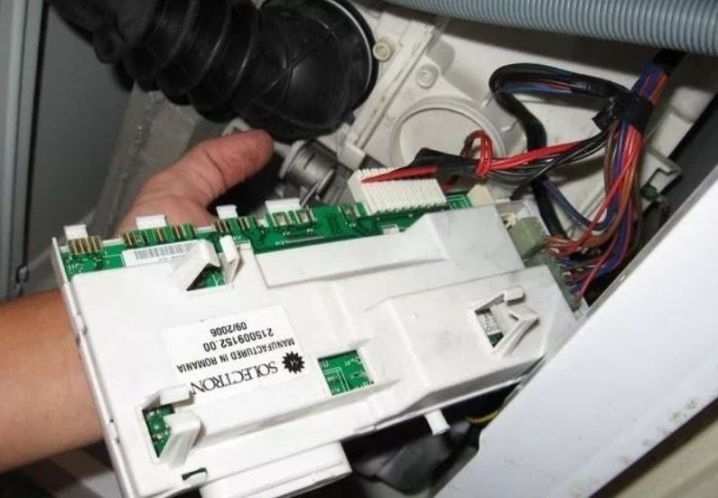
- Now you need to disassemble the front of the car. Let's start with the control panel. To dismantle it, you will need to unscrew the mounting bolts, and most importantly, do not forget to unscrew the small bolt under the temperature switch.
To get to it, you will have to poke the switch handle with a flat screwdriver (to gain access to the fasteners).
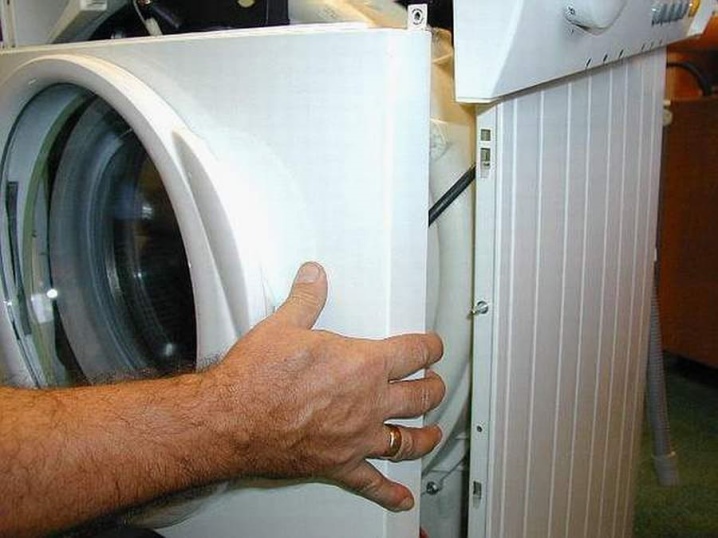
- When everything is unscrewed, we begin to remove the panel. It is rather difficult to remove - the plastic that engages must be carefully pry off with a flat screwdriver at the joints, especially in the area of the powder hopper. When the panel is detached, the buttons remain attached to it. The wires on them are assembled into terminals and can be easily removed.
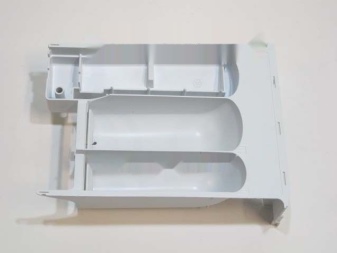
- After successfully dismantling the panel, remove the water inlet hose and valve. We disconnect it from the powder compartment and take it out together with the valve. Now we unscrew the detergent bin itself. It is attached with 2 screws. After unscrewing, we take it out of the case.
- It remains to disconnect the control board and other electronics that may interfere with the removal of the tank from the case. Do not forget to remove the gasket from the door hatch. It is fixed with a clamp, which must be pry off with a flat screwdriver and removed. After that, we straighten the rubber from the seat and bend it inside the tank.
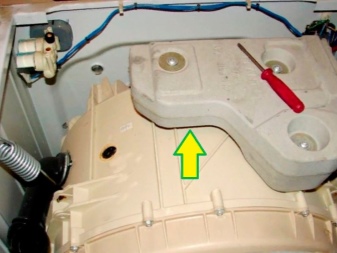
- To dismantle the tank we just have to unscrew the crossbar on which it hangs. It is bolted at the top. When everything is disconnected and unscrewed, you can begin to get the tank. Since it will not be possible to remove the counterweights in the case, you will have to get the entire structure (a lot of weight) through the top. At the same time, the weight itself will not be the main problem when removing it from the body - the drum shaft will rest against the rear bar and the tank will have to be maneuvered on the weight so that it still leaves its place. This procedure is best done with two people so as not to damage or drop anything.
When the tank has been successfully removed, the counterweights can be removed from the tank, but they must be marked. If installed incorrectly, the balancers will perform a completely opposite role, and this will lead to a re-disassembly of the entire unit and the overturn of the counterweights in the right direction. They are mounted on 2 studs and tightened with nuts, turning which parts can be easily removed.
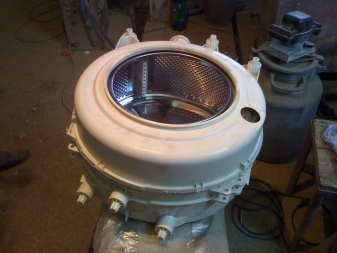
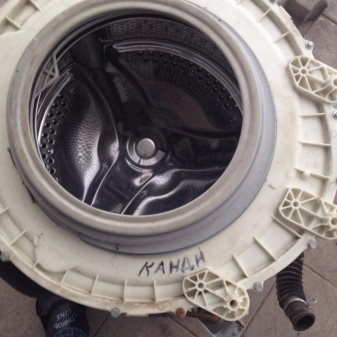
- Now the most important thing remains, namely to remove the drum. To do this, you need to disassemble the tank itself. Its 2 plastic halves are fastened together with bolts and plastic latches. Having unscrewed the bolts, you need to snap off all the latches. Do not worry if you break a couple of these fasteners during this time - after assembly, the tightness will depend on the degree of tightening of the bolts and on the integrity of the tank gasket.
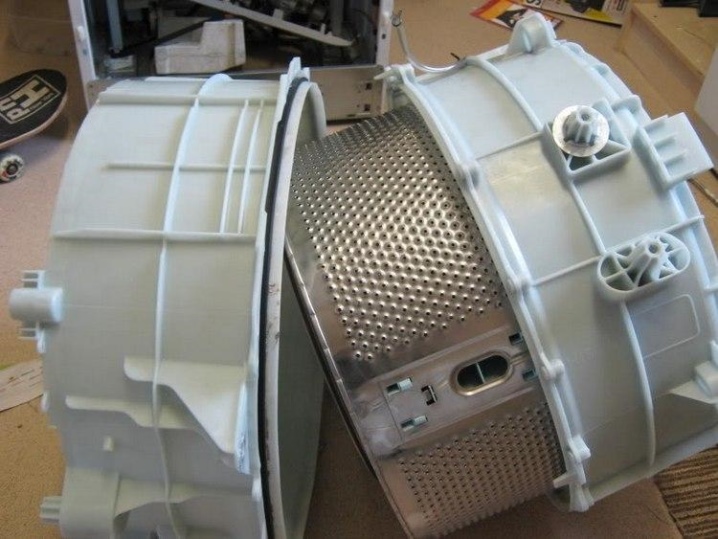
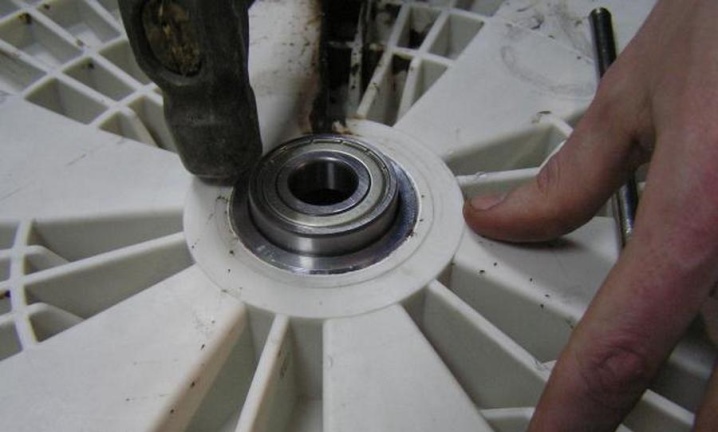
- When the tank is disassembled, you need to remove the drum. Due to the fact that the tank is plastic, it is highly undesirable to knock out the drum with a hammer. A bearing puller is a good choice for this. First you need to remove the oil seal, then all the bearings.
Remedies for common faults
All washing machines, regardless of brand or manufacturer, have certain problems that will appear someday. Let's consider the most common faults.
- The machine does not start. If this happens, then first of all it is necessary to check the power sources (plug and socket) - perhaps the malfunction lies in them. In the case when everything is in order with them, and the machine still does not turn on, then gently ring the power button. It is possible that the contacts on it have oxidized.
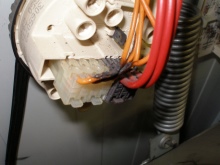
- The water does not heat up. This malfunction cannot be noticed immediately, unlike the previous one. As a rule, it is noticed with indirect signs: if the quality of washing has deteriorated, and sometimes an error may appear during self-diagnosis. If such a problem arises, do not rush to change the heating element. The electronic module may also be the cause of the problem. To find out, first you need to ring the heating element. To do this, you will have to remove the back panel to get to the contacts of the heater itself. Disconnect the wires from it before measuring.
- A serviceable heating element will show resistance in the region of 20-30 ohms. If so, then you need to check the electronic module. If the device showed 1, then this means that the heater has burned out and needs to be replaced.
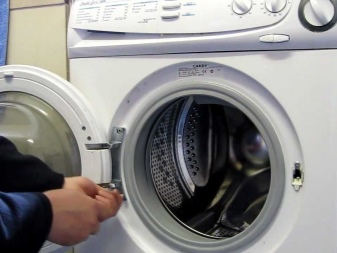
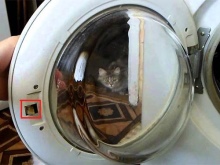
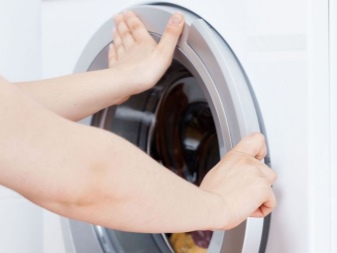
- The door will not open at the end of the wash. Such a malfunction may have 2 reasons: either the lock is out of order, or water remains in the tank and therefore the door will not open. In the first case, you need to squeeze the flap of the machine and insert the lace into the hole. While dragging it around the perimeter, you need to pull on both ends so that it presses on the hook. After the door opens, remove the sealing cuffs and through the resulting space, you can change the door lock without a global analysis.
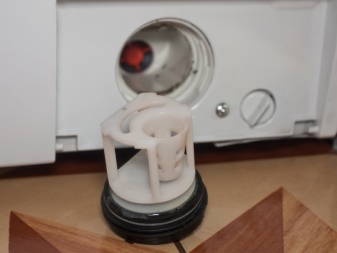
- In the second option, you will have to use an emergency water drain. As a rule, after this, the door opens, and so that this does not happen again, you will have to eliminate the cause of the problem. Most often it is a clogged drain filter.
- When the spin mode starts to work poorly, this may indicate that there are problems with the engine, but first you need to check the brush. Most often, it is she who is the cause of this problem.
Helpful repair tips
If you decide to repair your washing machine at home, but do not have enough experience in this matter, then any photo or video shooting will be a good assistant in disassembly and reassembly. She will tell you how to assemble everything in reverse order.
It is best to purchase spare parts in specialized stores, where experienced sellers, knowing the brand of the washing machine, will be able to accurately select the spare part you need.
For the intricacies of the repair, see below.


The comment was sent successfully.