We make woodworking machines with our own hands
Any man dreams of such a room as his own workshop. Moreover, I want it to be equipped with all the necessary tools and equipment, which will make it multifunctional and as versatile as possible. After all, we all know that manual tools do not always allow us to bring certain ideas to life. You should have at least some machines. Let's try to figure out how to make a homemade woodworking machine with your own hands at home, which will allow you to create various products and do woodwork.

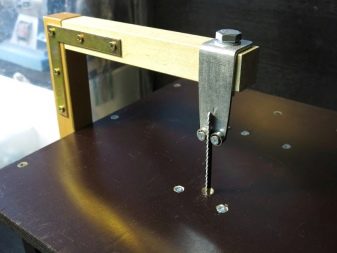
Circular machine from a drill
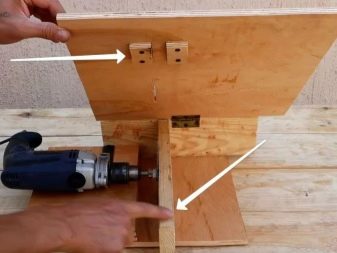
To make such a machine at home, you will need to have on hand several bars under the legs on a parallel-type stop, as well as a couple of pieces of plywood that will become such a tabletop. First, you need to make holes in the plywood in the places where the legs will be fixed. It is best to apply a little epoxy to the places where they will be secured to be more confident in the reliability of the fastening.

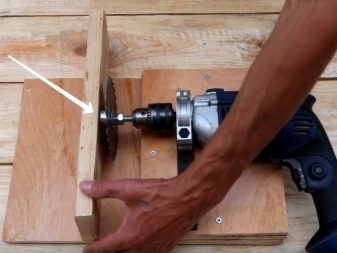
At the next stage, we install the legs and fix them on the back with self-tapping screws, after which the machine can be installed on them. Now you need to drill a hole in a simple piece of rectangular plywood using a crown. Its diameter should be equal to that of the drill chuck. In principle, it is not scary if it is slightly larger, because fixation will still be carried out using a bolt. This element needs to be fixed under the machine table top. It would be better to apply a marking at the point where the saw blade exits.... This part should be fixed with self-tapping screws on the back, and here you can also use epoxy glue for greater confidence.
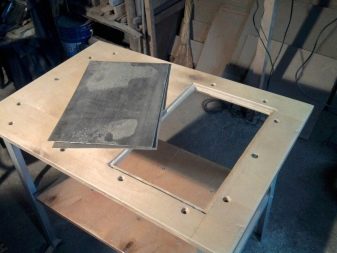
After that, a hole is made to fit, a slot is carefully cut out with a jigsaw.
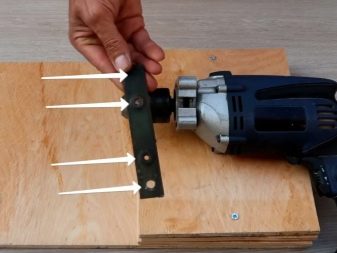
Now you should arm yourself with another plywood, which will have dimensions similar to the first piece of plywood, and make the same slot for the saw blade to exit. You also need to make a through hole that will match the width of the bar. Moreover, it should be done at an angle of 90 degrees from the last slot. It will be for the rip fence. The resulting blank should be glued over the first plywood.
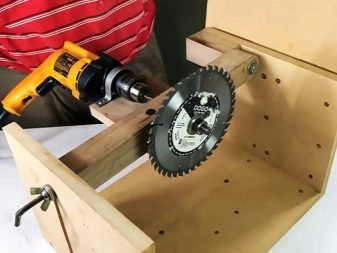
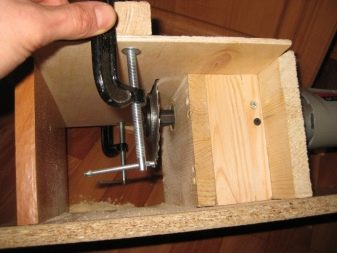
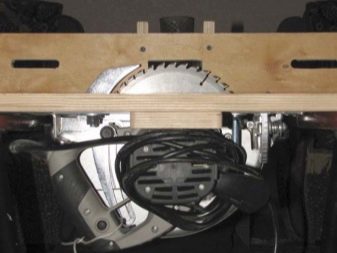
It remains to install the drill and put on the saw blade. To do this, we put it in a previously prepared part with a round hole, which was previously installed under the countertop. The saw blade must be secured to the bolt with a nut, and a washer must be fitted on each side of the blade. After that, the bolt is installed in the drill. For the final fixing, a self-tapping screw is screwed in, the reliability of fixing the drill is checked. On the reverse side, it is secured with a pair of clamps.
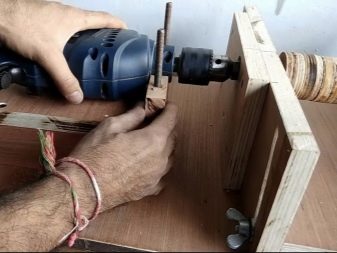
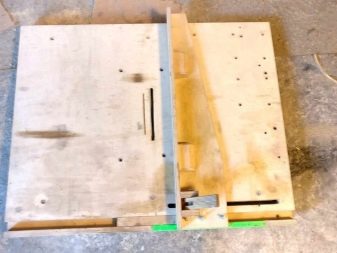
The matter remains exclusively with the latter. To do this, a block is inserted into the groove, and an even piece of plywood is glued from the front side at a 90-degree angle, after which the parallel stop is fixed to the tabletop. It is imperative that the bolt be located on top so that after setting the stop, it can be fixed.
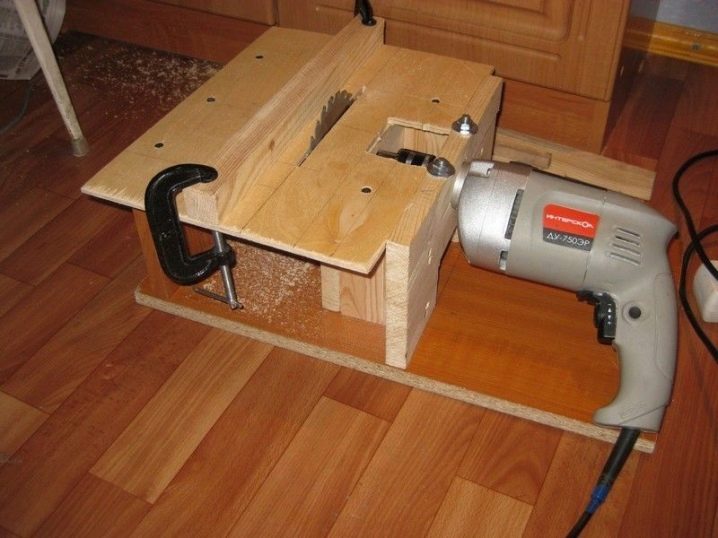
This is how you can make a good circular machine from a drill for a home workshop.
Grinding machine manufacturing
To create a carpentry grinder for your home, you will need to arm yourself with the following materials:
- plywood;
- bearings;
- switches;
- a motor from a washing machine;
- a piece of chipboard;
- glue;
- a piece of pipe and a plumbing coupling;
- threaded rod;
- nuts, bolts and washers.
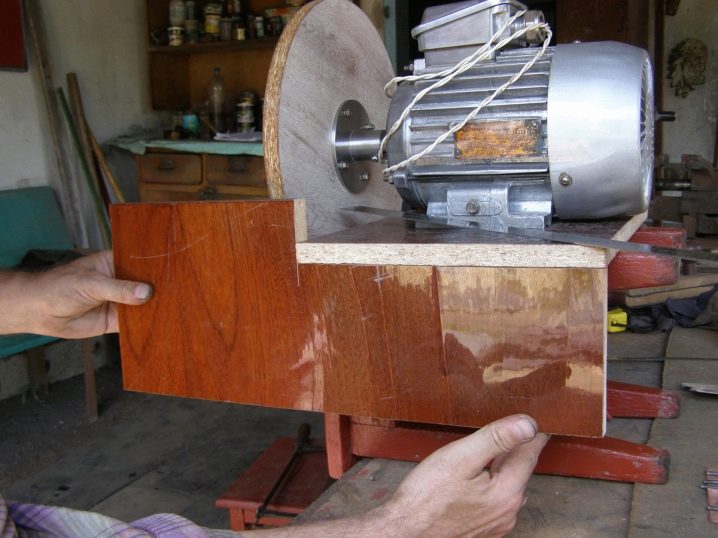
If possible, then it would be better to make preliminary drawings of the device, which will improve the accuracy of all operations for its creation... At the first stage, you will need to cut the chipboard blanks, which will become the machine body. After that, a series of actions should be performed with the engine from the washing machine. To mount the drive roller on the motor shaft, select a plastic pipe coupling of such a size that it can sit well on the shaft pulley. To obtain the required size of the latter, you will need to turn on the motor and file it like a lathe. After that, the clutch is carefully pressed onto the pulley so that it is clearly fixed. If you want to fix it as securely as possible, you can use glue.
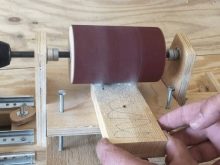
Now a piece of pipe should be installed in the coupling, which will be the driving roller. To provide a better grip with the sanding belt, you will need to glue the roller with rubber from the camera, which can be removed from the wheel from the bicycle.
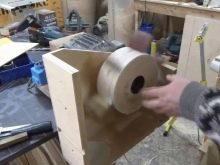
At the next stage, the body is assembled, the motor is mounted and it is well fixed with nuts and bolts. The tabletop itself will have 2 holes: for the driving and driven rollers. To make a driven roller, you need to take a piece of pipe where you need to press a pair of bearings. An axis can be created from either a threaded rod or a long bolt. The axis of the driven roller is attached to a special plywood platform that can move horizontally under the tabletop. This allows the sanding belt to be tightened.

For maximum tensioning convenience, use a long rod equipped with a thread with a nut... It will pull on the platform, which will tighten the belt. Note that there is no belt centering in this design, which means that it will be better to fix the rollers so that the axles do not move, but diverge slightly, which will allow the belt not to fly off. After that, all that remains is to attach the emery support pad and slide the sanding belt onto the rollers.

Creating a sawing machine
Now let's talk about creating a wood cutting machine. Usually it is created:
- from a saw;
- from a jigsaw.
Let's consider in more detail both options of machines.
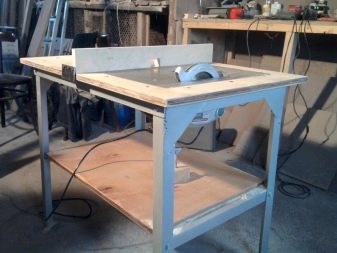
From the saw
To create this type of fixture, you need a pair of bars of the same size, which you need to screw from below to a sheet of plywood. The longer the sheet, the longer the workpiece can be processed. But if the machine is too large, then it is better to use squares made of steel, not aluminum. After the bars are attached to the plywood, you will need to install the circular saw on a pair of aluminum squares. Moreover, at the edges, they must hold the saw as tightly as possible so that it goes exclusively forward and backward. Even the presence of minimal backlash can result in a significant reduction in cut quality.
Now you need to screw the squares to the bars using self-tapping screws. In this case, you should not save them, and therefore it would be better to use 2 such devices on both sides of the square. This will allow you to make high-quality guides along which the circular saw will move. At the next stage, it is necessary to create a stop that will be needed if an end cut will be made. It is better to do it at standard angles of 45 and 90 degrees, and if necessary, you can add others. We attach a small block to the bolt on one side. The metal rod should be taken such that it will be convenient to unwind by hand. The nuts can be hidden with a piece of plywood, covered with epoxy or glue.After that, set the block 90 degrees to the saw blade and fasten it to the bolt on the other side.

After that, you can cut at 90 degrees. And in order to be able to cut from the end at 45 degrees, it will be enough to add 1 more bolt.
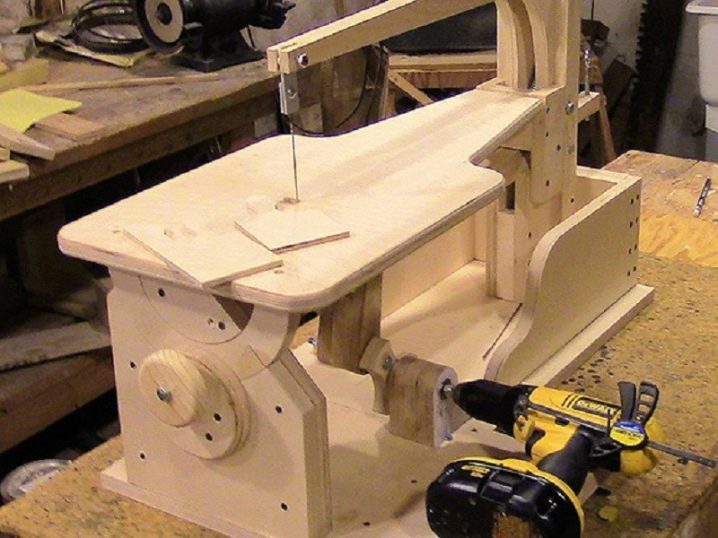
From a jigsaw
First, you need to mark and cut out the platform where the jigsaw will walk. To do this, in the center of the plywood, you will need to create a markup and make holes at the beginning and end of the groove, where the jigsaw should calmly enter. The width of this device should be equal to the width of the jigsaw platform. Now, with the help of the latter, we remove everything that is superfluous between the holes, after which we fasten a couple of slats to the edges, which will limit the course of the device. We drill holes and fasten 5 self-tapping screws on both sides.
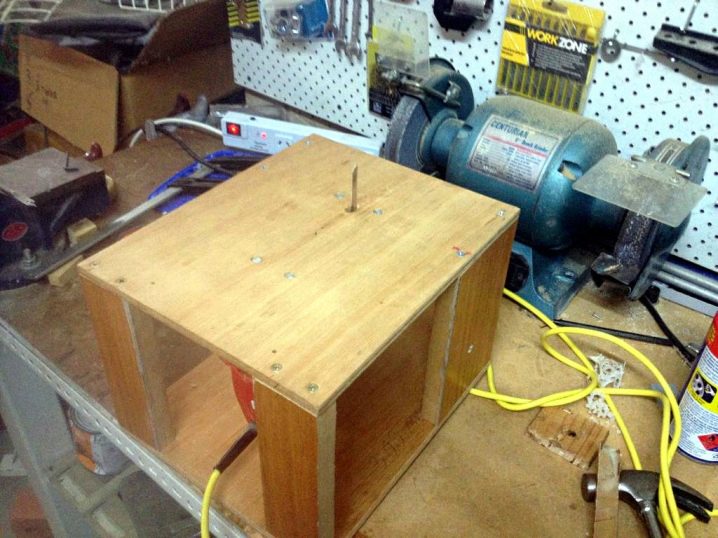
That is, as you can understand, the width of the platform should be equal to the width of the jigsaw sole.... Now we fix 2 legs on a common machine platform. But it is better to make the legs higher so that they also serve as bumpers for the upper part. It is better to fix them with three self-tapping screws on both sides. If suddenly the platform for the jigsaw turns out to be slightly longer than the common platform, then it can be shortened. Then the marking is done, after which everything unnecessary is cut off with the help of a jigsaw. Now it is necessary to fix the machine platform from above.
It is required to make a pair of stops, after which we drill holes through the platform of the jigsaw at the beginning and end of the groove in the main platform, which will allow us to transfer the hole for the saw to travel. It remains to form a slot with a jigsaw on the main platform. The machine will be ready. If you want to be able to cut at a 45-degree angle, then you will need to mark and attach the bar with a pair of self-tapping screws to the machine. When not needed, you can simply unscrew it.
More ideas
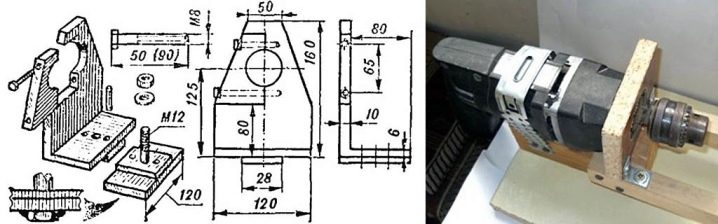
It should be said that for wood processing, there are many other ideas in terms of creating machines... For example, the unit can also be made from a screwdriver, but most often a drill or jigsaw is used for this. Depending on the design of these devices and their technical characteristics, as well as the required tasks, homemade machines can have different shapes, different operating principles, and technical characteristics. If you want and have the required skills, you can even make a woodworking CNC machine.
For information on how to make a woodworking machine with your own hands, see the next video.


The comment was sent successfully.