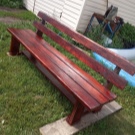
We make benches from boards
A dacha is a place where you can not only relax alone or in a pleasant company, but also work hard. In this case, you simply cannot do without a bench. There are many different ideas and schemes for such a design: in the form of a small sofa, traditional benches, with a back, with decorative stands instead of legs, etc. It is important that the bench fits into the overall design of the suburban area.
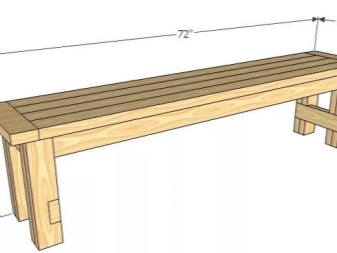
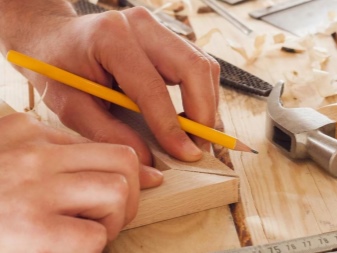
Drawings and dimensions
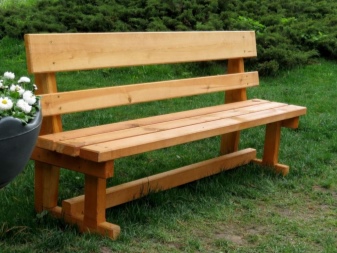
The simplest and most economical option is a plank bench. It is necessary to decide exactly where the bench will be located, this often affects the choice of material for the future structure. It is better to locate it in a place where there is an opportunity to admire a pleasant view, for example, opposite a lake, a garden, a flower garden. A country bench is a place of rest and relaxation, preferably in the shade of trees or under a canopy. There are many sketches of benches on the Internet, and in most cases they are part of a summer gazebo, veranda or playground.

The first thing to do is create a drawing or diagram. It is at this stage that the first questions arise: what height will be the most comfortable, how many legs the bench should have, what thickness of the boards is suitable, etc. There are several standards to rely on when drawing up a sketch:
- seat height - 40-50 cm;
- seat width - 50-55 cm;
- back height - 35-50 cm;
- seat length for one person - 50-60 cm, for two - 120 cm.
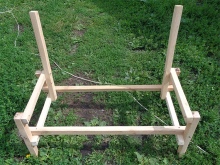
If you plan to create a country bench with a back, you need to immediately decide how exactly it will be attached to the seat. The legs also need to be planned in advance, depending on whether the bench is portable or not. For stability, you can design a third leg, but for such a product you need a perfectly flat surface.
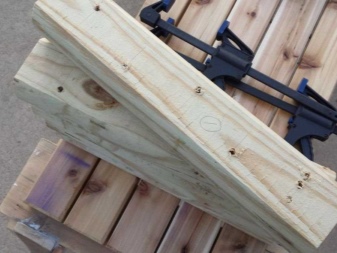
The standard parameters of the bars from which the legs of the bench will be created are 50x150 mm, you can also take material with other dimensions - 50x100, 40x150 or 40x100 mm. To make the design reliable, it is not recommended to take smaller sizes. For the back and seat, a smaller thickness is suitable - 25 mm.
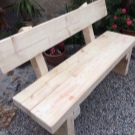
How to make a small bench?
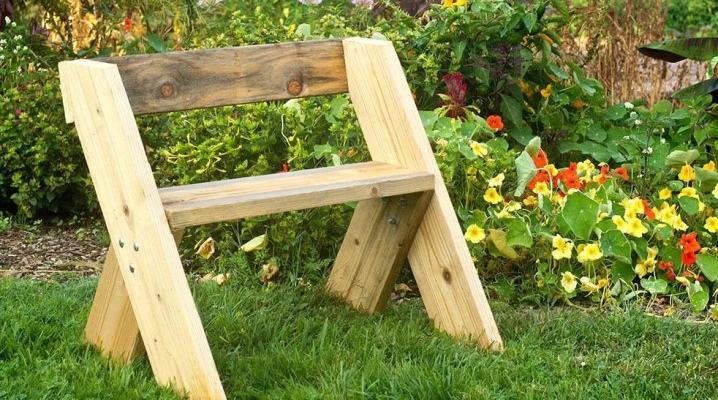
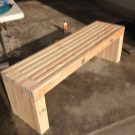
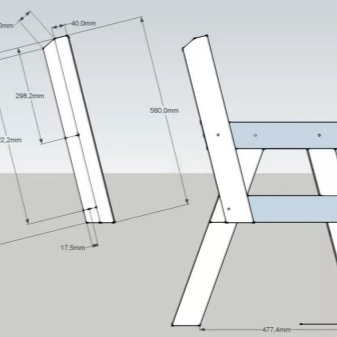
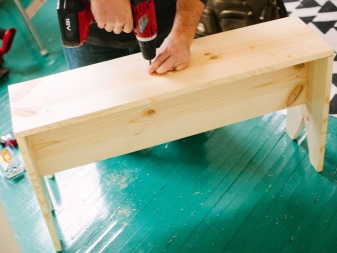
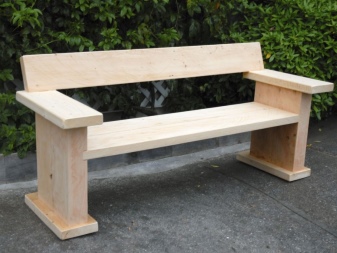
You can make a simple and comfortable bench with your own hands from any materials at hand: from old furniture, from terrace furniture, from flooring or even from unedged boards. And from the scraps, build additional parts, for example, crossbars to enhance the bearing capacity or additional shelves. A step-by-step diagram of a simple project that even a beginner can handle is a small bench consisting of two legs and a seat.
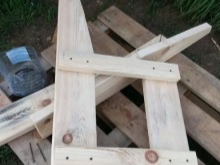
- To begin with, you need to cut out 3 parts from a wide board, that is, cut it into 3 parts: a seat and 2 legs. The seat should be 96 cm long and the legs should be 38 cm.
- Now you need to create decor on the legs. The first step is to cut a groove in the middle of both parts. The second step is to drill a hole of any convenient diameter in the center. Holes are also made in two parts.
- The next step is to create the support in the uprights. To do this, you need to make an arch. First, a sketch is made with a pencil, stepping back 4 centimeters from the edge, then it is cut out with a band saw and sanded. The arch for the second post can be made using the first one as a template.
- Now you need to cut out additional crossbars.
- On the future seat, for convenience and aesthetic appearance, bevels should be made at the edges - chamfers.
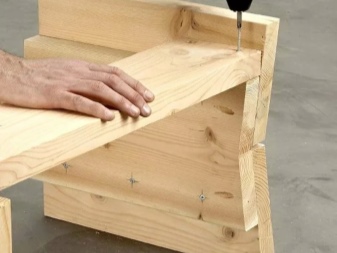
- The preparation is over, now you can start assembling.First, using screws, you need to connect the crossbars and legs - you get a kind of frame. The holes for the screws should be prepared in advance using a drill.
- The last step is to screw the seat onto the frame.
Making a street shop
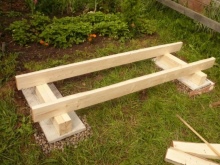
One of the easiest options for a summer cottage or a country house is a rustic outdoor bench. The bench consists of two stumps instead of legs, and a wide board is installed on top as a seat. Such garden benches are usually installed near the fence or near the wall of the house, so they do not have a back. If the design of the bench is quite long, then another stump is placed in the center - this will allow the board not to bend or crack.
To create a rustic-style bench, you will need a tree, stumps and poles. This is, as they say, waste material lying underfoot, which can be taken either at your summer cottage, or in some forest belt where sanitary felling is carried out. The base or legs of the future bench are built from the stumps, and the crossbars are made from the poles in order to rigidly fix the structure. A tree trunk is opened on a circular saw - this will be a seat. If there is no suitable equipment in the arsenal, then a simple unedged board will do.
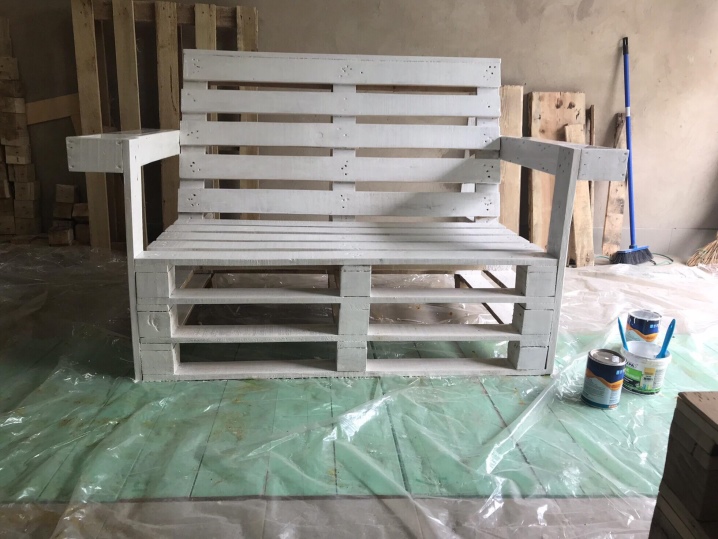
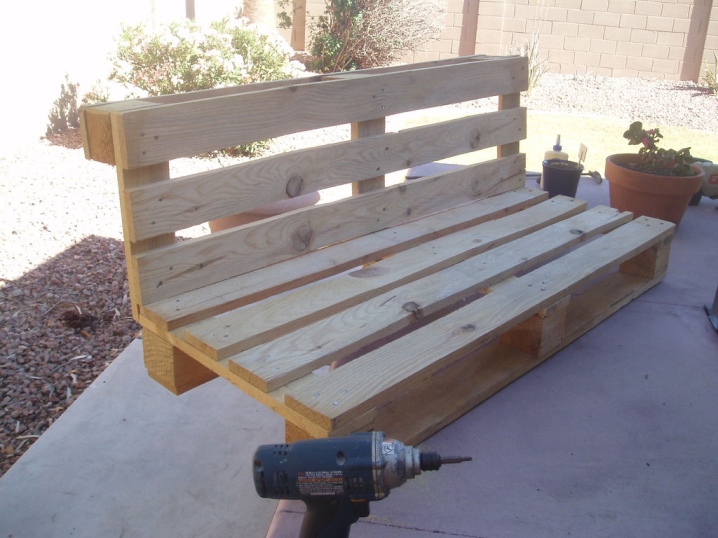
Another economical option for creating garden furniture is from old pallets. Pallets are wooden pallets. But not any pallet is suitable, but only from a high-quality edged board - a euro pallet. It usually has EUR marking on it. The standard width of such a pallet is 80 cm.
If desired, you can leave the dimensions unchanged, or you can shorten them. For example, a bench with four pallets - three of them stacked on top of each other serve as a base and a seat. And the fourth pallet is the back. Part of the support bars is removed from the pallet for the backrest, and the rigidity of the structure is provided by additional wooden slats: one end is attached to the seat, the other to the back.
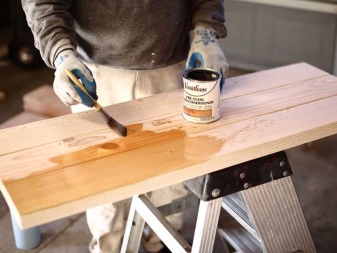
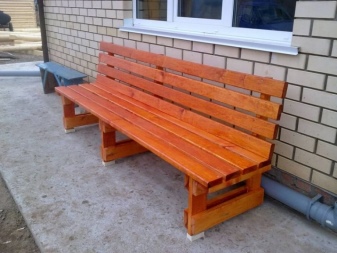
Quite high requirements are imposed on garden furniture if the construction was not made with materials at hand, but purchased in a store (lining, decking, etc.). There are a few tips to follow to extend the life of your finished product.
- The material that was purchased for outdoor furniture should be kept at the site of operation for at least three days.
- Additional logs can be installed to distribute the load.
- To avoid cracks, it is recommended to prepare holes for self-tapping screws in advance.
- If a timber bar is used for the structure, it is recommended to cover it with a layer of paint, oil or varnish from all sides, and from the ends too.
- The deck board does not need to be covered with any protective layer, as its surface is already treated and ready for use. You just need to close the ends with special plugs.
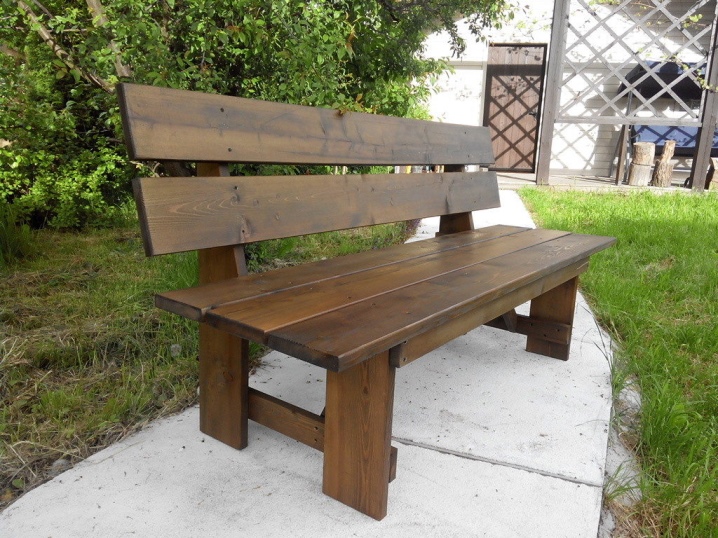
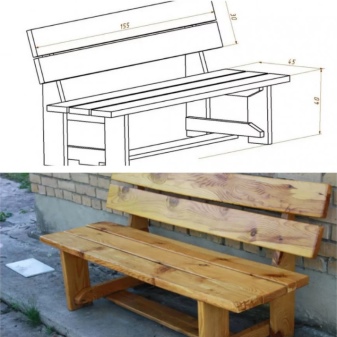
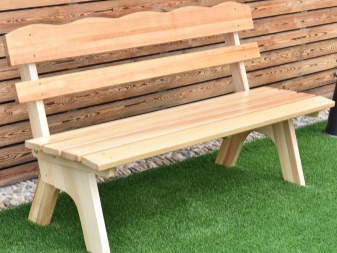
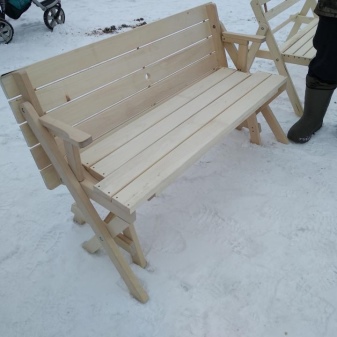
Making a bench with a back
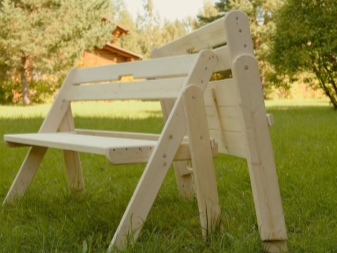
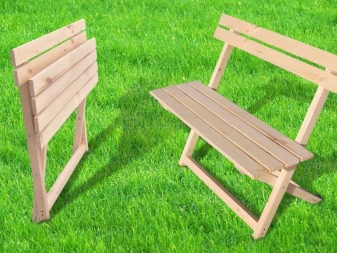
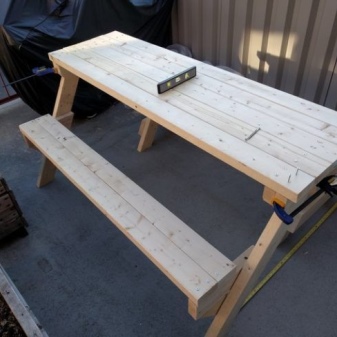
Quite an unusual and beautiful version of a summer cottage, made by yourself - this is a transforming bench. Compact and functional design: when folded it is a bench with a backrest, when unfolded it is a table and two benches. The disassembled bench is designed for 6 people. It will not be possible to assemble such a shop quickly, but if you have patience, the result will be amazing.
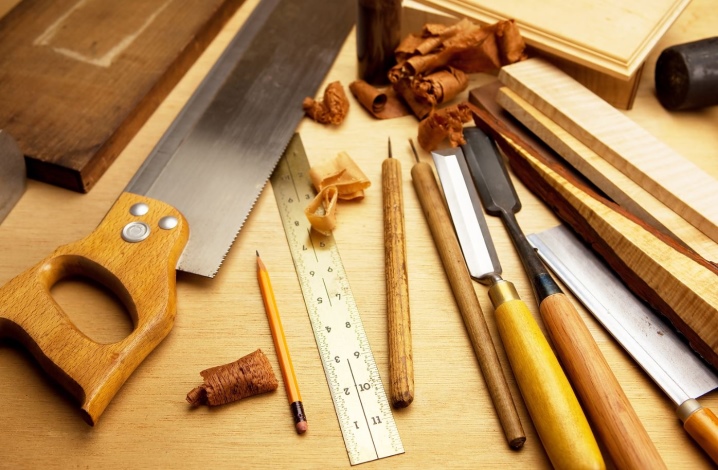
Tools and materials
Materials:
- boards 30x80 mm (for reliability, it is better to take hard wood);
- metal corners;
- self-tapping screws;
- liquid nails or special glue;
- bolts size M12;
- nuts, washers and nails.
Instruments:
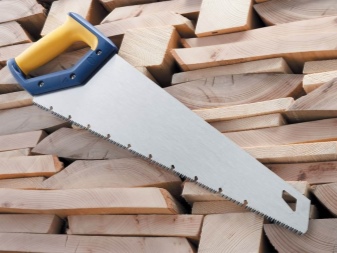
- saw-hacksaw;
- screwdriver;
- drill;
- hammer;
- ruler;
- pencil;
- protractor;
- corner;
- roulette.
Assembly stages
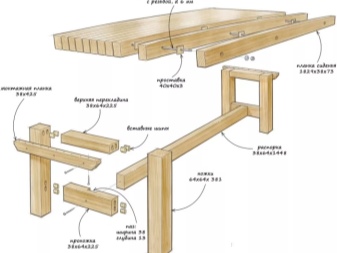
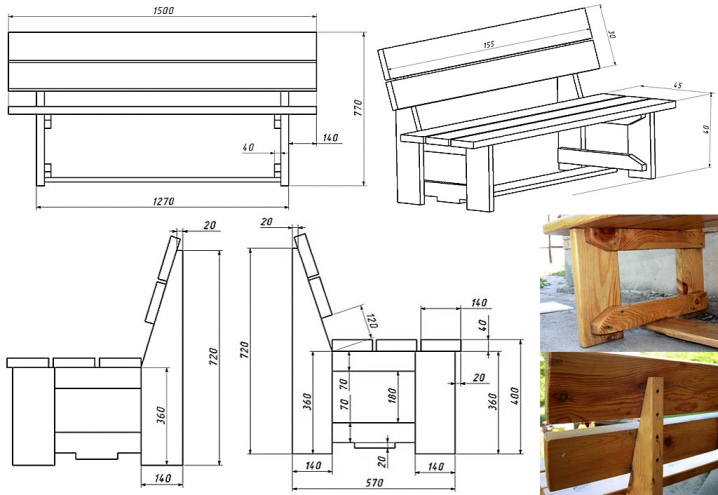
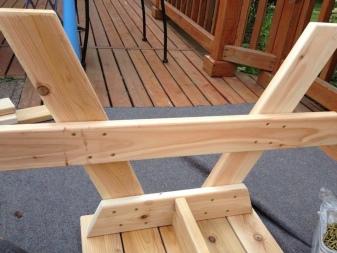
First you need to draw all the necessary templates, and then cut the boards to size. There will be two benches in the finished form, preferably the first to assemble the outer one, and then the inner one. The height of the legs is 44 cm, the distance at which they are located: at the top - 25 cm, at the bottom - 40 cm. This is done for reliability and stability.The crossbar between the legs is at a distance of 15 cm from the supporting surface, it should be located on the inside. The length of the seat is 138 cm. Before starting the assembly, all parts must be sanded and chamfered. The design of the bench is quite simple, all fastenings are made with self-tapping screws and glue, and corners are added for reliability and rigid fixation.
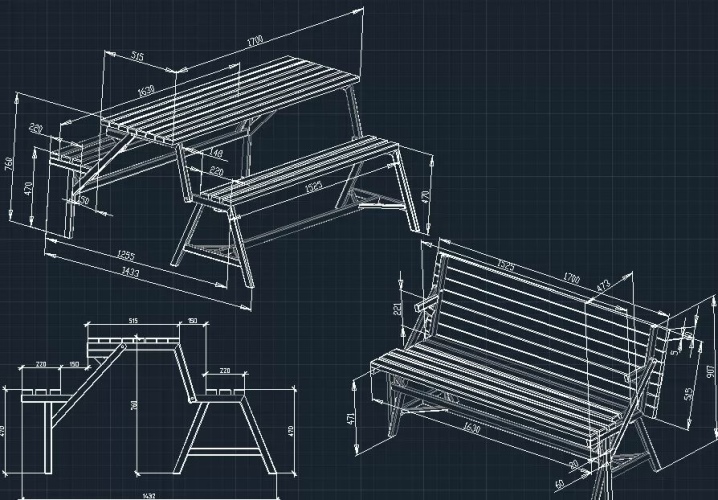
The next step is assembling the inner bench. The height of the legs should be the same as that of the first bench, but here the crossbar is carried out. The length of the upper bar increases from 25 cm to 35 cm. A hole is drilled on the protruding part 4 cm from the edge, where the M12 bolt will be installed; to hide the head of the bolt, this hole needs to be enlarged slightly. The length of the seat should be 144 cm.
Both benches are assembled, now they need to be tried on to each other - the outer bench should go into the inner one, that is, when folded, they should look like one whole bench.
Next, you need to make brackets from two bars. They are connected in such a way that an angle of 100-105 degrees is obtained. One bar is the width of the countertop, the second is the distance from the bench to the countertop. A hole is drilled in the second bar (which is responsible for the distance), where the M12 bolt will be installed. The finished brackets are now connected to the inner bench. So that the junction does not wear out, and the parts do not touch each other, you need to install a washer. The bolt head is recessed into the drilled hole, the same actions are done on the opposite side.
After that, the brackets are installed in a flat, that is, in an unfolded position. Now you can connect the table top to the outer bench. This is done using two strips, 75.5 cm long. Holes are drilled at both ends at a distance of 4 cm from the edge. On both planks, a limiter is needed so that the table top does not slide out in the future and is securely fixed. It is not difficult to make it: a small piece of the board needs to be cut off at a certain angle (by trial and error, the desired degree of angle is selected) and connect it to the bar using self-tapping screws. The same is done on the second bar. One end of the bar is connected with the bracket (with the part responsible for the width of the tabletop) from the inside using an M12 bolt, the other end is also attached with a bolt to the outer corner of the outer bench. Washers are installed at the joints. The final stage is the collection of the countertop. Pre-prepared boards are screwed onto the brackets. The transforming bench is ready.
When folded, the table top "turns" into a backrest, and two benches - into one whole seat. To unfold such a structure, you just need to pull on the outer bench.
How to process?
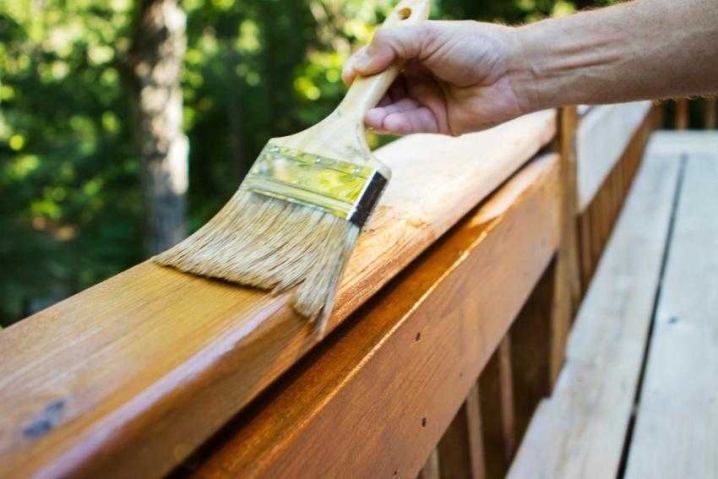
Wood is the most popular material for outdoor furniture. Various atmospheric phenomena - temperature drops, wind, rain, snow, sun - all these affect the life of a wooden bench. There is a wide range of products on the market that protect the material from rot, fungi, moisture, fires, etc. The first thing you should pay attention to is special antiseptics. They can be in the form of a paste or solution. An antiseptic can be:
- penetrating - a more effective remedy;
- film-forming - after a while, the layer on the surface must be renewed.

All dirt and dust is removed from the bench before applying the product. It is not necessary to process a wooden product with only one tool, you can also use antiseptics that work in a complex. They are usually applied to the surface in 2-3 layers. To protect a street shop, it is not necessary to use special preparations, you can simply paint it with paint. But for such processing, it is advisable to take facade coloring compositions for wood. They are weatherproof and provide protection from high humidity and sunlight.
For information on how to make a garden bench from boards, see the next video.


The comment was sent successfully.