How to plaster a brick wall correctly?

The moment of finishing is very important in construction and renovation work. It should be borne in mind that almost any person can plaster a brick wall on their own, experience and special skills in this matter are not required. If you carry out the work correctly, its result will delight for many years and no problems will arise. The main condition is compliance with the rules and nuances of the process, which we will talk about in our article.
Types of plaster
The first problem that finishers face is choosing the right plaster. It depends not only on how smooth the walls become. The material also protects the surface from moisture penetration, can provide a decorative function, in addition, it helps to improve sound and thermal insulation. Plaster can be divided into several types depending on the scope of its application:
- ordinary;
- special;
- decorative.
Ordinary plaster is usually used in rooms in which further finishing is planned. It can be used as a base for paint or wallpaper. The special one perfectly protects against moisture, helps to strengthen sound and thermal insulation. Decorative, however, can be made in various colors and textures, it is usually used for outdoor work.

For quality work, the correct choice of solution is very important. It contains sand and a special binder, most often cement, gypsum or clay. The type of solution should depend on the place of use.
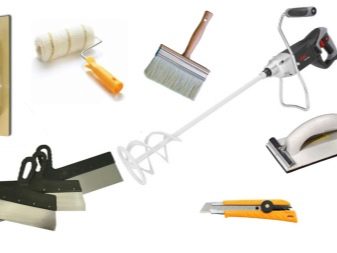
Required tools
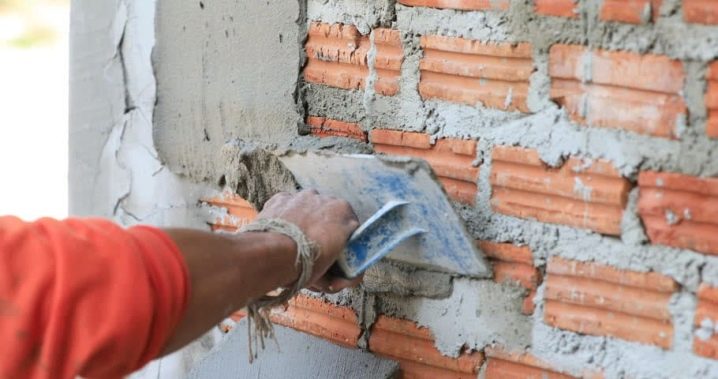
The next important point is the selection of instruments. It should be borne in mind that the lack of necessary items can disrupt the course of work and will not allow achieving the desired result. So, you will need a container in which the solution will be diluted, a mixer or a spatula for mixing it, a brush or roller for application, a scraper, a chisel, a perforator, a level, a drill, a tape measure, a half-trowel for removing corners, a grater, a spray gun for wetting the surface, a plumb line, usually a pencil.
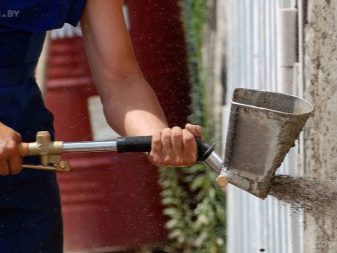
In order to speed up the progress of work, it is advisable to use a plaster gun. It does an excellent job of spraying the composition on the wall. At the same time, the result is better. Due to the pressure, the solution adheres better to the surface, filling irregularities, and the process itself is much faster.
How to prepare the solution?
When plastering a brick wall, both cement and plaster mortars can be used. They differ in certain parameters. Gypsum must be mixed in small quantities, as its setting time is rather short. Cement, on the other hand, can withstand longer periods, so it is advisable to prepare it in larger quantities. The final drying time also depends on this - if, in a situation with gypsum, this process takes up to a week, the cement mixture will finally dry out only after a month.
There are 2 ways to plaster the surface, which differ in the presence of beacons. In this case, the solution in both cases is prepared in the same way. It happens in the following way.
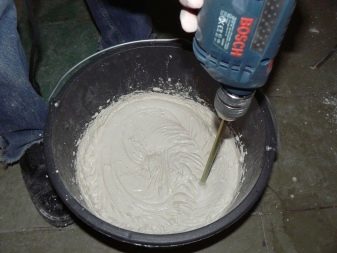
First of all, it is necessary to sift the sand, removing debris from it. Next, cement is added in proportions of approximately 3: 1 and thoroughly mixed to an even consistency. After that, water is poured in. Stir the solution constantly.If the proportions are not observed, adhesion to the surface may deteriorate. Using a drill, the solution is mixed thoroughly, after which it is left for a few minutes.
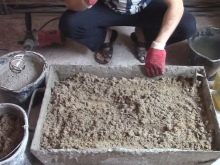

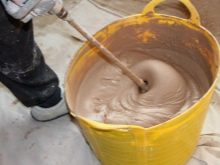
In order to increase the plasticity of the solution, you can add latex, PVA dispersion or a plasticizer. It is recommended to use the mixture within the next 1.5 hours. When thickening, you can add a little water to it.
Preparatory stage
An important stage is the preparatory work. It includes several points that cannot be ignored. First of all, you need to check the availability of tools. This is followed by surface preparation.
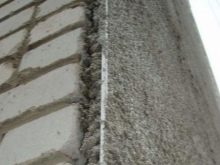
The walls need to be examined carefully. Loose bricks, if any, are fixed with cement or polyurethane foam. Cracks and chips are smeared, deformed areas are removed. If this is not done, the plastered surface can begin to deteriorate quickly enough. The old composition needs to be removed.
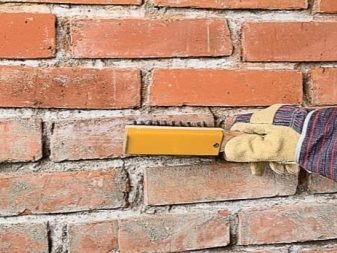
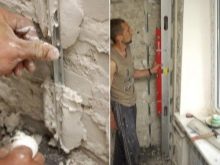
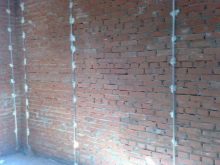
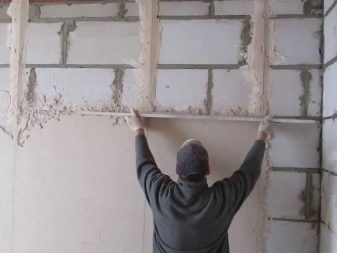
The plumb line will help identify imperfections and surface irregularities. The seams are smoothed, dirt and dust are removed. The rest of the surface is also cleaned, after which it should be primed. It is the primer that will help the materials adhere better. The next item is the installation of beacons.
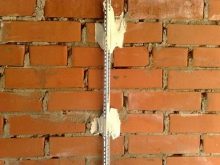
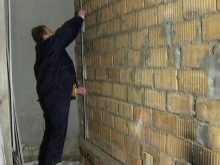
To begin with, self-tapping screws are installed in the upper corners, protruding a couple of centimeters above the surface. Plumb lines are placed, screws must be fastened behind their cords. Next, a tourniquet is stretched, which forms straight lines horizontally, and beacons are set up under them, the distance between which is 2 meters. The fixation points should be 20 centimeters apart. As a result, the wall will have vertical dividing lines.
Work technology
Correctly plastering a brick wall is not difficult, you just need to strictly follow the technology. For beginners, the question often arises as to whether beacons should be removed. Experts answer positively, explaining that the implementation of this paragraph will save you from a lot of problems in the future. After all, even galvanized elements will corrode over time, which will negate the work done.
It should be borne in mind that plastering outdoors and indoors has its own nuances. Let's dwell on them in more detail.
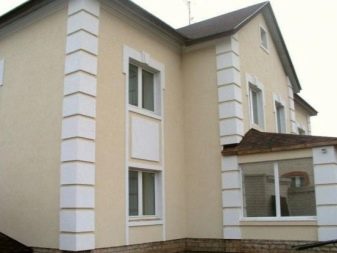
Outside
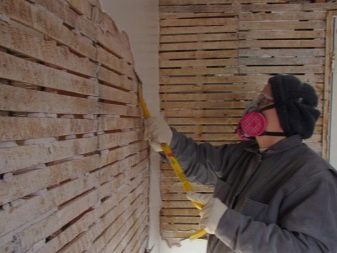
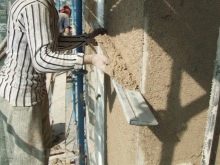
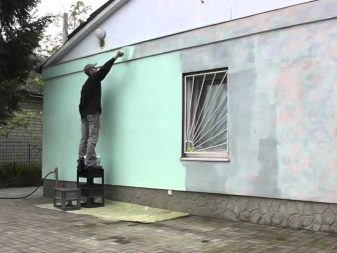
If work is carried out not inside, but outside the premises, the preparatory stage should not be neglected. If the house is old and the exterior renovation of the building has already been carried out, the first step is to get rid of dirt and dust. In any case, you will need to moisten the facade, which can be done using a conventional watering can or a spray bottle. Next, the surface should be primed.
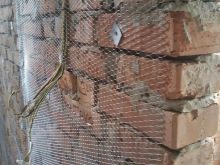
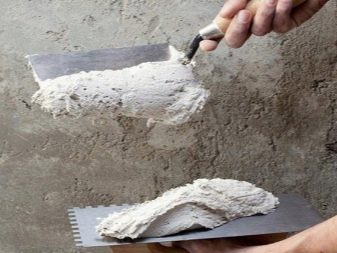
You can use a special mesh. It is fastened before starting work, and the mixture is applied from above. Plaster leveling is done from the bottom up, focusing on the beacons. In order to achieve a perfectly flat surface, a rule should be used.
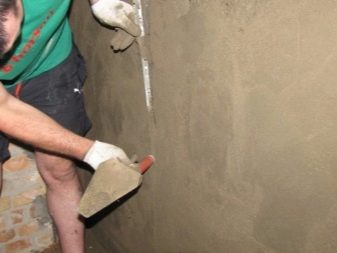
It is recommended to apply the solution in a thin layer. If you do a few tricks, there will be fewer shrinkage cracks. The first layer is necessary to fill the pores and ensure a stronger adhesion of materials. The second is applied only to a dry surface, so it sticks better and holds more firmly. The solution in this case is used thicker.
For greater adhesion to the top layer, the surface should be brushed with a wire brush. The topcoat should be 2 millimeters thick.
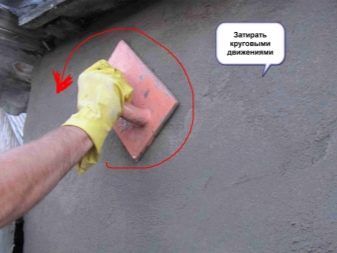
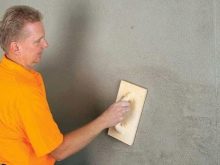
After carrying out all the manipulations, grout is done. This will require a grater, which must be moved counterclockwise. Once the grout is complete and the walls are dry, you can start whitewashing.
Inside the house
If repairs are carried out in an apartment, work should be done as follows. Beacons must be securely attached to the surface to be wetted. The solution first of all fills cracks and irregularities on the walls.As soon as the first layer has dried, the main part of the plaster is applied, the thickness of which depends on the level of the beacons.
The mixture is leveled from bottom to top, excess material is removed. Do not apply the mixture in a too thick layer, as it may crack. After the coating has dried a little, the beacons should be removed, and the seams should be carefully repaired. Next, grouting is carried out. After that, you can carry out finishing from the inside of the room.

Useful Tips
Plastering brick walls is not a very complicated process, but requires, however, care and competent execution. You can do the work with your own hands, however, violation of the basic rules can lead to the fact that after a while the plaster will crack and crumble, respectively, you will have to change the decoration of the room or the facade of the building. To avoid such a problem, in addition to describing the technology of work, experts give recommendations, focusing on which you can reduce the operating time, get a good result and extend the life of the surface. Let's consider the main ones.
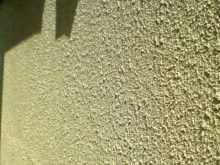
It should be noted that the range of materials for outdoor decoration is wide enough. There are decorative bricks, siding, ceramics and much more. Plaster occupies one of the main places. Connoisseurs of unusual design and new technologies will like the facade decorative plaster called "bark beetle". It is used quite often and has become popular due to its appearance, imitating wood spoiled by a bark beetle.

If the plastering of brick walls is carried out in rooms with high humidity, experts recommend adding lime to the mixture. This option will be appropriate when carrying out work in the basements of buildings. To increase plasticity, you can add a small amount of liquid soap to it. It should be borne in mind that plastering should not be carried out at temperatures below 7 degrees.
If it is not possible to use cement mortar, experts recommend making a gypsum mixture. In cases where it is required to process a wall with insulation, but it is impossible to use special materials, the addition of pumice will save the situation. To check the readiness, a test application of the mixture should be carried out. To do this, it is laid out in a dotted thickness of 2-3 centimeters and must hold firmly to the surface. If the layer is more than 7 centimeters thick, the mixture should drain.
It must be borne in mind that if the building was recently built, you need to withstand time for it to shrink. Any monolithic brick house is subject to this process. If thick coverage is required, a reinforcing mesh should be selected. This condition is especially important when carrying out outdoor work.
For plastering brick walls indoors, see the following video.


The comment was sent successfully.