Features of string beacons and their application
String beacons are used during construction and repair work. They are essential for perfect leveling of surfaces. With their help, the putty of the walls and the floor screed are flawless. What are string beacons, how to install them and whether you can make them yourself, we will tell you in our article.
Features and purpose
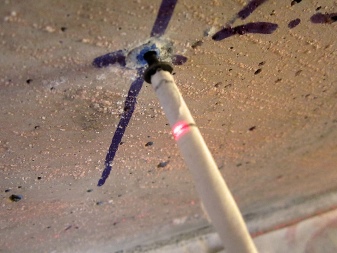
The surface of the floor, ceiling or walls can be flawlessly executed using auxiliary landmarks. They can be perforated strips, profiles, but in our case we will talk about wire products stretched like a string. Hence the name - "string beacons".
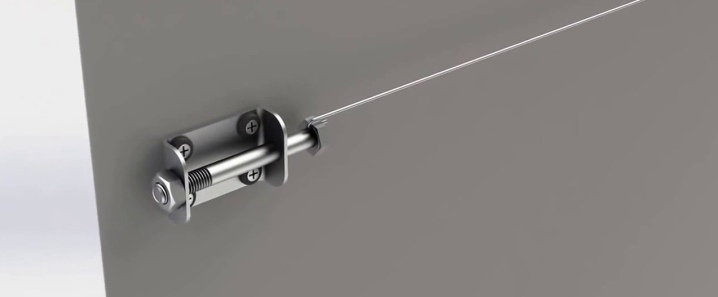
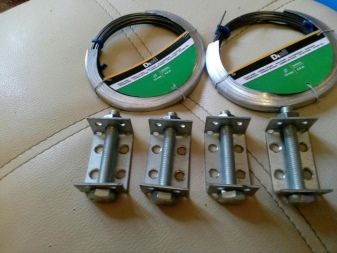
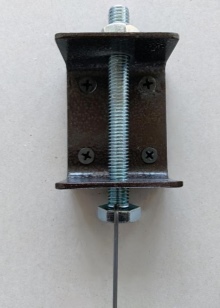
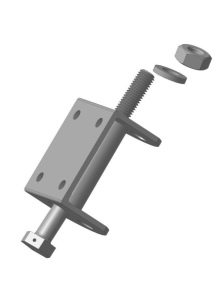
Today, factory gadgets can be found in building supermarkets. They are compact metal housings with a hidden adjusting screw.
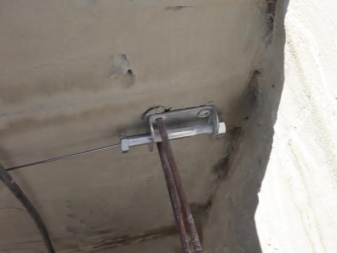
To tension the string, you will need two such boxes, on the screws of which both ends of the wire are attached. Products are installed from different sides of the wall, and the string is stretched between them.
In some cases, it is difficult to replace wire guides with other types of beacons. This happens under the following conditions.
- When the working wall is large: for example, 15 m. Installation of two- or three-meter planks on such a surface is difficult.
- A barely noticeable string is required to apply a thin layer of putty to the wall. After all, plastic or metal perforated beacons are 3 mm thick, so the layer of putty cannot be less. We can say that the string helps to save plaster by setting the minimum thickness of the surface to be leveled.
Continuing to highlight the positive aspects of string devices, we note the following points:
- beacons in this category are reusable products;
- a string that has worn out over time is easy to replace;
- the minimum use of plaster allows you to speed up the work process: you have to mix less mortar, the treated plane dries faster;
- in the process of using wire beacons, the difference between vertical and horizontal contraction is not felt: it all depends only on the skills of the master;
- the cost of these devices is low, in addition, they can be made independently.

But string products are not always preferred, as there are negative sides.
- Working tools are required to install the wire beacons.
- With a noticeable difference in the surface of the walls, a backing element is installed under the fixing part. In this case, the coating of the string is more difficult, in several stages.
- The area after removing the string has to be plastered on the second day.
How to install?
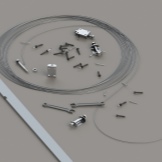
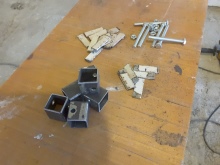
To plaster one surface, you will need the following materials and tools: corners, bolts and nuts - 4 pieces each, wire, self-tapping screws.
The workflow is not particularly complex, but meticulous accuracy in installing the beacon is still important. Perfect surface alignment depends on it. When installing beacons, the following stages are adhered to in the work.
- On the wall next to the right corner, points are marked above and below, located at a distance of 30 cm from the ceiling and 30 cm from the floor. Exactly the same markings are made on the left side of the wall. As a result, 4 marks are applied to the plane.
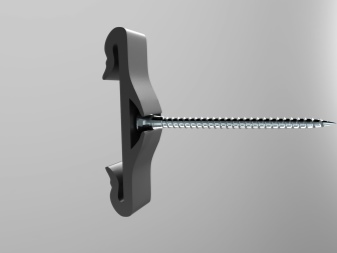
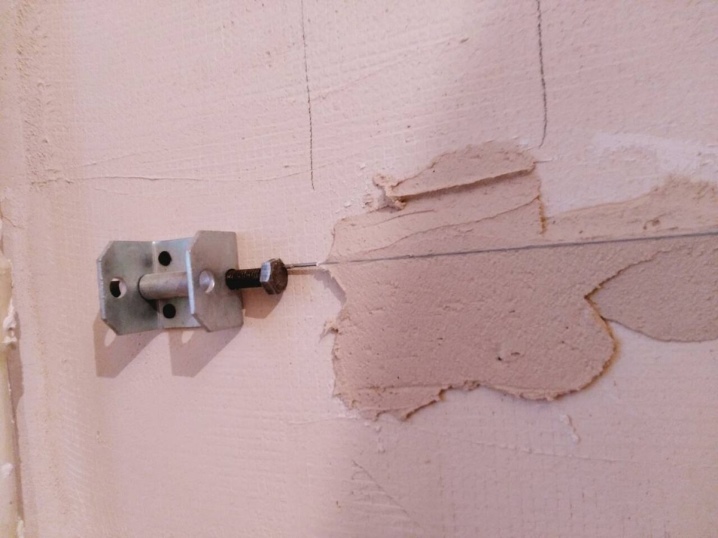
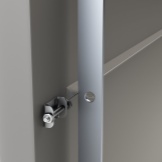
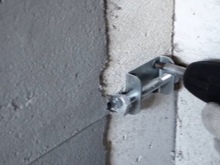
- Metal corners with holes are fixed on the markings.If it is a concrete or brick wall, you will need dowel-nails for fixing, the corners are attached to the wooden wall with self-tapping screws.
- With the help of bolts and nuts, wire is attached to the holes of the corners.
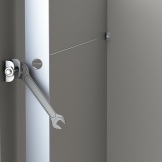
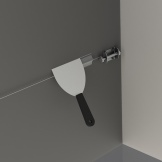
- When the strings are fixed (form an upper and lower beacon), use a wrench to make a tight stretch. At this point, you need to try to pull the wire so as not to break.
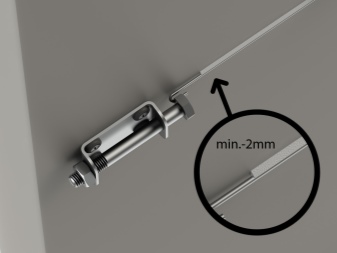
- The resulting structure is not yet ready for use, as the string is receding from the wall. With the help of self-tapping screws, it is pressed against the surface. Fixation takes place at a distance of about 20-30 cm from the corners.
- The plane is clearly built using the level and the rule. Additional self-tapping screws are used to remove the vertical. If done correctly, the upper and lower strings will clearly run along the plane and serve as a guide for the rest of the surface.
- The string, pressed against the wall, is coated with plaster to increase rigidity. In the fixed state, it will not bend at the moment the plane is aligned with the rule.
Thus, the installation of the beacons is completed and they are ready for use. Removing the string is much easier. The seized mortar is slightly removed, the wire is raised, then the side mounts are dismantled. After removing the lighthouses, the wall must be finalized: go through the plaster, check with the level.
Considering the topic of installing lighthouses, one cannot fail to mention horizontal plastering. During this process, the rule has to be held vertically, and this requires some skill.
To facilitate the work, you should not apply the solution along the entire line of movement of the rule: it is better to place it fragmentarily.
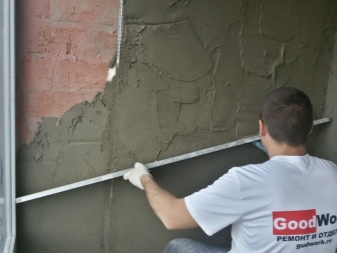
When the putty is applied horizontally, it often crumbles to the floor, so the solution is prepared thick and viscous so that the composition does not slide along the vertical rule. The applied putty must be leveled immediately. In one step, it is better to plaster a fragment of the wall no more than a meter. After plastering the central part of the surface, the string is removed. The already prepared section will serve as a reference point for further work. The process should be continued after the plaster is completely dry, then, as a rule, you can rest on the approximate layer of the plane.
How to make them yourself?
For self-manufacture of string beacons, you will need the following materials and tools:
- metal corners in the amount of two pieces;
- bolts with nuts for 10 - 2 pcs .;
- dowels with ears for better fixation or self-tapping screws;
- pliers;
- wrench.
The workflow consists of the following points.
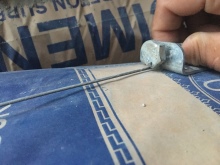
- On each side of the metal corner, a hole is drilled: a bolt will be inserted into one, a self-tapping screw into the other. The same is done with the second corner.
- The product will be connected to the wall with a self-tapping screw. The side of the corner with a built-in bolt must be aligned perpendicular to the plane and turned towards the second corner located on the other side of the wall.
- Around the head of the bolt, make several turns with a wire, which is wrapped around the tip for a firm fix. The excess is removed with pliers.
- A nut is screwed onto the bolt.
- The same actions are performed with the second corner, fixing the free end of the wire to the bolt.
- The string is tensioned with a wrench. At the same time, it is necessary to hold the head of the bolt with pliers to avoid twisting. Care should be taken when tightening, as a broken string can accidentally injure you. It should be remembered that breaks occur not only due to excessive diligence, but also in the presence of a factory defect on the wire.
String beacons aren't the only landmarks used for plastering walls and floor screeds, and they may not be the best ones. But in situations with large surfaces and when it is necessary to apply a thin putty layer, they are indispensable.
For information on how to install string beacons with your own hands, see the video below.


The comment was sent successfully.