How to make a workbench with your own hands?
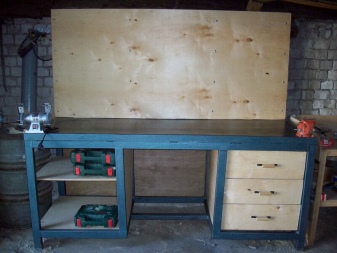
In a garage or workshop, the workbench is always the main thing, it sets the tone for the rest of the work area. You can buy a workbench, but we we suggest making it yourself - this will not only help you save a lot, but also get a desktop with the parameters and functionality you need.
Design features
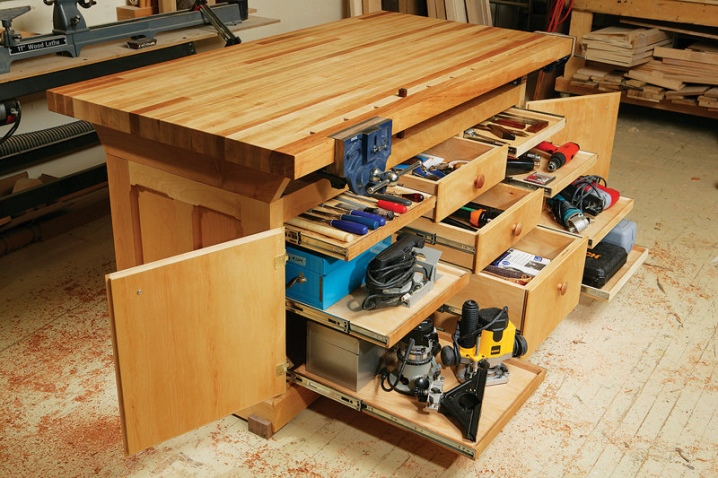
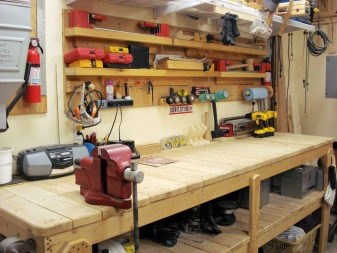
A workbench is a multifunctional table on which various work is carried out to manufacture, repair any metal, wood or other products. It is complemented by various drawers and shelves for power tools, spare parts, small parts, fasteners and building stuff. The universal table is useful for both the welder and the motorist, and thanks to its simple design, it is quite easy to assemble.
Parameters of a standard workbench for one workplace: width 80 cm, height - from 70 cm to 90 cm, length - up to 150 cm.
You can make a do-it-yourself workbench in other sizes, taking into account your individual characteristics. Making a workbench is not difficult; for this, materials that can be found in any hardware store, in the country or in the garage are suitable. You can arrange a working area in an apartment on a balcony or loggia, in a private house in the basement (in the absence of a garage or a separate workshop) or under a canopy (street version). The unpretentious design allows you to put workbenches not only for the home, but also in a home car service.
You need to choose not only a suitable workbench model, but also it is necessary to take into account its location in the room... The table should be near a window or other source of light and be equipped with additional lighting. The drawing must be made taking into account whether you are right-handed or left-handed.
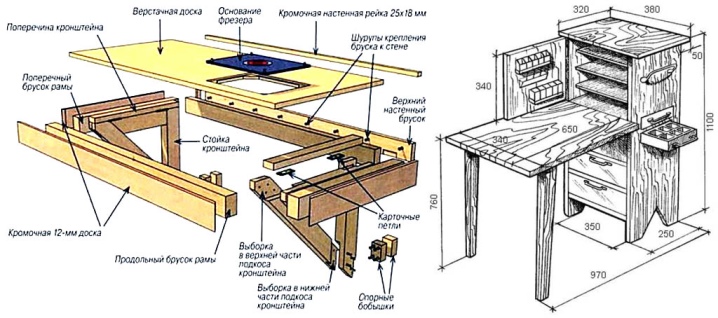
You need to think over the design to the smallest detail: what the base materials will be, will there be a roll-out or stationary table, the number of outlets that may be needed, and much more. The more detailed you can imagine your ideal workplace, the easier it will be to bring the idea to life. There is no need to take industrial workbenches as a basis, it is labor intensive and will require a lot of money.
Types of tables
Most often, workbenches are subdivided for locksmiths, for metalwork, joinery and carpentry, designed for woodwork, and universal, combining two work surfaces.
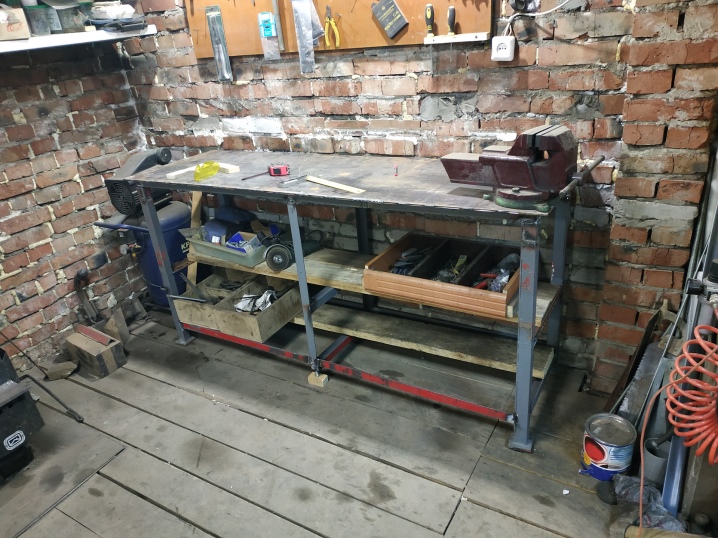
Locksmith's table special strength is needed, since work is carried out on it for grooving, grinding, cutting, collecting and disassembling various parts and metal structures. The base of the table is metal, covered with anti-corrosion protection. To dampen vibration, a cellular box is installed on the bed. The tabletop should be thick enough - from 2.5 to 5 cm. Usually it is made of chipboard sheets, dry boards or MDF, from above they make protection from a steel sheet. Protection is needed against damage when working with hand and power tools or various chemicals. To speed up the work, the table is equipped with an apron for tools, a place for various equipment, for example, for various vices or a welding machine, pedestals with drawers.
Handling heavy parts requires a reinforced workbench that can support a lot of weight.
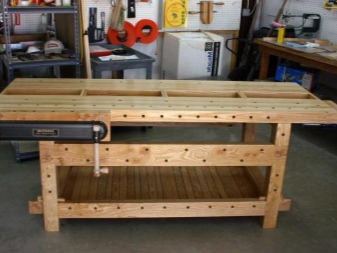
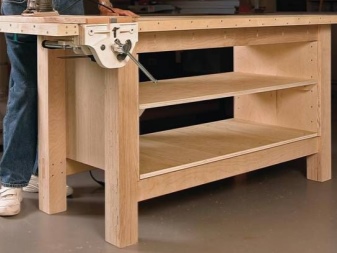
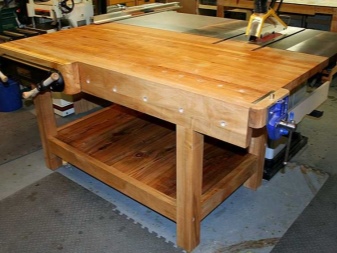
Joiner's table designed for working with wood blanks and creating various wooden objects and furniture. It is made mainly of hardwoods... It doesn't need protection, a reinforced base and a long work surface. The optimal dimensions of the working surface are 100 by 300 cm, a vice is placed on it, various stops for fastening with vertical and horizontal wooden clamps designed for working with workpieces. Also, on the table, they additionally equip a place for an auxiliary tool, for example, for a jigsaw or for a router.
Carpenter's workbench practically does not differ from carpentry, except that it is reinforced and the dimensions of its table top are up to 150 by 600 cm. Strengthening and increased length of the table are associated with the fact that the work takes place with solid wood. The design includes additions in the form of an apron for hand tools and a place for equipment.
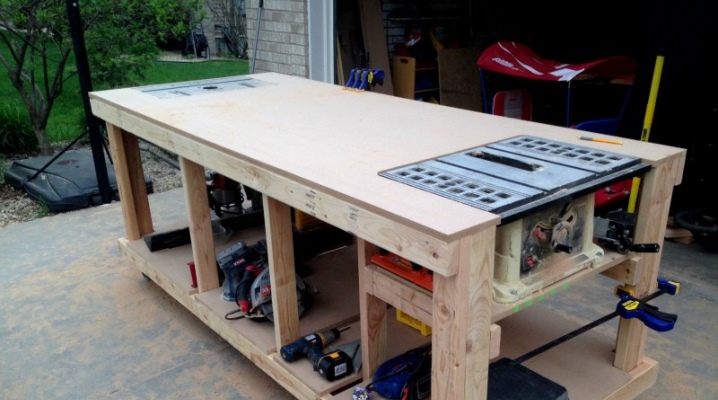
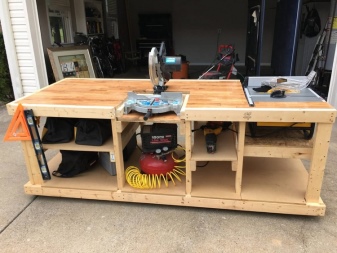
Universal workbench represents something in between the two desktops - carpentry and metalwork. It is equipped with all kinds of fixings and its table top is protected by a metal sheet of steel. Behind this workbench, work is carried out with any material.
In addition to the fact that all workbenches are subdivided into types, they can be divided into types:
- with one or two pedestals,
- folding or folding with attachment to the wall.
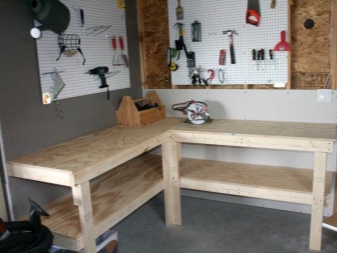
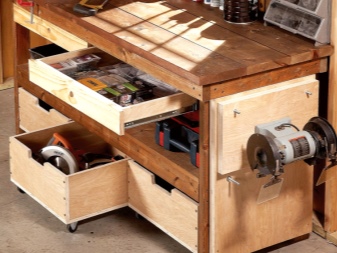
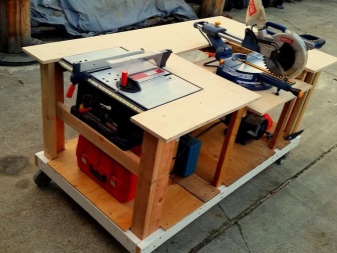
Besides, tables can be different in sizeeg mini workbench; have trolley-like wheels for moving a portable table; the workbench can be jewelry, portable, or a large corner workspace with removable panels, a separate workstation for welding. For home, it's best to make a homemade universal table.
Material selection
Having decided on a place for a workbench and drawing a drawing, the question logically arises selection of materials for the product... Much here will depend on what is more accessible to you - metal or wood. As a base, you can use a wooden beam or a 40 mm board, or you can make a frame from a metal corner, from a profile pipe or from an aluminum profile. For the countertop, you can use chipboard, MDF, but you can also build it from scrap materials, for example, from the same pallets or pallets.
You will also need a steel sheet for the device of a corner for locksmith work.
Metal work often involves processing with oils or other chemical liquids that are well absorbed into the wood, therefore, to prevent impregnation of the countertop and a possible fire, you need to equip a locksmith's corner. Plywood or perforated metal strips are great for an apron. We also need self-tapping screws, screws, pins, glue and other small consumables.


Base
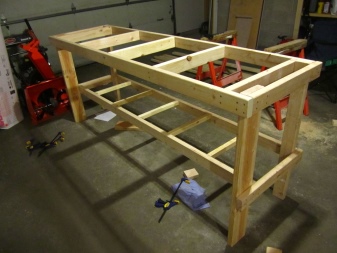
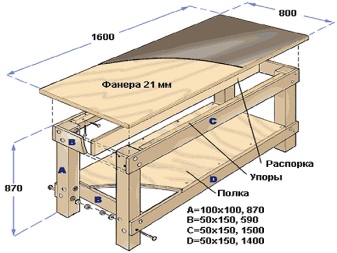
The base of the structure with a stationary placement, it is best to do it from a wooden bar with a size of at least 150 * 50, so the workbench can easily withstand a load in statics up to 200 kg / cm and in dynamics up to 750 kg / cm. Among other things, wood is more ductile than metal and perfectly dampens vibration. Of course, these legs must be made of dry hardwood or softwood and treated with impregnation.

If for some reason you do not want to make a wooden base, then you can weld it out of metal. This has its pros and cons, for example, you can make adjustable supports - this is a plus. It is impossible, without losing the ability to maintain a dynamic load, to make an opening for the legs in the frame - this is already a minus. Boxes for such a base are made of galvanized metal.
What to make a tabletop from?
The table top for the workbench must be sturdy. The best option would be glued dry board panel not less than 25 mm thick. However, chipboard or MDF sheets covered with steel sheet or hardboard are also suitable. Instead of a purchased board, you can also use junk scrap materials such as pallet bar (pallet). The table can be divided in the same way into two sections: one made of wood and the other made of a rectangular metal tube (instead of a thick metal plate).Boards will need to be treated with linseed oil and fire retardant to prevent fire.

Protective shield
It is very easy to make a desktop screen protector - it is enough to hammer the entire tabletop or part of it with metal.
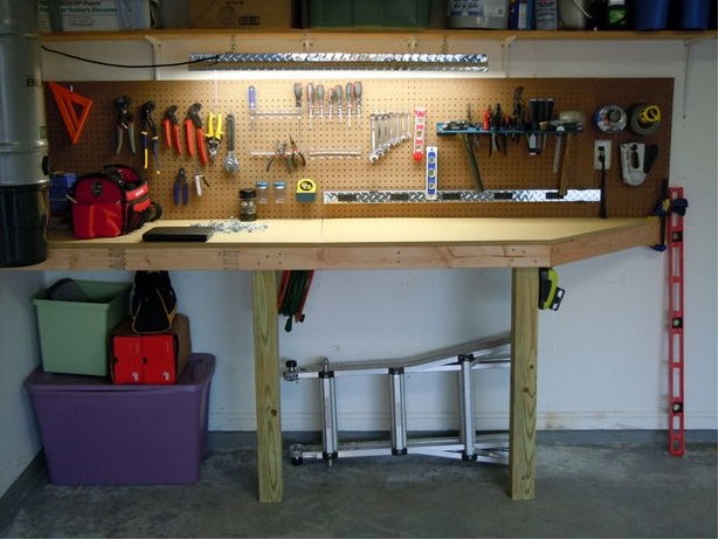
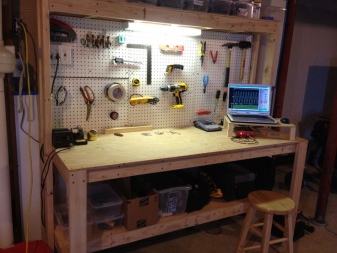
To increase the functionality of the workbench, an apron made of plywood with drilled holes or a perforated metal strip is additionally installed on the rear edge of the table.
Such screen allows you to significantly increase the area useful for use, because due to the holes, you can make a good storage system for tools or various little things, leaving shelves and boxes for more voluminous things.
Optional equipment
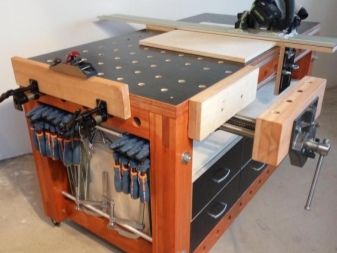
The universal workbench must be equipped with not only with a vice, but also with clamps and various clamps. In addition, various equipment is additionally installed, for example, a jigsaw, a milling machine, additional power and lighting points, grinding equipment, and a dust extraction system.
What tools do you need?
For making a workbench with your own hands no special tools needed, almost every owner has everything you need. You will need:
- welding machine;
- Bulgarian;
- circular (circular) saw, or you can use a hand saw;
- screwdriver or screwdrivers;
- square;
- electric drill;
- several clamps;
- eccentric sander;
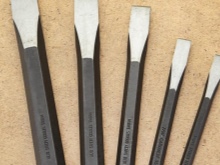
- chisels;
- roulette.


You may have to supplement the list with some more tools that you will have to use according to your drawing, but the most basic equipment is listed above.
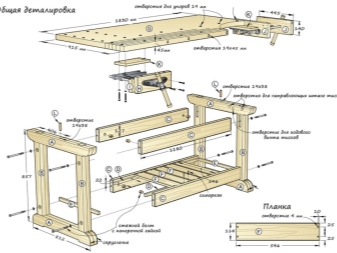
Manufacturing instruction
The purchased materials must be prepared according to the parameters of your scheme.
- For metal base. Using a grinder, we cut a profile pipe 50 * 50 mm for the device of corner posts, a pipe of 30 * 30 mm for a tie between the supports and a corner of 30 * 30 * 3 mm for a frame and guides for shelves and boxes. The length of the parts is calculated in accordance with their own needs. All metal must be cleaned from rust.
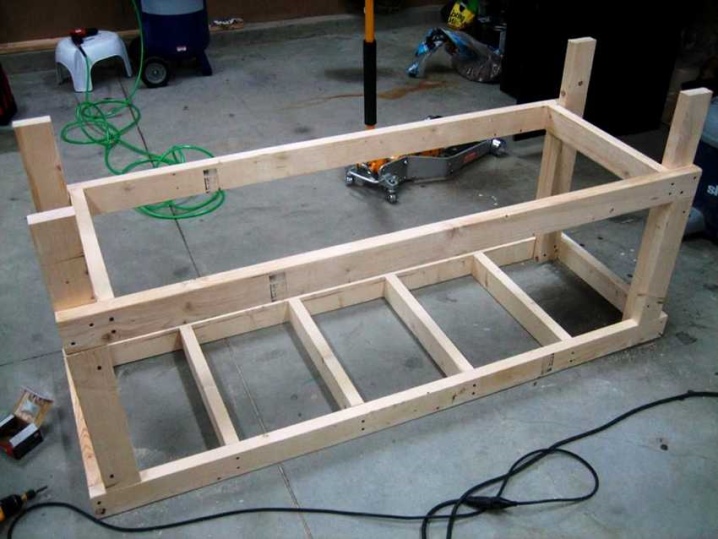
- For wooden substation. To do this, we need a bar with a size of at least 90 * 90 mm. The exact amount of material will depend on the design and size of the workbench. We saw the timber according to the marked parameters.
- We cut the tabletop from chipboard, MDF sheets or saw the boards. To increase the strength of the tabletop, the boards for it are not assembled along the frame, but across, respectively, and they need to be cut with this in mind. The boards will need to be properly treated with an antiseptic compound to prevent the formation of rot and fungus under the metal sheet.
- We cut a shelf from a steel sheet with a thickness of 1 mm or more, or we cut a rectangular metal pipe along the length of the board.
- To damp the vibration of the metal frame under the table top, it is necessary to make a cellular box from a 40 mm board. The size of the cell is from 40x40 to 70x70 mm, we correlate it accordingly to the width and length of the base according to the plan.
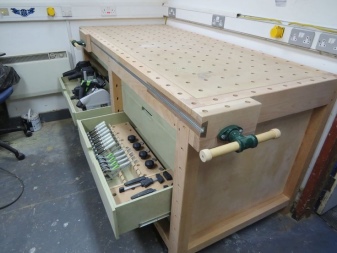
- We prepare parts for boxes and shelves from chipboard, MDF or a small sheet of plywood. Also, a small sheet of plywood will go to the apron if it is not possible to purchase a perforated metal strip.
All parts must be sized according to the drawing, otherwise the workbench may be skewed.
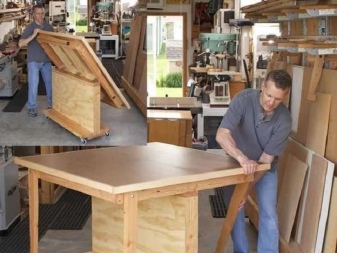
Assembly
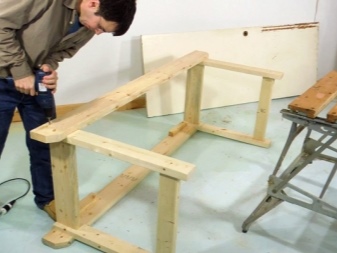
We start assembling our desktop from the base. First, we weld the frame and support posts, then we weld the rest of the parts, or we connect the wooden blocks with self-tapping screws, we additionally strengthen the intermediate supports with a steel corner. Do not forget that the workbench is not just a table, therefore, in order to avoid deflection of the table top, the metal supports should be from 4 to 6, and the wooden legs are reinforced with stops. We grind the bed at the welding points.
On a metal bed we make a wooden box and fix it together with a pillow of boards with self-tapping screws. The corners of the work surface must be secured with long construction bolts to increase the rigidity of the structure.We put the shelf on self-tapping screws (a couple of pieces on each board), along the last boards every 6-7 cm. The second assembly option involves not a shelf, but a metal pipe - it is laid on a box and also fixed with self-tapping screws.
We collect plywood boxes and insert shelves. We fasten a screen made of plywood or perforated metal to the back wall of the workbench. We install the equipment we need.
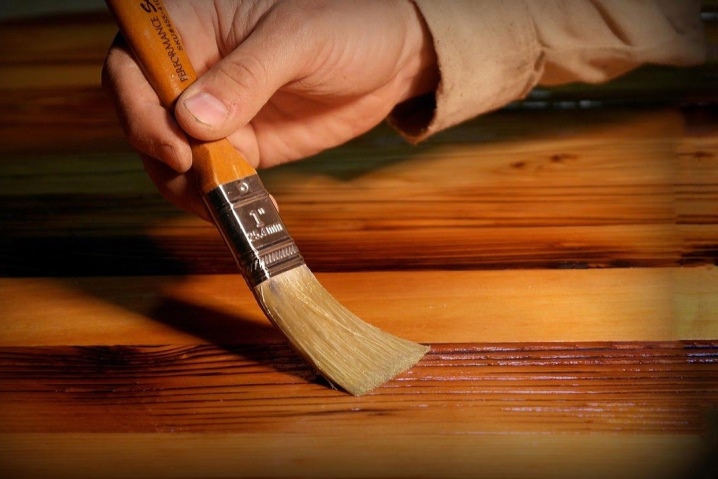
Painting
Partially our workbench is painted before assembly, for example, boards that are processed drying oil or antiseptic and fire retardant liquids. The metal frame is covered anti-corrosion paint immediately after the end of all welding work.
It is cheapest to cover the shelf or metal part of the countertop with bituminous metal varnish on both sides. We saturate the boxes with linseed oil or varnish.
Tips & Tricks
For a home workshop, a workbench is simply a necessary thing, but for all its simplicity of manufacture, it still has some tricks.
- Some sources advise not to weld the bed, but to connect it with bolts. The advice is not only irrational, expensive and laborious, but also simply harmful - the welded structure is much more reliable in terms of characteristics.
- There must be a pedestal or frame in the desktop - this helps not only to distribute the load on the tabletop, but also gives additional stability to the entire structure.
- If you plan to work with small parts, screws, bolts and other trifles, then you need to make a small side on one edge of the tabletop, and cover the work surface with a linoleum rug cut out across its area.
- Additional lighting, just like sockets, can be built into the screen. Many people use LED strip for backlighting.
- Some craftsmen mount a magnetic stripe on an apron. It is very convenient to "hang" screwdrivers, wrenches and other little things on it. Everything is at hand and before our eyes.
Make your own comfortable desktop much better than buying it, and it's not even about the money. You can make a "homemade product" from what is in the garage or in the country, taking into account your own needs, capabilities and size of the workplace.
How to make a workbench with your own hands, see below.


The comment was sent successfully.