Tap wrenches overview

The tap is like a “reverse die”. It is not the external thread (on smooth reinforcement or wire) that is cut, but the internal thread (in a drilled workpiece for a nut, a blank). The tap holder is characterized by a mechanized method of application (in a screwdriver chuck) or manual (a knob).
general description
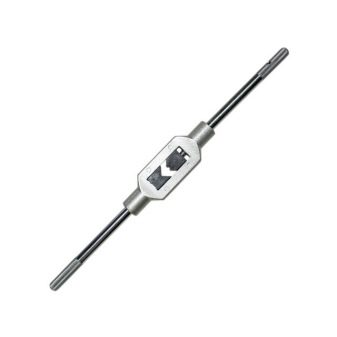
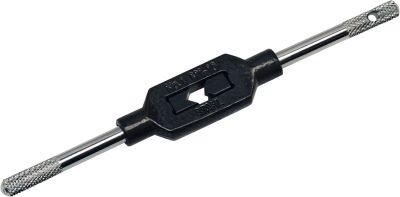
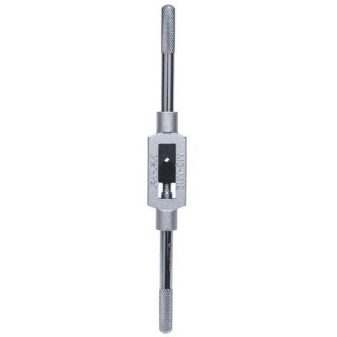
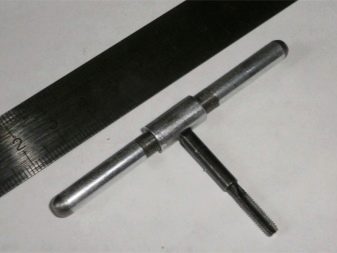
The manual tap collar is available in straight and L-shaped designs. The main components of the tap holder are:
- prismatic frame;
- static handle;
- a removable handle with a ratchet that fixes the change of position when turning a certain angle.
As additional parts - movable pads and a device for their immobilization as part of adjustable tap holders.
Due to its standardized shape in the form of a square element (according to the standards of GOST No. 3266), the tap holders on the tool market are unified. They are compatible with left-hand and right-hand threads and work on inch and metric cutters. According to the design, the holder for the tap can be with a flat or L-shaped holder, with a radial or axial movement of the cutter, with the possibility of adjusting the free section for the tail.
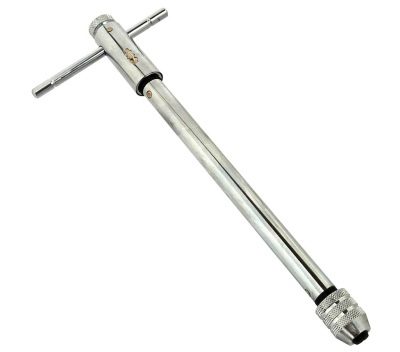
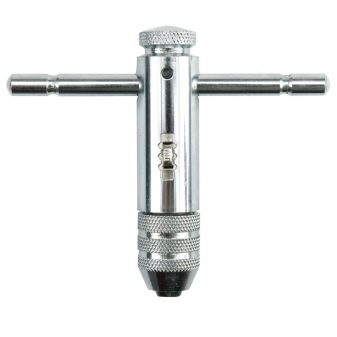
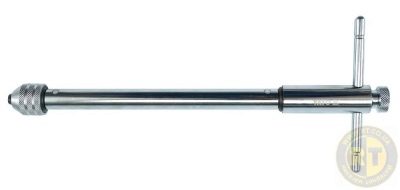
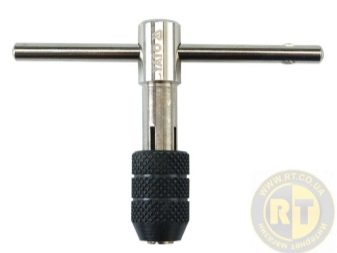
The tap holder has one, two or three landing sections - in accordance with the diameter of the threaded groove to be cut. Axial movement assumes the tool end execution and works with extremely limited free access to the cutting area.
The end tap holder requires more effort when cutting - in order to facilitate labor, a ratchet is mounted in the tool, which reliably fixes the cutter for moving the handle.
Views
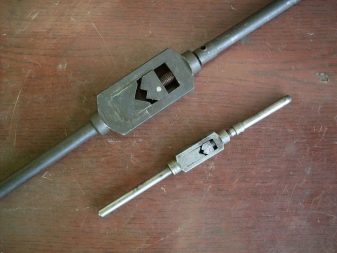
In terms of the size (inner diameter) of the threaded hole, according to the domestic GOST, wrenches for taps of the ranges M3-M12, M6-M20, M8-M36, M1-M12, M1-M10, M4-M12, M8-M25 and a number of others are widespread on the market ... The more powerful and thicker the knob, the more force the master can apply to the tap. By design, in addition to the aforementioned end tap holders, on the hand cutter market there is a holder for a prism tap, as well as a universal one.
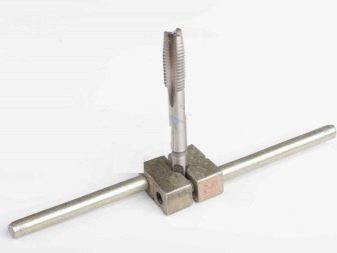
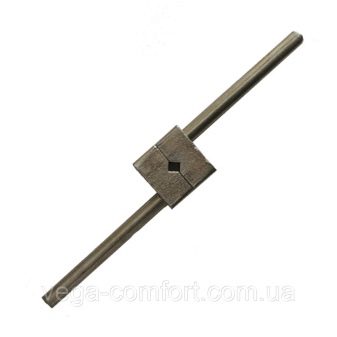
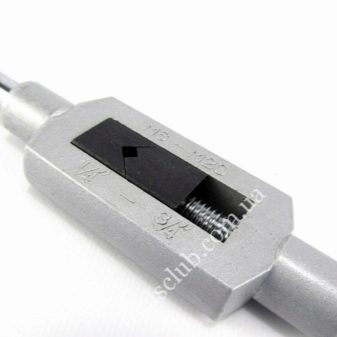
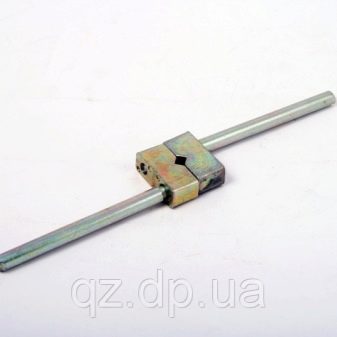
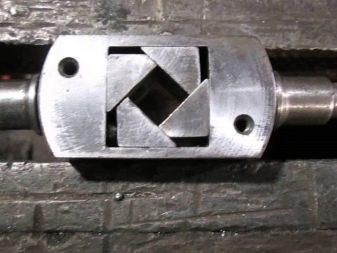
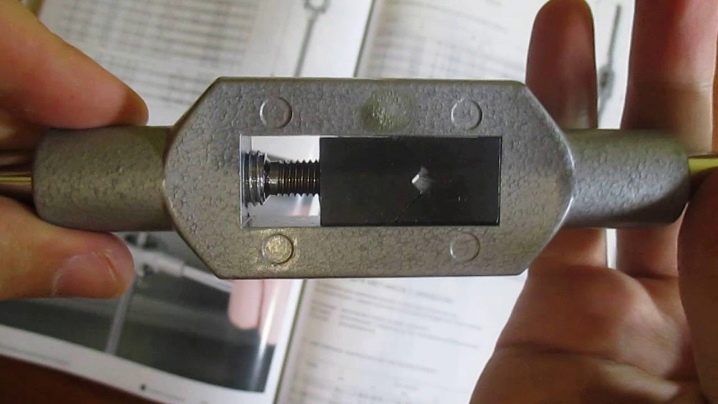
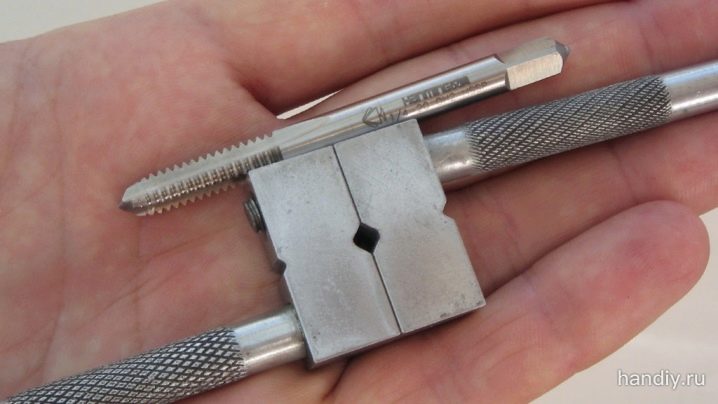
Prismatic tap holder - two overlays in the frame, while one fits into the other, like elements of a mosaic or puzzle. Rectangular prisms, having closed, form an unoccupied square-shaped gap in the middle, into which a cutter with a shank of the same shape and size is inserted.
This is similar to the crank-carriage system on a bicycle: the fastening of the pedals on the axle of the bushing mechanism in this case is a square gap into which the carriage rod is inserted (and tightened with a nut or bolt).
The tap behaves in the same way when it is fixed in the tap holder. Tightening of the shank in the holder is carried out using the adjustable knob bars.
The universal tap holder is the same prismatic sliding auxiliary tool. For joint work with an end ratchet tap, an adapter equipped with such a ratchet is supplied with the holder. This allows the use of both previously discussed types of torches, bypassing the dependence of the selected torch on the type of wrench holder.
How to do it yourself?
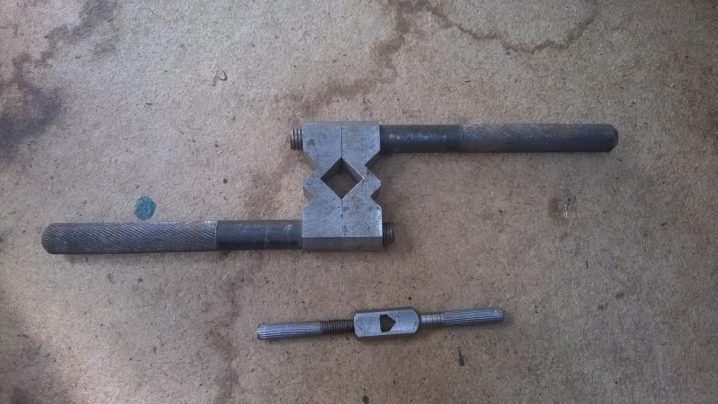
The simplest holder-knob is made in the following way.
- Drill a hole for M10 bolts in the center of a piece (for example, 5 cm) of a square reinforcing bar with a cross section of, for example, 400 mm2 (the side of the square is 20 mm).In this example, a left-hand thread tap is used on an M10 nut shank. The hole for the tap is drilled strictly in the center (middle) of the piece of the rod. Is the depth of the hole half or? the thickness of the rod. For example, a 20 mm rod is drilled up to 10… 13 mm.
- Use another tap to cut the threads in this center hole. It is recommended to cut the left one - the right one would interfere with working with such a wrench, the cutter would be unscrewed when cutting blanks. Screw in the tap, make sure it "sits" there securely.
- At the ends of a piece of a rod, drill the same holes for the crossbars of the knob, for example, up to 1 ... 1.5 cm deep. Cut a similar thread in them.
- Screw the lengths of the studs into the side holes. For example, the length of each is 10 cm. Put on them - for convenience of work - heat-shrinkable tubes or a piece of ordinary thin hose.
Tip: Strictly adhere to squareness when drilling. A skew of at least one degree to either side will cause inconvenience during operation and will contribute to more intensive wear on both the torch and the holder. It is recommended that all work on drilling be performed on a drilling machine, on which the squareness (perpendicularity) of the drill stroke is already set at the factory.
If the base of the holder is made of steel grade, which is used for the manufacture of construction fittings A400-A500, then after cutting and testing the holder, it can be hardened in machine oil - like hardening homemade knives, saws and axes. Hardened steel is many times more wear-resistant than unhardened steel. Tempering the knob will make the fixture durable. Alternatively, it is recommended to get some tool steel - for example, use a broken large wrench or pliers as a blank for a wrench. Drilling and sawing of the collar base is carried out with a drill and a diamond-coated disc.
The manufacture of a prismatic holder is somewhat more complicated. The halves of the clamping plates, driven by the wrenches, are sharpened on a milling machine, which will greatly facilitate this processing of the wrench with a CNC machine. The use of laser and milling cutting is approximately the same - the precision of CNC devices makes it easy to copy a large number of identical parts. The halves pressing the tap are made of a thick-walled plate (10-20 mm) of sheet steel.
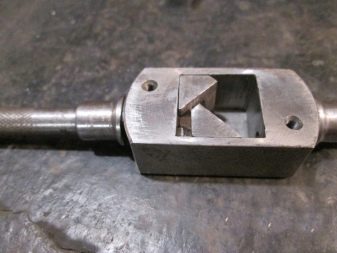
Further, the halves are placed in a frame welded from a U-profile, in which holes are drilled for the manual halves of the crank. But the halves can be connected without a frame - the same threaded rods of the wrench will give it the most stable position, thanks to which the tap shank is clamped thoroughly. The halves of the clamp are drilled counter-coaxially: the screwed-in pins, which the master takes when threading in the workpieces, pass through the first half-prism - from one side - and half enter the second.
The non-ratchet mechanism is much easier to manufacture, since the ratchet would also require a part in which one or two ball bearings are installed. As practice shows, the main thing is to ensure the serviceability and durability of the holder knob for many years. The sophisticated bearing design is a solution for craftsmen who have passed the first level of experience in making hand tools on their own in a garage.


The comment was sent successfully.