How to install a kitchen sink in a countertop?

In order to properly install the kitchen sink in the countertop, you need to choose the correct method of mounting the structure. Depending on the type of washing, experts recommend adhering to certain rules. The cut-out countertop is considered the most popular type of sink. To mount it correctly, you first have to cut a hole in the countertop. It is important to correctly calculate the dimensions of the structure, otherwise it will not be possible to install it properly.
What do you need to know about installation?
There are several rules that are important to follow when installing a sink. They will help improve the operation of the finished structure. The point is that:
- the sink is best installed near the work surface;
- it should divide the countertop into two parts, on one side of the sink, products are cut, on the other they are already served;
- the height should correspond to the height of the hostess or those who will use the kitchen in the future.


All installation work is divided into two stages:
- preparation;
- installation work.
At the first stage, it is necessary to collect all the tools that will be used in the process of work. To do this, you need a screwdriver of different sizes, a jigsaw, an electric drill, a drill in size that works on wood. Pliers and screws are also useful. A pencil is needed to outline the outline, a sealant, a rubber seal. If the countertop is not ready for installation, measure the dimensions of the sink and properly cut the hole for its installation.
If the countertop is made of stone, then you should prepare the tools that are used to work with this material. The same goes for hardwoods. If a worktop made of such raw materials is used, then the sink connector must be cut out in advance, otherwise it simply cannot be installed.


How to fix the sink correctly?
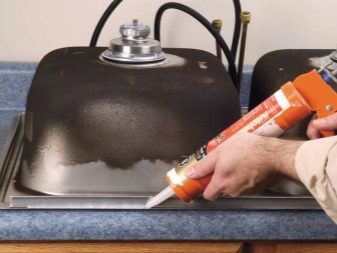
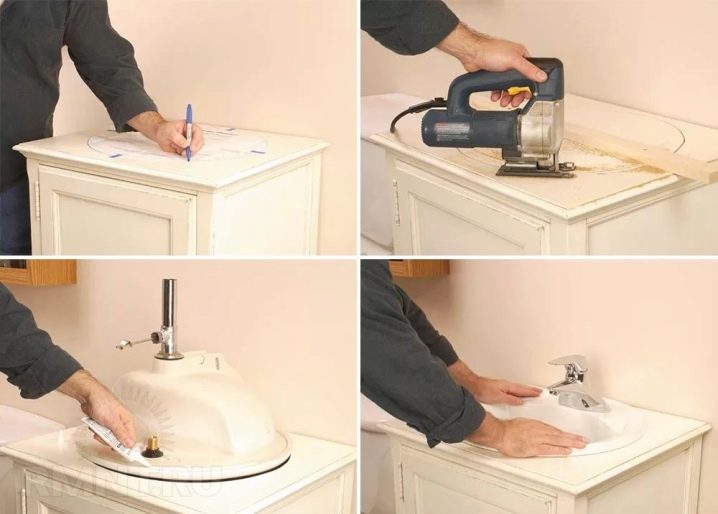
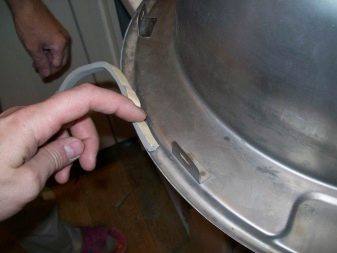
To securely fix the sink, use good quality sealants. It is also important to correctly perform preliminary measurements, otherwise the structure simply will not fit into the hole. Before inserting the sink into the countertop, it is necessary to apply sealant to the edge of the product. A rubber seal will help get rid of gaps where moisture is present. We must not forget that a sealant is also applied to the sealant beforehand. It must be attached around the entire perimeter of the structure. After the above steps are completed, you need to install the sink in the hole and press it well. Only then are the hoses and mixer connected.
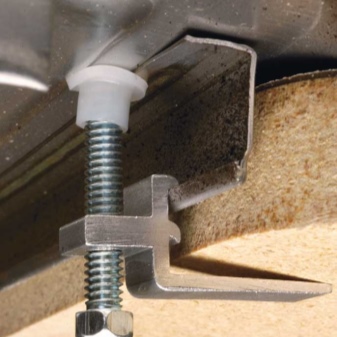
If the dimensions of the sink are larger than average, then additional fixing materials must be used; in this case, sealant alone is not enough. The weight of the dishes placed in the sink can cause the sink to fall into the cabinet.
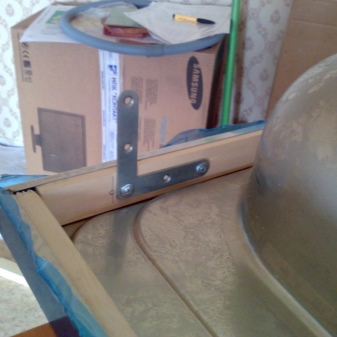
Internal lathing or support bars will help to strengthen the structure. But this is only necessary if the size of the sink is very large or if a double design is used. In other situations, ordinary hermetic glue is sufficient.
Installation subtleties
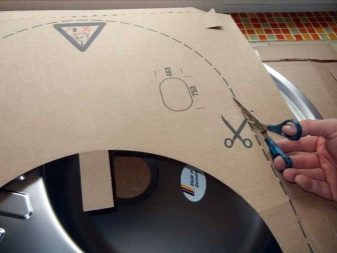
Experts say that installing a flush sink is a more complicated process. Usually a cardboard template is always included in the kit, which shows exactly which hole should be cut in the countertop. If it is not there, then you will have to use the design itself.To begin with, the template is placed on the surface, with the help of a pencil, its contours are drawn. First, you need to tightly fix the cardboard with tape.
After the first time the template is outlined, you should step back one or one and a half centimeters and re-outline the template. It is the second line that is used when working with a jigsaw. Then a drill is used in the work, with its help a connector for a jigsaw is made. The drill must have exactly the same parameters as the tool itself.

Following the jigsaw, sandpaper is included in the process. With its help, you need to clean the surface well and completely get rid of sawdust. When the hole is cut, the sink is fitted.
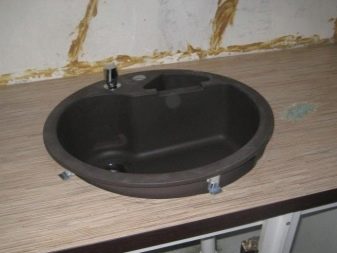
It is important that it fits snugly, the dimensions must correspond to the cut hole. Only in this case it will be possible to put the structure correctly.
How to embed a mixer?
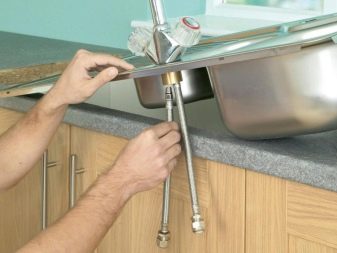
The next important step is to embed the mixer into the installed sink. The infeed process depends on the type of product. The most commonly used kitchen sinks are stainless steel. The first step is to wind the FUM tape around the threads of the flexible hoses. If the latter is not at hand, you can use polymer thread. This process will ensure complete sealing of the structure. Then the hoses are connected to the body.
Someone may think that the presence of a standard rubber seal allows you not to use the tape, this is a rash opinion. Rubber does not provide 100% leakage protection. When screwing in the hose, do not hold it by the lash. Otherwise, you can break in the area of abutment to the sleeve. To avoid this, a special key is used when installing the mixer.


It is important first of all to put the union nuts into the hole of the sink. And only then stretch the mixer body to the installed sink. For this purpose, a nut with a stud is used; if necessary, it can be replaced with a wide plate.
For maximum tightness, it is necessary to install an O-ring before screwing on the sink. Experts recommend, when assembling the harness, not to apply special force, otherwise you can tear out the insides of the crate.

Step-by-step instruction
The process of installing a sink in the kitchen consists of several stages. Following these tips, you can install the sink yourself and embed the mixer. And also cut a hole in the countertop. The preparation stages consist of the following steps:
- the first step is to stick the tape responsible for the seal, stepping back 3 millimeters from the edge of the sink;
- it is important to apply silicone sealant around the perimeter, it should go beyond the boundaries of the tape;
- the next step is to install the sink in a previously prepared hole in the countertop;
- remove excess sealant around the edges of the structure.


After the above manipulations, you can start connecting flexible hoses through which the water supply is carried out. Then the siphon is installed. But at the very beginning, you should cut a hole in the countertop. Its dimensions must match the dimensions of the sink. Therefore, the measurement is carried out carefully, it is better to measure it several times and make sure that the data obtained is accurate.
The sequence of instructions may vary depending on the type of sink. But the basic steps remain the same.
For information on how to embed the sink yourself into the kitchen countertop, see below.


The comment was sent successfully.