What is euroform tabletop and how to make it?
When arranging a kitchen, everyone strives to make the kitchen countertops last a long time. To do this, you need to reliably fasten the individual elements together and provide a smooth surface.
In order for the procedure to be performed efficiently, certain knowledge and skills in using special tools will be required. The joints are made taking into account a right angle or straight line. It is worth taking a closer look at what Eurozapil is and how to make it.
What it is?
Eurozapil is a special method that ensures high-quality joining of two surfaces. Often used to connect two kitchen countertops.
There are three docking options.
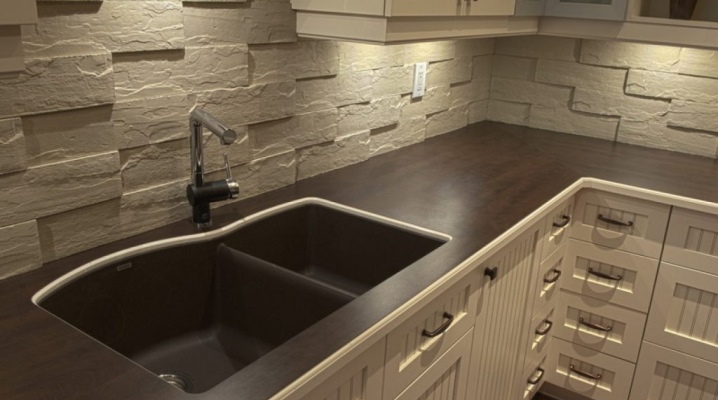
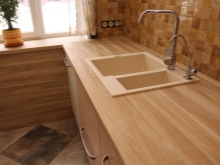
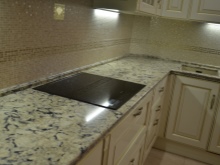
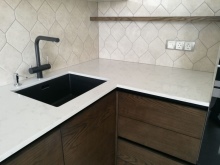
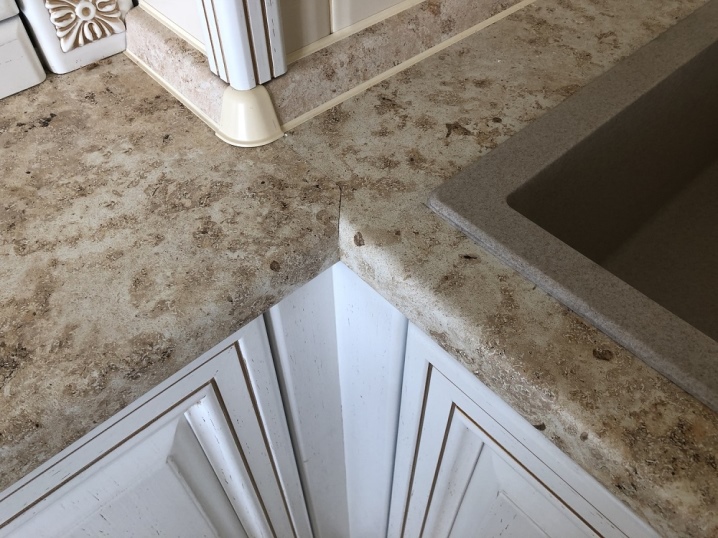
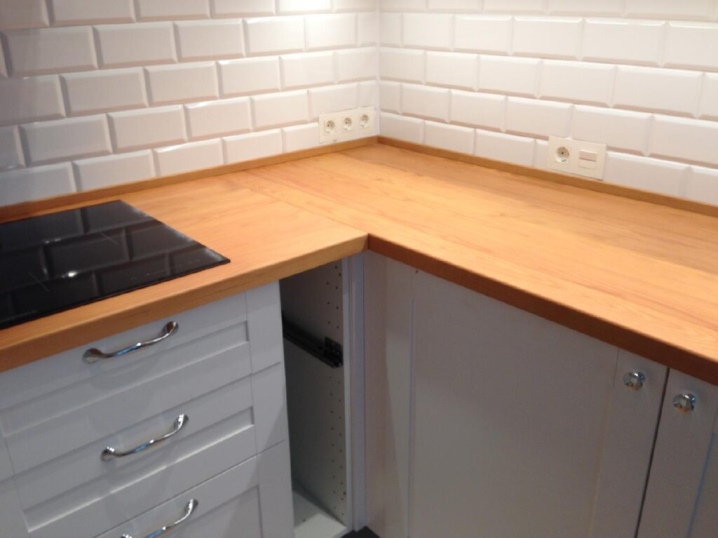
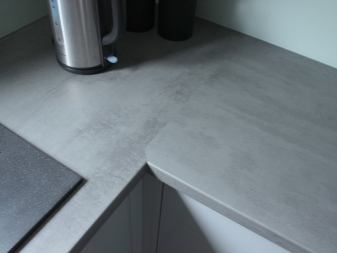
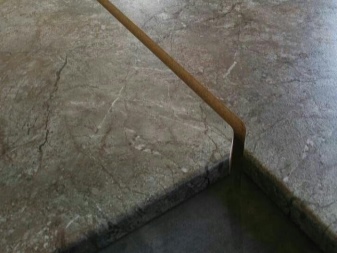
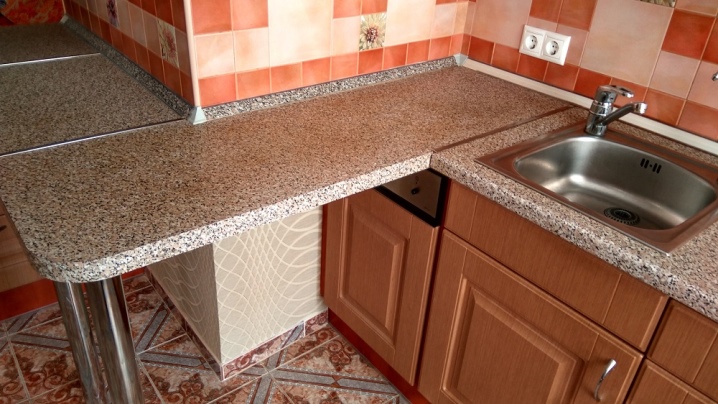
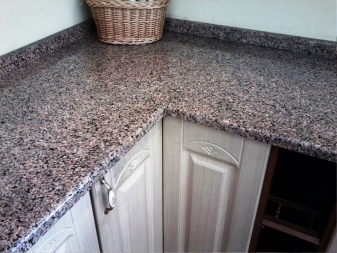
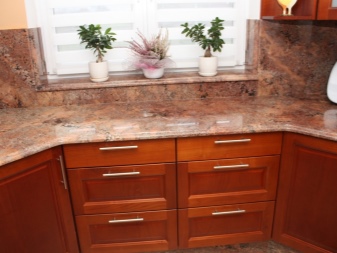
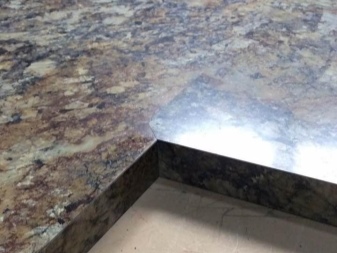
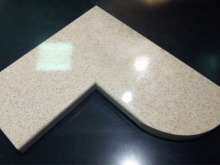
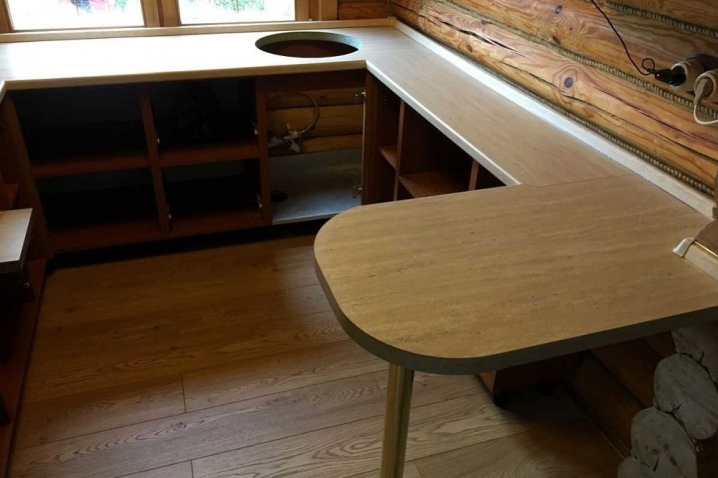
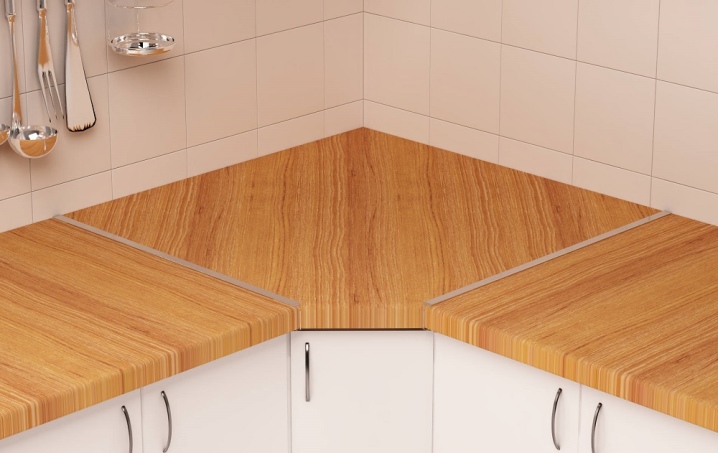
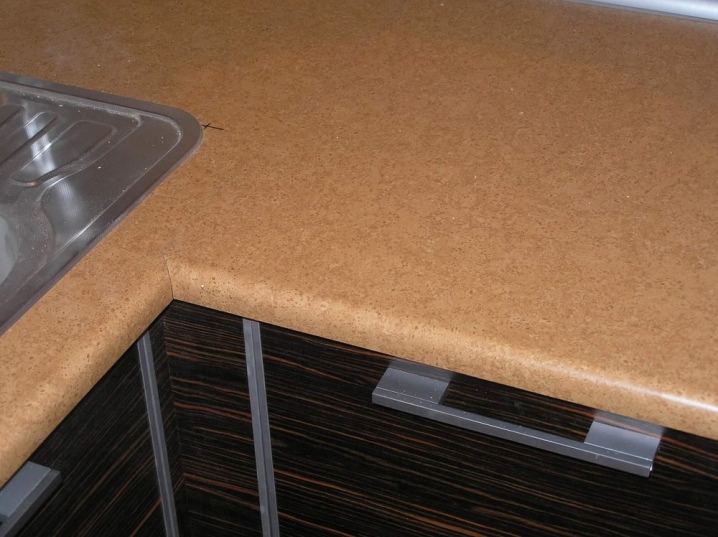
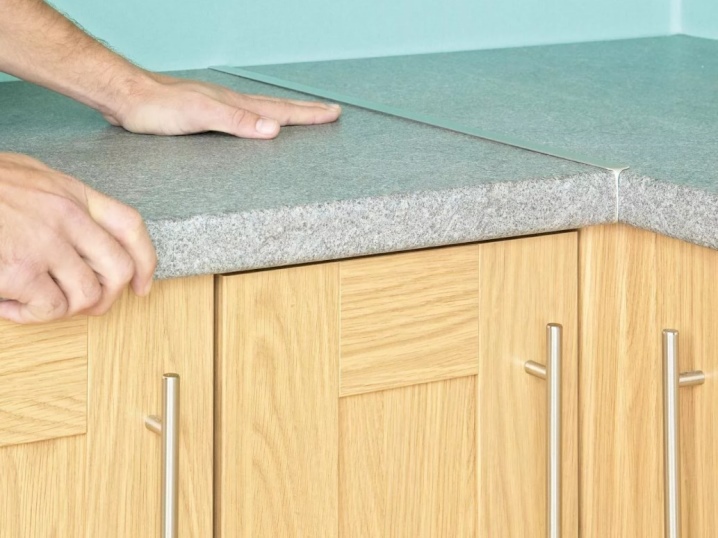
- Using a right angle. In this case, two canvases of countertops are positioned, maintaining a right angle. Docking in this way looks attractive.
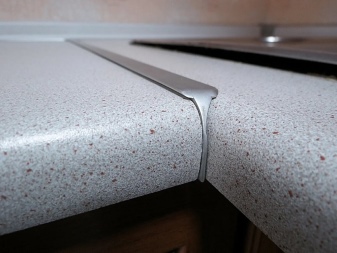
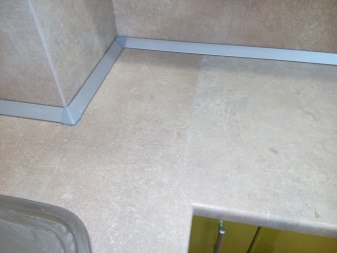
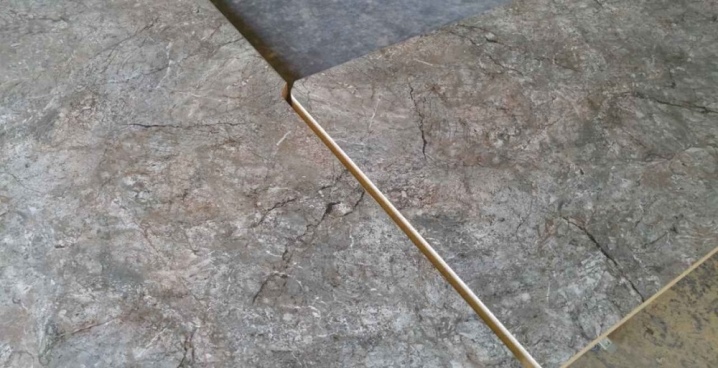
- Using the T-profile. An aluminum profile or steel strip is taken as a basis. The variant is suitable for kitchens with corner sections.

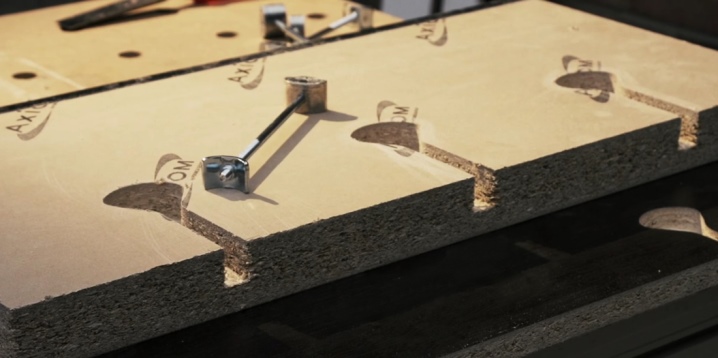
- With the help of the euro tie. Provides a turn through a segment. The most difficult option that only professionals can handle.
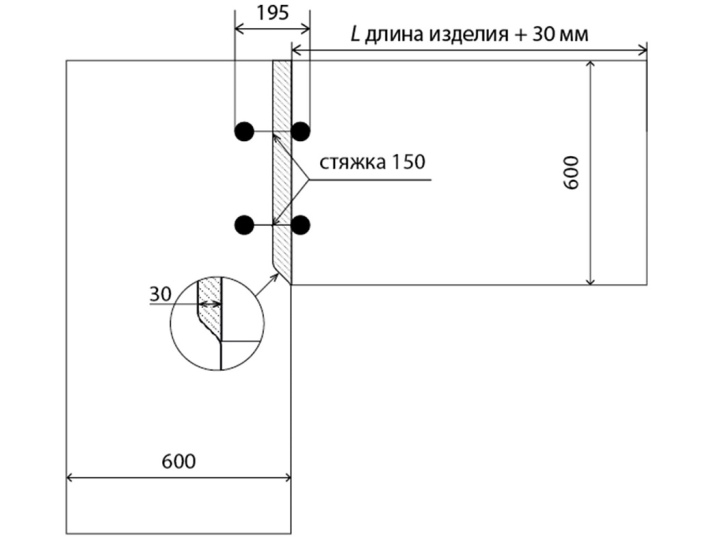
To ensure the integrity of the countertops, a drawing is preliminarily developed or a mold is made. Then it will be possible to do the job efficiently and extend the life of the kitchen set.
The guarantee of a long service life of kitchen worktops is their reliable connection. Joints can be formed both at right angles and along the wall, if the size of the room allows.
Advantages and disadvantages
Eurozapil is a modern method of joining two surfaces to extend their service life and ensure reliable operation. The advantages of this method include.
- Attractive look. The kitchen becomes more aesthetic and neat. Well-done work is immediately visible. It is worth noting that small gaps may remain after the eurozap, but you can get rid of them if you turn to professionals for help.
- Easy maintenance. Eurozapil does not require special care. A properly executed joint will prevent gaps between kitchen surfaces, which will avoid the accumulation of dirt and grease. Thus, taking care of the kitchen will be much easier.
- Lack of dampness. In the process of carrying out the eurosaw, a sealant is embedded in the surface, which prevents the penetration of moisture and microbes into the joints.
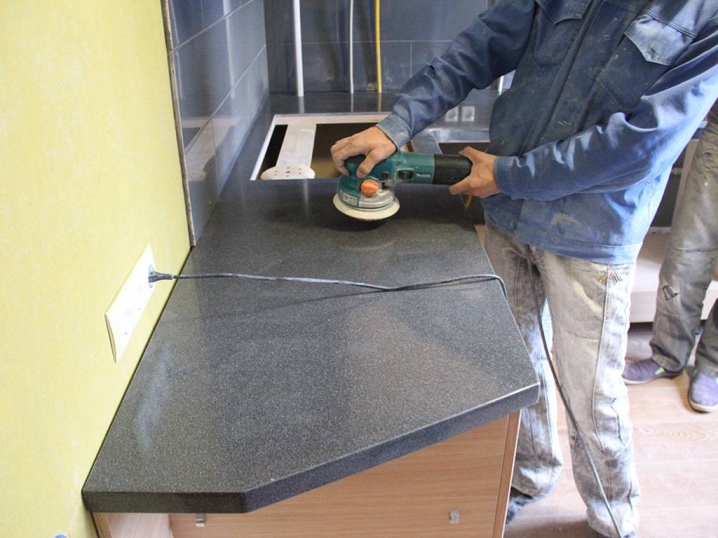
- Smooth surface. The result can be achieved only through the work of professionals. In the case of an independent execution of a euro-saw, it is extremely difficult to achieve a smooth surface.
- No raw edges. Especially useful for dark colored surfaces.
In addition to the advantages, Eurozapil also has disadvantages. Among the main ones it is worth highlighting.
- The emergence of difficulties when carrying out a Euro-saw with your own hands. To create the most even and smooth surface, as well as to ensure a reliable joint of the countertops, you need experience and skills in using special tools.
- Subtleties at work. To complete the euro joint, you will need to organize a solid fixation of the tabletops. The connected elements should not move or change their position during the work.
- Risk of moisture penetration. Relevant for those who decide to do their own Eurozapil.In this case, water that gets inside can spoil the appearance of the countertop and reduce the service life.
In order for the euro-saw to turn out to be reliable, it is important that an angle of 90 degrees is maintained between the walls. Therefore, the choice of this method of joining kitchen surfaces will require additional costs from the owner of the premises.
How to do it yourself?
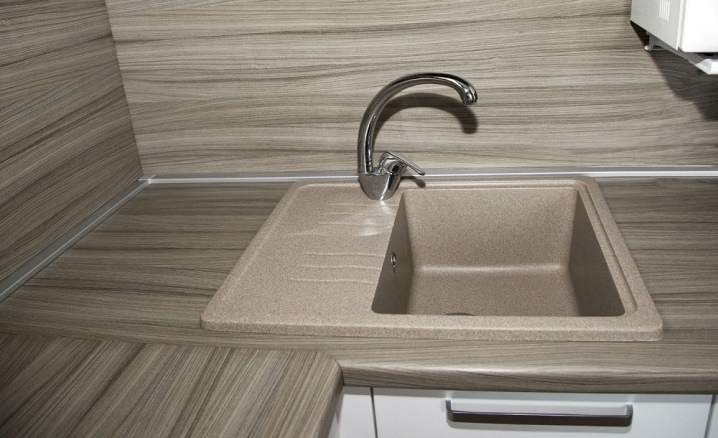
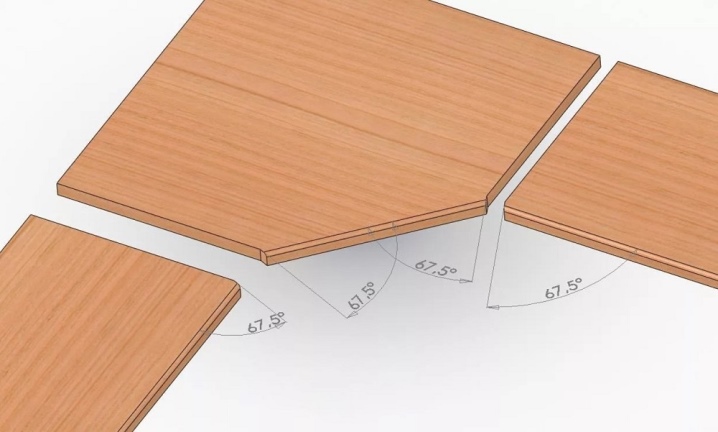
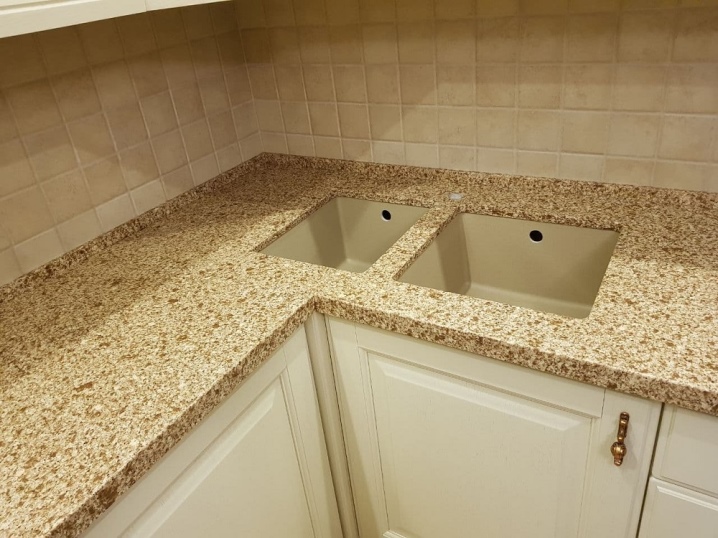
Most often, L-shaped configurations are found in kitchens. In such variants, a special corner piece in the shape of a trapezoid is made to install the sink. The angle at the side bevels is 135 degrees.

To perform self-joining of surfaces, either a duralumin profile or the eurozapil method is used. It should be noted right away that the assembly of furniture is a complex process that requires compliance with a number of rules that have certain nuances.
Preparation of tools and materials
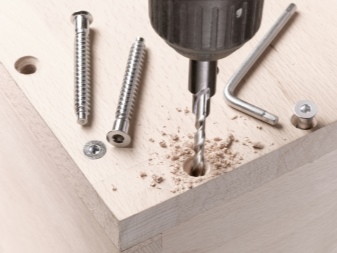
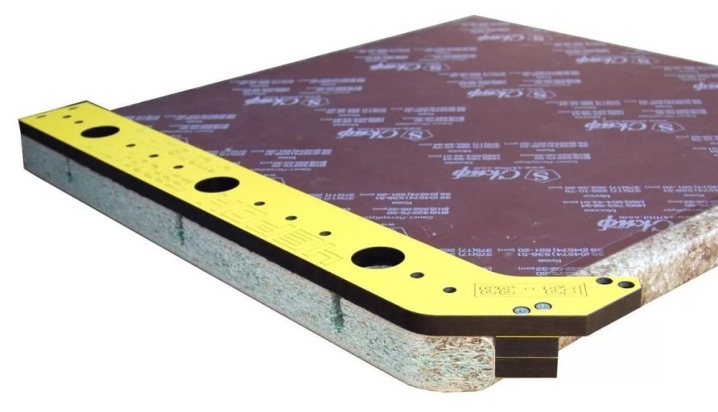
To perform a euro saw, you will first need to prepare the workspace and stock up on the necessary tools and consumables. Basically, you will need to purchase hinge drills and euro screws. Additionally, you may find it useful:
- milling cutter;
- E3-33 template for Eurosapiles;
- conductor;
- cutters;
- ring.
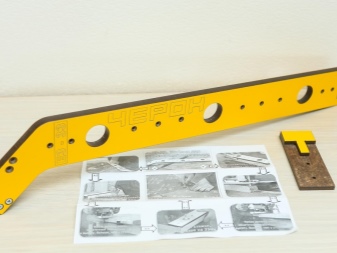
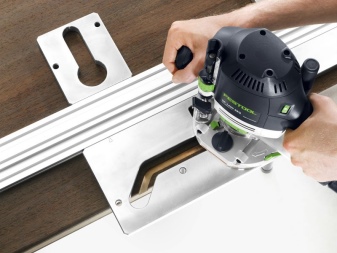
The last two elements are necessary if you plan to make the euro joint not at a right angle.
Schemes and drawings
In order for the work to be carried out in accordance with the established requirements, you should take care of the development of drawings and diagrams. With their help, it will be possible to more accurately determine the position of the euro joint, as well as observe the necessary angles and height of the fastening of the elements.
Stages of work
When performing a European tie, you should not be guided only by a photo, drawing or video instruction. It is recommended to carefully study this issue, look at the reviews, recommendations of experienced people who have already gone this way. When you have received enough information on how to execute the Eurozap, you can get to work.
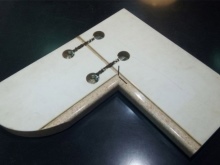
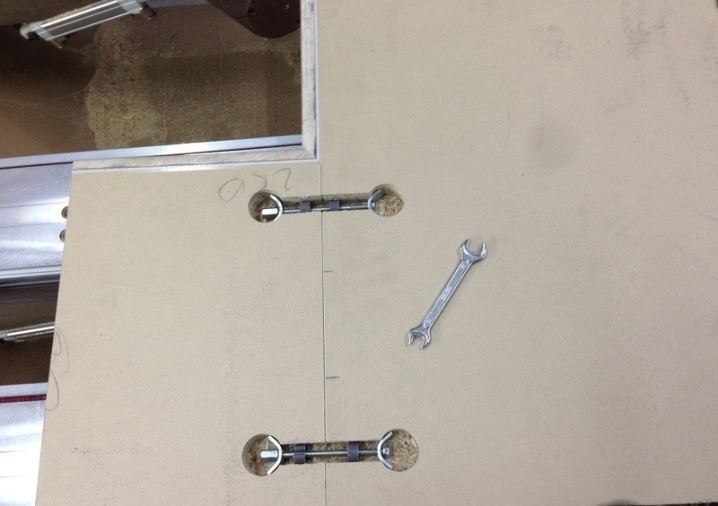
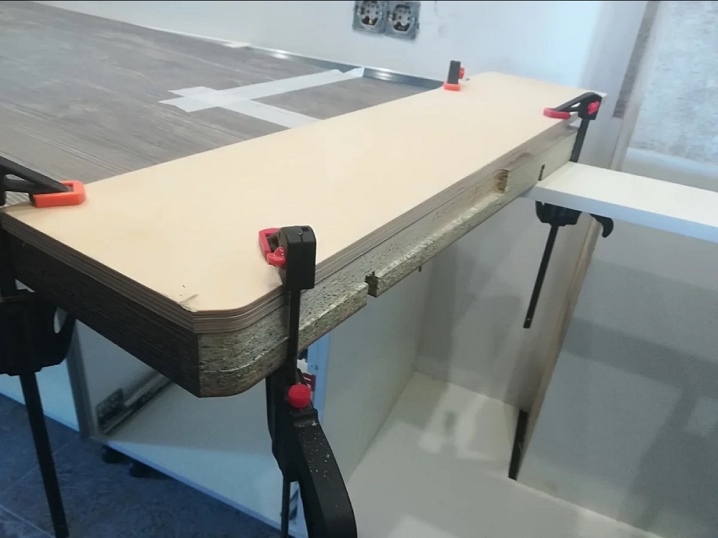
When connecting tabletops with a Euro saw, it is necessary to carefully monitor the position of the elements until the last screw is tightened. The surfaces must be at the same height.
In the case of joining elements with ties, it is recommended to initially fix all parts.
The process is divided into several stages.
- In the case of self-execution of the European joint, you must first buy a tabletop, which will have a small margin in length. This need is explained by the peculiarities of the installation of the kitchen surface. When the joint is formed, the slab will need to be trimmed.
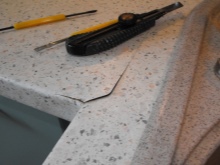
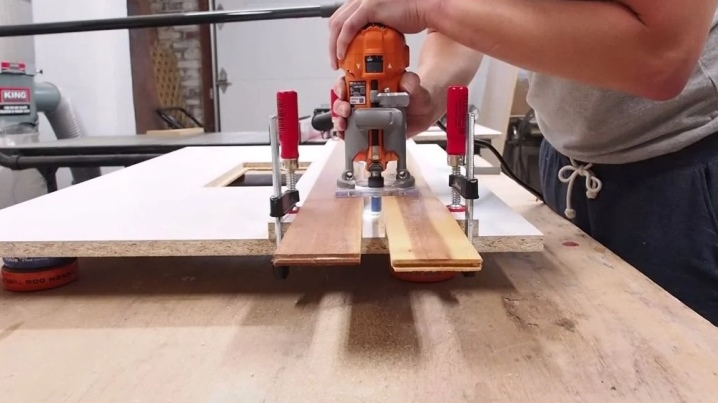
- First of all, it is necessary to make cuts on both sides of the tabletop. Then you need to bring them together and check how high-quality the joint is. If everything is done correctly, you should start trimming the edges and shaping the tabletop to the desired size.
- The third stage is the formation of screed holes. When carrying out work, it is recommended to take into account several important rules. For example, the depth of the grooves should not be more than ¾ of the thickness of the worktop. Otherwise, the material will quickly wear out and deform.
- Next, you need to perform cuts. To do this, you need to use a suitable template. For caps, templates for cuts of 20, 25 and 30 mm are usually used.
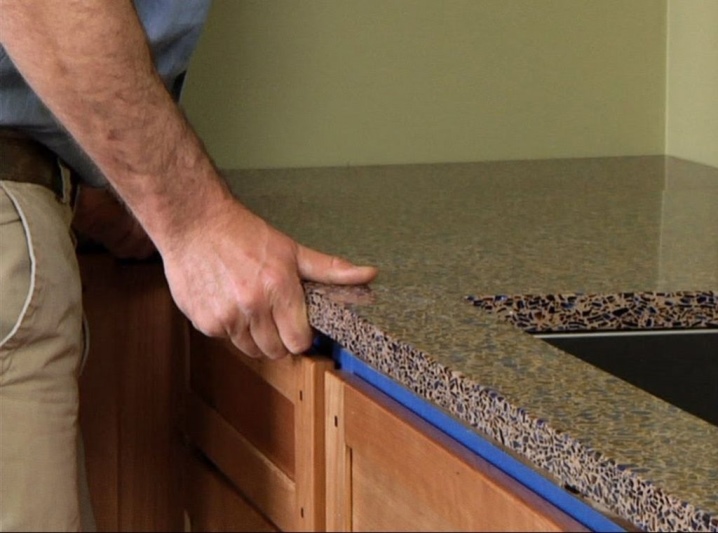
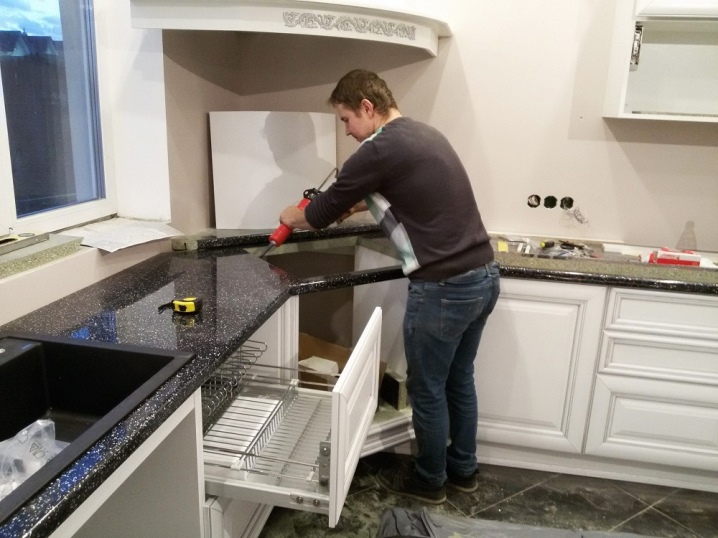
- The last stage involves ensuring the protection of the joints from moisture. The procedure is performed using sanitary silicone, which contains glue. Silicone is coated along the joints to achieve their tightness.
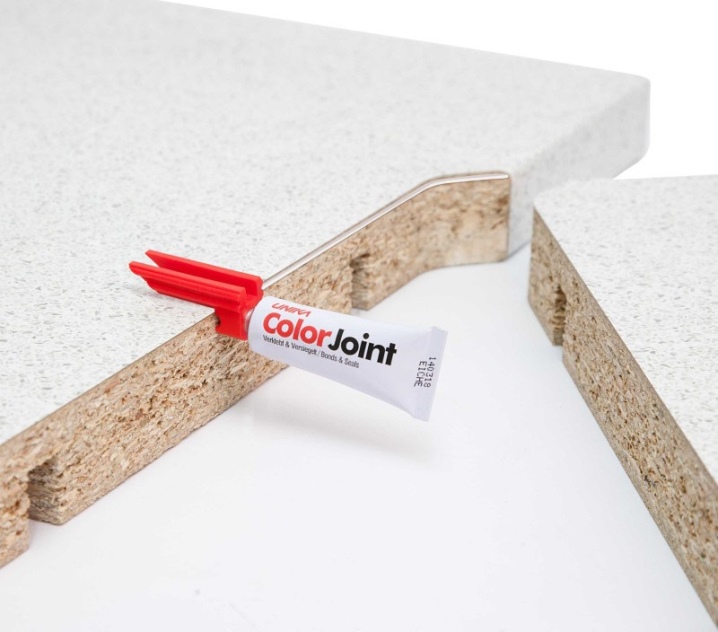
When all the work is done, it is worth letting the sealant dry, and then remove the dirt from the joints and finish the white or dark surface.
Recommendations
If a person does not have professional skills, it will be difficult for him to qualitatively connect two tabletops with a Euro saw. In this case, you should use some tips:
- When carrying out work, it is necessary to set accurate marks. To achieve the desired quality of cuts, it is worth using a circular saw.It is important to remember that any gaps will be visible, even if they are tiny. In addition, moisture or dirt can enter them.
- Before installing countertops, it is worth laying them with the laminated side down. This will help avoid chipping.
- If the countertop does not have a solid canvas, it is necessary to provide a support under it to hold the surface. When the connection of the canvases is completed, you will need to press the joint, check its strength and accuracy.
- To achieve an even and high-quality gash, you should give preference to a new cutter.
- Excess glue can be removed with a napkin or paper towel. At the same time, for each new smear, it is worth taking a new napkin. Otherwise, the surface will be stained, you will have to install a new one.
- If debris or other small particles get into the seam, you do not need to try to get them out. It is best to wait for the sealant to dry and then thoroughly clean the affected area.
Also, during operation, if the seam is made poorly, the surface may swell. This is due to the penetration of moisture into the joints. If the table is swollen, the countertops will need to be replaced.
Eurozapil is an excellent solution for those who want to make the kitchen attractive and comfortable, to extend the service life of kitchen surfaces. The procedure, if desired, can be done by hand. However, before carrying out work, it is recommended to study all the information on the method of joining joints.
How to make euro-sawed countertops with your own hands, see the video.


The comment was sent successfully.