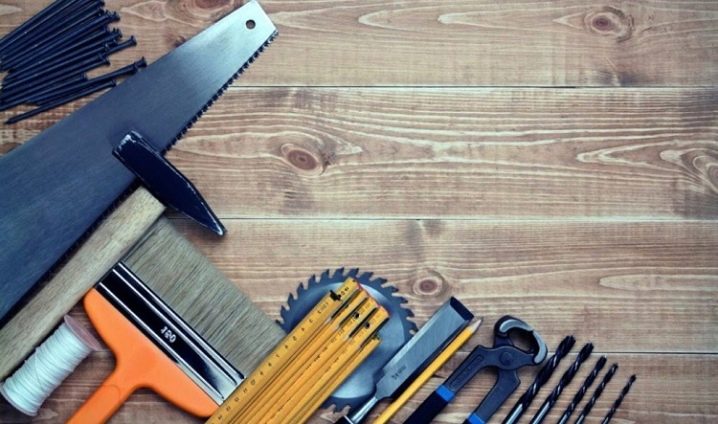
DIY kitchen countertops
Making kitchen countertops can be done in different ways. It depends on the type of cladding used, taking into account the general concept of style, as well as the financial capabilities of the owners of the house. Sometimes this is a forced measure, which is rather a renovation of an old structure. The material of this article will tell you about what a countertop can be made of and what the main stages of work are.
What can be made of?
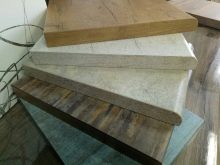
Materials for making or updating a tabletop may be different. At the same time, when choosing one or another type, it is necessary to take into account that the main load will fall on the tabletop. In addition to a sufficient working surface, you need to choose a material that is resistant to abrasion and mechanical damage. In addition, you will need to ensure that the raw materials for the cladding are selected based on considerations of moisture resistance and ease of maintenance.
It is important to note that all materials are characterized by different thicknesses, which determine the weight of the finished countertop. This factor is another nuance that you need to pay attention to when choosing a facing raw material. A heavy countertop will forcefully press on the walls of the kitchen set, thereby accelerating its wear. Consider several options for the material in demand from buyers.
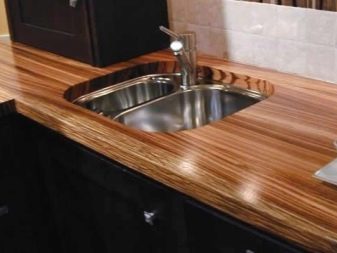
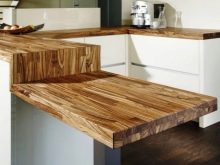
Made of wood
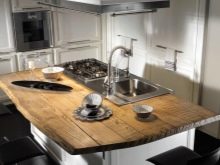
As an environmentally friendly raw material, wood is aesthetically pleasing. The wooden countertop can be made of boards or pressed boards. However, like MDF, it is afraid of water, deforming from constant humidity. Even if a wooden tabletop has a protective film, such a table will not be durable. Of course, wood is better and more durable than pressed slabs, but it is inferior to stone, is afraid of cutting objects and needs constant care.
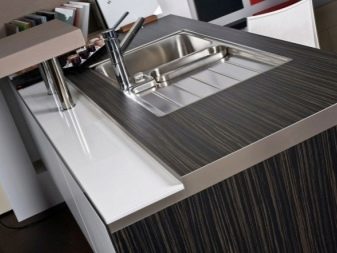
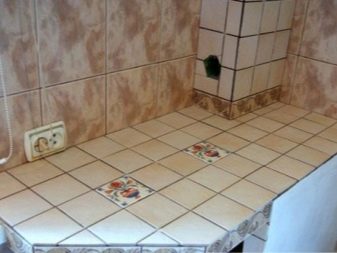
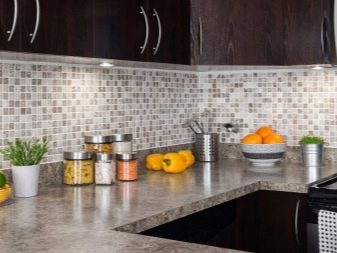
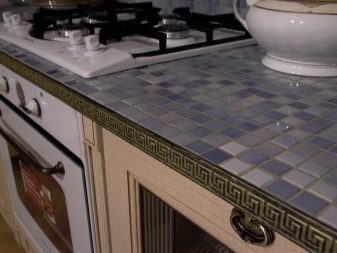
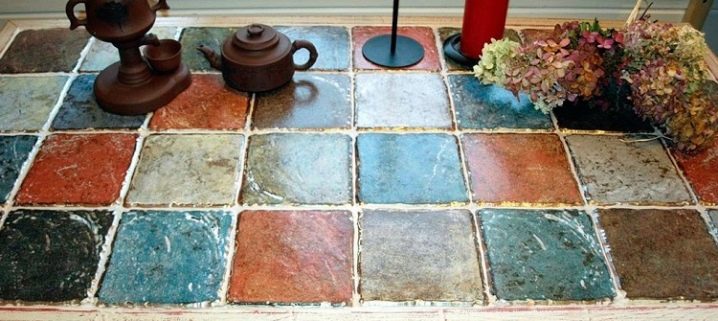
From tiles
The tiled worktop for the kitchen is practical and retains a presentable look for many years. The tile is not afraid of moisture, resistant to the formation of fungus, and can last more than 10-15 years. This material is able to imitate different textures, for example, you can purchase varieties for a stone. Depending on the type, the material may have a protective film that resists abrasion. The tile does not fade during the entire period of operation. The disadvantage of such a countertop is the seams into which dirt gets clogged and which do not like contact with aggressive chemicals.
From porcelain stoneware
This material is considered the best and strongest for the manufacture of kitchen countertops. The dimensions of such plates are larger in comparison with ceramics, while the material perfectly imitates the stone texture, which allows you to add notes of high status to the interior of the kitchen. Porcelain stoneware is distinguished by its reliability and durability, such countertops are indelible and resistant to mechanical damage.
Other materials
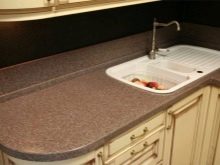
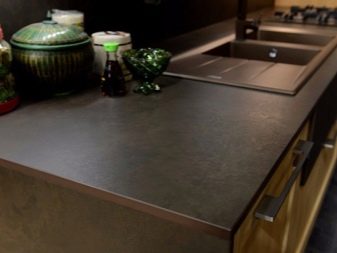
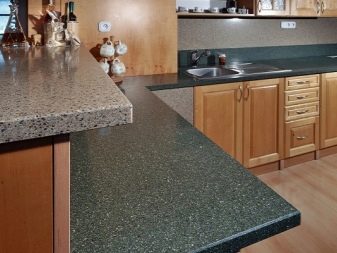
Often, when thinking about a material for a kitchen countertop, the choice falls on concrete and stone. The table top can be acrylic, laminate or mosaic. As for the mosaic, it is advisable to use it for the sides of the working plate, because here, too, inter-mosaic seams can become a problem. It is quite possible with mosaics to update the sides of an existing countertop that needs to be repaired on the side edges.
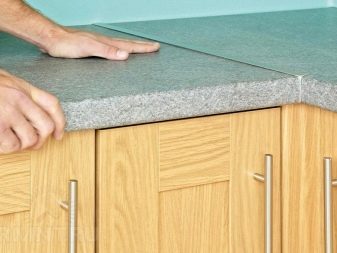
Laminate cannot be called a high-quality and durable type of material, since it is capable of deforming during operation. A stone countertop is beautiful enough, but making it at home is not so easy. The work involves cutting to a given size, processing edges, gluing individual parts, as well as grinding, which can take more than one hour of working time.
Types
Kitchen countertops are different. Conventionally, such products are divided into linear and angular varieties. It is easier to make the first ones, since in this case you do not need to take into account the curvature of the corner, which often complicates the workflow. This is especially true for tile countertops, which give out any curvature of the wall by mismatching the tile joints.
In fact, if everything is simple with linear variations, then corner countertops can have not only a laconic, but also a complex shape. For example, the countertop can have rounded corners, which provides safety when moving around the kitchen in a small space. In addition, the corner model, according to the drawing, can consist of three conventional figures: two rectangles and a square in the corner with a beveled corner. Depending on the type, the tabletop can be monolithic or consisting of parts. Docking in wood products and MDF, chipboard can be seamless. It is generally accepted that sawing is a more technologically advanced option, therefore, monolithic products for corner kitchens are more a rarity than a common rule.
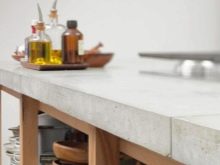
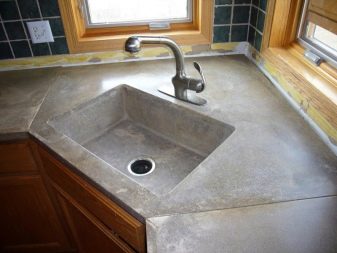
How to make from concrete?
To give a homemade concrete countertop a chic look with a marble texture, in addition to the necessary accessories, you will have to take care of the presence of a sander. For work, you need to prepare plywood (chipboard), boards, an aluminum profile, sand, crushed stone, reinforcing wire. Also, during the manufacture, you will need a sealant, assembly glue, drying oil and paint for concrete.
First, with the help of boards, formwork is arranged with a thickness of 4 cm or more. Chipboard sheets are cut to size, the sides are installed, and they are fastened with self-tapping screws. The fixing points of the beams and plywood are poured with silicone gel - this will exclude the ingress of concrete into the cracks. From the inside, the formwork is treated with linseed oil to avoid adhesion of the solution to the boards.
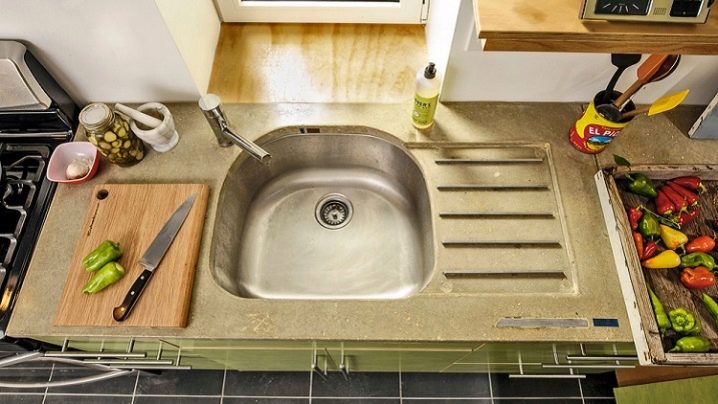
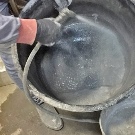
As reinforcement, you will have to use wire no more than 8 mm thick. A lattice is made from it a little less than the size of the formwork and placed in a container, at the bottom of which glue is already poured. The grating is glued to the plywood. After the glue is completely dry, concrete mortar is poured into the formwork. For its preparation, cement, crushed stone and sand are mixed in a 1/2/2 ratio. To improve the quality of the solution, a plasticizer is added to it. The dye should be added to the solution at the rate of 10 kg 0.2 kg, leaving a little for the finished plate.
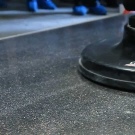
All excess is disposed of with a spatula. Then the countertop is covered with polyethylene for about a week. After complete drying, the surface is sanded until smooth and placed on an old kitchen table. Before that, the old tabletop is dismantled and the body is reinforced with supports made of bars. You can install the stove in its permanent place.


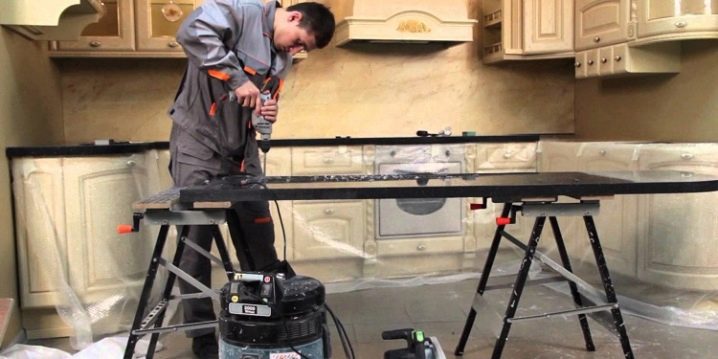
How to do it yourself from chipboard?
To make such a countertop, it is worth preparing chipboard plates for the work surface. In the work, you need to use grade 1 material with a minimum number of visual defects. For a chipboard tabletop to be more durable, it must be monolithic. Before proceeding with the marking on the plate, prepare a drawing with the applied dimensions, holes for sinks, tiles. After that, the dimensions are transferred to chipboard sheets, the material is sawn using a jigsaw with knives of the required size at home. If not, use a hacksaw with a sharp blade. For evenness of the cut, as well as to exclude the appearance of chips and burrs, masking tape is glued along the cutting line.It is preferable to use a blade with a fine tooth in the work.
The prepared composite is given the required shape. To do this, grind the ends and corners, check the surface for evenness and smoothness. If irregularities are found, sanding is performed “under the level”. At this stage, sandpaper is used.
Next, they proceed to the stage of impregnating the composite, then decorating the surface or finishing. The table top is treated with protective coatings, and after they have dried, they are varnished in several layers. Moreover, each layer is applied only after the previous one has dried. Before coating, it is imperative to apply a layer of primer to the composite. Only after it has dried can the slab be painted.
Some craftsmen use wood stain when making chipboard countertops. This substance is suitable for impregnation of chipboards, this composition usually dries up within 10-12 hours from the moment of application. Varnishing should be done with a water-based varnish. The ends are processed with veneer or melanin edging.
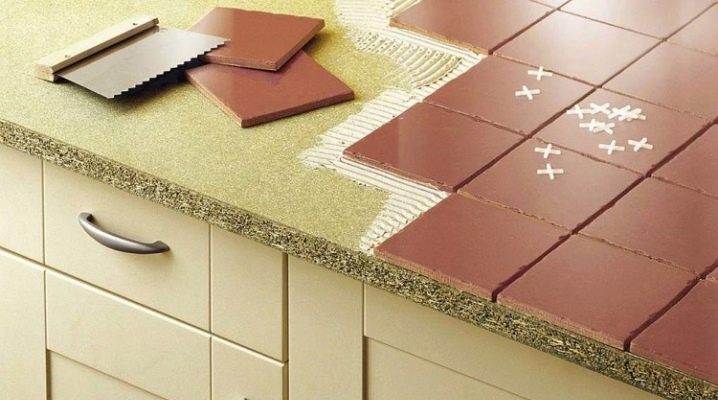
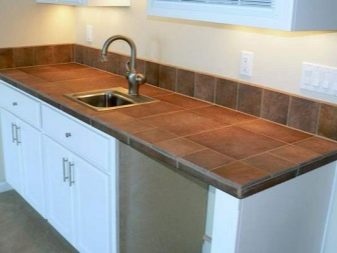
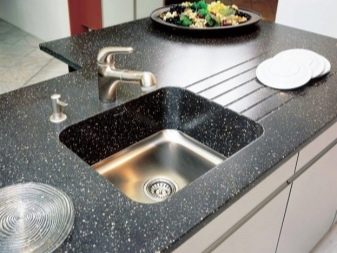
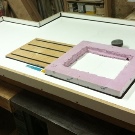
Execution from tiles
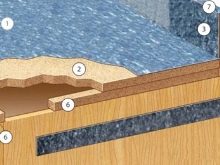
The tiled countertop is laid on two layers of plywood, the layers of which must be glued together. In order to improve the quality of the finished countertop, the slabs should be treated with a waterproofing material. The convenience of this technology is the fact that the countertop can be made larger than the original surface. At the initial stage of work, measurements are taken and the material is selected in such a way as to minimize the number of cuts.
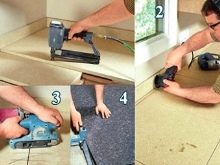
If you plan to update an old countertop, you can use the pedestal of the kitchen unit. Otherwise, it is worth using a painted chipboard shield. It is necessary to cut it with a circular saw taking into account the required dimensions. After cutting, the edges of the backing should be treated with moisture resistant wood impregnation. You can apply a layer of oil putty. Before that, masking tape is glued to the edges. Next, the ends are cleaned with sandpaper and painted with oil paint.

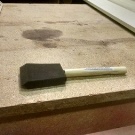
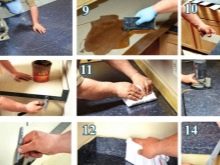
The assembly is carried out by means of metal corners, dowels and screws. Before you start gluing the chipboard with tiles, you need to cover it with a moisture-resistant impregnation using a paint brush with natural hair. Next, drying oil is applied. After it dries, you can start tiling the surface with ceramic tiles.
It is better to use glue on an acrylic or epoxy base, since cement will not adhere well to wood. Laying is carried out in a layer of small thickness, distributing the adhesive mass with a notched trowel. Work begins from the front and leads to the wall (rear edge). The next rows are laid end-to-end to the ends of the first. In work, they use crosses or special clamps.
The ends of the table top are ennobled with wooden slats or mosaics. At the final stage of facing the countertops, the seams are rubbed using a special grout mixture. Then they wait for the grout to dry and use a regular sponge to remove the excess, polishing the tiled surface. The table top is ready.
Installation features
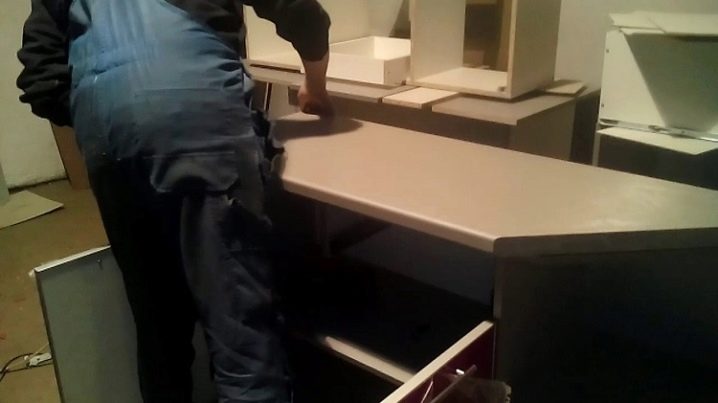
Despite the seeming simplicity and clarity of installation, the manufacture and installation of the countertop have their own nuances. For example, it is rarely possible to carry out this work on your own. This is possible if the owner of the house has experience in such work and knows exactly all the intricacies of the process. When an amateur gets down to business, and even ignores important aspects of the work, the finished result will be far from the desired one.
Getting down to work, you need to choose the right base for the future countertop. In this regard, it is easier to independently make a fixture from veneer, wood or chipboard. Some people build it out of stone. You can tile concrete, but only if you have at least basic skills for such work. In order to put the countertop in its place and not be afraid that it will break the headset, it is necessary to strengthen the furniture. The heaviest will be a stone countertop. You will have to install it with an assistant.When installing the countertop yourself, it must be borne in mind that the edge of the surface needs processing, regardless of the type of material selected.
The legs of the floor pedestals also need attention, for the adjustment of which craftsmen usually use the building level. If necessary, adjusting wedges or plastic gaskets are placed under them. When installing, do not forget about the sealant, treating the necessary areas with it, as well as the rear edge of the tabletop.
As for the installation of the stove, it can be done in two ways. In the first case, it is pushed close to the wall. For another installation, a clearance of 5 mm is made. The installer chooses the necessary option on his own based on his own preferences. However, you can also take into account the amount of overhang of the countertop above the cabinet.
When installing a concrete slab, you need to set the level of all cabinets. Only then can a chipboard or plywood base be laid on them. Before installing the formwork, the base must be properly fixed. We must not forget about the fencing of the place for the sink. Replacing the countertop is not limited to dismantling the old slab. It is also important to clean up the sink, baseboard and all connections. The old countertop must be removed carefully so as not to damage the surfaces of the kitchen set. The dimensions of the new slab must exactly match the original parameters, otherwise difficulties may arise during installation.
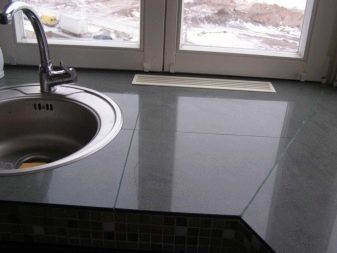
You need to install a new stove in the same way as the production one was installed. In addition to the fact that you will have to maintain an identical level, you need to ensure that the tabletop does not stick out against the general background, even taking into account the end elements. If the table top is small, it should not be knocked out against the general background with a width. The edges obtained as a result of the work are especially in need of sealing if the surface of the product is to be laminated. Corner joints when working with a stone must additionally be closed by means of aluminum profiles. In this case, the hole for the sink is made at the final stage of the manufacture of the countertop.
For information on how to make a cement kitchen countertop with your own hands, see the next video.


The comment was sent successfully.