Grouting decorative bricks - all the subtleties of the procedure
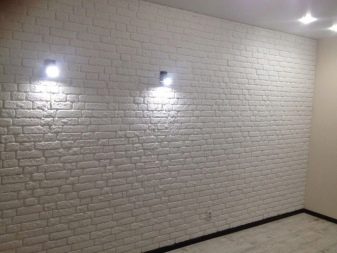
After finishing the base, it is necessary to grout the seams of decorative bricks or other material, which will give a finished look to the masonry and ensure its uniqueness. It is easy to do this work on your own and does not require special education or skills. You can prepare the mixture yourself or buy a ready-made one in a hardware store. With the correct work, the decorative finish will last on the wall for many years and will not lose its appearance.

Features of grout
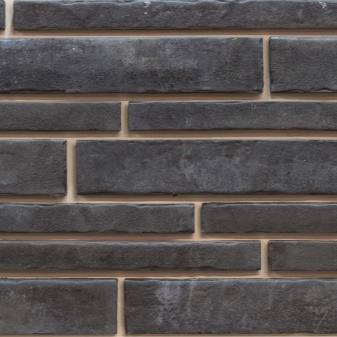
In order to fill the gaps between the individual building materials after they have been laid, various formulations can be used. When choosing such a composition, it is necessary to take into account the color of the decorative product, the space between its individual elements, the thickness of the bricks and other points. You can rub with mixtures that differ in different shades depending on the color of the finishing material itself. And you can also mix solutions of different colors, achieving the desired shade.
When preparing such a composition with your own hands, you need to take into account the features of the masonry and the location of the wall itself. If this will be a room with high humidity, then it is necessary to use compounds for sealing joints, which will prevent the possibility of moisture getting between the bricks. For this, various additives for solutions can be used.
The advantage of gypsum grout is that the material hardens quickly, but the work must be done carefully so that no mortar remains on the front side of the brick. Otherwise, it will be difficult to wipe it off or wash it afterwards.
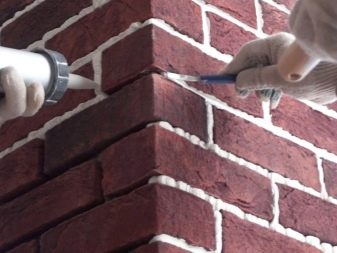
In some cases, wiping after bricklaying is done with silicone sealant, which is usually colorless, but dyes can be added to it. Such grouting after completion of work will allow you to emphasize the natural color of the finishing material itself and smooth out the unevenness of the seams, if any.
Amount of compound for filling joints
All grouting work should be carried out only after the completion of the installation of the finishing material. You can reliably and beautifully wipe the distance between individual elements if you follow the rules and regulations. And it is also important to keep the masonry itself at the same distance between the individual bricks, in this case it will be easier to fill the joints.

Depending on the width of the joint and the depth of the masonry itself, you can calculate the amount of material required to fill them. For joints under a brick up to one centimeter wide, you need to spend 7-8 kg of the mixture per square meter. But these parameters may vary depending on the characteristics of the masonry.
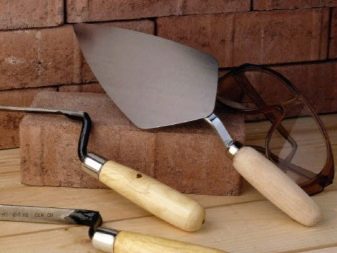
Grouting technology
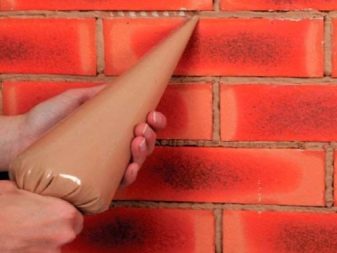
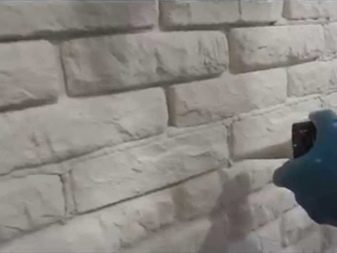
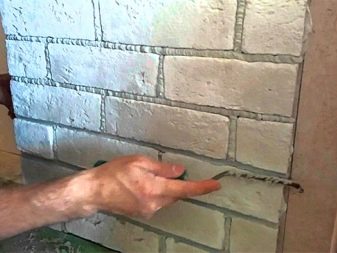
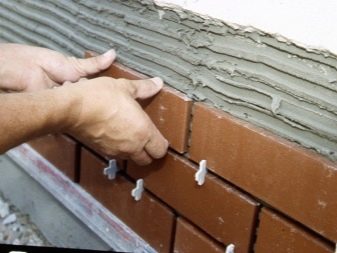
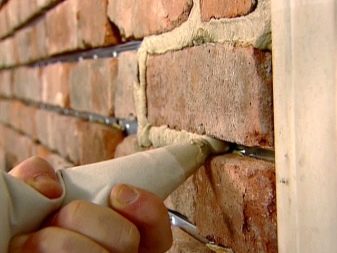
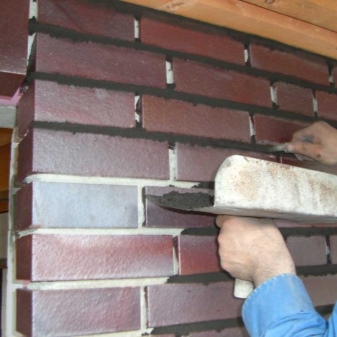
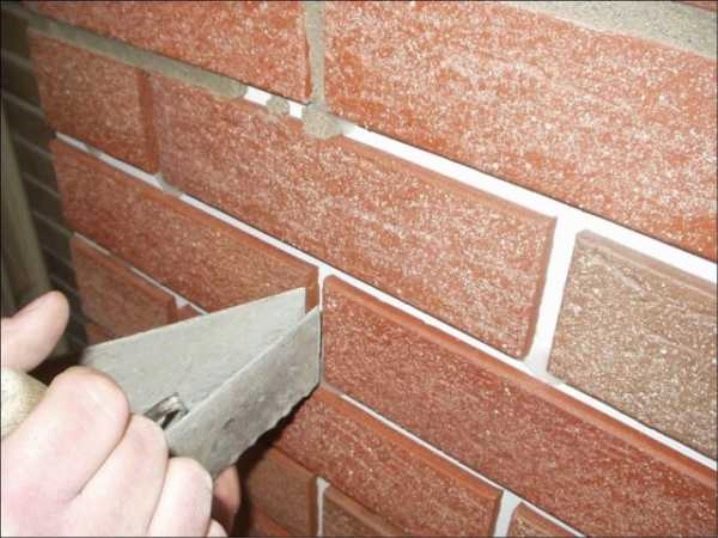
To carry out all the work, you need a tool, among which the main one is a spatula and a special bag where the composition is placed. But also work on filling the joints can be done with a syringe. The use of these tools will help to quickly process the seams without contaminating the surface of the brickwork.
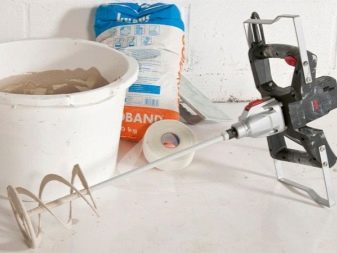
Depending on which grouting method will be used, an additional tool must be prepared:
- container for solution;
- trowel;
- level;
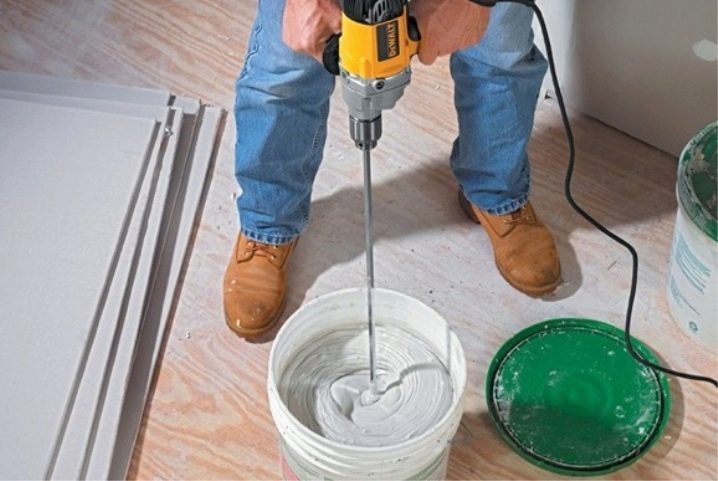
- mixer.
It is important to initially prepare the surface and clean it from excess solution and dust. The mixture is carefully laid in the seams and compacted, and its excess is washed off immediately after application so that they do not dry out.
You need to choose a mixture depending on the characteristics of their use, and dilute in accordance with the instructions on the package. Often such formulations are sold dry, they only need to be diluted with water and stirred. It is better to prepare such an amount of the mixture that the master can use for the period of time during which the grout cannot harden. In addition, stale mortar can worsen the waterproofing of the joints, and when dry, cracks will form in them.
With this moment, it is necessary to decide at the stage of laying bricks, depending on what the method of laying bricks itself will be chosen. Each of the grouting technologies has its own execution technique, and therefore it must be adhered to throughout the entire time of work. Usually grouting is done in several ways.
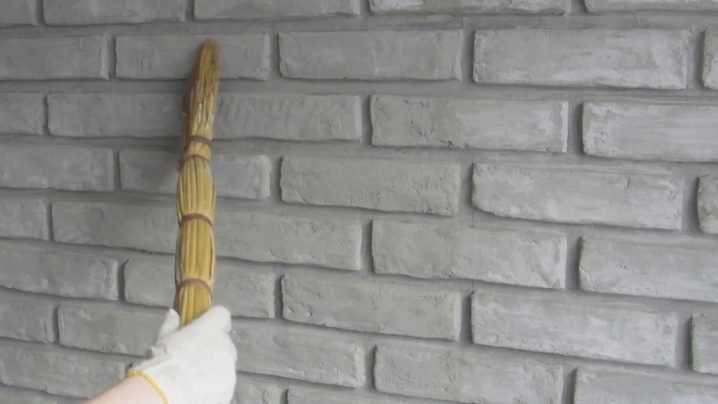
- Flush. This is the simplest option and it is performed with a semi-dry mixture. You can do it yourself. The composition is applied between the bricks with a trowel, and the excess is removed. At the end of the work, it is necessary to wipe the surface with a hard rag or brush to remove excess.

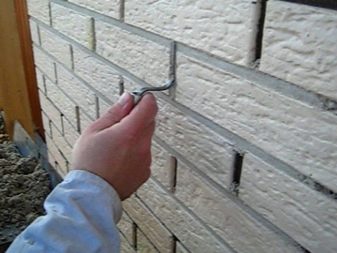
- Inside. All the mortar that remains when laying bricks between them is tamped and, if necessary, additional indentations are made. This will create concavity in the seams and the bricks will protrude outward.
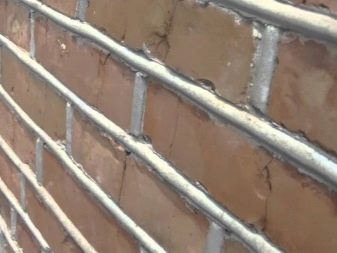
- Convex. For this, a special spatula is used, which is carried out along the seam filled with a solution. Thanks to this method, the seams come out. But the process requires certain skills, not everyone can cope with it.
- Triangle. Quite a complex process and it is often used for grouting indoors. To carry out the work, it is necessary to remove a small amount of mortar between the bricks, and distribute the remaining composition in a triangle. This technology requires a certain amount of experience from the master.
- Under the bevel. This method is simple and requires no skill. It is necessary to move the trowel along the seam and remove part of the mortar, making a small depression up to 4 mm at a certain angle.
Specialist recommendations
So that during the work there are no defects and errors, you need to read the recommendations from the masters.
- When preparing a grouting composition on your own, it is necessary to use sieved components so that they do not contain large fractions.
- After preparing the solution, it should be allowed to settle for 10-15 minutes, and then mixed again to improve plasticity.
- When grouting, avoid applying mortar to bricks.
- If the solution gets on the decorative finish, it must be removed immediately, avoiding drying out.
SNiP indicates that the thickness of the seam should be up to 1 cm, and therefore it is recommended to make small gaps between the bricks themselves, adjusting the value depending on the climatic conditions at the place of work. It is not necessary to start grouting on hot days, as the mortar will quickly harden, which can lead to disruption of the technological process. And also it is worth refusing to carry out work in wet weather. The solution must be mixed in small portions in order to quickly produce it and not allow it to solidify.
As you can see, grouting is a responsible, but effective way to improve the appearance of a ceramic or other coating after finishing work, and it will also make it possible to create completeness of the work. A professionally produced grout will improve the appearance of the substrate and protect the wall from damage. In addition, it will increase the thermal insulation properties of the masonry, which will allow it to stand for a long time and not require annual repairs. To do this, you only need to complete all the work in accordance with the recommendations and rules.
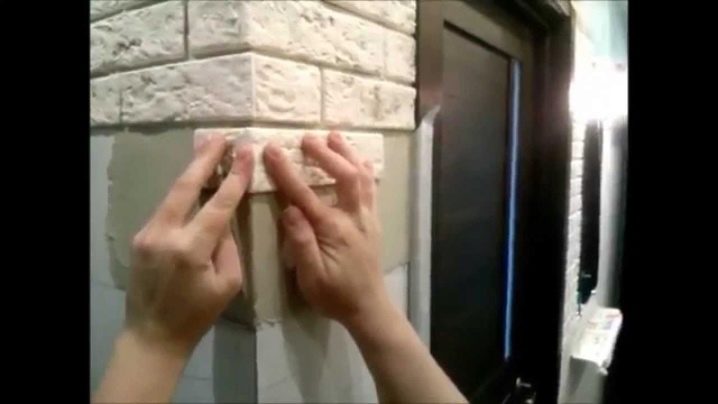
You can see an example of grouting in the video below.


The comment was sent successfully.