All about polycarbonate showers

Polycarbonate, due to its characteristics, has gained wide popularity among building materials. It is used for sheds and roofs, buildings for various purposes in the local area. In buildings such as a shower, a greenhouse, a structure above the pool, not only the roof, but also the walls are built from polycarbonate. The article will focus on a summer shower, which provides a certain degree of comfort and hygienic conditions to the owners of private houses and summer cottages.
Advantages and disadvantages
There are solid pluses from the presence of a shower in the personal plot. On a hot day, there is always the opportunity to rinse after working in the garden or take a shower just for pleasure. Even if the house has a bathroom with a state-of-the-art shower, why bring dirt into the house after excavation work, when it can be washed off under the pleasant warm jets of the garden shower.
You don't even have to heat the water, the tank heats up completely in the sun during the day.
The disadvantage of a summer shower may be that it is installed in the wrong place:
- where it does not fit well into the landscape and spoils the appearance of the local area;
- in the shade, which does not allow the water to warm up;
- in a place inconvenient for water supply and drainage.
It is also worth noting the advantages and disadvantages of polycarbonate, from which an outdoor shower is built on the site. A well-chosen material for construction affects the comfort of being in the shower itself.
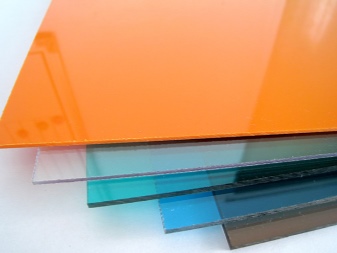
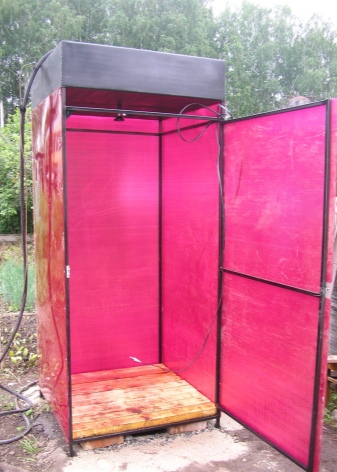
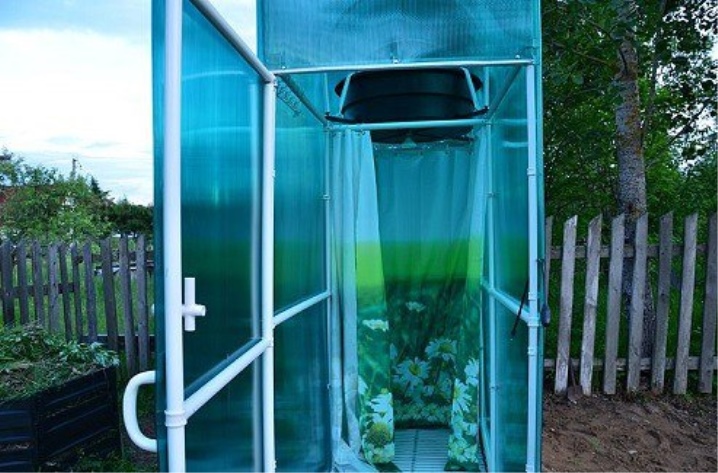
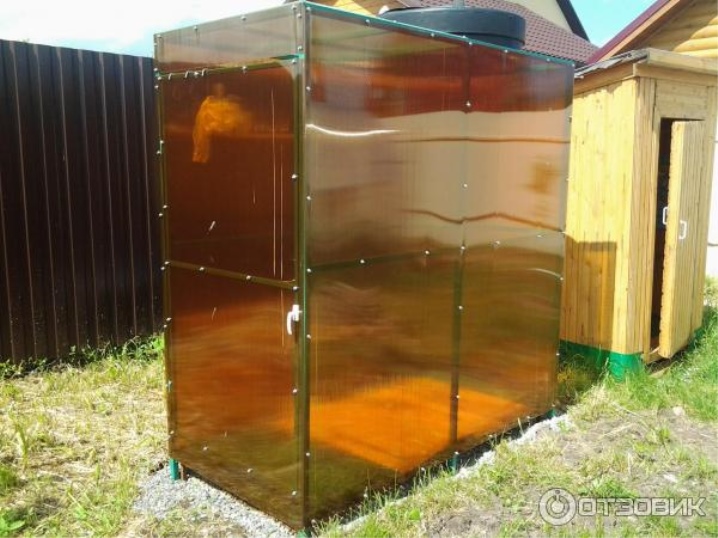
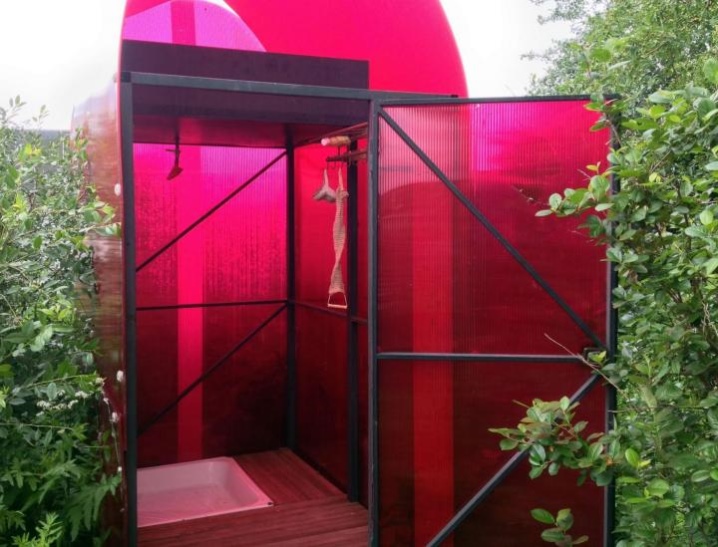
- Polycarbonate is capable of transmitting light 80-90%, which guarantees natural light in the shower. To hide the bather, choose a not too light color of the material or use oilcloth curtains inside the building. But you can also pay attention to the opaque polymer.
- Carbonate is 10 times more durable than acrylic.
- The material is flame retardant and durable.
- The light weight of the sheets and resistance to mechanical stress, allows you to install yourself.
- The polymer can withstand large temperature fluctuations: from –40 to + 120 degrees.
- The material is plastic, has a wide color palette, which allows you to build a beautiful and positive building.
- A summer shower is easy to care for.
- Polycarbonate is relatively cheap and affordable to many.

The negative aspects include the tendency of the material to thermal expansion, therefore, during installation, special fasteners are used, and gaps are left between the sheets.
Description of species
Polycarbonate belongs to thermoplastic polymers, it is divided into several types:
- monolithic, even and durable;
- honeycomb, structured, containing plates between two canvases, from the end resembling honeycombs.
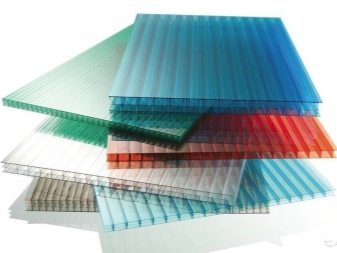
Both types have varying degrees of thickness and strength. Each of them is suitable for building a shower.
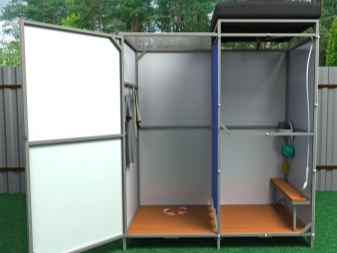
Having decided on the type of building material, you should choose the design of the shower building for yourself. It can be simple (summer cottage) or an additional dressing room, toilet, pantry. Sometimes, next to the shower, they arrange a seating area with a bench, under a common canopy.

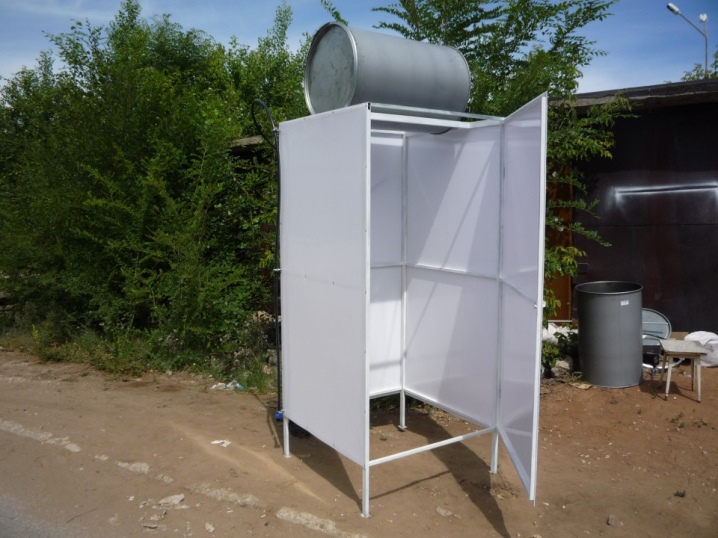
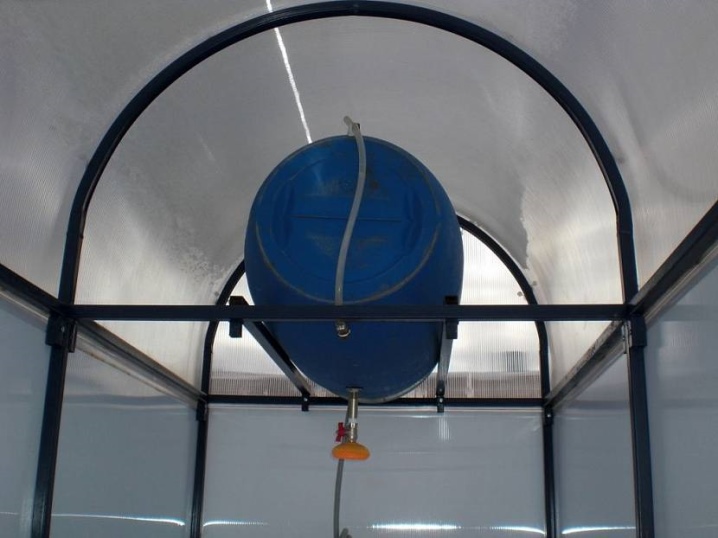
In most cases, the building contains a large tank, which is supplied with water by means of a pump. Heating is carried out in a natural way, due to the heat of the sun.
But there are options for buildings without a tank. Heated water is supplied through communications from a private house or a kitchen that is detached in the courtyard. Such a shower also belongs to the summer building and has nothing to do with the bathhouse.Let's take a closer look at the different design variations of a street shower.
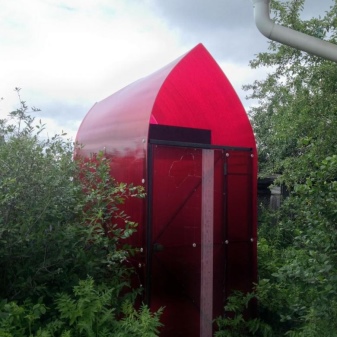
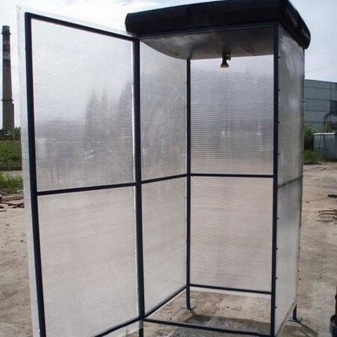
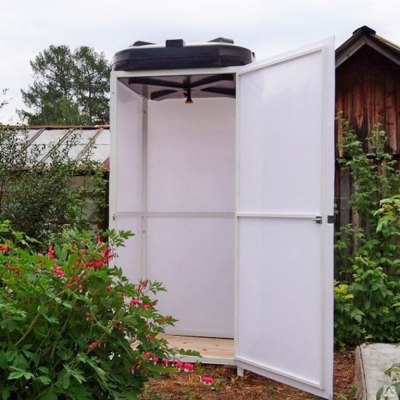
Simple
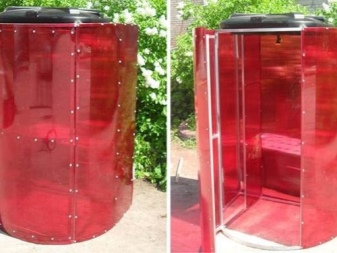
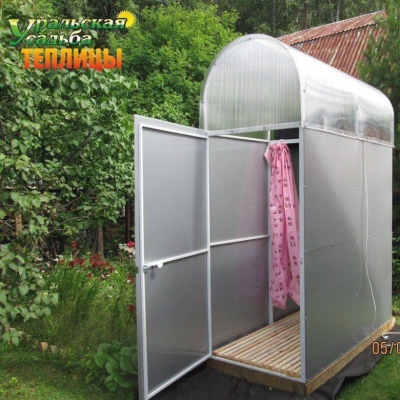
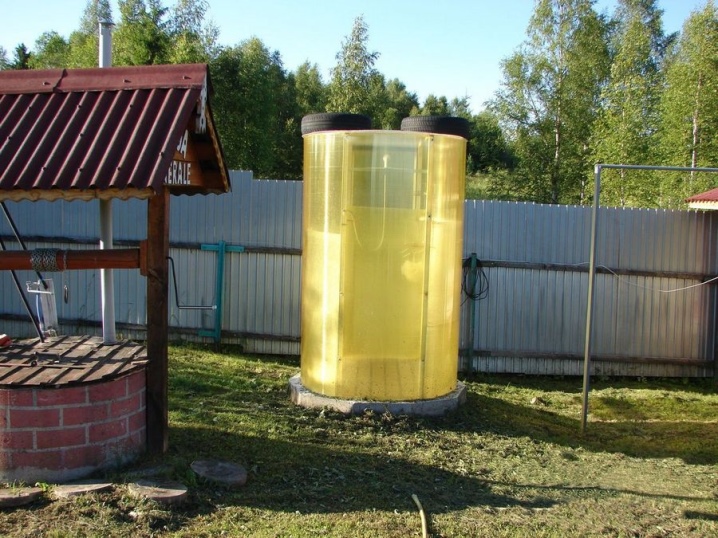
A building that performs only the function of a shower, without any additions, can contain any shape, be rectangular, square, cylindrical, round.
The sizes also have no restrictions, they depend only on the wishes of the owner.
At the minimum parameters, the movements of the hands of the washing person should be taken into account; too tight walls can interfere with water procedures.
A simple shower has some accessories:
- a pair of hooks for a towel and a bathrobe;
- a shelf for soap, shampoo, washcloths;
- lighting if the shower is used in the evening.
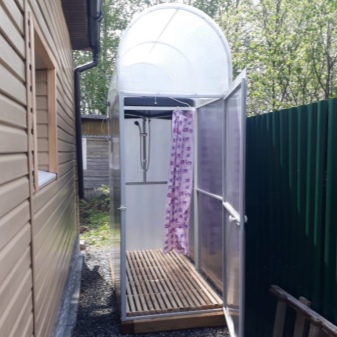
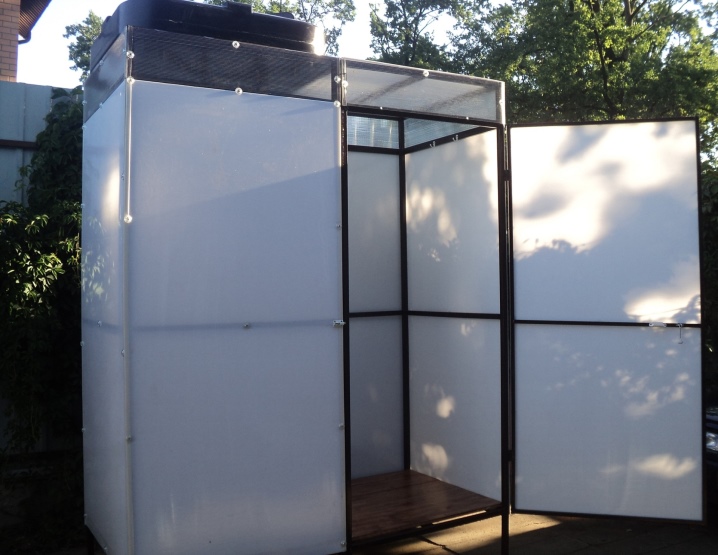
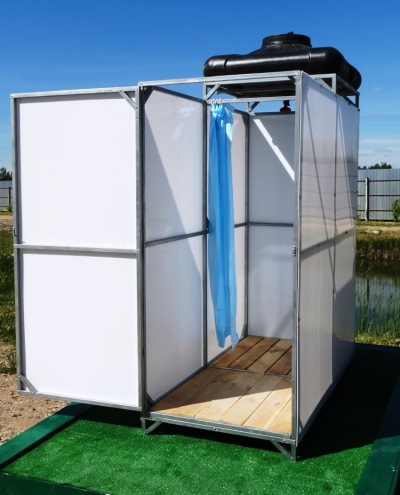
With dressing room
Even a spacious shower stall equipped with a hanger cannot always guarantee dryness of a towel and clothes. The ingress of moisture on textiles occurs for various reasons: due to too active bathing, uncorrected shower rotation, and cramped parameters of the booth. The exit is a double room, separated by a light polymer wall or curtain.
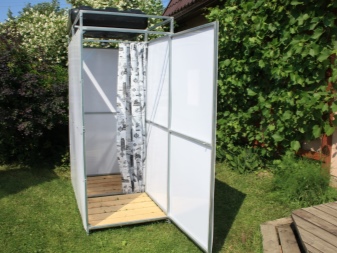
Between the sections it is better to make a sill, since the changing room should be slightly higher than the shower room.
The shower water flows out through the floor slope down to the drain grate.
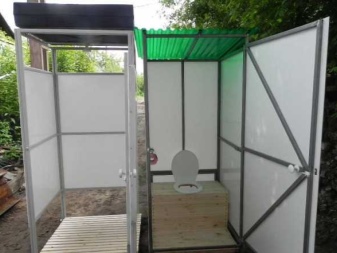
With toilet
Often, outdoor showers are arranged under the same roof as the toilet. The entrance, most often, is different. They resort to the construction of such a structure for many reasons:
- in order not to spoil the aesthetic appearance of the territory, household buildings scattered in different parts of the site;
- a double building takes up less space than two independent objects;
- on a building connected by a common roof and walls, you can save building material;
- it is more convenient to use when all outbuildings are collected in one place.
Before building the foundation for the shower and toilet, a cesspool is prepared under it.
On the foundation, a frame is mounted from a profile metal pipe or from a wooden bar, then the walls are sheathed with opaque polycarbonate. The roof is usually installed with a pitched roof.
Projects
Any construction, even as simple as an outdoor shower, needs to start with a project. Spontaneous erection in the future can have unpredictable consequences.
First of all, a drawing of the booth is being prepared, the following points are noted:
- the size of the building;
- type of foundation;
- drain place;
- branch options;
- frame material, diameter of shaped pipes, size and quantity of all prefabricated elements;
- type of polycarbonate, its thickness, sheet sizes;
- the method of installing the water tank is thought out, calculated and noted in the sketch.
A separate drawing examines the details of the interior arrangement of the shower:
- shower structure;
- shelves;
- hanger or hooks;
- lighting.
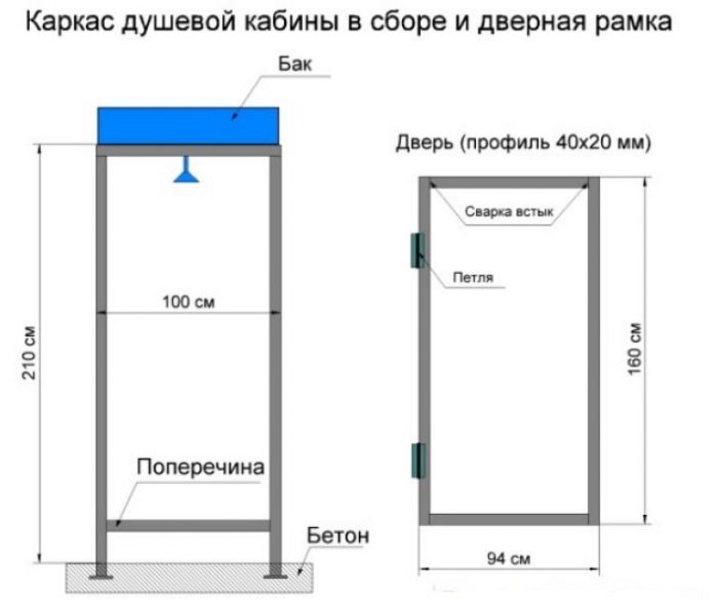
The minimum dimensions of the shower cubicle must be at least 1x1 sq. m and a height of 2.2 m.If the family has small children, the footage of the room should be from 1.7x1.7 sq. m. The minimum parameters of the adjoining dressing room are 0.7-1 sq. m.
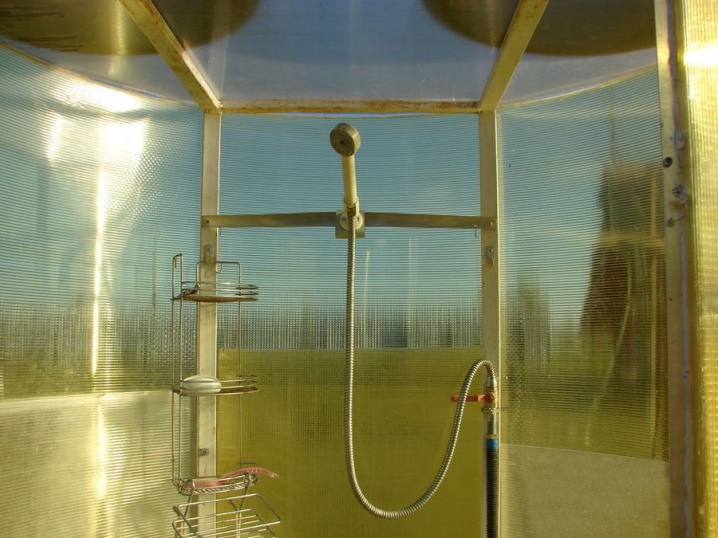
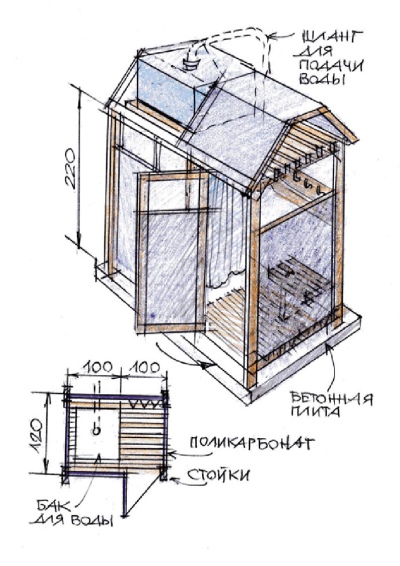
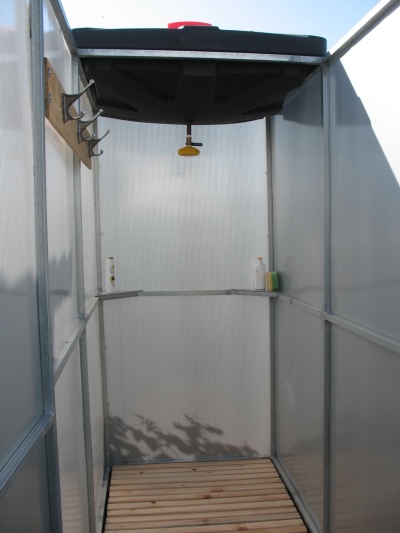
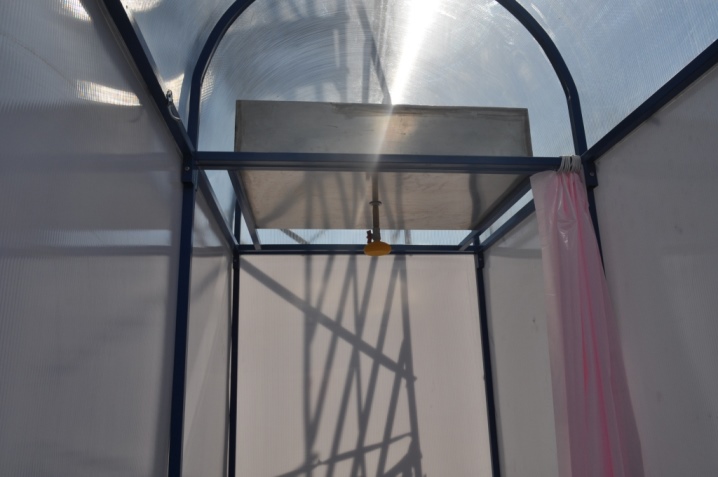
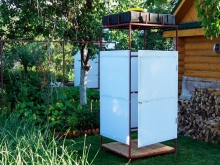
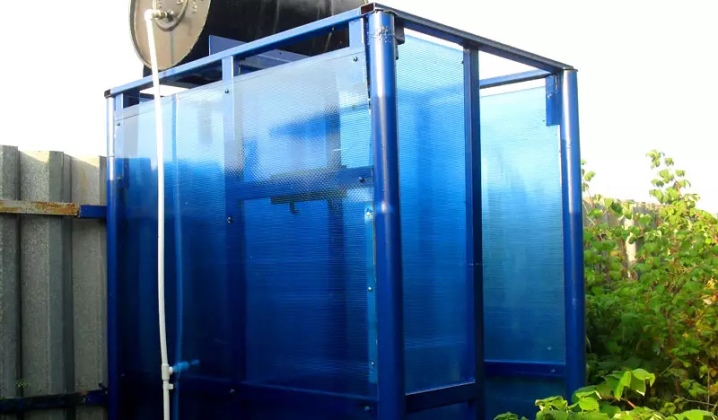
The tank is installed on the roof of the building, this allows it to quickly heat up in the sun. Sometimes it is placed under an additional polycarbonate dome. In this case, heating occurs slowly, but it also cools down longer.
For interior furnishings, it is better to choose shelves of the "corner" type, they are located at the maximum distance from the shower, this will help keep the soap dry.
Towel hooks are also positioned away from the stream of water. The lamp is chosen small and waterproof, the switch is needed for outdoor use, since it will have to be outside the booth.
Here are some ready-made summer shower projects as examples.
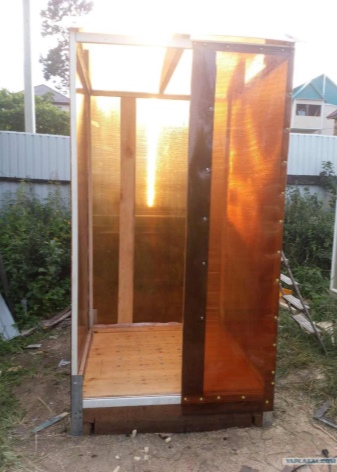
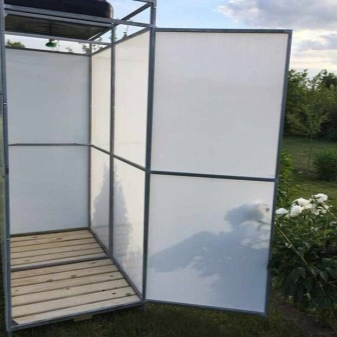
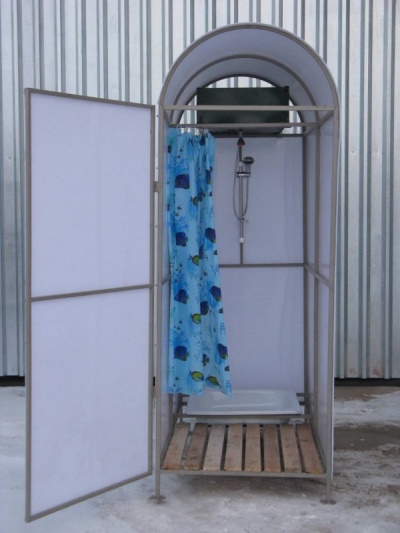
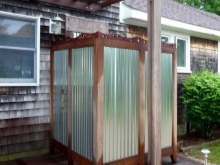
- The simplest shower cubicle on a metal frame with polycarbonate sheathing.
- Sketch of the building, complete with a dressing room. Her floor level is higher than in the shower room. Instead of a dividing wall, an oilcloth curtain is used.
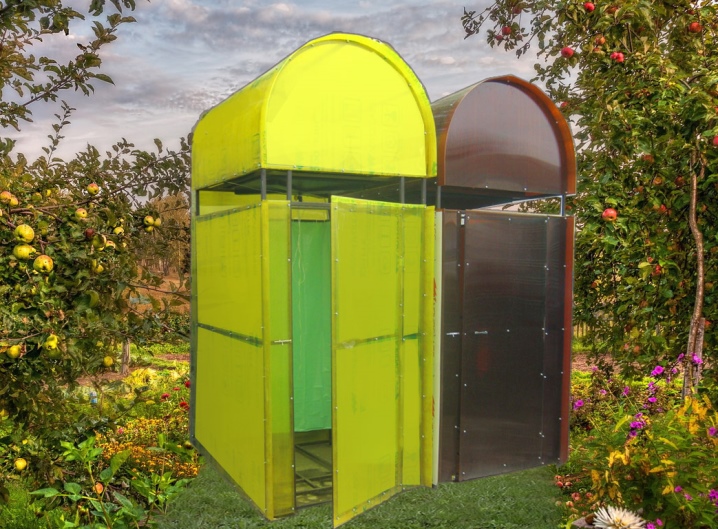
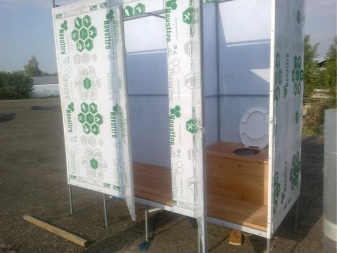
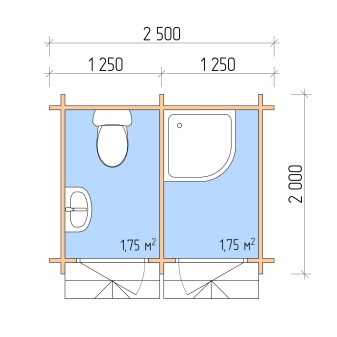
- Shower and toilet in the same building - 2x2.5 m. Separated by an internal partition and have different entrances.
- The 2x3 m building includes a shower, toilet and storage room. The premises are separated from each other and contain independent entrances.

The finished project must be implemented in the correct location. Where it is best possible to ensure the delivery of water and its outflow.
The place should be sunny and hidden from prying eyes.
DIY making
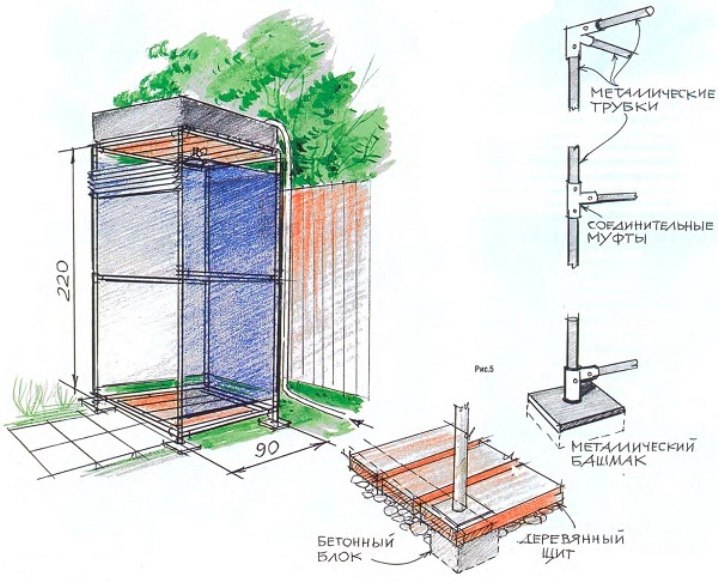
- A place for a shower. It is chosen on a hill, this facilitates the drainage of drains. The site is leveled and markings are applied, according to the drawing. In order not to be mistaken with the parameters, you can use pegs and a rope.
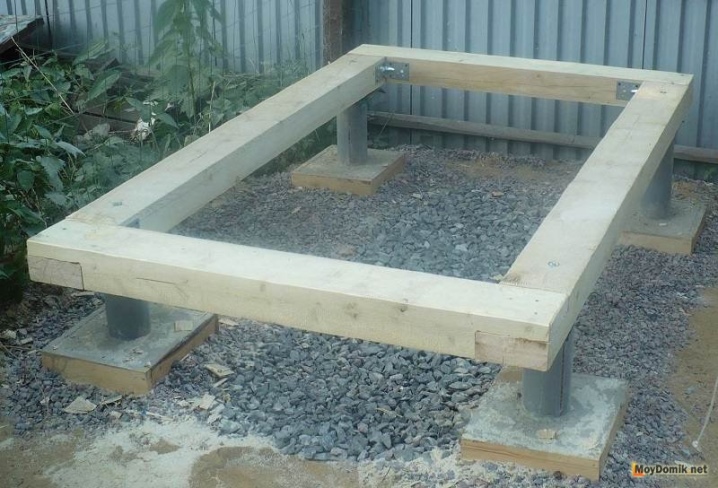
- Foundation and drainage system. Focusing on the markings, they dig a hole by the size of the booth, 30-40 cm deep. A metal profile pipe (4 pieces in total) is driven into each corner.
A layer of sand is poured into the resulting pit and tamped. Install a plastic pipe, directing the outlet upward in the place where the drain hole is supposed to be. On top of the sand, over the entire surface of the pit, a layer of crushed stone is distributed, forming a drainage cushion.
Formwork is erected along the perimeter of the pit from a rough board.
Before pouring concrete, the hole in the pipe bend is securely closed.
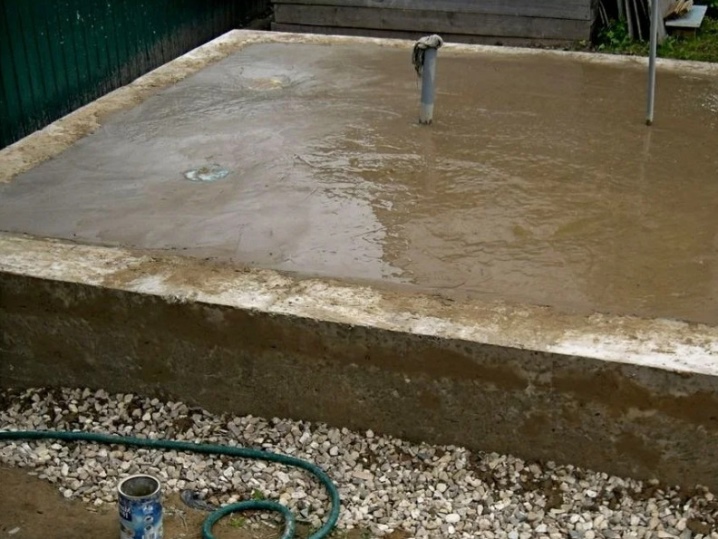
The cement is poured with a slope towards the drain funnel, then the water during the operation of the shower will be easily removed. The formwork is removed after the concrete screed has dried.
The plastic pipe is subsequently connected to the sewer system of the house. Or, with its help, they make a drainage to the drainage pit, which is located to the side of the shower stall. But you can make a hole under the shower itself. For this, a strip foundation is mounted, the foundation pit under the building is deepened to a meter or more. Crushed stone is poured into the bottom, a grate is installed in the shower instead of the floor.

- Frame. It can be made from wooden beams and strips or from a metal profile. But since there are already concreted profile pipes in the corners of the building, it is better to build the frame from metal.
From the bottom and top of the racks, strapping is made, that is, horizontal pipes are welded along the perimeter. Depending on the length of the structure, intermediate elements are mounted to the upper and lower profiles, on which polycarbonate should be attached.
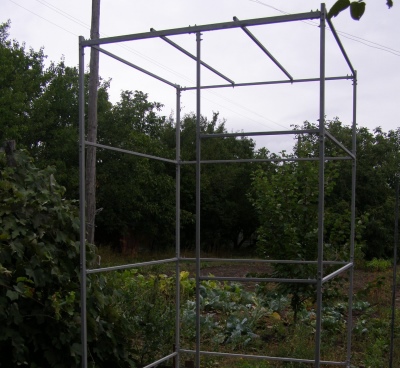
It should be borne in mind that the width of the sheet is 2.1 m, this size can be used to create the walls of the booth.
A pipe is welded to the upper and lower strapping, on which the door is mounted. It is pre-assembled from metal elements and polycarbonate. The width of the product should be 0.7-0.8 m.

- Roof. The roof is made single-pitched or gable. Some owners leave the surface open, instead of a roof, they weld several pipes to install the tank. The building comes out a little cheaper, but is often fouled by rainfall and falling leaves.
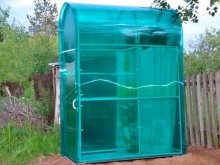
- Sheathing with polycarbonate. Any kind of polycarbonate is suitable for a shower, but if the building is summer, it is enough to purchase a cellular version, it is also durable, but it costs less than a monolithic one.
On the polymer canvas, markings are applied with a felt-tip pen, according to the drawing. Cutting is done with a construction knife or a hacksaw so that the cells in the structure are in a vertical position. Thus, condensate will not accumulate in them and can easily leave the "honeycomb".
The sheets are mounted with the glued film outward. If there are joint seams, gaps of 3 mm are left on them, as the material expands in the sun. At the end of the work, the film is removed, the joints are sealed, plugs are installed on the ends of the sheets.
The shower is ready, it remains to raise the water tank to the roof and do the interior arrangement. A pallet is installed in the booth, connected to the drainage system, a shower is mounted, shelves and a hanger are attached.
How to make a shower from polycarbonate, see the video.


The comment was sent successfully.