How to fix the lining?
Nowadays, the range of finishing materials is very diverse. High-quality and beautiful products can be selected for both outdoor and indoor work. Separately, it is worth highlighting such a popular material as lining. Today we will consider in detail how to fix it correctly.

Peculiarities
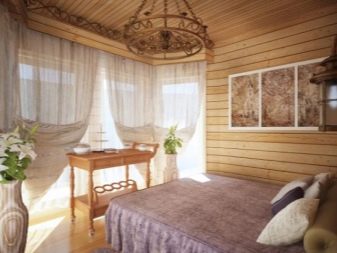
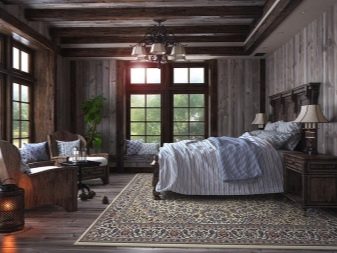
The premises, finished with wooden materials, look incredibly cozy and hospitable. That is why many buyers opt for such design options.
A wide variety of finishes can be used for such an attractive finish., from special wood panels to wood-effect laminate. However, different types of lining are recognized as one of the most popular and demanded. This material is not uncommon - it is easy to find it in specialized stores.
High-quality lining made of wood has an impressive service life. According to manufacturers, such products can serve for 15-20 years without any problems, without losing their original appearance.
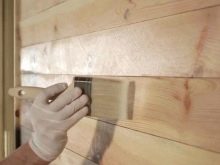
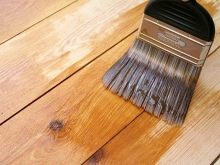
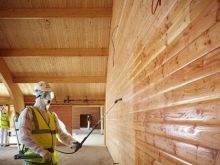
The durability of the lining largely depends on the proper care by the owners of the home. Such coatings should be treated with special antiseptic compounds from time to time. They are necessary to protect natural material from the appearance of fungus or mold. It's no secret that wood is a favorite "dish" of various insects, but with the use of special impregnations, you can forget about such problems.
As a rule, the lining is processed by similar means at the stage of its manufacture. However, over time, the material will still need self-care. Fortunately, many suitable products and varnishes are sold in stores that will provide the lining with excellent protection from negative external factors.

Advantages and disadvantages
Lining is rightfully recognized as one of the most demanded materials. Consumers choose this finish because it has not only a harmonious and natural appearance, but also a number of other positive qualities.
- The main advantage of the lining is its environmental friendliness. Currently, not every finishing material can boast of such quality. The lining does not emit hazardous and harmful substances, even if it is in high temperatures.
- The lining can be given a perfectly smooth and pleasant to the touch surface.

- It is not at all necessary to involve professional finishing teams to install such wood panels. It is quite possible to fasten such materials on your own, following simple instructions.
- Many consumers note the pleasant woody aroma inherent in such finishing materials. Thanks to this property, an indescribable atmosphere is created in the room.
- High-quality lining boasts resistance to mechanical damage and strong impacts. It is not so easy to break or damage it.
- The lining is not a soiled material, however, if dirt appears on its surface, then you will not have to make a lot of effort to remove them.
- It is worth noting the excellent thermal insulation properties of the lining. A room in which such a finish is present will always maintain a comfortable microclimate.
- Also, the lining has soundproofing properties. Thanks to such materials, the audibility of extraneous annoying noises in the room is significantly reduced.
- Under the clapboard, you can hide unpresentable elements such as wires and various communications.
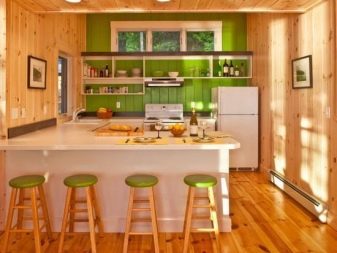
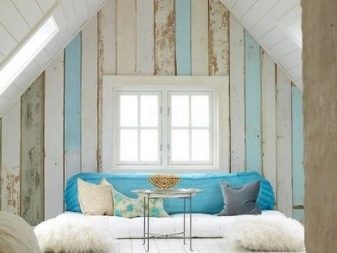
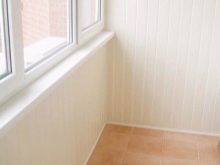
- Such a finish can be used not only in a country or country house, but also in an ordinary city apartment.
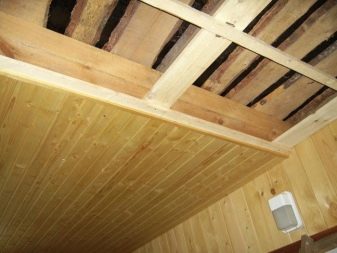
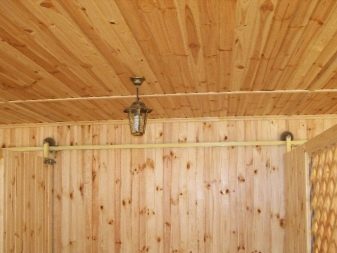
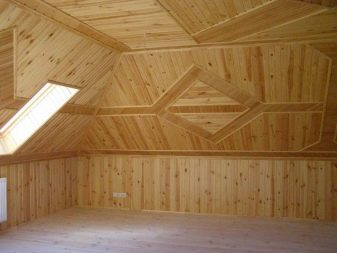
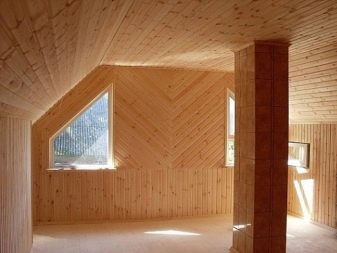
- Clapboard can be used to decorate not only walls, but also the ceiling. Ceilings designed in this way look very aesthetically pleasing and neat.
Of course, the lining has its drawbacks. You should also familiarize yourself with them if you want to refer to this material in the design of your home.
- To install the lining, a frame is often required. Most often, such mounting structures have to be addressed when it comes to finishing the ceiling. Also, you cannot do without a frame if the walls in the room are too uneven and have noticeable differences.
- The disadvantages of the lining include the fact that it is not fireproof. Of course, this quality can be corrected if the material is processed with special means, but even they will not make such raw materials 100% nonflammable.
- Over the years, the lining can change its geometric parameters. Most often, such deformations occur if the owners improperly looked after the finish or installed it incorrectly.
- Lining cannot be called a cheap material. Moreover, many consumers consider it quite expensive.
- It was mentioned above that it is necessary to periodically look after the clapboard, treating it with special protective compounds. Most consumers consider this feature to be a disadvantage.
Views
There are several types of lining. They are made from different materials and have different performance characteristics. Let's consider them in more detail.
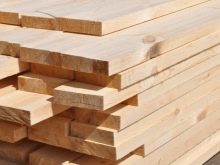
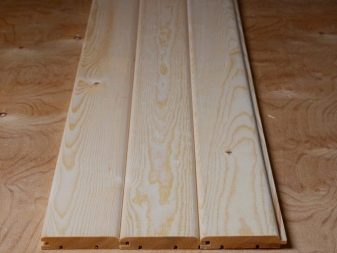
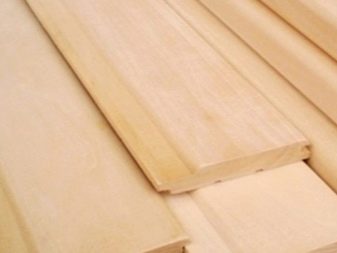
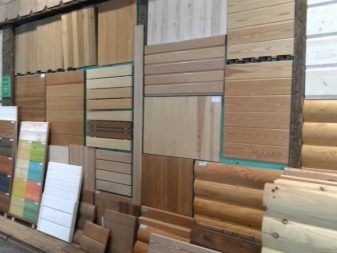
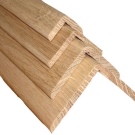
Wooden
The most popular is the lining made of wood.
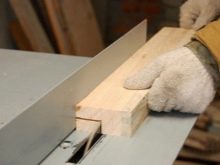
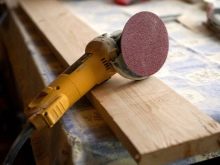
The manufacturing process is quite complex and takes place in several stages. The proper quality of such a finishing material can be achieved by only if you strictly adhere to a certain technology:
- first, the edged board is prepared;
- after that it is dried in a special industrial way;
- further work is carried out on sawing grooves;
- then the wooden lining is carefully polished;
- at the end of all production processes, the resulting panels are always sorted.
The properties of wooden lining largely depend on the type of wood from which it is made.
Aspen
Aspen boards are distinguished by a light shade. There are practically no resins in their composition. Such materials can boast of good thermal insulation characteristics, so they are often used for interior decoration.
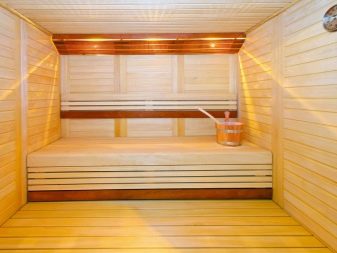
Aspen lining can also be installed in baths or saunas. Of course, in such cases, one must not forget about the high-quality processing of the material so that it does not rot.
From spruce
As a rule, northern spruce is used for the manufacture of lining. It is characterized by a fairly dense and hard wood. Such finishing materials can be used to decorate not only the walls in the dwelling, but also the ceiling.
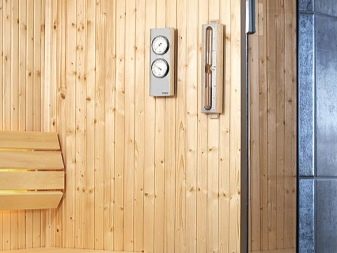
Spruce lining is not afraid of dampness and moisture. However, it should be borne in mind that over time it changes its color and becomes darker.
Pine
Pine lining is one of the most common. It is inexpensive, but it has excellent quality, so many consumers choose it.
Pine lining is distinguished by a beautiful natural structure, which also becomes darker over time.
Oak
Oak lining is expensive, but this does not affect its popularity in any way. Such a finishing material is not subject to decay and is easy to process.
The main advantages of oak lining are its amazing color and structure.With the help of such finishes, you can transform the interior, making it richer and more solid. Experts say that oak lining must be stained and pickled.
Hardwood
Lining made of hardwoods practically does not emit resins and has a low density. Thanks to these characteristics, it can be safely used in the cladding of a bath or sauna.
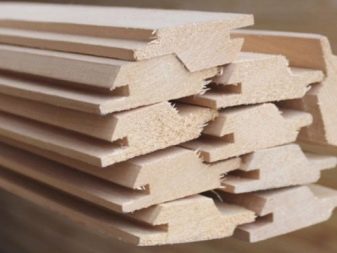
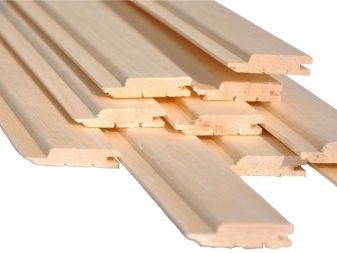
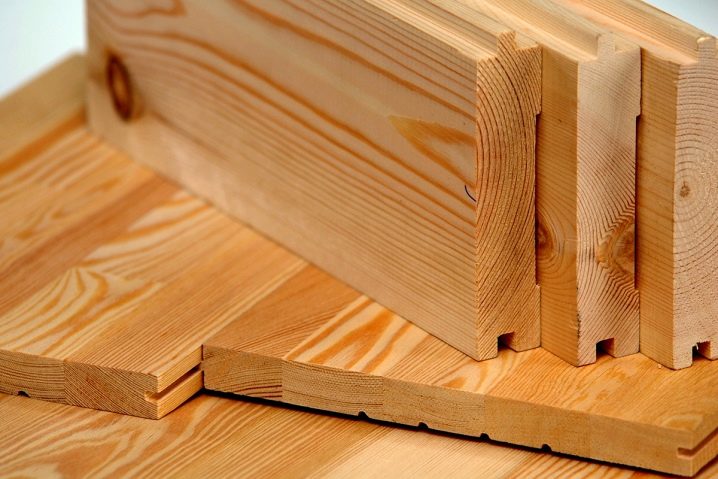
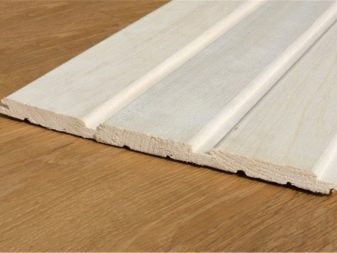
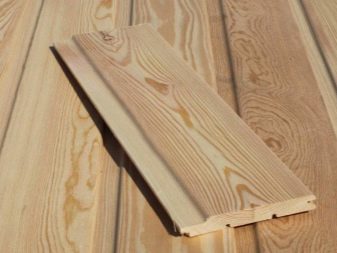
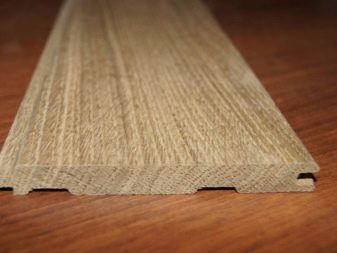
Wooden lining can have different cross sections.
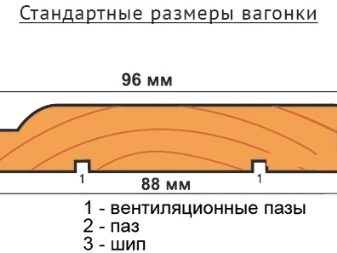
- Standard. Such panels are equipped with a standard tongue-and-groove locking system. As a rule, the tenons in the lining are always slightly shorter than the grooves. This is necessary so that the material does not deform when the wood is strongly dried out. Panels with a standard cross-section have good sound and heat insulation.
- "Calm". Otherwise, panels with such a section are called "collective farmers". They have rounded outer corners. Such materials look very neat and tidy.
- Euro lining. These types of wooden lining have a longer groove, so as a result, the surface takes on a completely different appearance.
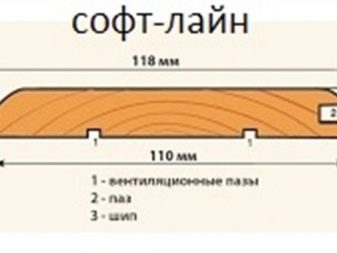
- Softline. Such finishing materials also have rounded bevels and a long groove.
Also, lining made of wood is divided into classes.
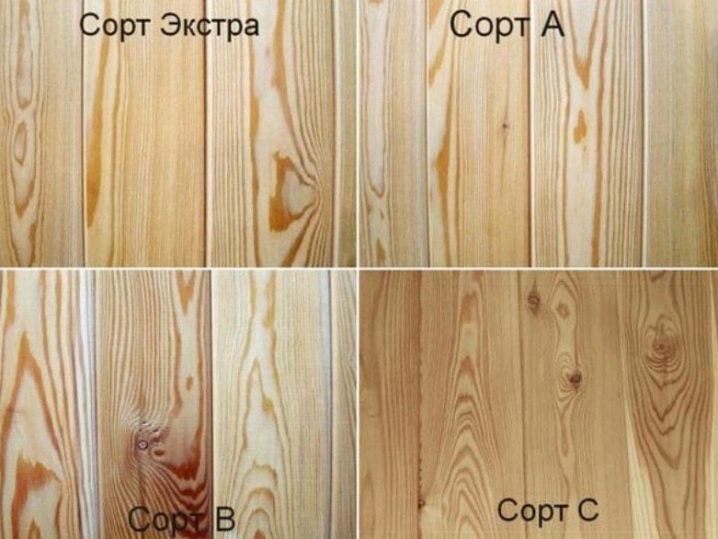
- "A". This class includes high quality panels. Small knots are sometimes visible on their surface, but they do not fall out. Also, on such materials, you can find several small cracks and cracks. Class "A" lining can be safely used for interior decoration.
- "V". Planks of this class have a length of 1.5 m. There can be no more than 3-4 knots on their surface. Also, these types of lining have small resin pockets and blind slits. Experts do not recommend using such materials for interior cladding.
- "WITH". Materials of this class are not of high quality. As a rule, they are used to decorate outbuildings for which design is not so important. In such slats, noticeable knots can fall out, and through slots are often present. Their color is far from the standard.
- "Extra". The "Extra" class lining is an ideal finishing material. There are no defects on the surface of such panels.
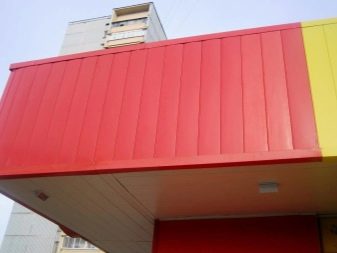
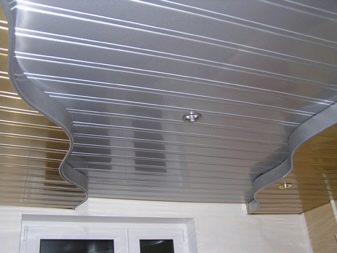
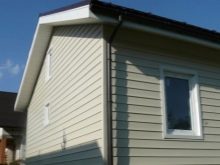
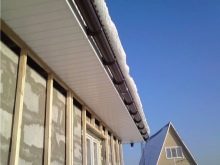
Metal
Instead of wood, you can use metal lining. Most often, such facing materials are used when it is necessary to arrange a base, which is in conditions of high humidity. Such panels are not afraid of negative external influences and protect the base on which they are installed from them.
Many consumers opt for metal lining, as it has an almost unlimited service life. She does not require complex and regular care, which speaks of her unpretentiousness.
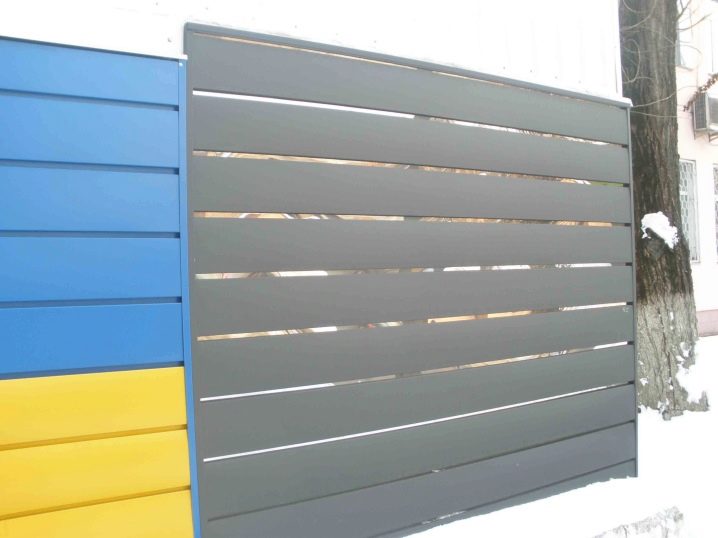
The good thing about metal lining is that it is presented in a very rich color spectrum. In addition, this finishing material can have a different texture.
The advantage of metal panels is that they are non-flammable and do not support combustion. Popular wooden coatings cannot boast of such qualities.
Such materials are also environmentally friendly. They do not contain hazardous compounds that are harmful to human health. You can install the metal lining with your own hands. Moreover, this material can be mounted both on the wall and on the ceiling.
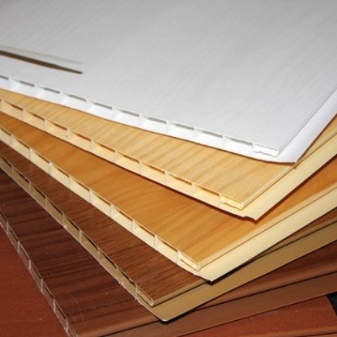
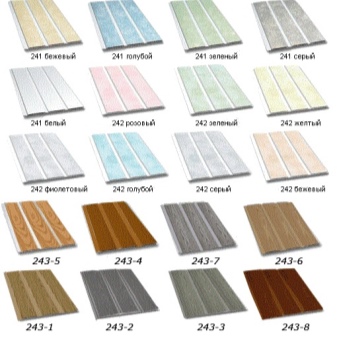
Plastic
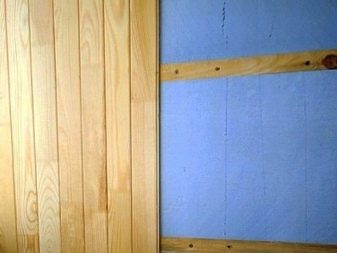
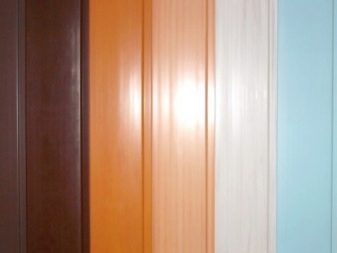
If metal and wood types of lining seem too expensive to you, then you should look for more affordable plastic options. Such coatings are made of polyvinyl chloride. This material is safe for human health, so there is no need to worry about the well-being of household members.
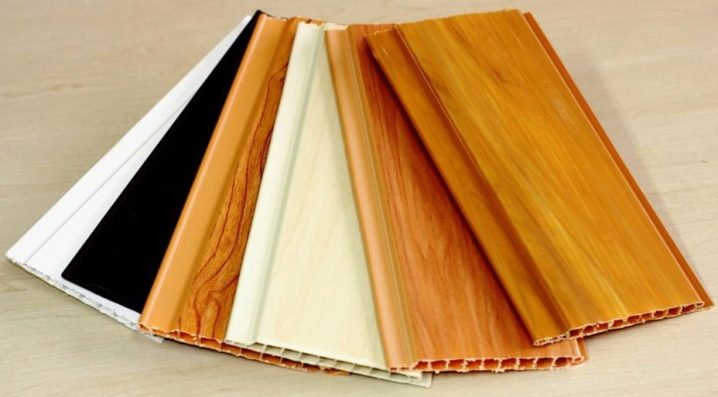
As a rule, the width of PVC lining is 10 cm. Wooden elements have similar parameters. In addition, plastic panels can be used not only for the interior, but also for the exterior decoration of the home.
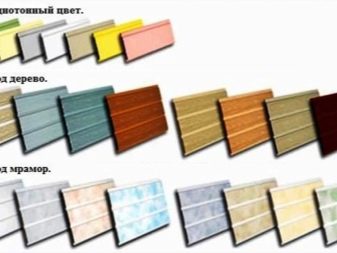
Plastic lining is not only monochromatic, but also multicolored. In some stores, you can find more original materials with interesting prints or patterns. Panels imitating natural wood are especially popular today.

For exterior decoration, it is recommended to use a special frost-resistant lining. For its manufacture, special plastic is used, supplemented with the necessary additives. Such a finishing material easily tolerates both low and high temperatures.
Plastic lining for outdoor use cannot boast of such a wide selection of different colors. Here, as a rule, monochrome options are used in soothing tones, as well as wood-like coatings.
The advantages of PVC lining include:
- heat and sound insulation properties;
- fire safety;
- resistance to high temperatures;
- non-susceptibility to mechanical damage;
- moisture permeability;
- light weight;
- democratic cost (especially when compared with natural wooden materials);
- unpretentiousness.
Plastic clapboard does not need to be regularly looked after using expensive means. In addition, dirt and dust are very easily removed from it.
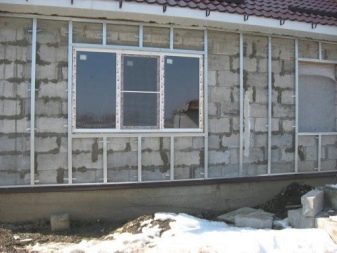
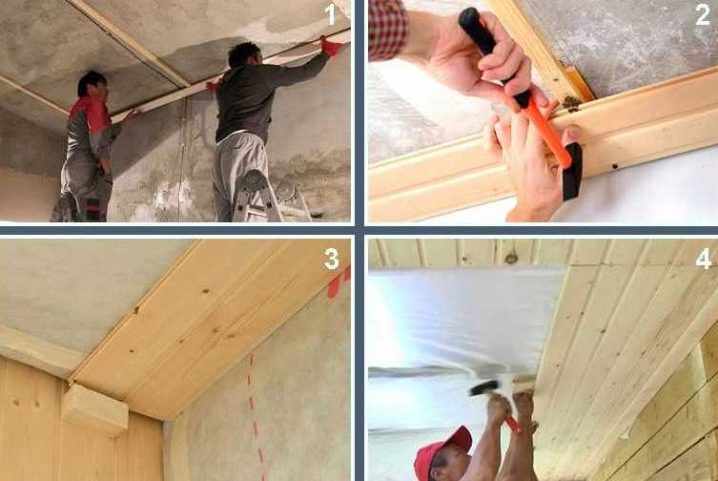
Preparing the walls
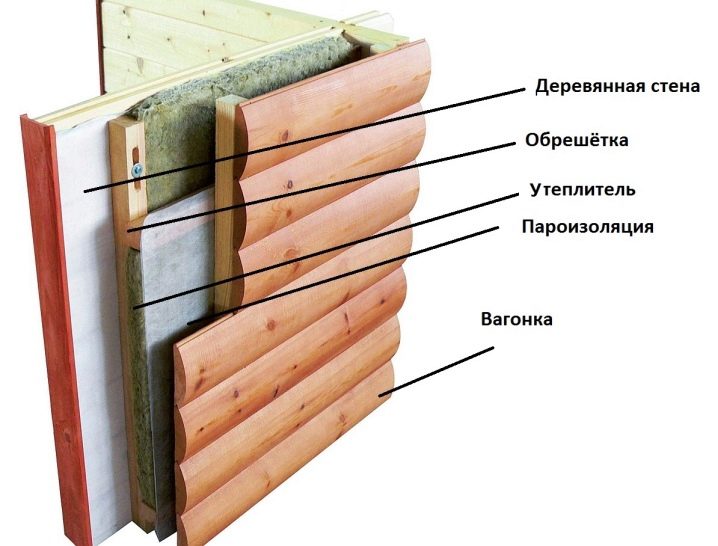
Before installing the lining (especially if it is wooden), it is necessary to properly prepare the walls. After purchase, the lining itself should be placed in a dry room for at least a day. There it must settle and adapt to room temperature. Only then can you start cutting the finishing material to give it the desired length. If you neglect this stage of work, then the panels will not be tightly attached to each other.
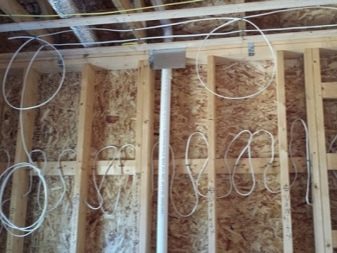
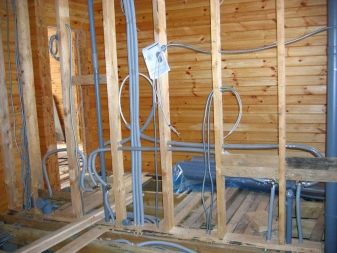
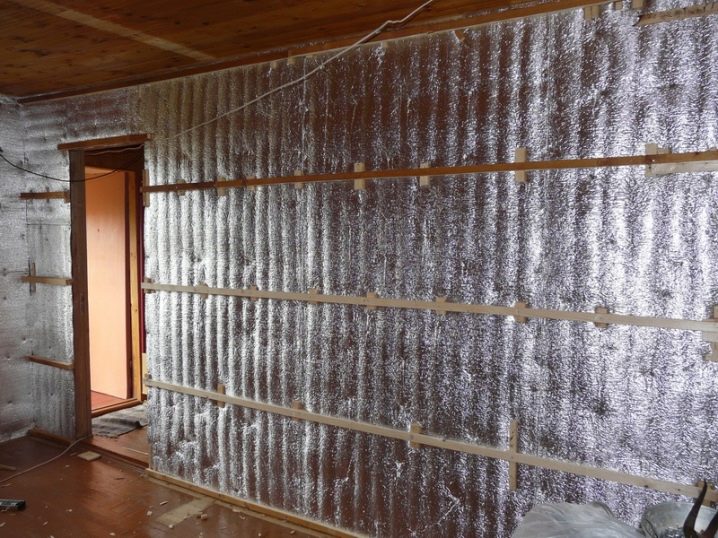
As for the walls themselves, they will need to provide good vapor barrier. To do this, you first need to nail the slats onto them. Their width should not be less than 3 cm. These elements must be nailed in increments of 1 m. Then you need to take a film of polyethylene, foil or roofing material and install it on the fixed slats. Small holes should be made at the top and bottom of the vapor barrier to ensure better ventilation.
This stage cannot be called strictly mandatory, but experts recommend using it when it comes to a room with a high level of humidity from the outside.
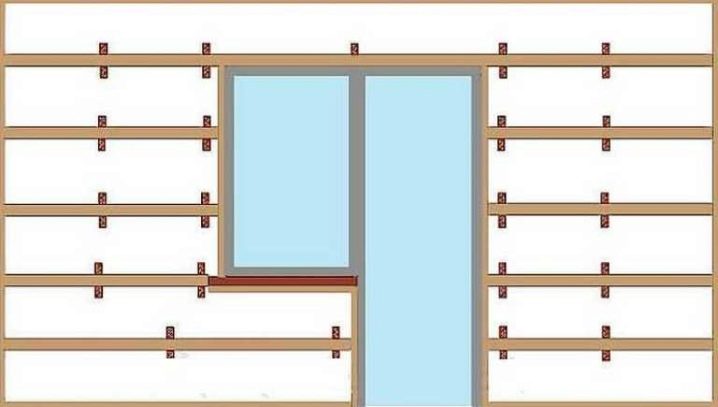
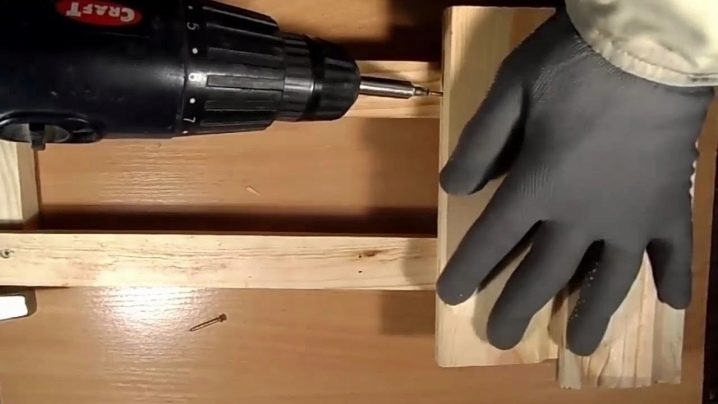
Next, you need to build a high-quality crate for wooden slats. Slats with a section of 20x40 cm must be screwed with a screwdriver. Observe a step of 40-50 cm (horizontally). Always check that all parts are correctly installed using the mounting level.
With the help of slats, you can qualitatively level the wall before installing the lining. This way the boards will be much easier to attach to the base. In addition, such a frame should also be assembled so that the gap between the ceiling and the wood trim is ventilated.
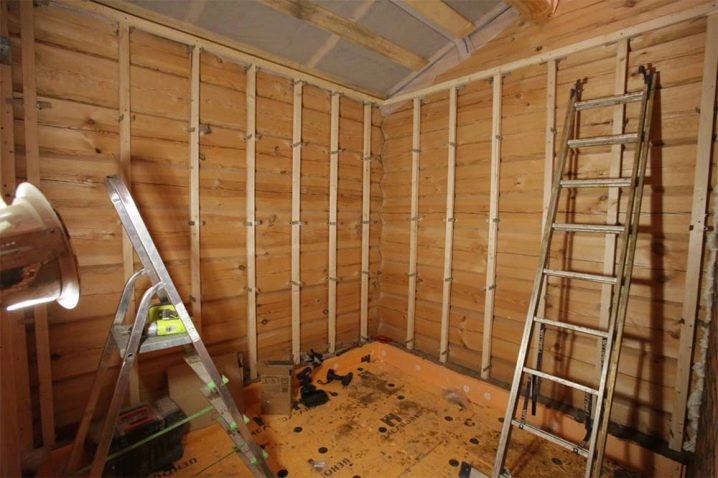
If the walls do not have a flat surface, then something must additionally be laid under the crate. You can also build thicker battens. A plywood sheet, block of wood, or a mounting wedge is best for the backing. The lathing should be fixed with long self-tapping screws and dowel nails. The lower slats should recede 5 cm from the floor, since there will be a plinth in this area. The same indentation should be adhered to in the upper part of the structure, since there will also be a plinth, but already a ceiling one.
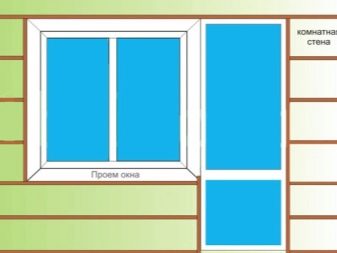
The lathing must be mounted around door or window openings. Such structures are made not only from wood, but also from metal or plastic.
If you did not install a vapor barrier on the base, then the crate should be mounted directly to the wall. If it is present:
- if the slats to which the vapor barrier was attached were fixed vertically, then the details of the crate should be installed horizontally and vice versa;
- fastening the battens to the slats on which the vapor barrier layer lies must be done with long self-tapping screws.
Insulation should be laid in the appeared "windows". Experts recommend purchasing mineral wool for this. The insulation should be fixed with polypropylene spar so that it does not shrink over time.
Another layer of vapor barrier can be laid on the insulation. It should be attached with the rough side to the insulating layer.
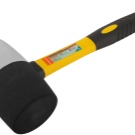
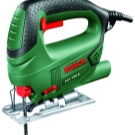
Instruments
For the installation of the frame and wall cladding, you must have the following devices:
- screwdriver;
- perforator with the necessary attachments;
- building level;
- hammer;
- mallet;
- jigsaw;
- electric stapler;
- wooden corners;
- self-tapping screws;
- assembly gun;
- nails;
- profile (for the frame);
- staples.


Mounting methods
In total, there are two main options for fastening the lining. They differ from each other in directions. Let's consider them in more detail.
Vertical
The vertical fastening of the lining is done in this way:
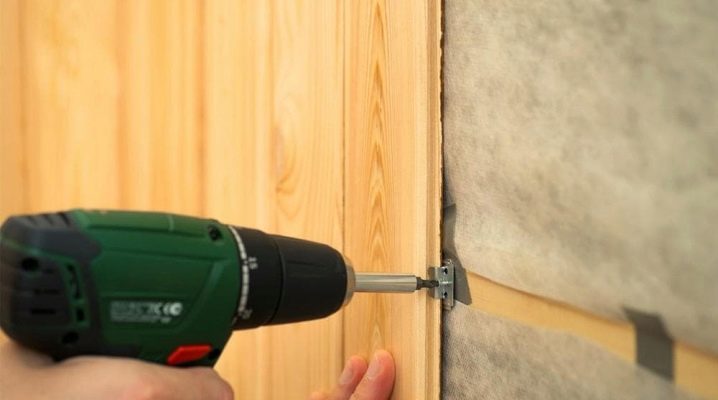
- The starting part is installed in the corner. To do this, use nails, which are then hidden under a decorative corner. If you do not have this item, then you can simply "bite off" the hats with side cutters. Drive in nails as carefully and carefully as possible.
- Always check if you are vertically laying the lining correctly - any errors can lead to the fact that the next lamellas will bend more and more.
- The fixed part must be attached with clamps. After that, you can proceed to the installation of the remaining lamellas. However, they must first be inserted into the grooves, and only then fastened.
- Every 5 elements, it is necessary to check the evenness of the surface using a level and a plumb line.
- The final lamella must be filed to the required dimensions.

Horizontal
To lay the lining in a horizontal way, the following rules should be observed:
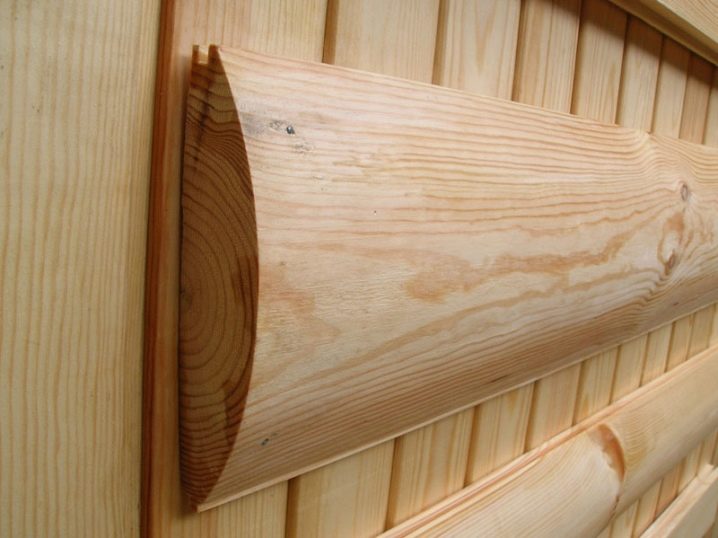
- In this case, the lamellas must be fixed starting from the ceiling. The groove should point downward. If the finish looks like a rounded log, then it should be installed with the groove up to hide the docking points.
- The parts should be fastened together according to the same principle as with the vertical installation method. It should be borne in mind that for a more reliable fixation, the boards should be knocked out with dies.
- Gradually descending from top to bottom, it will be much more convenient to fasten all the lamellas with the help of studs. It is very important to hammer them in such a way as not to harm the front side of the lining.
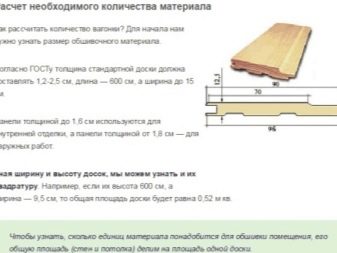
Calculation of the amount of material
When choosing a lining, you need to figure out the amount of finishing material that you need. As a rule, the cost of wooden lamellas is indicated in square meters (less often in cubic meters). However, an elementary mathematical calculation in this case will not work, since the quadrature will be influenced by such parameters as the length of the lamellas, the height of the floors in the house, the dimensions of the door and window openings.
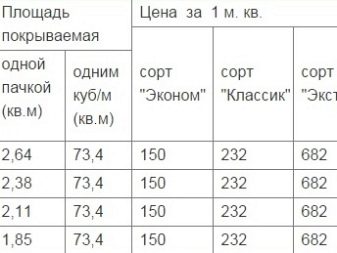
There are two ways to help calculate the number of lining.
- Intuitive. Following this method, you should calculate the perimeter of the surface area that you plan to trim with lamellas. From here you need to calculate the dimensions of the openings. Add 10-30% waste to the result. This calculation method is simple, but not the most accurate.
- Mathematical. This method of calculation is more scrupulous. To do this, you need to count the lamellas one by one, taking into account their length and width, as well as the dimensions of the openings. For the calculation, the surface length parameter should be divided by the lamella width. So you can determine the required number of lining. As a result of all calculations, it will be possible to obtain a fairly accurate value. In this case, no more than 10% can be left for waste.

Tips & Tricks
If you decide to sheathe the walls in the house with clapboard with your own hands, then you some simple recommendations should be followed:
- During installation, make sure that no ugly gaps remain between the lamellas. You can avoid these defects if you constantly monitor the level of material laying.
- When calculating the required amount of material, do not forget about elements such as doors and windows. You need to build a frame around them. Slopes from the lining can also be built with your own hands. The main thing is to adhere to the correct dimensional parameters.
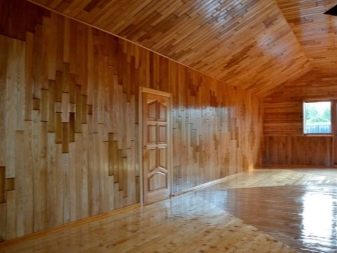
- If you want to freshen up the atmosphere, then you need to form various geometric images on the floors with your own hands. To do this, you need to adhere to several options for the layout of the lamellas at once.
- In winter, it is not recommended to put the lining on the walls. It is better to postpone such work until summer or spring so that the material does not undergo deformation.
- If you have chosen a lining for finishing, which has the shape of a rounded log, then you should install it with the groove up. This is necessary to hide the joining of individual parts.
- Many users are sure that the lining can only be mounted on a metal profile. Of course, such structures can be used, but they are more suitable for those cases when the floors in the room have too strong irregularities and differences.
- The diagonal upholstery of the walls with clapboard looks original. It should be made on a frame in which the racks are located at a closer distance to each other.
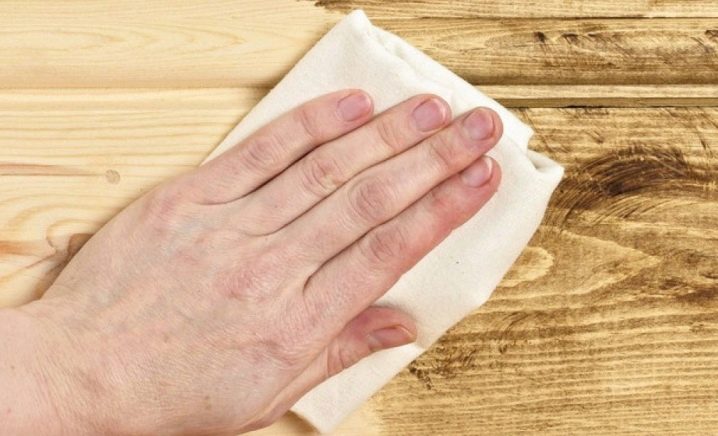
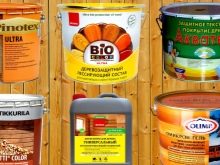
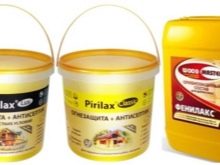
- After installation, the lining will need regular maintenance. To do this, you will need a primer for wood, antiseptic compounds, bio oil, alkyd varnish, antipyrine, which forms a refractory layer and other similar substances. According to experts, the processing of the lining must be done before its direct installation.
- When choosing a suitable material, pay attention to its class, since it is recommended to sheathe living quarters with some slats, and outbuildings with others. Of course, for the interior cladding it is best to use the highest quality materials of the "extra" class.
- Stock up on all the tools you need in advance. Self-tapping screws should be screwed in with a screwdriver, as this will take a minimum of time. However, do not forget to be careful. Work carefully so as not to damage the finishing material.
- In areas with high humidity, the cladding should be laid so that the lamellas do not enter the grooves all the way. Thanks to this technique, the material will not undergo deformation.
- Do not hit the grooves with a hammer. This can lead to serious material deterioration.
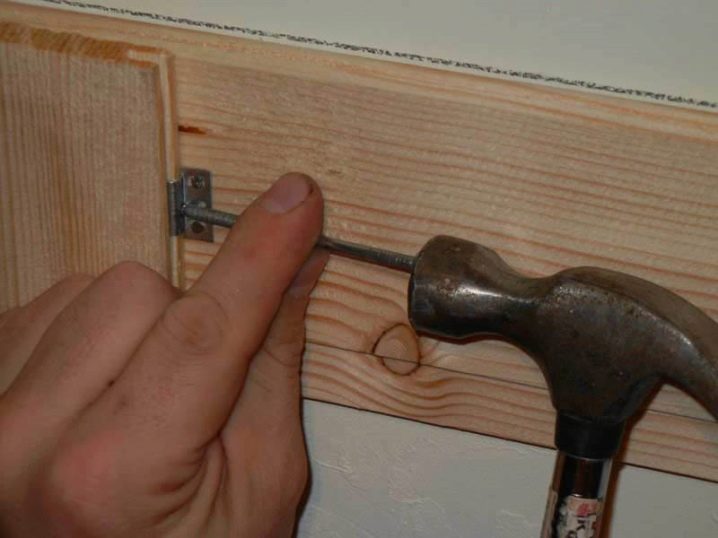
The method of attaching a wooden lining to different types of kleimers is described in the video.


The comment was sent successfully.