How to install a washing machine in the bathroom?
The most commonly used places in apartments for installing washing machines are the kitchen, hallway and bathroom. By purchasing sophisticated equipment, each owner thinks over the installation site and the connection procedure in compliance with all standards. In this article, we will analyze all the basic rules for fixing and installing a washing machine, taking into account all the nuances.
Installation features
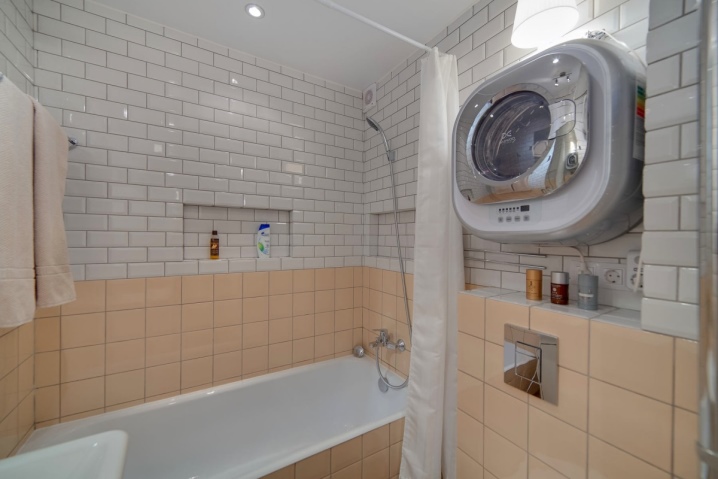
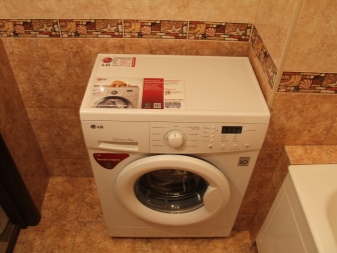
How the washing machine is installed correctly and in what place determines its operation, service life and the safety of the owners. Therefore, before installation, everyone should think over all the subtleties of working with the unit. The standard solution is to install appliances in the bathroom.
Having decided on the installation of the device with your own hands, you need to take into account some rules so that there are no difficulties in the future. Let's consider where to start, and what features of the installation are worth paying attention to.
- The place must be flat and solid... Bases made of wood, linoleum or laminate will not work - in this case, the unit will vibrate strongly during washing and during spinning.
- The technician should stand close to the supplied communications in order to connect the device without problems and loss of time.
- The machine must be installed near the outlet, so that the length of the cord is sufficient to the source of connection. Do not use extension cords due to the danger of electric shock.
- Liquid should be avoided on equipment. The machine is not afraid of high humidity, but the constant ingress of water can damage the unit.
- On automatic machine it is undesirable to install unnecessary items to avoid additional stress that interferes with work.
- A car should not constrain the passage in the bathroom, interfering with the free access of households.
- After placement, the unit must remain free access from different sides.
Seat selection
There are different location options that the owners choose when installing washing machines in the bathroom. Let's consider each of the methods in more detail.
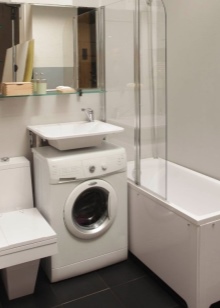
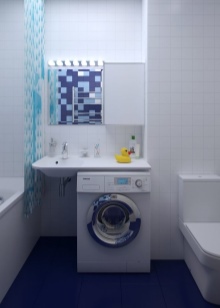
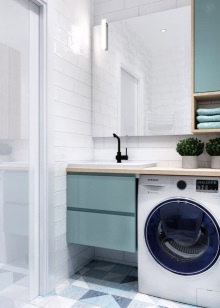
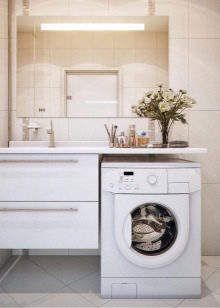
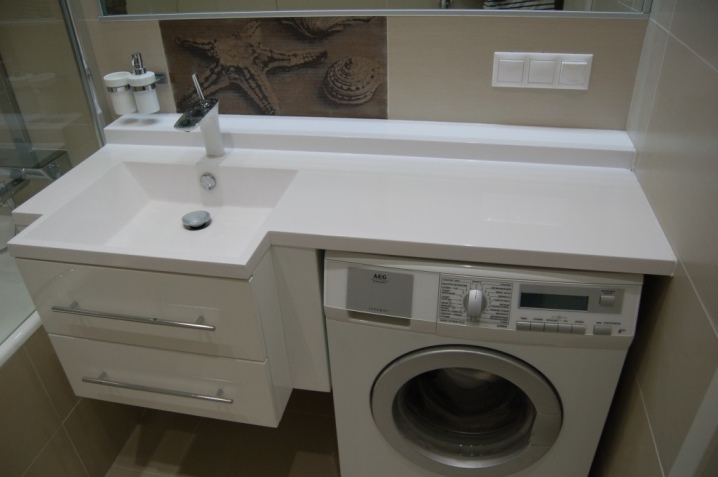
Under the countertop
A variant with many advantages:
- you can put and immediately connect the washing machine to ready-made communications;
- the technique will not look like a separate part, but as a whole with the countertop;
- instead of emptying, the space under the sink will be filled.

Let's highlight the disadvantages of this option:
- the likelihood of water getting from the sink, which can lead to a short circuit;
- due to the low loading hatch, you will have to bend your back when working with equipment;
- large vibration not only of the machine, but also of the tabletop, and everything that is on it.
Of the features of this installation option, it should be noted that the equipment should be purchased smaller in size than the sink (if the device is placed under it), and it is necessary to leave free space up to the wall so that the hoses fit.
The sink should be larger to cover the washing machine, preventing liquid from the sink from spilling onto the appliance.
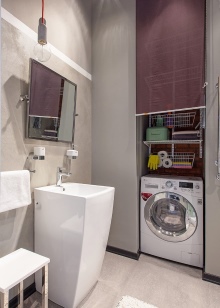
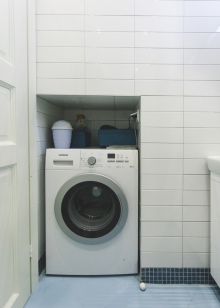
In a niche
In some cases, you have to make a niche in the wall. In all respects, this installation method is the most convenient. The machine is located in the depth, not protruding and not taking up a passageway. The depression can be either open or closed. In the second option, the technique will not be visible. To close a niche, use:
- roller shutters;
- swing doors;
- roller blinds;
- fabric curtains;
- blinds.
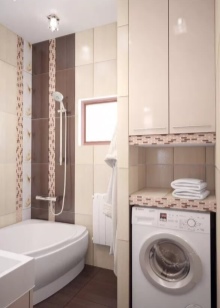
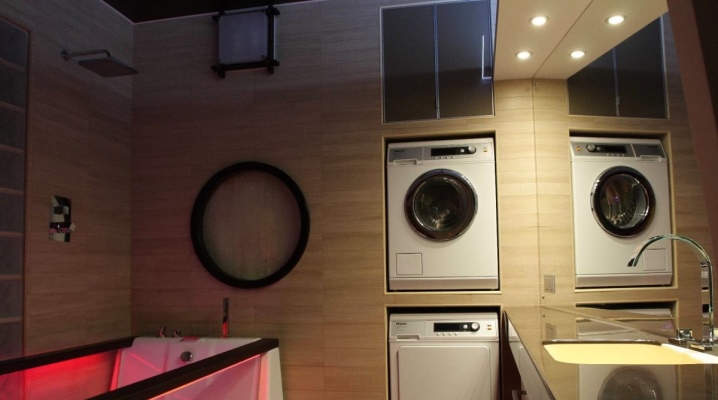
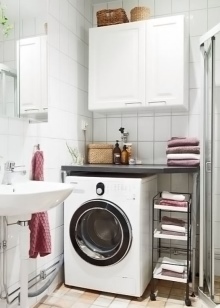
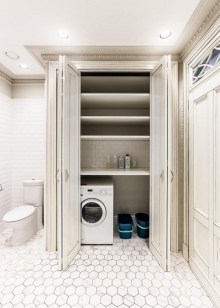
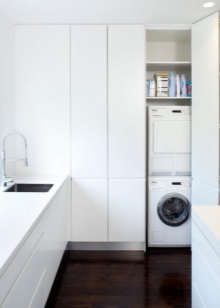
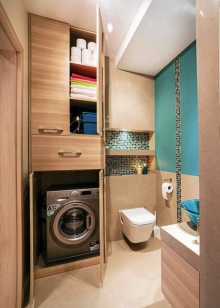
In the closet
In this case, a volumetric cabinet is built from floor to ceiling. A machine is installed in the lower part, and a place for storing household goods is equipped at the top. This is a kind of "pantry". This option can be both open and closed.
On the wall
An unusual way to install a typewriter in the bathroom. It is used in the absence of other places. Before installing the equipment, it is necessary to thoroughly prepare the wall using high-strength materials. With the correct placement, there will be no need to be afraid of the machine falling.
The disadvantage is the limited choice of models (only a machine with a small tank will do).
Preparation
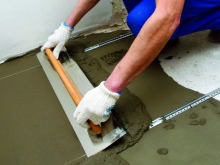
Before connecting the machine to communications, you should prepare a place. Strict requirements are imposed on the preparatory work.
- After determining the location, it is necessary examine walls and floors for evenness, hardness and dryness... Damp baffles can accelerate the corrosion of metal parts of the device.
- The floors and walls of the premises should be checked for damage, unevenness, and mold. If the latter is found, the seams must be treated with antifungal drugs.
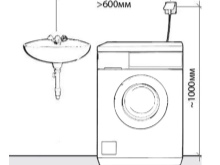
- Having decided on the method of connecting the machine to the water supply and sewerage system, it is necessary measure the length of the hoses... The parameters must be precise so that the technique falls into a clearly marked place.
- Pay attention to the electrical connection point. The socket for the machine must be grounded and protected from moisture, for which it is necessary to install a three-phase 16 Ampere device.
- It is necessary to connect the node using a circuit breaker directly to the panel... For safety reasons, it is advisable to use a voltage stabilizer.
- Freestanding types of machines cannot be built into furniture sets... The body of the equipment should not come into contact with other objects and devices.
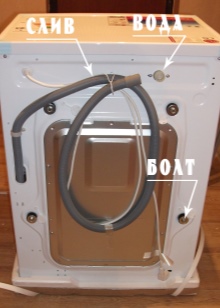
- The purchased goods are transported packed to the destination. To avoid damage during transportation, all rotating elements are tightened with fasteners (bolts, bars and brackets).
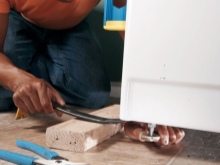
After unpacking, in preparation for installation, remove all fasteners:
- from the back of the equipment, brackets are dismantled, designed for rigid fixation of elements during delivery;
- slightly tilting the equipment forward, the bars are removed between the tank and the body, intended for attaching the drum;
- the bolts on the front of the model are twisted, and plastic plugs are installed in the empty holes.
All removed fasteners should be folded in one package and stored in a safe place in case they are transported to a workshop for repair.
Plumbing connection
You can perform the operation yourself in several ways. Everything here will depend on the skill of the installer. First, you need to examine the communications to which the connection will be made. If a problem is found, replace it before installing the equipment. Consider the options for connecting the machine to the water supply.
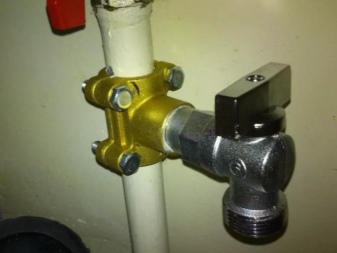
To a metal pipe
With this method, an insert should be made into the water pipe. To carry out work in this case, you will need a mortise clamp or crimp sleeve. In the upper part of the product there is a threaded hole where the water intake hose will be screwed.
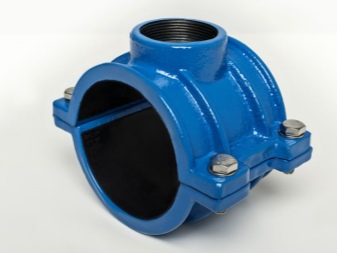
In conjunction with the clutch, you can see a guide sleeve and a rectangular rubber gasket. The insert is made like this:
- turn off all taps related to the mixer, then the main valve that stops the water supply;
- clean and polish to smoothness the surface of the communications, where the gasket will be placed;
- insert the guide sleeve into the clamp and fix it in the groove of the rubber gasket;
- put the clamp on the water pipe using 4 bolts, tighten, alternating each of them, achieving a tight gum clamp;
- make a hole in the pipe using a drill and drill with a diameter of 6 to 8 mm.
After the liquid has drained, you need to clean the hole from metal chips. Next, you need to install a new tap, then check the system for leaks.
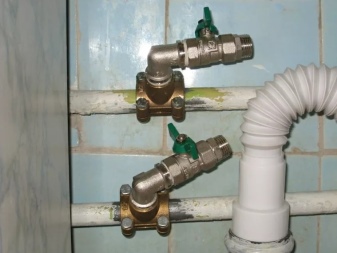
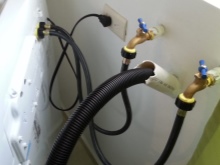
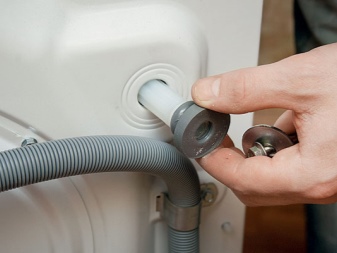
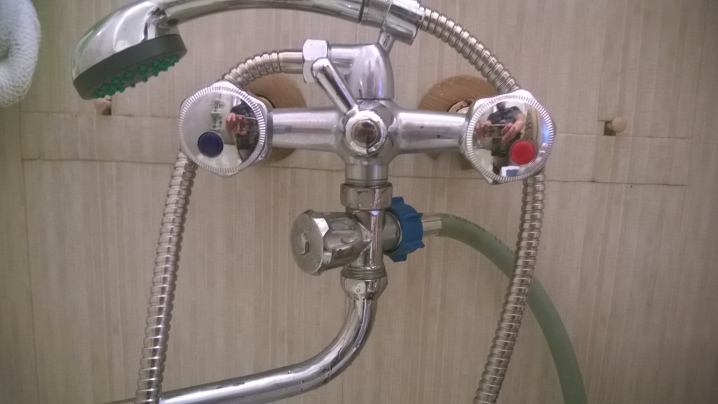
To the mixer
This option requires the installation of an individual tap between the mixer and the adapter, which is complete with a hose extension for hot water. You can connect to the mixer within a few minutes. This requires:
- unscrew the hose used to supply cold water;
- screw the tap onto the tee-shaped adapter;
- insert the mixer hose into one of the holes, and the machine's inlet hose into the other.
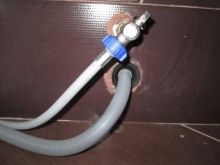
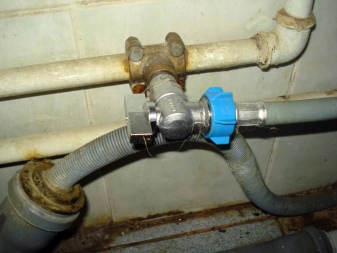
For bends
Most economical method. It is not much different from the previous one. Here the order is:
- it is necessary to turn off the taps, stopping the water supply;
- unscrew the valve supplying liquid to the tank;
- screw on a 1/2 by ¾ "faucet that will regulate the flow of water to the equipment.
The rest of the installation steps are identical to the previous method.
Organization of drainage
Having familiarized ourselves with the connection methods, we will figure out the drain options.
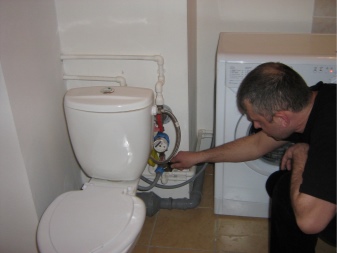
To the plumbing
A cheap and not laborious way, because the drain hose is already included with the equipment. Here it is necessary that the device is located next to the toilet. During the operation of the technique, the hose is fixed to the rim of the toilet bowl, where the used liquid will go.
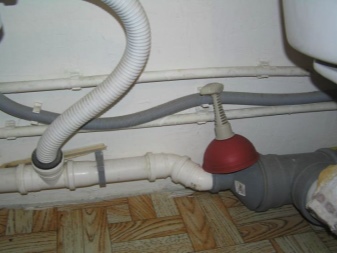
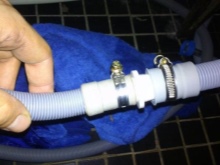
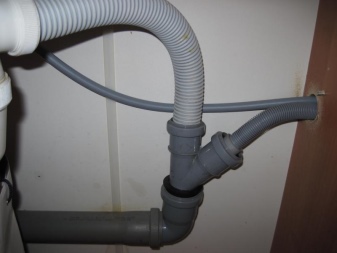
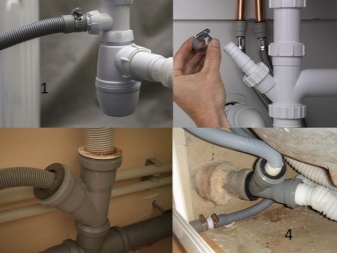
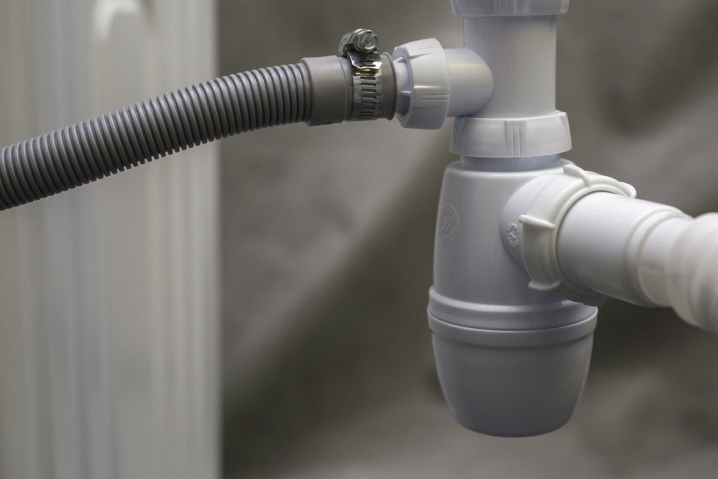
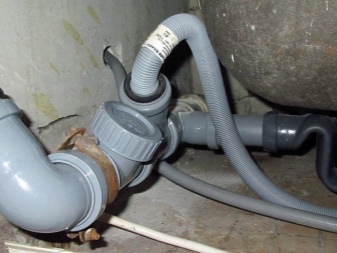
Through a siphon
You can use 2 types of connection - to the drain with an attached siphon and directly to the siphon.
The procedure is as follows:
- it is necessary to choose the angle of the tee, taking into account the type of drain;
- install a rubber ring inside the pipe to secure the hose tightly;
- insert the end of the drain hose into the outlet, pushing and twisting, additionally you can tighten it with a clamp.
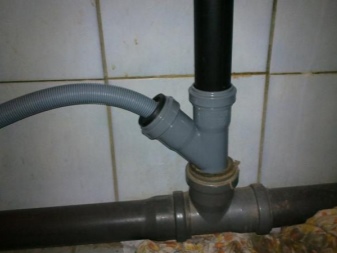
Down the drain
This method is more time consuming, but reliable. It is carried out in accordance with what kind of piping is available. The sequence of actions is as follows:
- all connected spare parts must be removed from the outlet pipe;
- inside it is required to install a rubber ring with a diameter of 75 by 50 mm;
- insert a tee 50 mm in diameter into the recess with reduction;
- connect to one of the taps the part that was originally installed;
- a rubber ring with a recess for the drain hose must be inserted into the second branch;
- insert the hose into the finished hole and secure.
Electricity supply
Before connecting the device, you should study the safety precautions and follow all the rules. It is advisable to exclude additional carryings by choosing individual wiring. The socket must be 3-phase (it must be grounded), connected directly to the panel with the presence of an automatic switch.
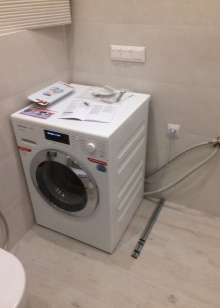
Machine installation rules
Consider the rules for mounting a typewriter.
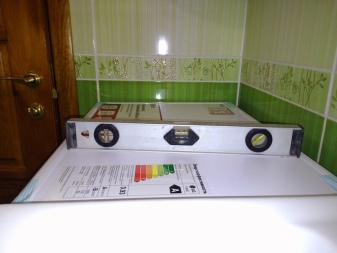
- After unpacking, you need to install the equipment in the allocated place. A level should be applied to the surface to check and adjust the level position. If unevenness is detected, the legs should be adjusted. Do not place the typewriter tightly against the wall and other objects located on the sides. A small gap should be left.
- To facilitate connection to communications, the unit should be pushed forward.
- Having chosen the connection method, it is necessary to install the hoses for draining and drawing water.
- To avoid kinks, it is recommended to tuck the drain hose into the recess on the rear wall.
After the entire procedure, the technique should be pushed back to its original position and adjusted in level.

Trial run
Trial testing should be carried out without using laundry - you only need water and detergent. The check begins with turning on the intake of liquid into the machine's tank. It is necessary to control the filling of the drum to the desired mark within a certain time. If during the test there were no leaks in the system, you can continue testing. The water should be heated for 5-7 minutes.
During normal operation of the unit, further check the rest of the functionality. After testing, check all joints and surrounding flooring for dryness.
Expert advice
Having made the decision to install a washing machine in the bathroom, you need to take into account the recommendations of the experts:
- the future place for the equipment must be flawlessly even and durable;
- the sewerage system, water supply system and the outlet should be located close to the unit;
- there should be no interference when opening the door or cover of the machine;
- it is not necessary to allow excess moisture in the room with the equipment.
From the above, the following conclusion should be drawn: subject to all the rules and regulations for installation and connection, the automatic machine will serve for a long time, without requiring repair.
How to connect the washing machine to the bathroom faucet, see below.


The comment was sent successfully.