How to disassemble a LG washing machine?
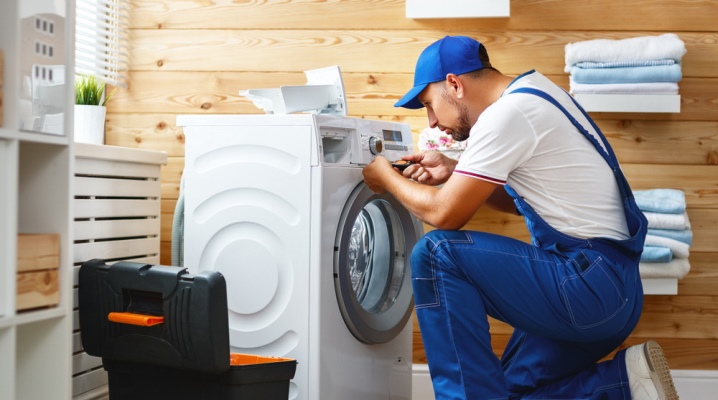
When the washing machine stops working or displays a fault code on the screen, then in order to return to working condition it must be disassembled and the cause of the breakdown eliminated. How to properly and quickly disassemble the LG washing machine, we will consider in this article.

Preparation
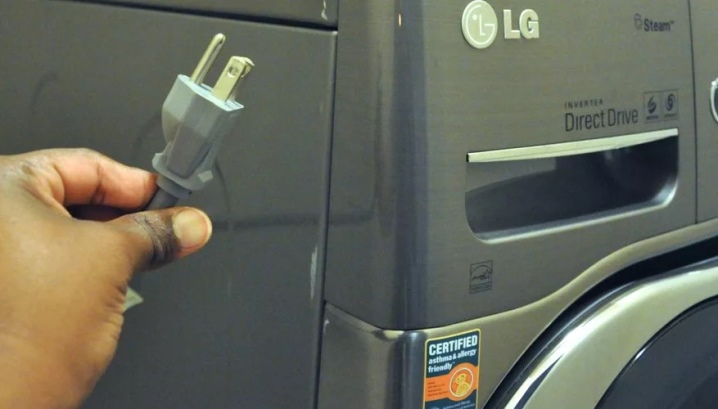
Before starting any repair work, the unit must be disconnected from the power supply. This will prevent accidental electric shock and damage to the electrical part during repairs.
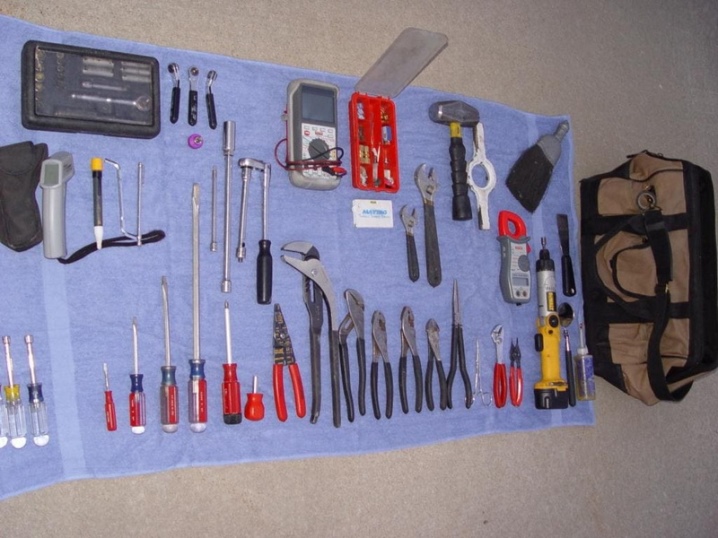
The next step is to prepare the necessary set of tools so as not to look for the required key or screwdriver during the working process. And when disassembling the washing machine you will need:
- Phillips and flathead screwdrivers;
- pliers and round nose pliers;
- side cutters or wire cutters;
- hammer;
- set of open-end wrenches;
- set of heads.
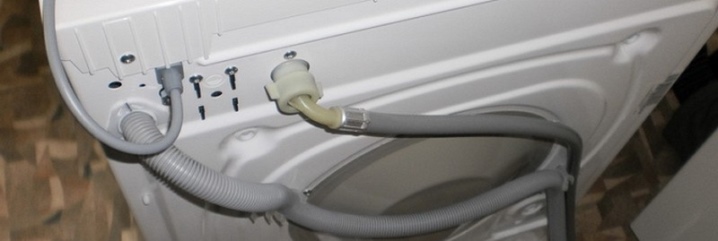
The next step is to disconnect the water supply hose from the unit. Very often, when self-repairing, water is forgotten, and after partial disassembly, unwanted splashing occurs with its further ingress on the control board of the washing machine. This can damage the board.
Modern washing machines differ from each other in modes, programs, button arrangement, but their internal parts are almost the same, so the principle of disassembling LG machines can be very similar to disassembling any other similar device.
If the process of disassembling a washing machine is an automatic machine for the first time in your life, then a good hint when reassembling will be photographs taken in the course of how you disassembled the equipment. So you can see exactly how it was and put everything back together.
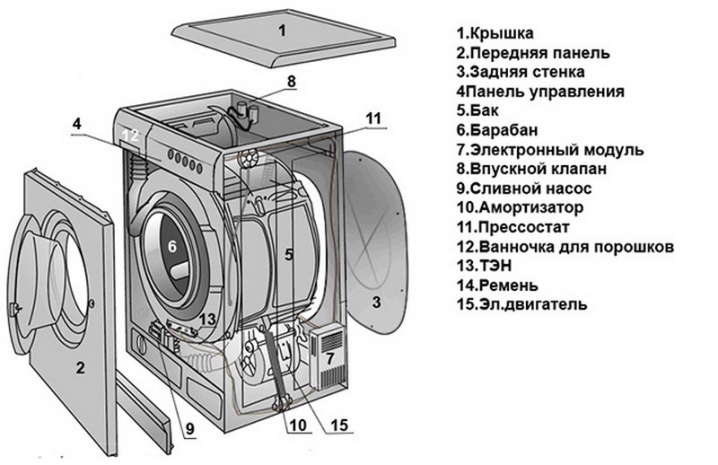
Washing machine device diagram
The next step is to familiarize yourself with the diagram of the machine. It is best to use the instructions that come with the equipment itself. If it has been lost over the years, almost any scheme of a washing machine of an automatic machine of that time (like yours or approximately) will suit you, since they are structurally all the same, and it is quite easy to understand what and where is located.
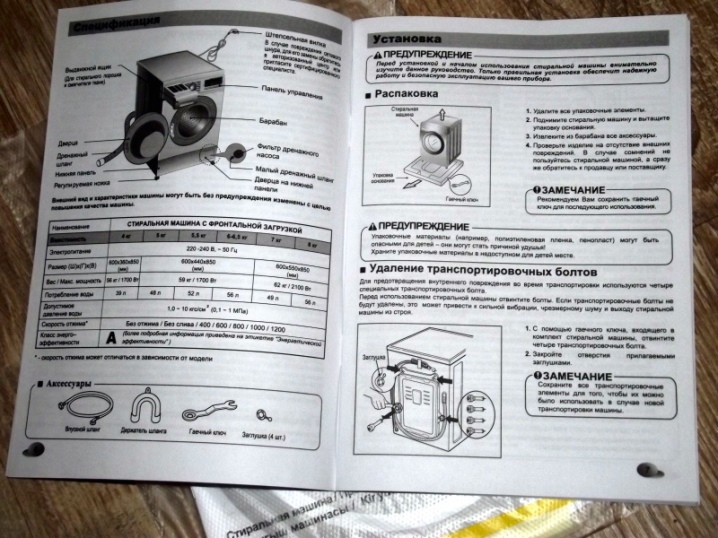
The washing machine consists of the following parts:
- top cover;
- block of solenoid valves;
- automatic regulator;
- detergent dispenser;
- drum;
- drum suspensions;
- electric motor;
- water heater;
- drain pump;
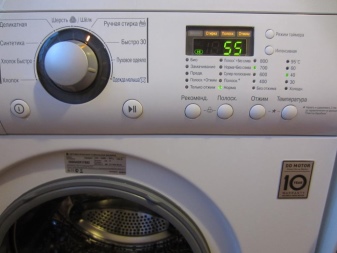
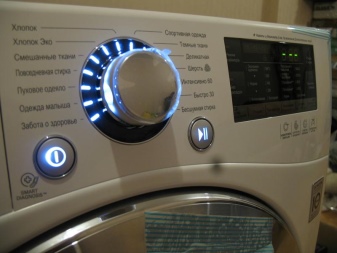
- control keys;
- loading hatch;
- sealing gum of the loading hatch.
Step-by-step instructions for parsing the machine
After all the preparatory steps and familiarization with the diagram, you can proceed to the analysis itself. Once again, we make sure that all communications are disconnected (electricity, water, drain), and only after that we start working.
Frame
In general, the process of disassembling a washing machine can be conditionally divided into 2 types:
- parsing into constituent elements (aggregates);
- full analysis of all mechanisms.
But the second method is more complicated, and without special knowledge, it is unlikely that it will be possible to find the cause of the breakdown.
It is not difficult to disassemble the car into units - you just need to adhere to a certain sequence.
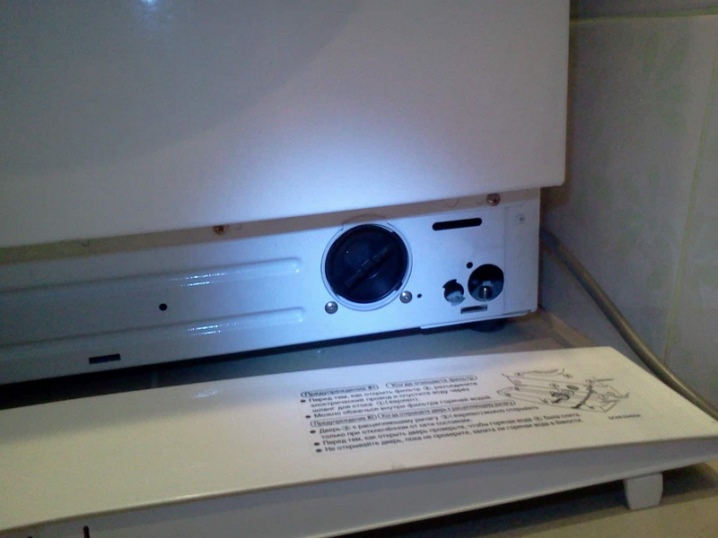
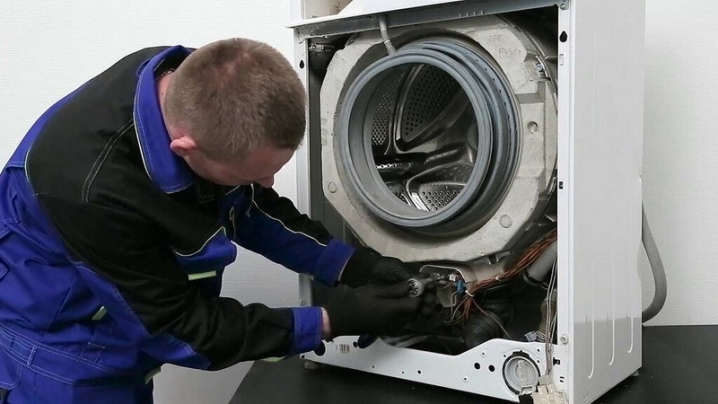
- First you need to remove the cover. There are 2 screws on the back of the machine. By unscrewing them with a screwdriver, the cover can be easily removed. You have to remove this part from the washing machine when installing it in a kitchen set.
- The bottom panel. It covers the dirt filter and the emergency drain hose, so the manufacturer has provided the ability to easily remove it.This panel is secured with 3 clips, which are manually separated by pressing on the sides and its upper part. As a result, it can be easily opened. Newer models may have 1 additional screw.
- Next, you need to remove the cassette distributing detergents. Inside there is a button made of plastic. When you press it, the cassette is easily removed, you just need to pull a little towards yourself.
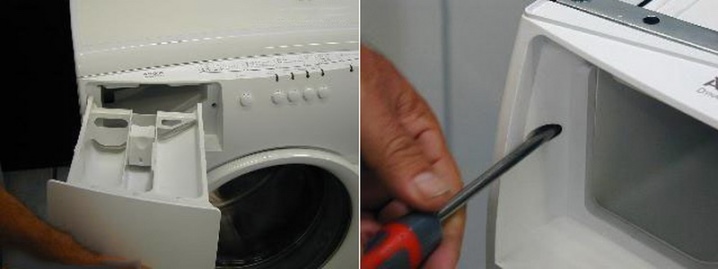
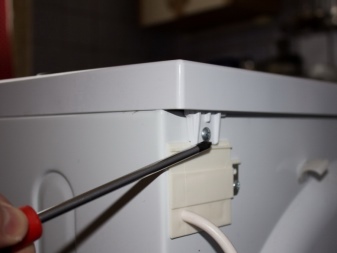
- Upper control panel. Just below the powder cassette is the first screw that secures this panel. The second should be on the other side of the panel at the top of it. After removing the fasteners, the panel is removed by pulling it towards you. The control module is located at the back of the panel. Temporarily, so that it does not interfere, it can be placed on top of the machine.
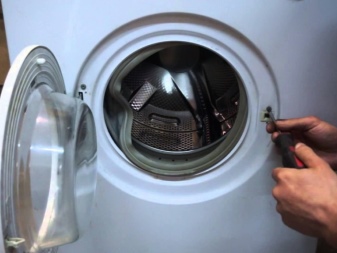
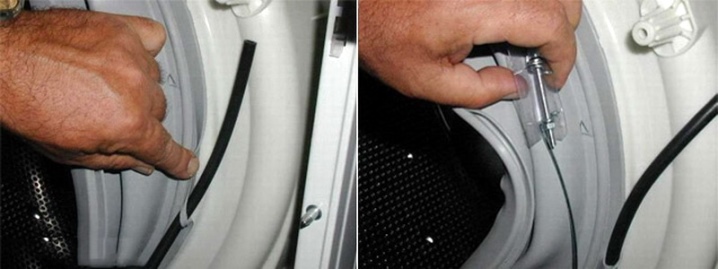
- In some cases it may be necessary to remove the rubber O-ring from the front wall. There is a connection point on its cuff. This is usually a small spring that you need to pry on. Then you can pull it back and gently start to remove the clamp in a circle. The cuff must be tucked inward. To remove the clamp, you may need to use round nose pliers or pliers (depending on the clamp design).
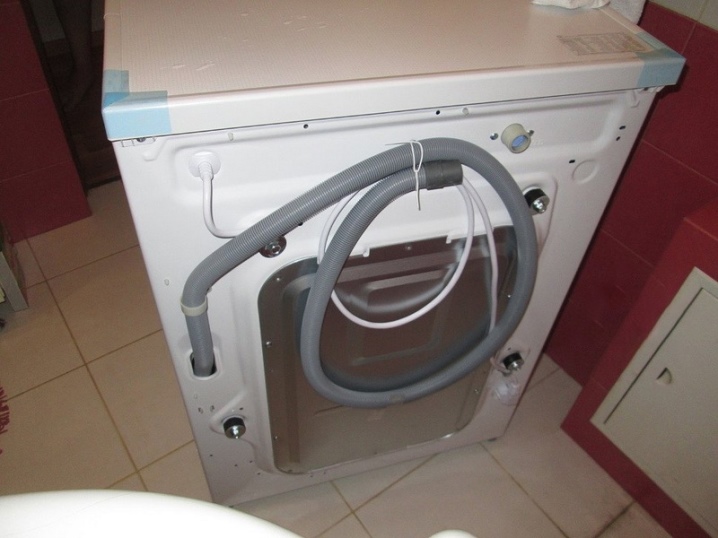
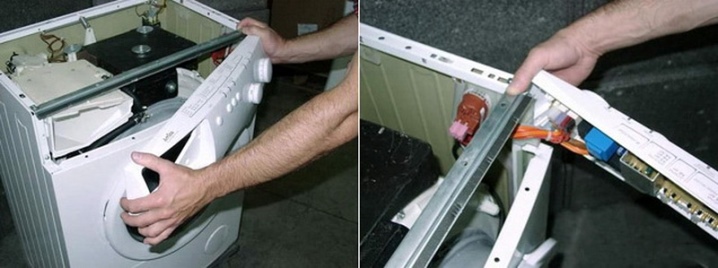
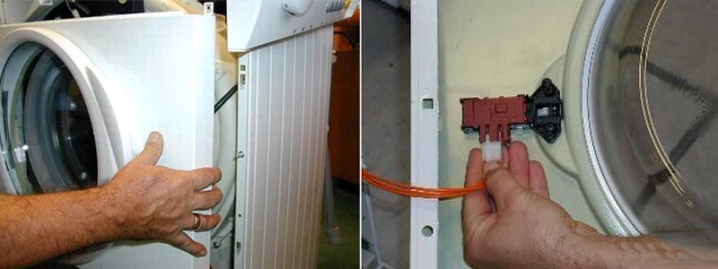
- Front panel. On the lower part of the front side (at the location of the lower panel), you need to unscrew 4 screws, 2 of which are usually located next to the hatch. There are 3 more screws under the top of the control panel. After unscrewing them, you can remove the front of the machine. Most often, it will continue to hang from the hooks and must be lifted to remove it. For complete dismantling, you will need to remove the electrical connector from the device that blocks the hatch. The door and its lock do not need to be removed.
- Rear panel. To remove this panel, you will need to remove a few screws that are easily accessible at the back of the machine.
Thus, we analyze the units for further repair of the device. Now you can inspect all the details and begin to establish the cause of the malfunction.
Sometimes it can be detected in just a visual way. These may be melted connectors that do not have good contact. After repairing or replacing them, one can hope to restore the unit's performance.
Individual elements and nodes
This is a more complex kind of disassembly, but still quite doable. To do this, you will need to perform certain actions.
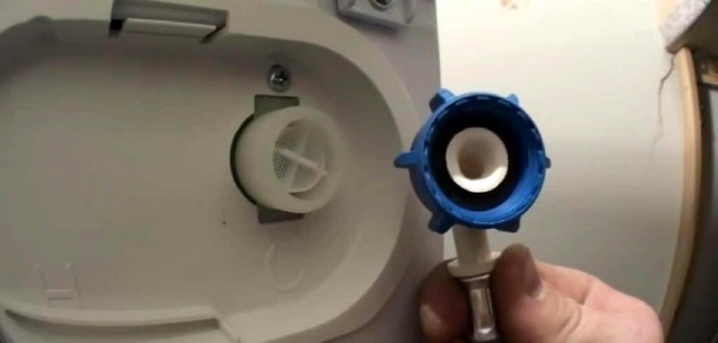
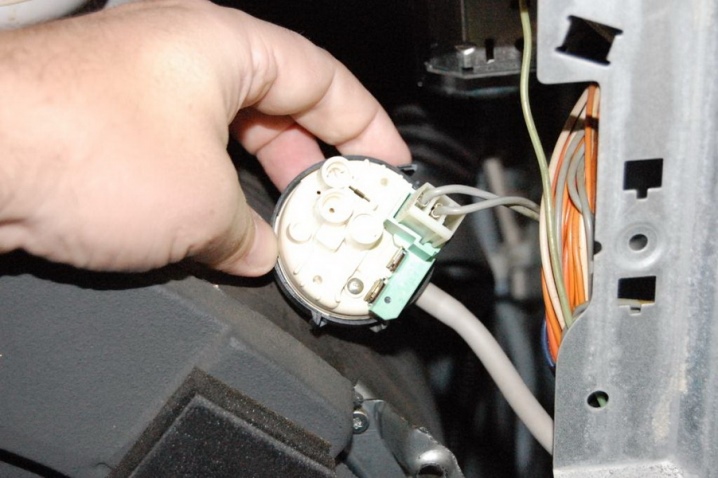
- In the upper part of the machine (usually in the area of the rear wall) there is a water level sensor in the tank or "pressure switch". You need to disconnect the hose from it.
- There is also a hose from the cassette for washing liquids, which must be dismantled.
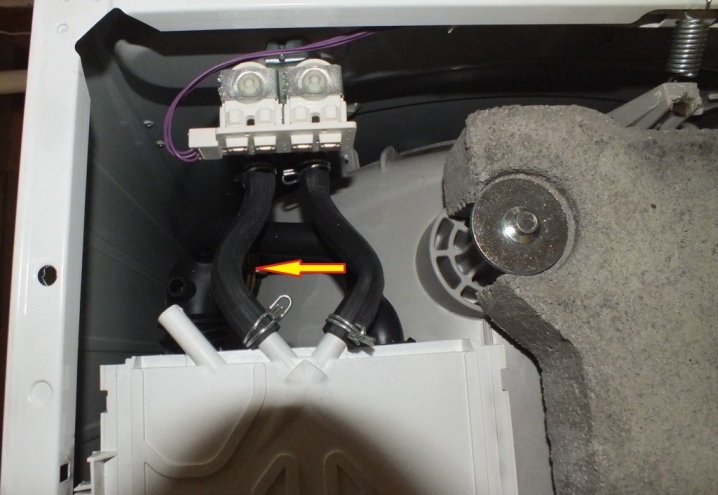
- Next, the drain and inlet hoses are dismantled.
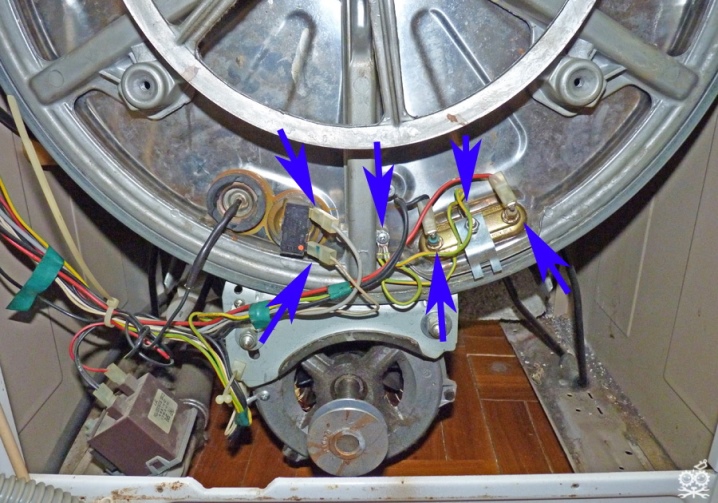
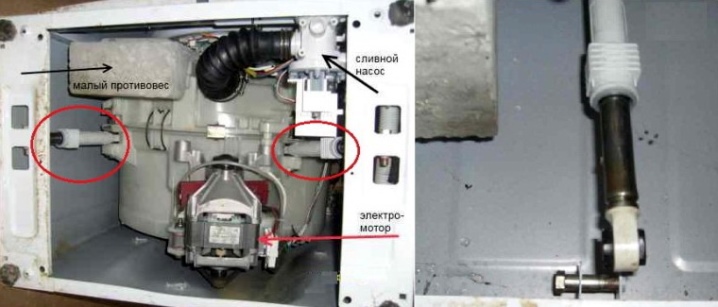
- The next step is to disconnect the wires from the motor.
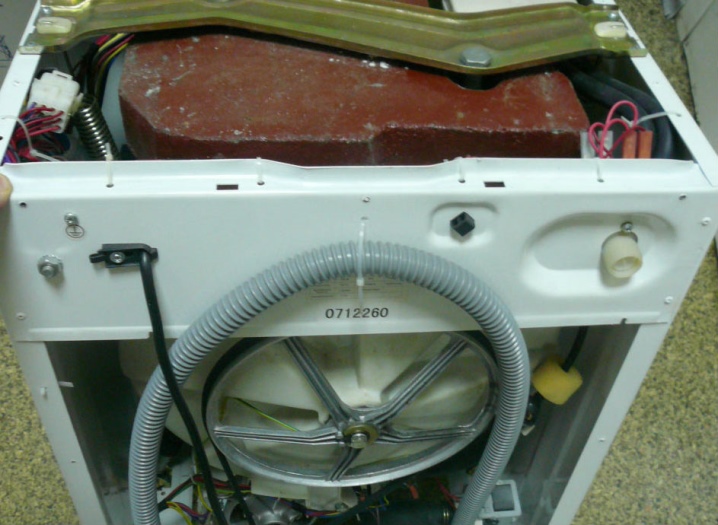
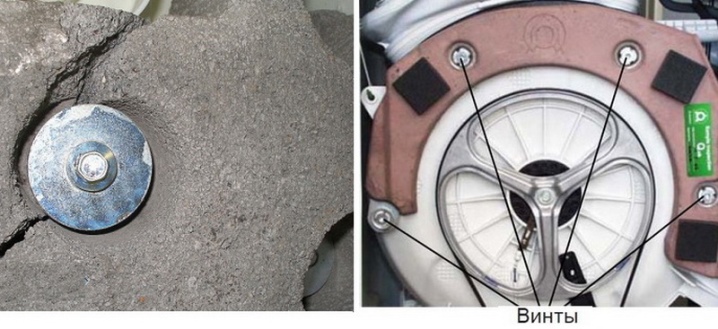
- Now you need to remove the counterweights, since it is almost impossible to remove the tank alone with them. Weights are usually located at the front and sometimes at the rear of the chassis. They are concrete slabs (sometimes painted) attached with long bolts to the tank.
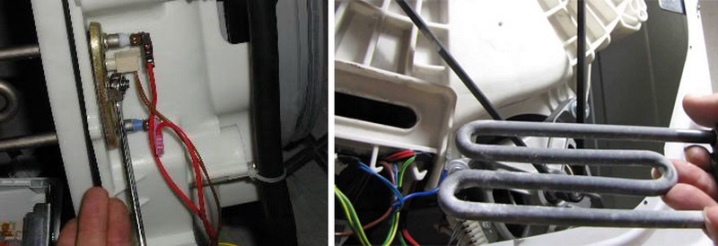
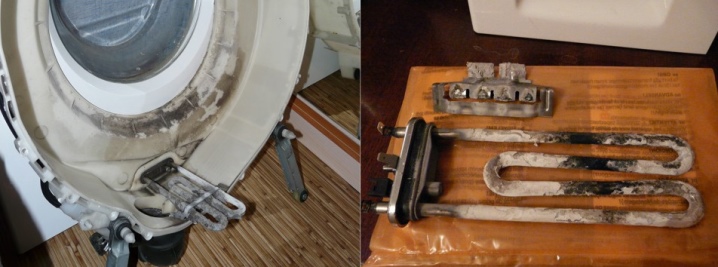
- We remove the heater (heating element). It is located in front or behind the tank, and can be overlooked with the naked eye. Only the part with the connector is available. It is necessary to remove the terminal very carefully, since the plastic on the connector becomes fragile from high temperatures and can be accidentally broken.
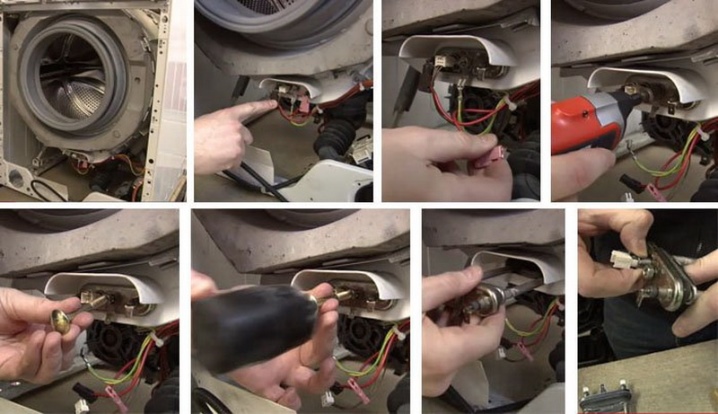
If there is no connector, but only wires that can be removed separately, then they must be signed or photographed so that later you do not suffer with the connection.
- In some cases, the TEN can be removed without disconnecting the wires. To do this, unscrew the fastening nut and press the stud inward. Alternately on each side, picking up with a screwdriver, you can gradually remove it. When the cause of the breakdown is only in the TEN, it is better to know in advance where it is located - this will avoid unnecessary and unnecessary disassembly. If it was not possible to find out its location, the search should be started from the back wall, since there are 4 screws on it in easy access.It is much easier to unscrew them, and if the TEN is in the front, then it will not be difficult to screw them back.
- Using a wrench, unscrew the shock absorbers holding the tank. They look like legs to support it on the sides.
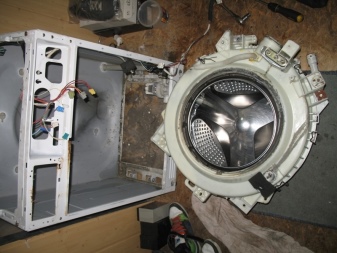
- After completely disconnecting the tank from all supporting elements, it can be removed, only this must be done as carefully as possible so as not to bend the fasteners.
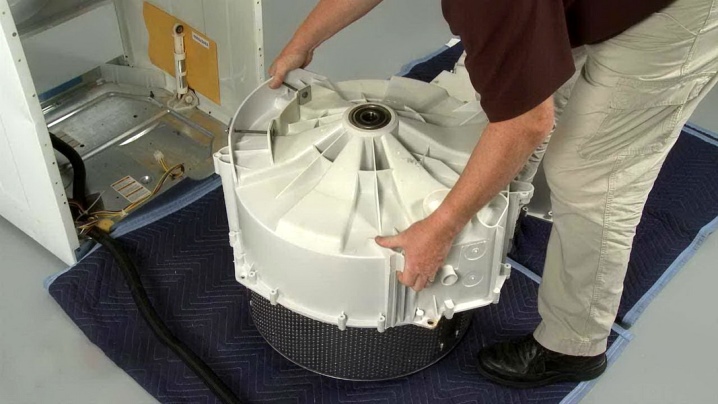
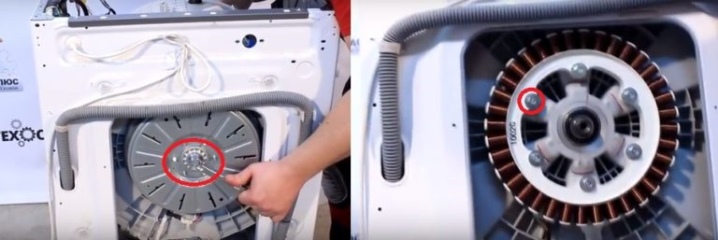
Then you can continue disassembling the units and remove the motor from the tank. To do this, it is necessary to dismantle the drive belt, and then unscrew the engine mounts and the shock-absorbing mechanism. But to remove only the engine from the assembled machine, it is not necessary to remove the tank - it can be removed through the back wall separately from the rest of the elements.
Now let's start disassembling the tank itself. To do this, you must first unscrew the screw that secures the pulley, and then remove the pulley itself. Next, you need to slightly press on the shaft to release the circlip. Remove the stopper and divide the tank into 2 parts.
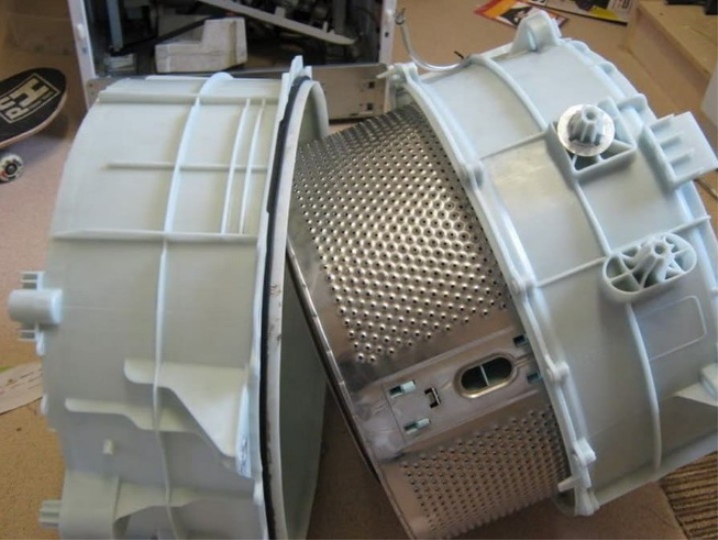
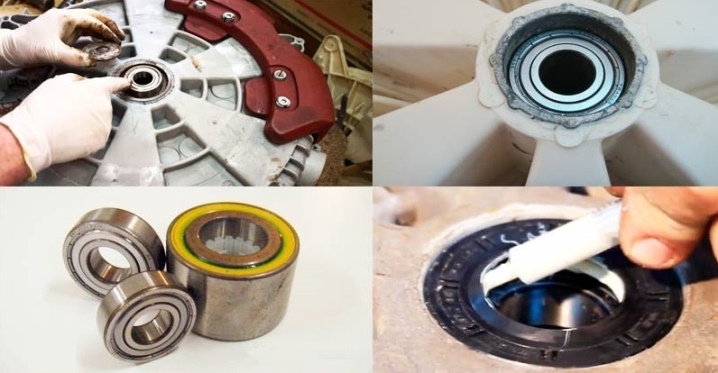
After we have disassembled the tank, access to the bearings opens, which (since we have disassembled so much) can also be replaced with new ones. First you need to remove the oil seal, and then knock out the old bearings with a hammer, only very carefully so as not to damage the tank itself or the bearing seat. We clean the installation site from possible dirt. A new or old oil seal must be coated with a special compound. The bearing seats also need to be lubricated a little - this will make it easy to press in a new bearing.
Next comes the pump. It is located in the front of the device and is secured with 3 Phillips screws and 3 clamps. There is an electrical connector at the bottom of it. Self-tightening clamps are loosened with pliers. To disconnect the connector, press on it with a screwdriver and pull gently. There is always dirt around the pump, which should be wiped off immediately.
If you only need to remove this pump, it is not necessary to completely disassemble the machine. It can be removed through the bottom. To do this, you need to put the machine on its side. To simplify your work, before removing the pump, you need to lay something under it and prepare a container for draining the liquid from it.

From all of the above, we can conclude that repairing a washing machine with your own hands is not as difficult as it might seem, especially if you have minimal skills in repairing household appliances. This procedure, performed independently, can significantly save money, since in the workshop, in addition to spare parts, most of the price goes to the work of the master.
Helpful hints
To assemble the machine in its original form, you will need to go through the entire instructions in reverse order. If you have used a camera and camcorder, then this will greatly simplify the assembly process. The procedure itself is not the most difficult, almost everywhere there are technical connectors and hoses of different cross-sections, therefore, it is simply not possible to assemble the structure in some other way, and not the way it was.
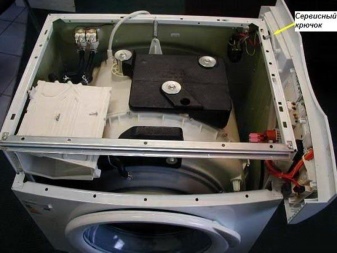
When removing the top panel, wires will interfere. In some models, the manufacturer has provided for such an inconvenient situation and made special hooks to fasten it during the repair.

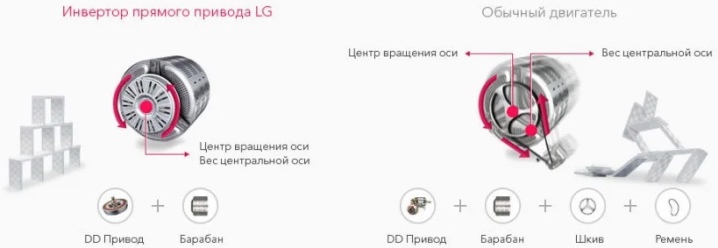
In certain models, inverter models are used instead of the usual brushed motors. They have a different appearance, and the dismantling process is slightly different from the collector, but in general everything is the same.
For how to disassemble an LG washing machine, see the next video.


The comment was sent successfully.