Ceiling baguettes: how to choose and install?
When the repair is almost finished, looking at the corners where the ceiling meets the walls, and the uneven edges of the pasted wallpaper, you want to achieve completion. In this case, baguettes and skirting boards will help. They perfectly hide all irregularities and complement the overall interior.
When choosing the type of baguettes and their quantity, you should pay attention to several nuances:
- the size of the room;
- ceiling and wall material;
- baguette material.
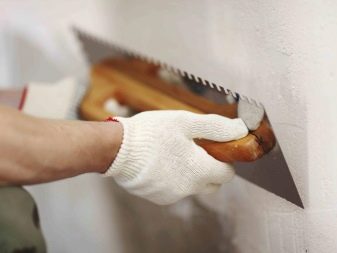
Each material a baguette is made of has its own advantages and disadvantages. You need to know them so that the work when gluing products is quick. This requires some skill, but this science can be mastered by anyone. If the walls and ceiling have large irregularities, then it is recommended to entrust the gluing to the master.
Baguette or skirting board?
Today, on the pages of the Internet, you can find two concepts: a baguette and a skirting board. The question arises: what is the difference between them? By and large, these two concepts mean the same interior detail.
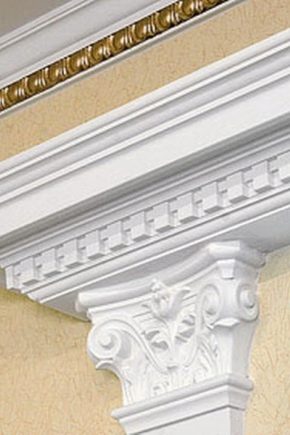
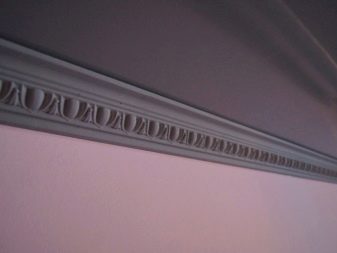
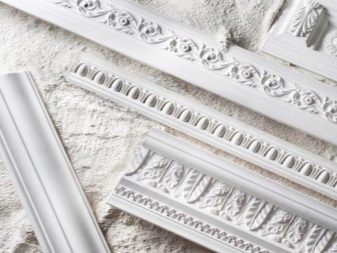
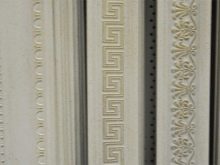
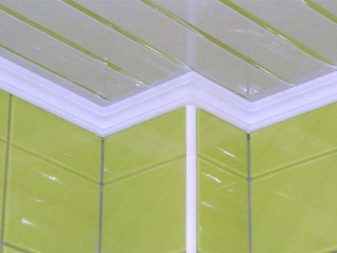
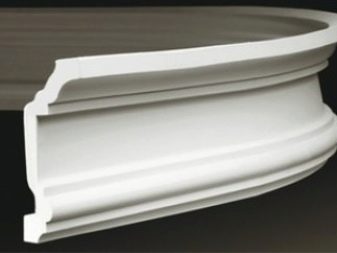
The main difference between the two is width. A baguette is a product with a width of more than 5 cm, which is made of plaster, wood, foam. Another of its main characteristics is the relief pattern, ovals. The skirting board is usually made of polystyrene without a pattern, its width is less than 5 cm.

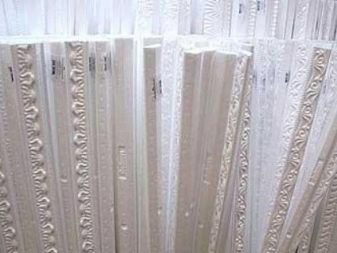
Varieties of ceiling baguettes
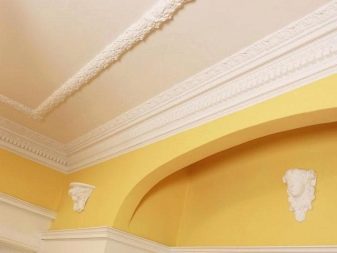
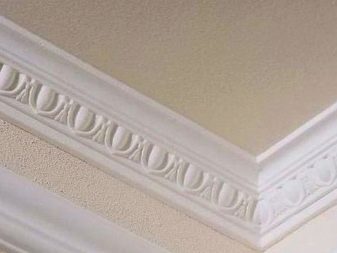
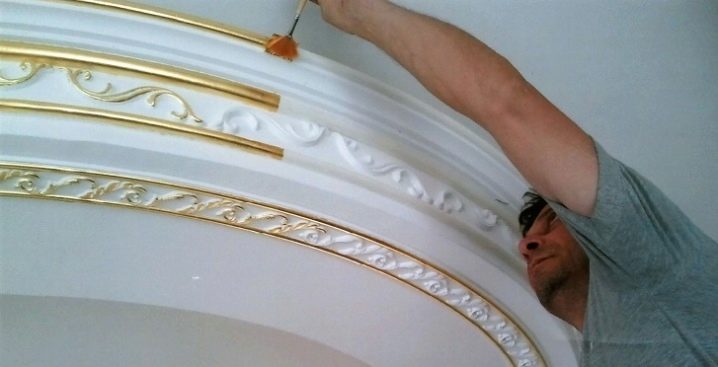
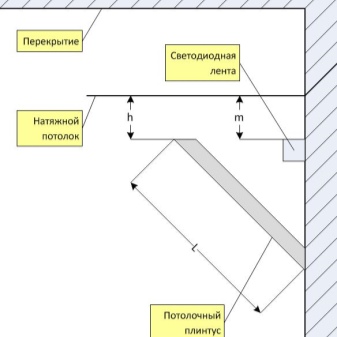
The modern market presents a wide assortment when choosing this product by model, size, material, relief and color. It can have a laconic shape or carved molding. Sticks tightly to the ceiling and wall. But if it is planned to carry out LED lighting, then it is glued only to the wall with an indent of a few centimeters from the ceiling.
The same tone of the ceiling and baguette is considered a laconic combination. But there are many styles in which you can choose the color to match the walls or wallpaper. Or, in general, you can perform finishing that will successfully delimit the walls from the ceiling. In any case, you need to select this part of the decor in such a way that at the end you get a harmonious look of the interior.
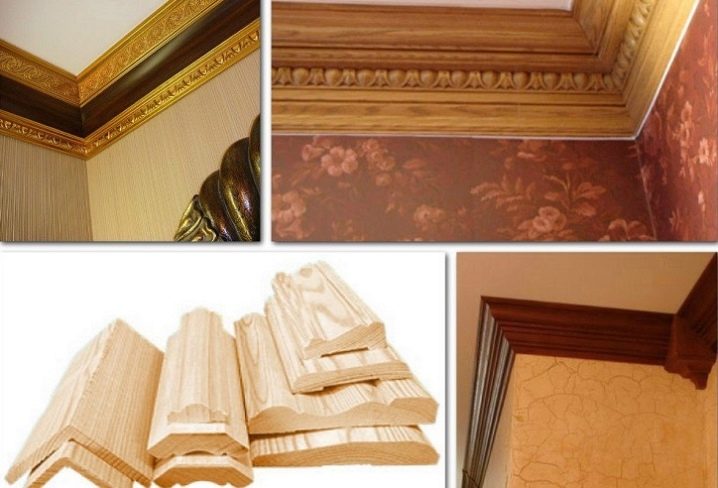
- Gypsum is attached to alabaster. It is undesirable to paint the product. The material has good moisture resistance.
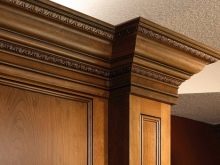
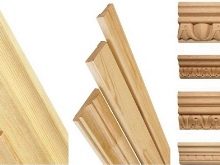
- Wood. This material is attached with nails or self-tapping screws, the caps of which are masked with a putty, and it is also mounted on a special glue. The product can be painted. Beware of high humidity. The material is durable and environmentally friendly, it gives the interior a rich look.

- Polyurethane. When gluing this material, a silicone sealant is used. There will be no difficulties with small irregularities. Such baguettes are glued before the walls and ceiling are finished. The material is not afraid of moisture and temperature extremes. The polyurethane material is the ideal solution for planning LED lighting. For the price, it is slightly more expensive than the others, but it looks more refined.


- Styrofoam. If the irregularities are more significant, then it is better to use a foam product. In this case, large gaps are filled with putty. You can attach products to putty or glue. They are characterized by good moisture resistance. If necessary, you can paint the material. It is light in weight and has a decent appearance for a low price.

- Plastic. To install plastic moldings, you need metal or wooden slats. Baguettes are attached to them using self-tapping screws. The material is lightweight, moisture resistant, and can be painted. Due to its flexibility, it is recommended for structures with ovals and curved lines. For the price, such a baguette is quite affordable.

Three basic steps before gluing
- Step 1. The first step is to calculate the amount of all material. To do this, you should know the perimeter of the room for which it is intended. Baguette sizes vary. For a large room, it will be more practical to take a longer length so that fewer joints are formed. For a smaller perimeter of the room, the length will need to be shorter.
Better to purchase the right amount with a small margin. After all, every work has flaws, and a small nuisance can happen to the working material - breakage, damage or lack of a very small piece.
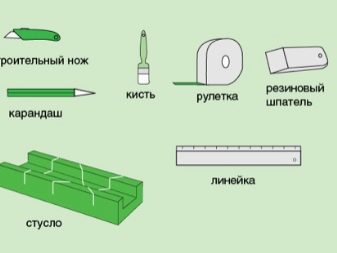
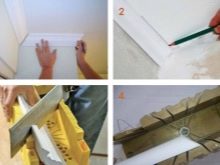
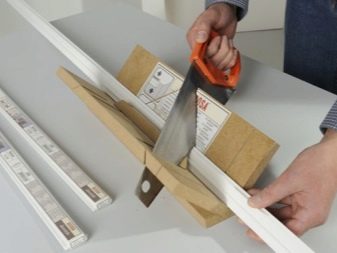
For high-quality work, you will need special tools: a marking pencil, a knife with a sharp blade, a hacksaw for metal and a miter box, as well as a suitable glue for the material used.
- Step 2. When the surfaces have already been leveled with plaster or putty, painted, covered with wallpaper, it is the turn of gluing. If the baguette will subsequently be painted along with the ceiling, then a primer should be applied to the attachment point. Otherwise, no additional work is required.
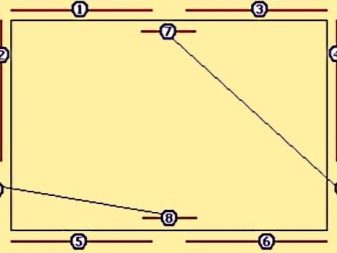
If LED lighting is planned above the skirting board, markings should be made along the bottom gluing line. To do this, nails are hammered in the corners of the room with the necessary indent from the ceiling. Then, between the adjacent nails, you need to stretch the cord along the wall, attach the plinth strip to the cord, and make pencil marks on the wall.
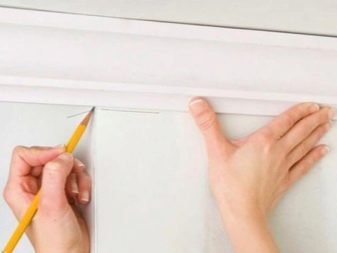
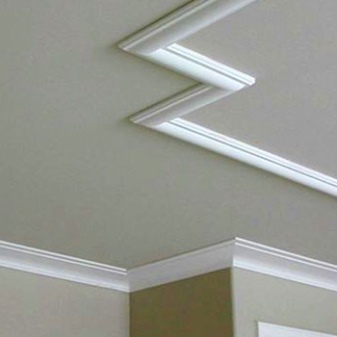
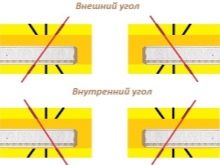
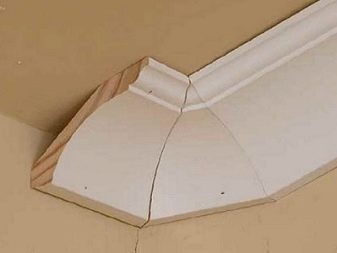
- Step 3. You should not pre-cut the material. It is better to do this in the process of work, so as not to be mistaken in size. The edge of the product that reaches the corner must be cut with a miter box. This ensures that the cutting angle is correct, which will not lead to gaps at the joints.
If the gaps are still formed, you can fill them up with putty or hide them under decorative inserts. They can mask the joints of the outer and inner corners. This option is quite appropriate if you are not afraid of unnecessary expenses. A two-level ceiling is best done in this way.
We glue it ourselves. Step-by-step instruction
In order to perform gluing as quickly as possible, you must follow the instructions.
The polyurethane and foam material is attached in several stages:
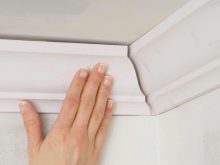
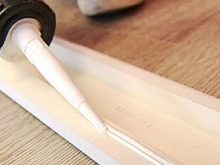
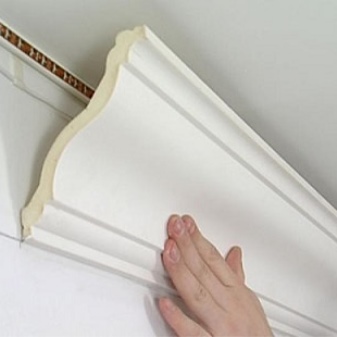
- Sticking should start from the entrance to the room. At the joints and along the edges of the ceiling plinth, glue is applied, the plinth is applied according to the markings on the wall and pressed against it for a while. It is better to remove excess adhesive immediately with a damp cloth.
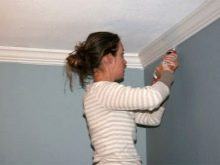
- Each next baguette is measured, the excess is cut off and glued in the same way. It is important to press down on the product with the palm of your hand, not your fingers. Otherwise, you can leave dents on it.

- When all the gluing work is completed, it remains only to putty the joints and let the whole structure dry. After drying, the putty areas should be wiped with fine sandpaper. After that, the baguette is covered with paint, if provided.
Wood
You will have to tinker with this material. But the whole time-consuming process is justified by the exquisite and luxurious appearance of such a finish.
It is important to follow the algorithm of work:
- The surface of the walls is leveled.
- The markup is in progress.
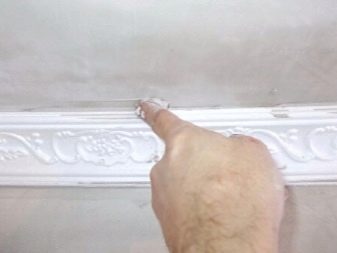
- Seams and edges should be well measured and then trimmed in a miter box.
- A light, small baguette can be easily glued to liquid nails. But a wide and heavy one is better to attach with self-tapping screws. Previously, you can grab it with glue to make it more convenient to work. Each next piece is measured to the desired length, the edge is cut with a hacksaw, and the corner part is cut in a miter box.
- The joints and heads of the nails are covered with putty.You need to let it dry and then clean it with sandpaper.
- The joints should be painted over with varnish or paint to match the color of the wood.
Sometimes the following technology is used: special small wooden corners are attached to the wall at a distance of about 40 cm from each other. The baguette is already fixed on these supports according to the steps described above.
PVC ceiling skirting board
In most cases, this material is used in bathrooms and kitchens where there is high humidity. In such products there is a special groove for connection with plastic panels, which are often sold as a set. The panels are used to decorate the walls or ceiling. Plastic is very practical. It does not turn yellow over time, it is easy to clean. Installation is carried out only after installing the panels in the corresponding grooves. You need to cut the PVC baguette with a hacksaw for metal.
It is recommended to do the following:
- Attach the frame rail to the surface depending on where the panels will be located.
- The baguette is attached to the frame with staples or self-tapping screws. The edges are cut in the miter box with a hacksaw. The gaps formed during installation are covered with silicone.
Plaster baguettes
Such material is considered the most expensive and heavy, but at the same time very fragile. It is better to entrust the work with such a product to experienced craftsmen.
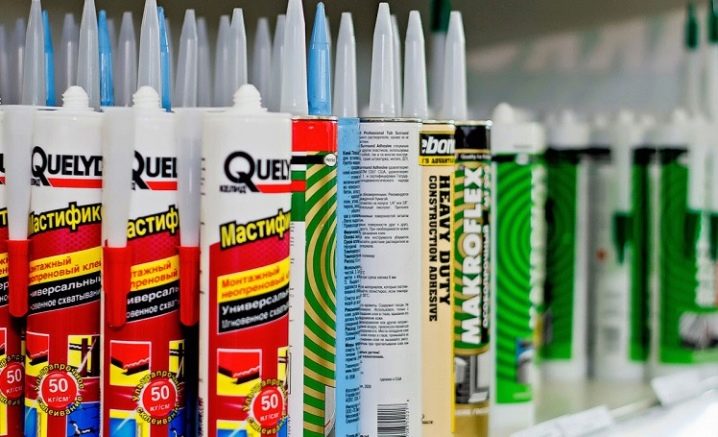
Choosing glue
Liquid polypropylene or acrylic nails can be considered a universal means for gluing baguettes. They fasten the product in one moment. So there is no need to hold the structure with your hands until it grabs.
After repair work, putty usually remains. Some craftsmen use it as an adhesive for baguettes. In the course of gluing, you can immediately close up the gaps and gaps that form between the wall and the baguette. But experts prefer glue solution. It sets quickly and holds the part firmly for a long time. The only drawback is that the solution is not suitable for foam baguettes. Silicone sealant can also be used as an adhesive. Only now it will be impossible to paint it later.
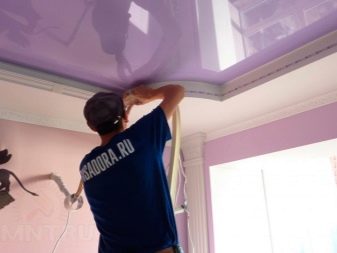
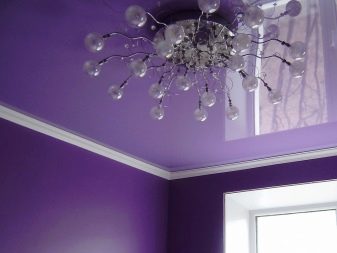
Stretch ceiling gluing
In the presence of stretch ceilings, the baguette is attached strictly to the wall, only closing the joint between the wall and the ceiling. Otherwise, you can hopelessly spoil not only the appearance of the two-level stretch ceiling, but also the canvas itself. After all, glue has the ability to pull together the surface, leaving waves and spots on it. Gentle gluing products will not work either. The smooth surface of the web requires a sufficiently aggressive adhesive with good adhesion strength. Therefore, it is difficult to glue anything to stretch ceilings.
Another important rule when installing ceiling moldings is that the stretch ceiling must be perfectly flat. Otherwise, in the presence of baguettes, the slightest irregularities of the canvas will be noticeable, which will be impossible to correct. After all, unfortunately, it will not work to putty the gaps between the stretch fabric and the baguette. Therefore, if there is no 100% certainty in the evenness of the ceiling, it is better to refuse gluing the baguettes, otherwise all defects will be visible.
The space from the canvas to the skirting board is almost invisible. It can be large if a backlight is provided. Any material can be used for stretch ceilings. Still, lighter raw materials (polyurethane or foam) will be easier to install.
Since the baguette is glued only to the wall, you will need to hold it with your hands for a while to grab it. If it is heavy, then there is a possibility that, under the force of its weight, it will slide down the wall.
If you decide to purchase material of large weight, then you should think about the method of fastening it and give preference to models with a wide lower part.
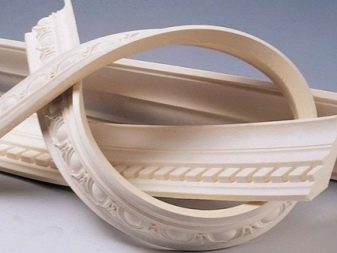
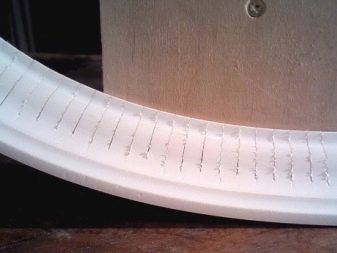
Flexible baguette
If the interior provides for rounded shapes and curves, then you will need a flexible baguette. Shaping your styrofoam product is easy.
There are several ways to do this:
- Make a few cuts on the back.
- Cut the whole product into small pieces and then reassemble.
- Heat treatment. The product is heated with a building hair dryer, a bend is made in the right place, after which the product must be lowered into cold water for cooling.
- The easiest to deform is a polyurethane baguette. No special tools are needed with it.
- The tree can be shaped with steam. After steaming, it should be fixed in the desired position until it cools.
Professional advice
So that decorating the ceilings with baguettes is pleasing to the eye, and does not become an unexpected difficulty, you should remember about some features when choosing a model:
- A wide molding will visually make the ceiling lower.
- The same effect can be achieved by choosing a dark color.
- The volumetric relief on the product looks out of place in small rooms.

- The complexity of the pattern directly depends on the complexity of cutting corners and joints.
- If the ceiling is too high, the baguette should be placed at a distance from it.
For a false ceiling, choosing a baguette is a snap, you just need to follow the instructions provided.
For information on how to glue a ceiling molding on a stretch ceiling, see the next video.


The comment was sent successfully.