How to choose a baguette for a stretch ceiling?

The stretch ceiling allows you to create a perfectly flat surface. It will look great in the interior, hiding all the flaws of the floor slabs and the unevenness arising from the difference in structures. But it is impossible to stretch the ceiling without a baguette - rails that allow you to stretch the stretch ceiling canvas, press its edges against the walls and seal its edge.
A baguette is no less an important part of the stretch ceiling construction than the canvas itself. The ideal evenness of the surface, the absence of sagging in case of emergencies, the possibility of cleaning the ceiling without causing damage depends on its quality.


What is it needed for?
An accident can happen on the floor above, and water from a neighbor's apartment will pour out onto the ceiling. The ceiling sheet will retain water, as it is treated with different solutions. But in this case, it can deform, and the whole beauty of the tension structures will be ruined.

When installing high-quality slats, the canvas will not hang, even if there is flooding from above. Therefore, choosing a baguette is a very responsible matter.
Firms often produce designs complete with fabric for ceilings. Therefore, you can always pick up the components of the stretch ceiling from the same manufacturer, so that both parts of the structure fit perfectly together.

Views
They produce a huge number of baguette profiles for stretch ceilings. Depending on the wishes of the customer, you can choose one or another option that is suitable for a specific design.
At the place of attachment, there are ceiling, wall and universal moldings. The slats can be placed on the ceiling or on the wall. The choice of a specific place depends on the baguette itself and the interior of the room in which the ceiling is being pulled. There is also a versatile baguette suitable for placement anywhere. It is often used to design precisely curved walls in a room.
There are special types of moldings: split, corner and flexible. They are used for complex ceiling structures, where simple slats are indispensable.


Separate baguette used in large rooms with an area of more than 60 square meters. There, the canvas can sag if it is integral. Therefore, in the middle of the room, a separate baguette is attached to the ceiling, in the design of which there are two mechanisms that secure the fabric. Thus, in a large room, a stretch ceiling is created from several canvases, but it looks perfectly even, as a whole.
Corner baguette attaches to the wall and ceiling at the same time. In its two locking grooves, the fabric is fixed in different ways. One canvas is mounted horizontally, the other vertically. Difficulties arise when an unusual multi-level ceiling design is created, and two canvases are fixed in one baguette at the same time. Also, one canvas can be fixed in a corner baguette alternately at different levels, obtaining a curvilinear geometric surface of the ceiling.

Flexible baguette initially created from materials that can bend. In addition, it has notches that allow it to bend without problems in accordance with any shape. The use of flexible slats expands the possibilities of using stretch ceilings. Even in a small rectangular room, you can create a two-level ceiling, in which one of the levels can have a wavy or curved shape. This provides opportunities for the implementation of design experiments in the interior.

According to the material of manufacture, there are aluminum and PVC baguettes.
Aluminum contour molding very durable. It can be attached anywhere. There are slats specially designed for ceilings or walls, and there are versatile designs to suit any placement. But such a profile is difficult to mount, because holes must be made in it before installation.


Aluminum slats do not lie on curved walls, therefore, if necessary, stretch the canvas to the configuration of a curved room, the aluminum baguette must be sawn into separate fragments, from which to lay out a curved contour. It is quite heavy and expensive.

PVC baguette is flexible and lighter in weight.


It is easy to use on curved surfaces. It is cheap but can flex under load. In the list of baguettes of this type there are visible and invisible options, which also allows you to choose a design to your liking.
Depending on how the canvas is attached to the baguette, there are four types of slats:
- cord;
- wedge;
- clothespin;
- cam.


In the baguette-cord, the ceiling sheet is fixed with a cord. This mount is very strong and allows the ceiling to not sag even under moderate loads.
In a wedge baguette, the fabric is fixed with wedges, which allows you to create multi-level structures. Such opportunities can be beneficially used in interior design.
In a clothespin baguette, the clamps are clothespins, which clamp the canvas very firmly.


When using them, you can be sure that the fabric will not slip out of the mount. And the cam baguette has slamming mechanisms on the profile.
You can choose a gapless wall molding that looks very stylish. It gives the impression of a "floating ceiling" and is a good dividing element.


Dimensions (edit)
There are many baguette profiles for stretch ceilings. Depending on the design features, the baguette is distinguished by numbers. Each room has its own rack configuration and a few more subspecies.
The complete list includes the following varieties:
- Profile No. 1 allows you to attach the coating to vertical structures. It looks like a corner and has a visible part. The standard profile length is 3 meters, fastening is required every 10 cm.
- Profile # 2 also allows you to attach fabric to vertical structures. It looks like a vertically elongated profile. There are visible and invisible options. Standard length - 2.5 m, fastening - up to 15 cm. Invisible options are available in four varieties, differing in design and beam weight.
- Profile number 3 allows you to attach the canvas to horizontal surfaces. The visible profile looks like a corner. There is a gap between the visible part and the wall, which can be closed with masking tape. The standard length is 2.5 m, an attachment up to 30 cm is required.


- Profile No. 4 is universal. It can be used to attach a stretch ceiling to both vertical and horizontal surfaces. It is quite rigid, therefore it requires a wider fastening - up to 50 cm. The standard length is 2.5 m, there is a gap between the visible part and the wall, which must be covered with masking tape.
- Profile No. 5 makes it possible to attach the canvas to the wall. The profile structure is elongated in the vertical direction. The standard length is 2.5 m. The profile is quite rigid, but requires fastening up to 20 cm and has a gap between the visible part and the wall, which must be covered with masking tape.
- Profile No. 6 is made in the shape of the letter "T", it is used for joining two canvases and has two fixing grooves. There is a gap that needs to be closed with masking tape. Length - 2.5 m.
- Profile No. 18, made in the form of an isosceles triangle, is used to connect individual ceiling panels and has two grooves for fastening the fabric. The gap must be covered with masking tape. Length - 2.5 m.

- Profile No. 9 is strongly elongated vertically.It is used to install two-level ceilings, so the profile has two fabric grooves at different levels. Length - 2.5 m.
- Profile no. 8 RV / RN and profile no. 16 RV / RN are box-shaped flexible slats that are used for curved structures. They can be bent outward (RN) or inward (RV). Length - 1 m, there are also certain maximum allowable bending radii.
- Profile No. 8 N looks like a box. It is a flexible profile that is used to create curved stretch ceilings. The rail has notches for easy bending. Length - 2.5 m.
- Profile No. 16 N has a box-like shape with notches and is used for curved tension structures. Length - 2 m.
- Profile No. 19 resembles the letter "G" and is used to fasten the fabric to the walls. The height and width of this product must be measured with extreme precision.


Design
Previously, stretch ceilings were used most often when it was necessary to hide an unattractive structure. But with the expansion of the range of stretch ceilings, they began to be used as interior decoration for the embodiment of design ideas. Now it is possible to experiment with the color of the coating. Stretch ceilings can be designed in any range - from traditional white to bright red or even black. Thanks to this color ensemble, a very unusual type of interior is created.


There is a wide selection of decorative elements for ceiling slats, allowing you to create an interior in different styles. There is also a wide selection of ceiling designs. The tension of the web itself may not be flat, but complex in shape. The addition of an illuminated curtain rail allows you to choose the style of the room, creating an amazing atmosphere.

Stretch ceiling slats can be visible or invisible. During installation, invisible structures are hidden behind the stretch ceiling. Invisible slats create a perfectly flat ceiling to the walls.
The visible structures are not completely hidden behind the canvas. The door leaf fastening system also has a decorative part that covers the structural strips. It is mounted separately under the baguette holding the canvas, has an aesthetically pleasing appearance and looks like a beautiful cornice.


If there is no need to cover ceiling structures with decorative elements, flexible tape can be used, which is laid in the gap between the wall and the structural element. They come in a variety of colors and allow you to create a perfectly smooth joint between the wall and the baguette.
Depending on how the visible part of the baguette looks like, products are divided into several types:
- narrow;
- wide;
- flat;
- with backlighting;
- for a panel on the ceiling.


A narrow molding with LED lighting is used when the canvas in one layer needs to be stretched around the entire perimeter of the room. It is almost invisible.
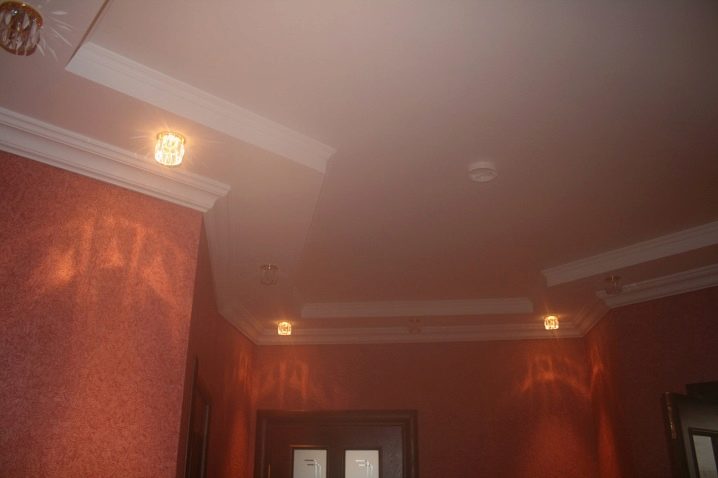
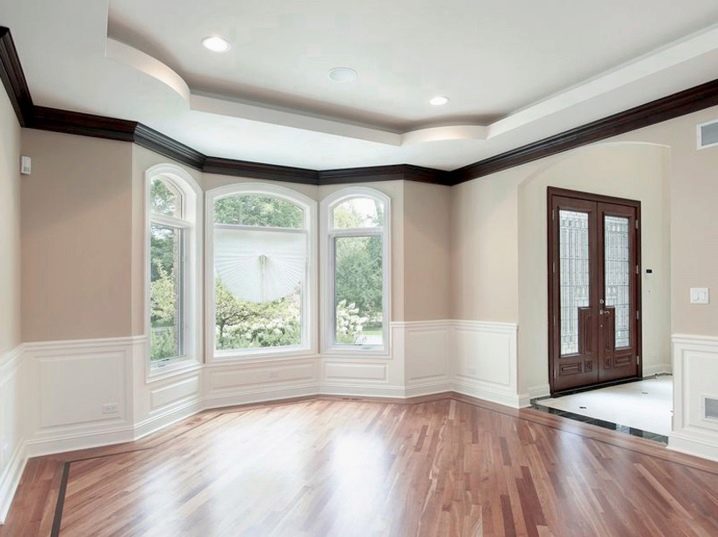
The wide molding in its visible part is a wide profiled cornice, which emphasizes the transition from wall to ceiling and brings variety to the design of the premises.
A flat baguette looks like a fairly flat tape around the perimeter of the ceiling. It emphasizes the transition from wall to ceiling, but is not as powerful as the wide one.

Cornice lighting of a baguette is a very original technique. In this case, a wide cornice runs along the perimeter of the wall. At some distance from it, a stretch ceiling is mounted. In the area between the cornice and the ceiling there are lamps that create an original illumination of the room. A perfectly flat ceiling shimmers with bright light.


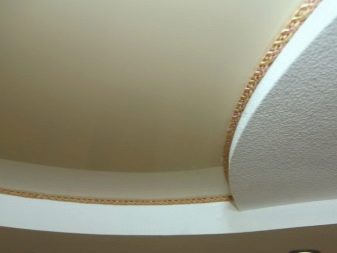
Also, with the help of a baguette, you can select a separate canvas on the ceiling, for example, a section with ornaments or paintings. In this case, a beautiful decorative baguette is used. The decorative part of the baguette can imitate plaster moldings, wood carvings and even stone. Since such a rail does not carry a load, it can be applied to any style of interior decoration.


Selection Tips
At the moment, stretch ceilings provide an opportunity to implement any of the most daring design ideas in the interior. Red curved inserts in the middle, black ceilings of complex geometry, classic flower circles in the center of the ceiling - any idea can be realized with a stretch coating.
For all areas - from classic to modern - there is a suitable solution among stretch ceilings. Therefore, the first step should be to study the range and possibilities of stretch ceilings. You need to think about which option is suitable for the room: simple or complex, catchy or calm, even or multi-tiered.
When a design idea is formulated, you can select the type of profiles depending on the design.
Next, you need to measure the room in order to calculate the number and footage of structural rails that will hold the canvas. It is also necessary to consider the number of decorative elements that decorate the transition from wall to ceiling. And only after that you can go to the store to buy everything you need.

Mounting
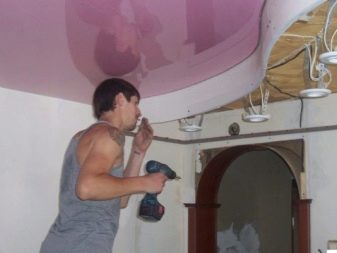
The installation procedure is quite complex and requires responsibility. But installing a molding to drywall is not very difficult.
The work is divided into the following stages:
- mounting;
- fasteners;
- gluing;
- painting.


When all the details of the structure have already been purchased, you can think about how to mount the ceiling. First you need to prepare the walls, remove the old wallpaper, make the surface smooth, since the slightest curvature or unevenness of the wall will ruin the whole impression of the result. If there are cracks in the concrete structure, they must also be repaired.

With the help of a building level, it is necessary to beat off a straight line. Construction work is often carried out in such a way that the floors are not laid horizontally, but with deviations. The stretch ceiling should be perfectly level in order to correct all the shortcomings of the construction work. You can use a laser level to mark the location of future rails.
If the profile is plastic, in the place where the corner will be, it is filed and bent.


The outer and inner corners are filed differently. Next, you need to punch holes in the baguette with a puncher with the step indicated in the instructions.
After that, you should attach the slats with dowels to the walls or ceiling. The joints of the baguette must be perfectly flat. Particular attention should be paid to attaching the battens to drywall partitions. Reiki should stick to them without any problem. If you follow all the rules and fix the slats perfectly evenly, then the result will look great.


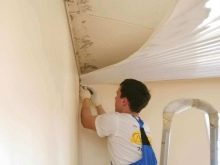
After that, the ceiling fabric is stretched. For fabric materials, this stage is quite simple if you do everything right. This process requires certain skills and care.
Then the decorative finishing of the finished structure begins. If necessary, you can seal the gap between the wall and the slats with flexible tape.


You can glue the decorative profile below the ceiling. The profile must be calculated along the length of the walls of the room and cut at an angle of 45 degrees at the joints. The cut must be perfectly straight.
Gluing a decorative profile also has its own characteristics. A special glue is needed for this procedure, since simple adhesive mixtures will not work. The decorative part cannot be glued to the wallpaper, it is attached to the wall surface. The wall should also be flat and clean.


In no case should the glue get on the ceiling fabric, therefore the profile is glued only to the wall. During gluing, it is even recommended to put newspaper or paper between the ceiling fabric and the decorative profile so as not to stain the stretch ceiling fabric. You need to glue it very carefully so that not a single drop gets on the fabric.
The last stage is painting the decorative profile, depending on individual preferences. If this is not necessary, you do not need to paint the outside of the decorative part.


Beautiful examples in the interior
You can choose a dividing baguette.It is better to entrust its installation to a professional, but if you have the necessary tools available, then you can do the work yourself.

Inexpensive plastic baguettes look very nice. They can be installed in the middle of the ceiling, not just around the edges.

For information on how to choose and correctly install a baguette for a stretch ceiling, see the next video.


The comment was sent successfully.