Dishwashers IKEA
The dishwasher is more than just an appliance. It is a time-saving, personal assistant, a reliable disinfectant. The IKEA brand has long established itself in the domestic market, although their dishwashers are not in such demand as the models of more famous manufacturers. IKEA technology will be discussed further.

Peculiarities
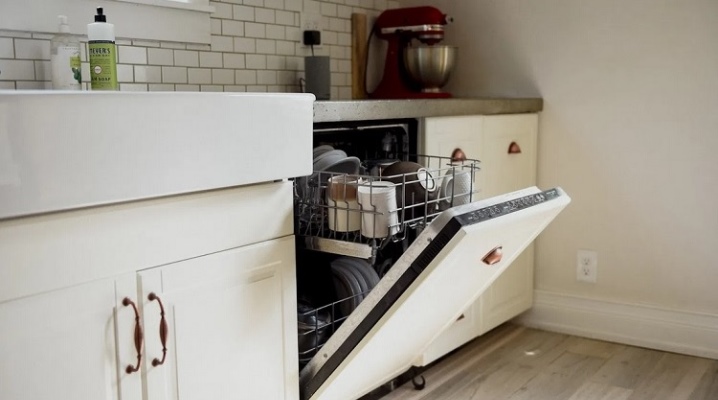
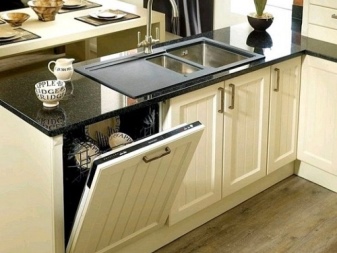
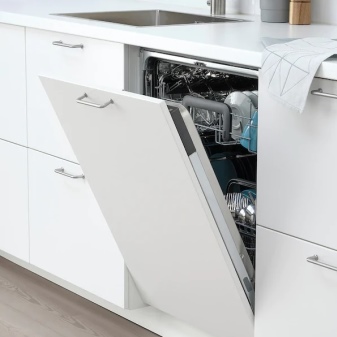
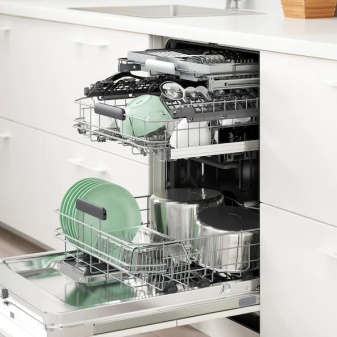
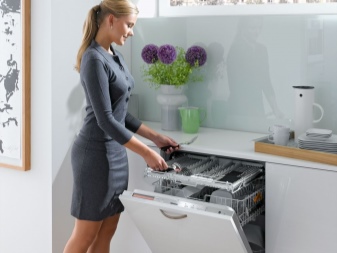
IKEA dishwashers are practical and essential. The manufacturer has focused on integrated solutions, as they are gaining popularity lately. With the built-in dishwasher, it is possible to hide the appliances behind the cabinet door, in the niche under the sink and in other places in the kitchen. It is so easy and simple to save space, which is important for small apartments. The brand offers two standard dishwasher sizes: 60 or 45 cm wide.
The wider ones are suitable for most houses and apartments. Inside they have space for 12-15 sets of cutlery. The slimmer, sleeker dishwasher only holds 7-10 sets, making it a good choice for a small home with few users. Washing dishes with a dishwasher saves time, water and energy. All equipment of this brand is powerful, reliable and belongs to the class from A + to A +++. In addition, it has an affordable cost.
Thanks to their standard dimensions, all dishwashers fit perfectly behind furniture doors.


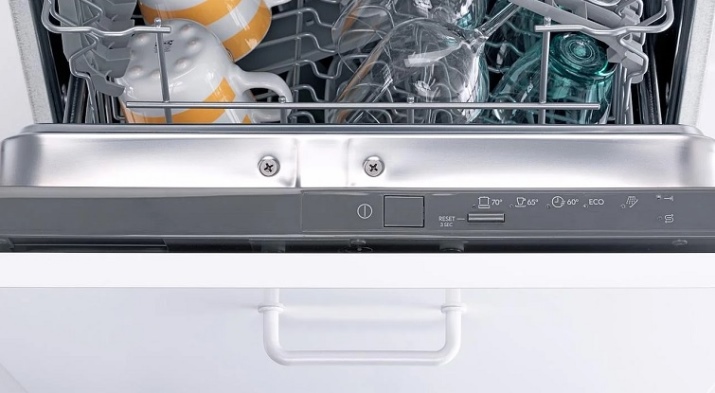
Noise level of all models: 42 dB, voltage: 220-240 V. Most of the models are CE marked. Of the main programs, we note the following.
- Auto wash.
- Regular car wash.
- ECO mode.
- Intensive cleaning.
- Quick wash.
- Pre-cleaning
- Wine glass program.
The lineup
The list of popular models includes built-in and free-standing dishwashing machines in the kitchen.

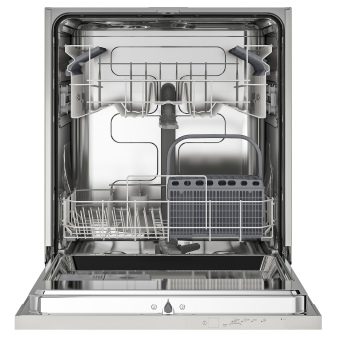
RENGORA
This dishwasher outperforms many brands in dishwashing performance. It also uses less energy and water. The user gets all the standard basic functions necessary for life. 5-year warranty. This built-in dishwasher makes dirty dishes sparkle clean.
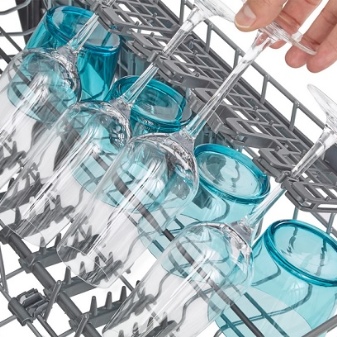
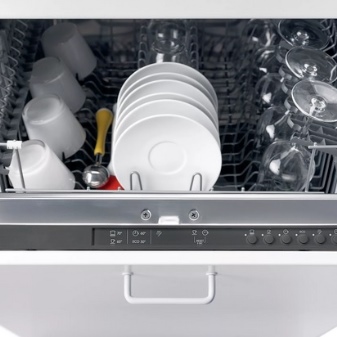
Since the inner cup and plate holders can be folded down, the user can set both the top and bottom rack horizontally to make room for larger items. Soft plastic spikes and glass holders hold them securely in place and minimize the risk of glass breaking.
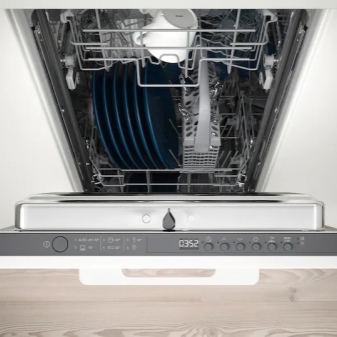
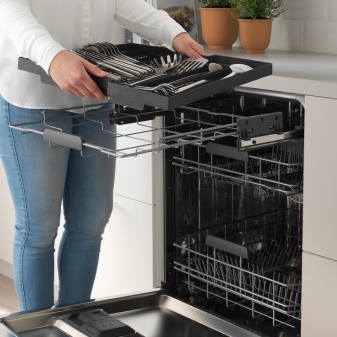
MEDELSTOR
Built-in dishwasher IKEA, measuring 45 cm. Ideal for small spaces. This dishwasher has several smart features and 3 racks to maximize your load capacity. Here is a handy kitchen helper that saves you time and energy.
A sensor detects the amount of dishes in the dishwasher and adjusts the amount of water based on the readings. The model has a function that detects how dirty the dishes are and adjusts the amount of water based on this.
Towards the end of the program, the door automatically opens and remains ajar to dry the dishes as quickly as possible.
RENODLAD
The size of the appliance is 60 cm. This model has 2 levels, a cutlery basket and a variety of programs according to the user's needs. It makes everyday life in the kitchen easier, with such an assistant you can relax knowing that it saves water and energy.
With the Beam on Floor function, a beam of light hits the floor when the dishwasher is running. A muted beep indicates when the program is finished. The delayed start function up to 24 hours allows the dishwasher to be activated whenever the user wants it. You can adjust the height of the upper basket to make room for plates and glasses of different sizes.
HYGIENISK
This quiet model does its job without compromising occupant comfort. It uses less water and energy, has many programs and smart features. Equipped with an electric salt indicator. The softener makes the lime water softer for better dishwashing results and prevents harmful limescale build-up in the dishwasher.
The water stop system detects any leak and automatically stops the water flow. A power cable with a plug is included in the delivery. Diffusion barrier included for added moisture protection. This model is intended for installation in furniture. Table top, door, skirting board and handles are sold separately.
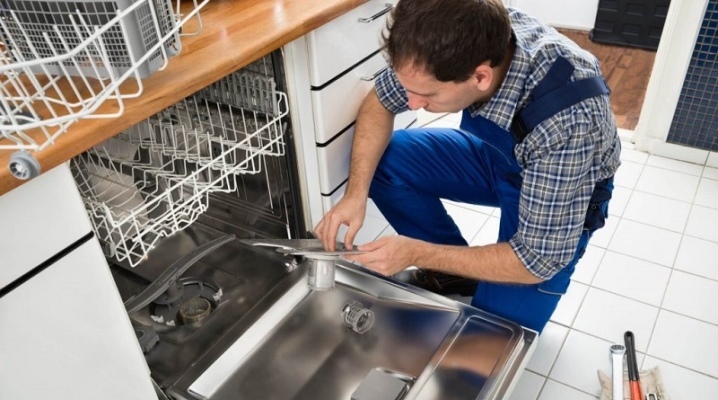
Installation and connection
It is important to decide at the very beginning which equipment is planned to be installed, built-in or free-standing. The principle is the same, but there are some nuances. Before assembling and installing the dishwasher, you need to make sure that the technician will fit in the hole. Most of the standard models require a wide space in the furniture set. If the user is installing new cabinets in the kitchen, it is important to consider the width of the dishwasher in advance. The height of most models is adjustable within certain limits, but before buying it is worth making sure that the dishwasher you plan to purchase will fit the dimensions of the existing hole.
Depending on the cabinet configuration, it may be necessary to drill one or more holes for the supply lines, electrical wiring, and downpipe. Modern tools allow you to do this work quickly, without the involvement of specialists.
The first step is to remove the faceplate at the base of the machine to gain access to the power inlet and electrical box. It's not a bad idea to connect all the communications before pushing the dishwasher into the cupboard. This makes it easier to access the underside of the technique.

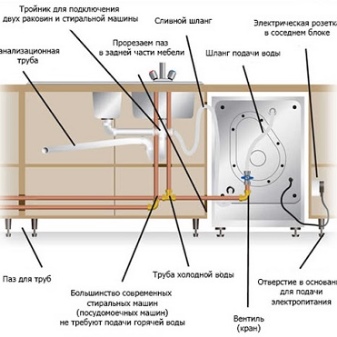
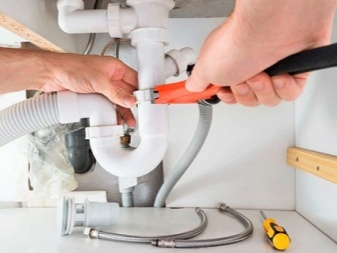
Downpipe connection
Start by connecting the drain pipe to the pressure pump. Many regulations require dishwashers to be ventilated with an air gap to prevent further pumping of water from the sink drain later. An air gap is installed in one of the sink holes or drilled additionally in the countertop. Connect the drainage pipes using a fastener, fix them with clamps.
If an air gap is not required, secure the drain hose with a hose clamp at the top of the cabinet to the wall to prevent backflow from the sink. The drain pipe is brought to the drain inlet and secured again with a clamp. Many drains have an inlet plug, so be sure to remove it first. If there is no dishwasher drain, replace the under-sink pipe with a branch pipe and install a drain over the under-sink trap.
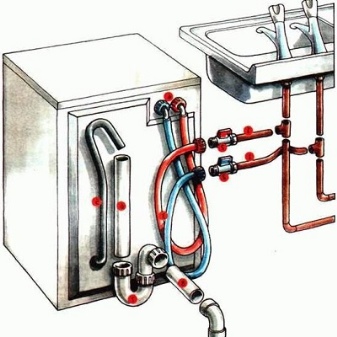
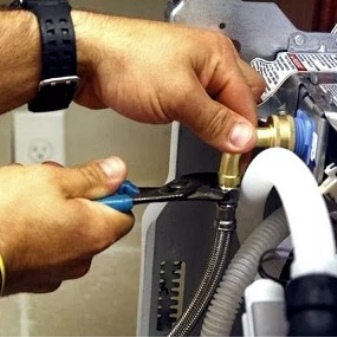
Connection of supply lines
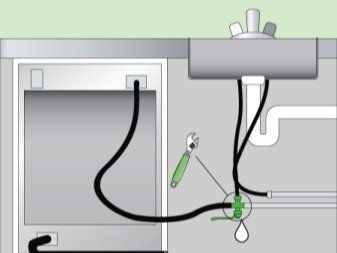
Most water lines are 3/8 ”in diameter. Before starting work, you need to make sure that you have everything you need to make a correct connection, including guides and a sliding hinge, at hand. The work should start by turning off the water and installing a double outlet shut-off valve to connect the supply line to the hot water dishwasher. One outlet on the valve provides hot water for the sink faucet, while the other connects to the appliance supply line.
Such a mechanism will allow you to turn off the water separately from the tap. Connect one end of the supply line to the shut-off valve and the other to the water intake on the underside of the dishwasher using a rectangular elbow. If necessary, apply special tape to the male threads to prevent leakage.
The supply lines should be hand-tightened and then a quarter turn with a wrench.
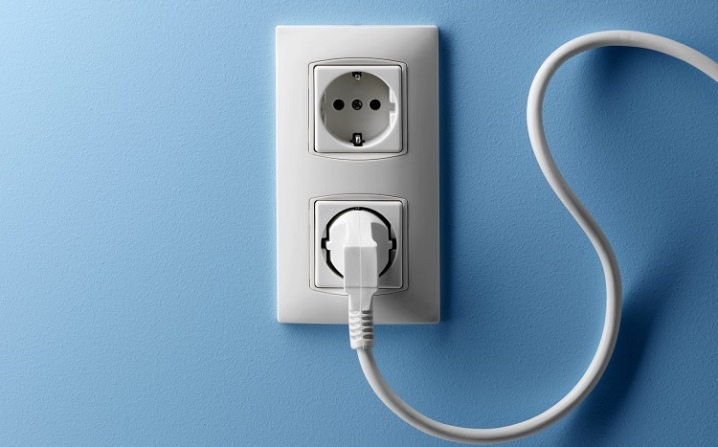
Power supply connection
You should always make sure to turn off the power in the house before starting work. Next, pass the cable through the back of the dishwasher's electrical box, and connect the usually black and neutral white wires to the corresponding ones in the box. For this, wire nuts are used. Be sure to connect the ground wire to the green one and place the cover on the box.
This is the hardest way to power your dishwasher. Modern models come with a cable and plug, so you just need to plug them in. After the installation is complete, you can turn on the water and check for leaks, then activate the power and run the equipment for a full cycle. If everything works correctly, insert the machine into the cabinet, being careful not to pinch the pipes. The technique is leveled by raising and lowering the adjustable feet on both sides. Now screw the dishwasher to the underside of the countertop to hold it in place. Mounting screws are used.


User manual
Before making the first start, it is worth inspecting the dishwasher. Be sure to check the dimensions of the supply lines and connectors. Close the shut-off valves before unplugging the old dishwasher. Prepare towels and a shallow pan to drain off any excess water remaining in the lines.
For fully integrated models, the door panel must weigh between 2.5 kg and 8.0 kg. It is important that it is resistant to steam and moisture. The user is required to ensure that there is sufficient clearance between the front door panel and the skirting board to smoothly open and close without any obstruction. The amount of clearance required depends on the thickness of the door panel and the height of the dishwasher.
Before turning on the equipment, it is worth checking the electrical plug, water and drain hoses. They should be located on either the left or right side of the dishwasher. It is important that the cables and hoses can be extended by at least 60 cm. Over time, the technician will need to be pulled out of the cabinet for maintenance. This should be done without having to disconnect the hoses and power cable.
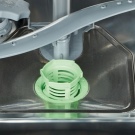
Be sure to turn off the power and water supply before any maintenance work. Pay particular attention to the icons and numbers that the technician demonstrates on the panel. If you use such a unit for a long time, there may be a problem with scale. In this case, experts advise adding salt. Its application once a month reduces the hardness of the water.
To clean the equipment, you will need to turn on the cycle with the dishes. You can then put on an additional rinse cycle. Don't worry about salt getting inside. For her, IKEA models have a separate compartment. Even if the salt has spilled, you should simply wipe it off with a damp cloth. It is important to know that a special product is used for cleaning, not ordinary table salt or any other salt. There are no impurities in the specialized one, and it has a special composition. The use of ordinary salt will certainly lead to breakdown of important equipment components.
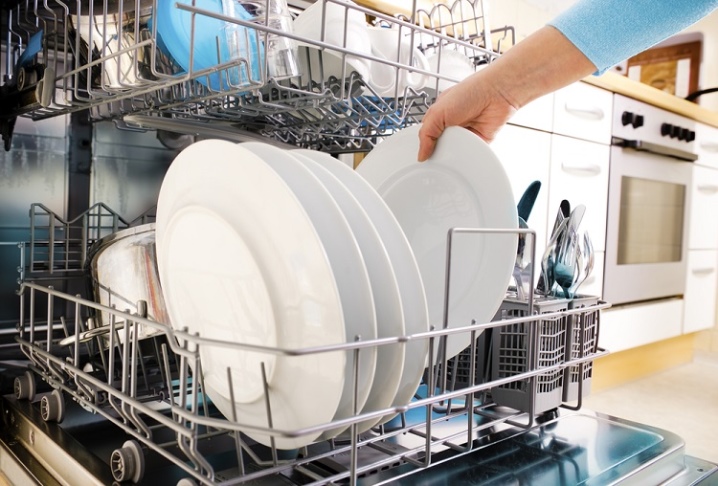
As for loading, you will first need to rinse the dishes in the sink or select the rinse cycle in the dishwasher first. Keep the plastic plates safe. If this is not done, the stream of water can turn them over and fill with water or, even worse, hit the heating element, as a result of which the dishes will simply melt. Never stack items on top of each other.Splashes of water will not be able to clean the dish on top.
Always separate stainless steel and silver cutlery (or silver plated). If these two types come into contact during washing, a reaction may occur.

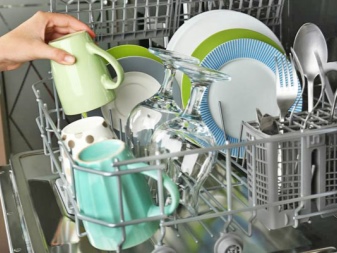
Bowls and plates go to the bottom shelf of the dishwasher. Lay them so that the dirty side faces where the splashing water is strongest, usually towards the center. Pots and pans should be tilted downward for best cleaning results. Flat pans and plates will also go to the bottom, placed on the sides and back of the rack. Never place them in front of a door - they can block the opening of the dispenser and prevent detergent from entering.
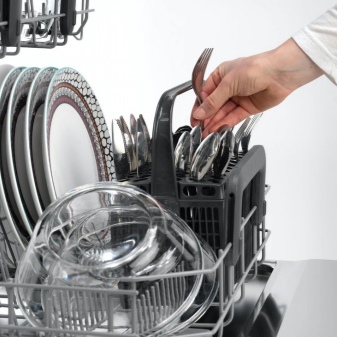
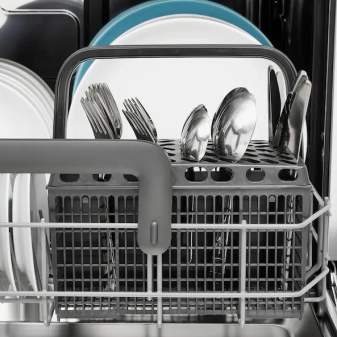
Spoons and forks should always be in the cutlery basket. The forks are raised so the tines are clean and the knives are positioned with the blade down for safety. Place glasses between the prongs - never on top. Be sure to tilt the cups at an angle so that the structure of the rack does not allow water to accumulate in the base. The bottom strut is unloaded first to avoid dripping. Wine glasses are carefully placed inside. To prevent damage, do not let them hit each other or the top of the dishwasher, and make sure they sit securely on the counter. Most modern dishwashers have glass holders.
Powders and liquids clean dishes well, but the detergent must be fresh, otherwise it will not cope with the dirt. A good rule of thumb is to only buy enough powder or gel that can be used within two months. Always store the product in a cool, dry place (not under a sink, where it can thicken or deteriorate). Do not overload the dishwasher, this will always negatively affect its performance and service life.
Wash large items by hand if necessary. It is best to remove large food debris before placing the plates inside the appliance. Cutting boards and large trays are placed on the outside of the underside of the appliance if they do not fit in the plate slots. It may be best to just wash the cutting boards by hand, as the heat from the dishwasher often warps them.


Review overview
On the Internet, you can find many reviews regarding equipment from the IKEA company. Mostly they are positive, but there are also negative statements, which in most cases are explained by improper use of the dishwasher. Users have no complaints about the assembly of models, but many talk about the unreasonably high cost, especially for inverter models.
All the necessary standard functions are there, and even more. The manufacturer is trying to constantly improve its technology. The features of the models presented by IKEA are economy, silence, attractive design. It is them that are most often noted in a positive way by users.


The comment was sent successfully.