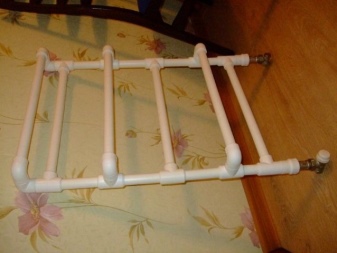
Heated towel rails made of polypropylene
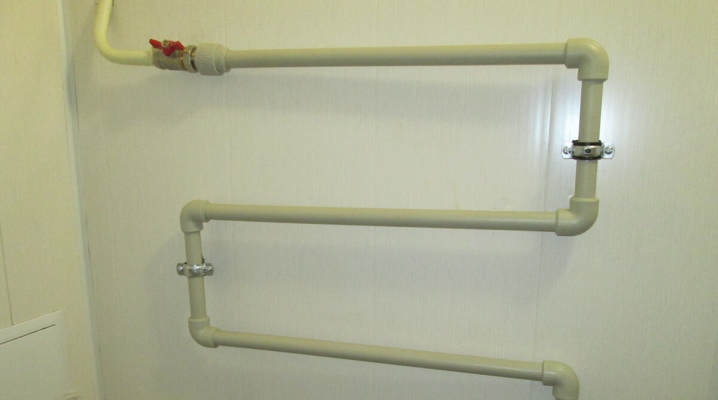
Today in the bathroom in every home there is such an element as a heated towel rail. The role of this device can hardly be overestimated. It serves not only for drying various linen and things, but also allows you to maintain a dry microclimate in such a room with high humidity, which makes it impossible for mold and mildew to form there. But the electric option made of metal is quite expensive. If you want to save money, then polypropylene heated towel rails are the best solution. It's quite easy to make such a homemade device with your own hands. Let's try to figure out how to make and install it.

Characteristic
It should be said that a polypropylene water heated towel rail is a rather interesting and profitable solution. And we are talking precisely about the advantages of such material, which are:
- low pressure loss;
- ease of installation work;
- low expansion due to exposure to high temperatures;
- low cost of pipes;
- long service life;
- no need for cleaning when welding.
It should be said that polypropylene pipes can be used for up to 50 years when exposed to temperatures of several hundred degrees. If you want to use them specifically for circulating hot water, then it is better to take reinforced pipes. Such polypropylene pipes are also called headquarters pipes. According to their characteristics, they have the same indicators as aluminum ones.
It should also be said that polypropylene heated towel rails can be:
- aquatic;
- electrical;
- combined.
The first ones are installed in the heating system, and their operation will depend on the season. In summer, they are not heated. By the way, you can even provide a supply of liquid from the water supply. In this case, the heated towel rail will only heat up when you turn on the hot tap. If the system is not used for a long time, the dryer will be cold. By the way, such systems are used to create a warm floor, and it is very convenient to sleep in a room with such a system in winter. True, in a number of cases there is a violation of various norms, which is why it is not recommended to create it.
The second category of such models operates from the mains. Its main advantage is stable heating. Because of this, mold and mildew do not form in the room, and it is also always dry. And the laundry dries quickly. But electricity consumption is increasing.

Combination models combine the characteristics of both options. This type of heated towel rail will be a good solution in case of constant interruptions in hot water.
How to do it yourself?
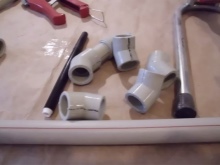
To create a dryer of this type, you will need to have a number of materials and tools on hand:
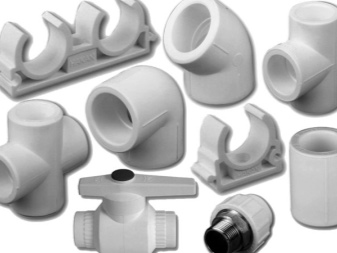
- polypropylene pipes;
- jumpers or couplings, which are also made of polypropylene;
- a knife with which pipes will be cut;
- mounts for installing the system;
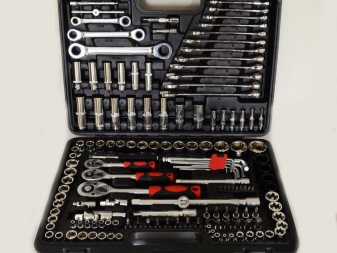
- a set of keys;
- Bulgarian;
- drill;
- marker;
- a couple of ball valves;
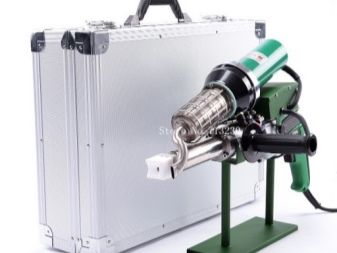
- welding for working with polypropylene.
Coil size must be taken into account when sizing pipes. It must match the routing footprints. Usually, pipes with a diameter in the range of 15-25 millimeters are used. In addition, if a combined or electrical option was chosen, then you should also prepare heating elements for 110 watts with an external half-inch thread and a circuit.


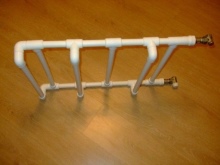
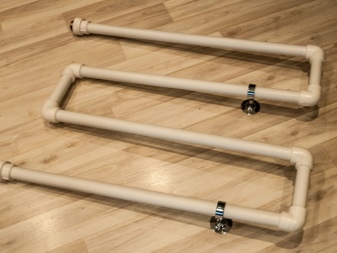
This construction is assembled according to the following algorithm.
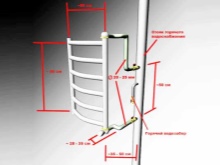
- First you need to decide on the configuration. In order to avoid accidents, it is best to first create a drawing of the desired design. When creating it, you should take into account the size of the bathroom room, as well as the type of connection to the heated towel rail system.
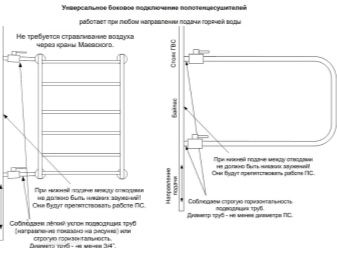
- If it was decided to use the diagonal or side option, then the feed will be from the top. It should be borne in mind that the pipe diameter must be the same size as the nodes. This technique is based on the so-called natural circulation. At the slightest narrowing, the system will work unstable and sooner or later will simply fail.
- If the bottom connection was selected, then forced circulation will be applied here. Thanks to this mechanism, the hot liquid is distributed on the riser as evenly as possible. By the way, in this case it will be impossible to do without the Mayevsky crane. It is he who is required to eliminate traffic jams from the air.
- Using a tape measure, we measure the required length of all the constituent parts, after which we apply the necessary marks with a marker. After that, we cut the pipes into the necessary parts using a grinder. Then we clean and polish the workpieces using felt and grinding wheels.
- Bends are welded to the edges. After that, you need to connect the parts to one another according to the scheme. Moreover, the connection should be as strong as possible. The seams must be ground so that the weld scars do not protrude above the rest of the structural elements.
- The tightness of the structure can be verified with the help of air and water. After that, you need to install the mount. We also check the length of the free elements and, if necessary, trim them.
- Once again, you need to grind the seams and make sure that all connections are made with high quality.
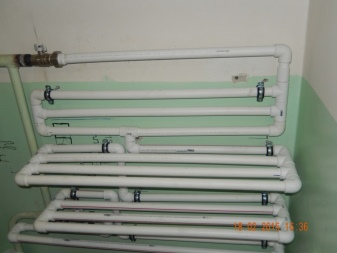
Mounting
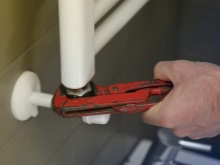
After the structure has been assembled, it is time to attach it to the wall. This process is carried out according to the following algorithm.
- First, shut off the water supply. We dismantle the old device. If it is attached with a threaded connection, then unscrew and remove. And if the pipe and the heated towel rail are a single structure, then you will need to cut it off with a grinder.
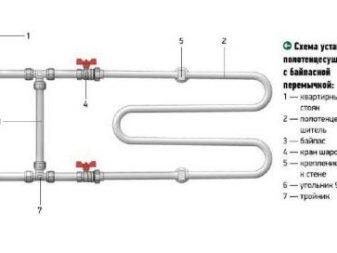
- Now you need to install the ball valves and bypass. This makes it possible not to shut off the water if repairs are required.
- A Mayevsky crane is installed in the jumper itself so that, if necessary, excess air can be removed.
- In the places where the structure is attached, we apply a marking for future holes on the wall with a pencil. We check that everything is placed exactly horizontally. For this, you can use the building level.
- We make holes and install plastic dowels in them.
- We attach the made heated towel rail, level it. Now the pipe is installed and secured with a screwdriver. The distance from the pipe axis to the wall surface should vary in the range of 35-50 millimeters, depending on the section and diameter of the pipe used to create the heated towel rail.
This completes the process of mounting the device and fixing it to the wall.
Connection methods
Now let's talk about how to connect such a device to the plumbing system. This process is carried out as follows.
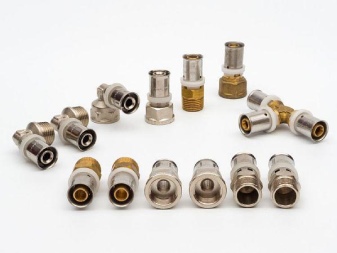
- When installing the dryer, you can use fittings, both straight and angled. Tying of threaded connections is carried out using linen winding. If the thread is tapered, then it would be better to use a FUM tape.
- When installing the entire structure, it is necessary to monitor the required slope of the supply pipeline in the direction of the water flow. Usually we are talking about 5-10 millimeters.
- The water must flow through the device from top to bottom. For this reason, the main flow must be connected to the upper bell.
- The nuts should be screwed through the cloth to avoid scratching the surface. It is also imperative to use rubber gaskets.When tightening the fasteners, make sure that they are not overtightened and the threads are not damaged.
- At the final stage, you should make sure that everything was soldered correctly, and check the heated towel rail for leaks.
This completes the installation process. It is important that in order to avoid water hammer, the device should be filled with water gradually.
Also, after filling with water, you need to carefully inspect and feel all joints and seams for leaks.
An overview of a polypropylene heated towel rail in the video below.


The comment was sent successfully.