Features of installing and connecting a gas stove
Installing a gas stove correctly and documenting it is not a difficult task, but it requires adherence to certain rules.
There are many different gas stoves on the market. It is possible to correctly connect such a unit, taking into account all norms and tolerances, only with the help of a specialist.
Can I install it myself?
All the work on preparing the floor and installing the slab can be done by hand, but a specialist who has the appropriate approvals can install and connect all the connections.
First of all, he must inspect:
- all fittings;
- all connecting elements;
- the quality of the gaskets;
- he also has to carry out test tests.

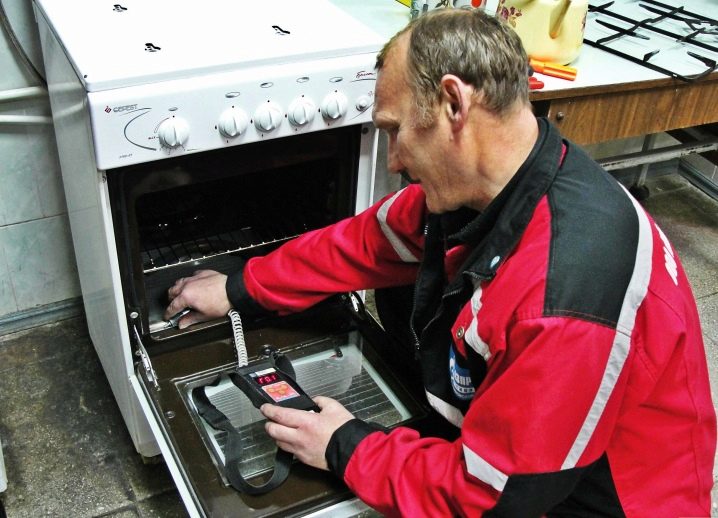
After that, he can give permission to operate the new device. If it is necessary to replace the stove after a while, homeowners will in any case have to inform the supervisory authorities responsible for the supply of gas about this.
All gas stoves and other appliances must be registered with a special supervisory authority. A fine is imposed for unauthorized installation of a gas appliance. Gas company employees are required to visit the landlord every six months and check the operation of the unit. If there is a violation, then a protocol is drawn up, penalties are imposed.
If the stove is officially connected, then the homeowner gets his hands on:
- agreement on the rules for the provision of relevant services;
- agreement with the supervisory authority;
- the subscriber's book, which contains the prices at which gas is supplied.
Where to contact?
To officially change the stove to a more modern model, it will be necessary:
- buy a unit;
- apply to a gas company that has an SRO certificate, that is, a permit to install gas equipment in a residential building.
Private gas services most often offer their services at affordable prices. After installing the new stove, it will be necessary to register it with Gosgaz. Employees from licensed firms are also authorized to make entries in the passport of the new gas unit. It is most rational to call a gas worker from a municipal gas organization, because the fewer intermediaries in this important matter, the better.
There is a certain procedure for replacing slabs in a private household. In megacities, there are city programs, according to which all gas stoves must be modernized. Often, such operations are carried out at the expense of municipal budgets (Moscow, St. Petersburg, Nizhny Novgorod).
To get a complete picture of the preferences and the procedure for installing equipment, you should contact Gorgaz.
It is possible to replace gas units free of charge:
- if the stove is on the balance sheet of municipal or state organizations;
- if the homeowner has benefits, being a hero of Russia or the Soviet Union, a participant in the Great Patriotic War;
- also the plates are changed for elderly people who do not receive any subsidies;
- poor citizens whose income is below the minimum wage;
- citizens who live in non-privatized households under a social tenancy agreement.

Before starting the work of the stove, a document "On technical inspection" should be drawn up.It is also called the "defective statement". It is usually compiled in several copies. It should contain entries:
- about existing faults;
- the operating time of this device.
After analyzing the annual preventive checks of the slab, a final document is drawn up. Then, an application is drawn up in the DEZ, which indicates the request for a replacement. A DEZ worker must put the homeowner in line to replace the gas appliance.

To make a replacement yourself, you need to take the following steps:
- submit an application to the PRUE of the city gas service, where you should indicate the request for the replacement of the unit;
- a specialist will arrive from this organization, who will assess the amount of work to be done, and write an invoice;
- in the event that the homeowner put the stove on his own, he is obliged to write a request for permission to connect it;
- after the invoice is received, it should be paid and an agreement on the time when the master will come and do his work;
- after installation, a corresponding mark must be made in the passport of the gas stove.

In the future, only this organization will perform maintenance of the equipment, which is very convenient, it will also be responsible if any problems arise with the equipment.
Requirements for the premises
SNiP approves the following procedure: gas stoves can be installed in rooms with a height of at least 2.21 meters. There must be a window with an opening window in the room.
In the absence of a window in the kitchen, the presence of a hood is desirable, it must be airtight and accessible for cleaning. On the roof, the chimney rises by at least 0.52 meters, a deflector must be present.
The norms also state that the volume of the room in which the gas stove with two burners is located must be 8.2 cubic meters. If there are three working burners, then the volume of the room should be 12.2 m3; if the stove is with four burners, then the volume of the room is 15.12 m3.

In private houses, the possible height of the kitchen is no more than two meters, but natural lighting must also be mandatory. If all of the above requirements are not met, then it is necessary to agree with the supervisory authority on an individual basis.
The stove is installed near the wall, which must not consist of combustible materials (plastic, wood, etc.). The distance between the stove and the wall must be at least 6.5 cm.

Walls can be covered with the following materials:
- sheet steel (4 mm);
- plaster.


The insulation exceeds the dimensions of the gas unit by 10.2 cm on all sides, and at least 82 cm at the top. For units without thermal insulation, the distance between the stove and the furniture must be more than 16 cm.
There must be a space of about 1.2 meters in front of the unit. It is permissible to install a hood with a fan above the stove.
Safety regulations
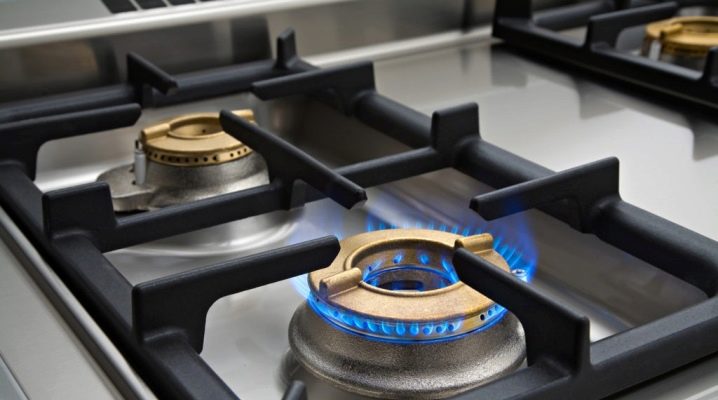
Before using hoses, they must be tested and visually inspected. You should also check the quality certificate and warranty cards of the device. The connection itself should not have additional fittings, this is strictly prohibited. Sometimes the connection is made using metal pipes, but this happens only in extreme cases.

The hose must not come into contact with any flammable surfaces or sharp corners. Sometimes it is possible to connect using a pipe, but this is a rarity nowadays.
The pipe connection uses special communications made of steel or copper. Such a connection is reliable and durable, but the plate becomes stationary, it will not be possible to move it.

Required parts and tools
To properly connect the stove, you should use the following tools:
- special hose (1.7 meters);
- ball joint made of brass;
- adjustable wrenches;
- gaskets;
- screwdrivers;
- special tape for sealing;
- a brush and a tube of foam.


At the junction points, various gaskets play an important role, most often these are the following materials:
- thread "Loctite 55";
- FUM tape.
It is best to use only those materials that are recommended by gas workers. The thread "Loctite 55" is a reliable material that ensures the correct fastening of working elements in the most difficult areas. It has a high density and plasticity (the length can be from 14 to 162 meters), in the places of threaded connections it provides perfect sealing. In this case, the pressure in the pipe can be quite high. The material is universal and suitable for any connection without any restrictions.

FUM tape is another type of sealing that can withstand significant loads, it is made of a special 4D fluoroplastic. There are three types of tapes in total.
- The first type is called "Brand 1"... It can be used in aggressive environments (acids, alkalis, etc.).
- Grade 2 works best in sites where various oxidizing agents are present. Has no lubrication.
- Grade 3 - a universal tape that can be used both in industry and in everyday life. In fact, these are thin threads that are assembled into a film coating.


FUM belts meet all the necessary requirements:
- high resistance to high temperatures;
- lack of corrosive phenomena;
- durability;
- lack of toxins;
- creating a good tightness.

Work order
Before connecting the stove to general communications in an apartment or in a private house, you should decide where it will be located in the kitchen.
The floor under the slab should be perfectly flat; the most rational way is to make a reinforced screed. Most slabs have legs that can be twisted to adjust the height.

During work it is recommended to use a good German or Russian building level. This is a simple tool that allows you to set the unit as accurately as possible. Sometimes cardboard or plywood is placed under the legs in order to align the gas appliance as much as possible.

Another important condition that it is advisable to observe is that furniture or a wall should not adjoin the back wall of the slabs. All liners must be accessible. If a malfunction occurs, it can be easily diagnosed and repaired.
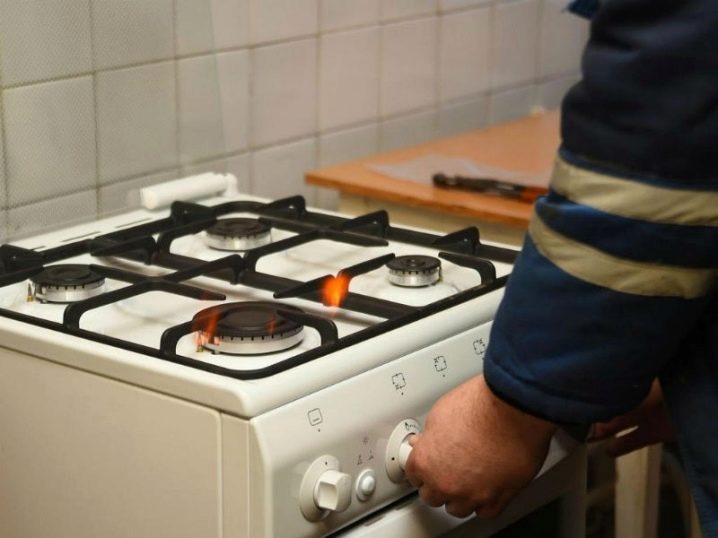
Compounds are wound onto the union in the area of the thread, which ensure a tight connection for a long time. Linen and cotton fabrics are not used at the joints due to their low tightness. The fitting, which has the necessary seal, is screwed into the gas cock, the other end is connected to the outlet of the gas stove. This should be done by a certified specialist from the relevant service. During operation, the windows must be opened and all sources of fire are removed.

It is important to remember that flexible hoses must be within reach so that they can be easily inspected and checked. The sleeve must always be made strictly in accordance with the regulations. It is forbidden to paint the hoses (the material deforms from the paint), but it can be pasted over with applications.
The hose without adapters is connected to the pipe and plate. Adapters are appropriate to use if there are any non-standard connections.

During installation, only special tools and consumables can be used. The built-in nozzles must be carefully sealed during the connection, there should be no leaks.

A wet cloth is used as a plug, as water can be an effective insulator. After the installation is complete, it is imperative that all joints are lubricated with a soap solution in order to understand where there may be a leak. If a quiet hiss is heard, then the gas is “poisoning” somewhere, in this case the emergency team should be called. You cannot fix such problems yourself, it is dangerous. You should immediately make sure that there is no open source of fire nearby, it is also better to turn off electrical appliances.

Dismantling the old slab
The installation of a gas stove consists of several stages. First of all, dismantle the old unit. To do this, turn off the gas valve. After that you need:
- unscrew the gas supply hose;
- unscrew the lock nut, which is located on the release coupling;
- after that, the clutch itself is removed.


If you change the tap with your own hands, then you should definitely open the windows and do all the work quickly enough. Dismantling work is simple and can be done in a short period of time. Before starting dismantling, you should prepare pieces of cotton fabric and wet them. They will be required to create a cork.
Replacing the tap
Gas service workers advise changing the tap before obvious problems appear in this unit. Usually the manufacturer's warranty is 10-12 years. There are a great many cranes, but they are divided into two main types.
- Cork - these are taps in which a cone-shaped element (plug) with a drilled hole works. This design effectively allows you to shut off the gas flow.
- Cranes are also made from metals (brass, cast iron), such assemblies are resistant to corrosion and wear. When opening the assembly using the handwheel, the hole in the taper will line up with the hole in the pipe. This ensures the flow of gas. When connecting plug valves and to ensure their tightness, a gland is usually used.
- There are also taps ball, the shut-off unit is a metal hemisphere. There is also a hole here, which, when turned, "hits" the hole in the pipe.


Ball valve advantages:
- affordable price;
- reliability and ease of use;
- strength.
Ball valves are now the top sellers.

It is also important how the valve is attached to the gas pipeline. There is a flange fastening method, when the fastening is provided with special bolts. Most often, this method is used when transporting cylinders. There is also a welded one, when the crane is firmly attached to the pipe by welding.


The most reliable valves are ball valves made of brass and made of bronze.
When choosing a crane, you should pay attention to the following indicators:
- pipe diameter;
- coincidence of the diameters of the pipe and the valve;
- no defects.

Replacing the tap takes on average 10-15 minutes. Tools required:
- locking knot;
- gas keys (1 and 2);
- a sealant;
- screwdriver;
- grease and graphite grease;
- stub;
- fittings and adapters.


During the operation, the valve should be tightened by hand, only the last couple of turns can be done with a wrench. Sometimes it is difficult to unscrew the old tap, in this case it is recommended to drip a special WD-42 compound onto the joints. It is worth waiting 5-7 minutes, the solution will be absorbed into the joints, and the fastener can be easily unscrewed.

Installation
In order to properly put the gas stove, you should prepare the place where it will be located. If the old plate is replaced with a new one, then after dismantling the old screed should be inspected. If there are cracks or chips, they are sealed with Keresit or cement mortar. New cement patches should dry up within three days. Only then can you start installing the equipment. It should be borne in mind that the kitchen set or countertop must stand at a certain distance from the stove (16-20 cm).

The new plate is removed from the packaging and inspected. All movable elements are removed:
- baking sheet;
- lattice;
- pallet.
The included legs are screwed to the device. The stove is placed on the prepared "pillow". There should be a small distance from the wall.

To put the stove with an electric ignition, you should place the socket in which the grounding will be located. After installing the stove, you should make a soapy solution and anoint all joints with a brush so that it is clear whether there is a gas leak or not.

Connection
It is not difficult to connect a gas appliance, but it is forbidden to do it yourself. If the homeowner decides to make the connection on his own, then he faces a fine from the supervisory organization. There is a reason for this, because gas is an explosive substance that can destroy not only your apartment, but the whole house.
Many trade organizations that sell gas stoves can contract to supply the unit. To install them, you must have permission from the appropriate supervisory authority. Be sure to call specialists from the gas company after the installation is completed, who will check the correct connection and make a corresponding mark in the document.

A special topic is the connection of a gas stove to a cylinder. Such rules must be followed by law.
- There must be a distance of at least 1.6 meters from the gas stove to the cylinder. Often, in rural houses, cylinders are placed outside the house under a special canopy in a box.
- The room should have excellent ventilation.
- If cylinders are used, then it is imperative to connect a reduction gear.

Examination
The check is done using a soapy solution. It is best to use shaving foam for these purposes, it will most effectively show the places where there is a loose connection. Foam is applied to all joints with a brush. If there are no bubbles, then the connection is sealed.

For information on how to properly install a gas stove, see the video below.


The comment was sent successfully.