Socket for an electric stove: types, installation and connection
Today, no technique is complete without an energy source. As a rule, they are electricity, which we draw from the power grids installed in our homes. The intermediary between the electrical network and the device is the socket to which the device is connected using a plug.
This article will talk about such a thing as a socket for an electric stove. We will consider its features and categories, how to choose it, plans for its connection, installation standards and how, if necessary, move it somewhere.

Peculiarities
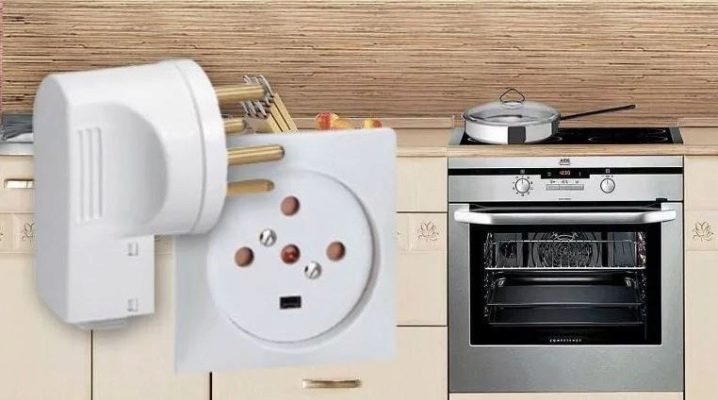
A power connector that can withstand a serious load is usually used to operate some kind of powerful household appliances, for example, an electric stove. This solution differs from a simple 220 outlet in that it can pass significantly higher nominal current values than ordinary household sockets.
Usually, to connect such an element to a single-phase network, a special 3-core wire is used, which contains zero, ground and phase cables with the appropriate cross-section. Simple sockets are designed for a current in the region of 10-16 amperes, and the ones needed in the considered option are for 25, 32 and 40 A. That is, such a current does not even heat their contacts, which will not lead to wear and tear over time.
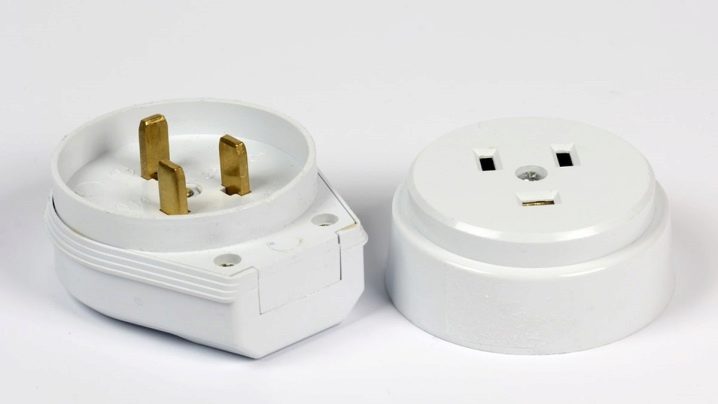
A solution that has increased power, like a regular outlet, has the following components:
- working part;
- screws;
- decorative overlay that performs an aesthetic and protective function.
Of the three elements, only the internal mechanism will differ from the usual socket. When disassembling it, it will become clear that there are special input-type terminals inside to connect the power cable and output-type contacts, which allow the transfer of electric current to the plug, which is inserted into the outlet.


Views
It should be said that power type sockets are different. They are usually classified according to several criteria.
Purpose
There are several types of outlets that differ in purpose.
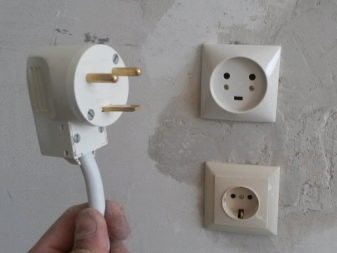
- Connector that has no ground... Such a solution will be the most technically simple type of power outlets for connecting electric stoves. It is usually used in conjunction with a plug that does not have grounding protection.
- Built-in power outlet with grounding... In addition to the holes for the pins, this solution also has a special plug-pin of category F. There are also similar solutions, but with contacts on the sides. This option makes the connection to the grounding contacts even before the moment when the plugs come in contact with the power-type contacts.
- Connectors with protective shutters... In such variants, the holes for the power-type contacts are simply covered with plastic plates. The shutters can be opened when the fork pins touch both contacts at once.
- Ejector socket... It has a special device in the body for ejecting the plug, which is triggered when you press the corresponding key.
- Timer connector... Here you can simply program the outlet for the time of connection and disconnection.
- RCD solutions... Such options will be an excellent solution in places where there are serious security risks.


Operating time
The duration of operation and the reliability of contacts will depend on the value set by the manufacturer in terms of the maximum number of switching on and off the device.If the outlet is of high quality, then it can withstand about hundreds of thousands of on and off cycles.

Installation technique
According to this criterion, power outlets are divided into closed and open. The second option is used in the corresponding wiring and is mounted directly in the wall as a cover plate. Typically, this type of wiring is used in loggias, wooden houses, on the street, and so on.
If the installation is closed, the power connector cuts into the socket. Then the wiring will also be inside the wall. It is the second method that is considered the most common and is done in most categories of residential premises.


Resistance to external influences
Usually, this moment is recognized by the markings that are indicated on each product. It usually consists of a special alphabetic code, namely the letters IP, as well as various numbers. Letters indicate the presence of protection against intrusion, and the numbers from 0 to 8 - the degree of this protection.
When choosing, you should pay attention to the following factors:
- the presence of a spring contact mechanism - it is better if the device has a pair of contact paws;
- clamping category - as a rule, it can be either double or quick-clamping design;
- fork hole diameter - according to the European standard, its size should be 4.8 millimeters, in post-Soviet countries this figure is 4 millimeters.


How to choose?
Now let's talk about how such an outlet is chosen to mount an oven or connect an electric stove. When choosing, the permissible current value is important.
As already mentioned, most conventional outlets are rated for 10 or 16 amperes. But if you connect a high-power appliance to a similar outlet in the kitchen with your own hands, the contacts will become too hot and the subsequent ignition will occur.

It is better to select the outlet for the maximum load current... In the case of the types of equipment under consideration, which have an indicator of power consumption up to 7 kW, you will need to have on hand a standard "plug-socket" set, designed for a rated current of 32 amperes, but with a permissible load for a short time at 40 amperes.
If the appliances in the kitchen consume more than 7 kW, then the indicator for the outlet rises to 63 amperes.
The next point in terms of choice is the number of phases. The single-phase connection method is the standard for household appliances. A 2-pole plug is then used which is either grounded or not. From time to time, the 3rd contact is used - grounding, which connects the metal case of the device with zero potential relative to earth.
Connection diagrams
Usually, all electric stoves end up in stores with an outlet already connected, but it so happens that you need to connect it yourself. It won't be a problem if you have the information.
First, you need to understand how the electric stove will be powered, because the single-phase and three-phase connection schemes will differ. It is important to understand here that Electric furnaces can operate both from a 220 volt outlet and from a 380 V outlet.
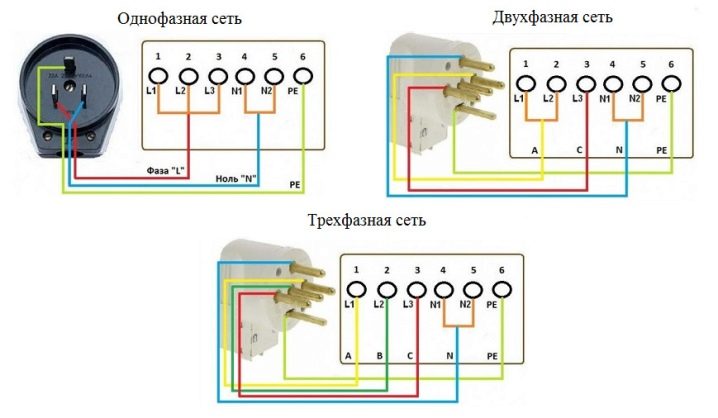
The most common will be a 1-phase connection, therefore we will consider it first. The plugs will then have 3 outputs, where the contact is a phase cable, one more is zero, and the remaining is a protective one.
If the socket has already been installed, then you should find each of the indicated cables, and connect the cables located on the plug to the necessary contacts.
If the socket has not yet been connected, then the extreme terminal on the left will be phase, the extreme on the right will be zero, and the remaining option will be a protective cable.

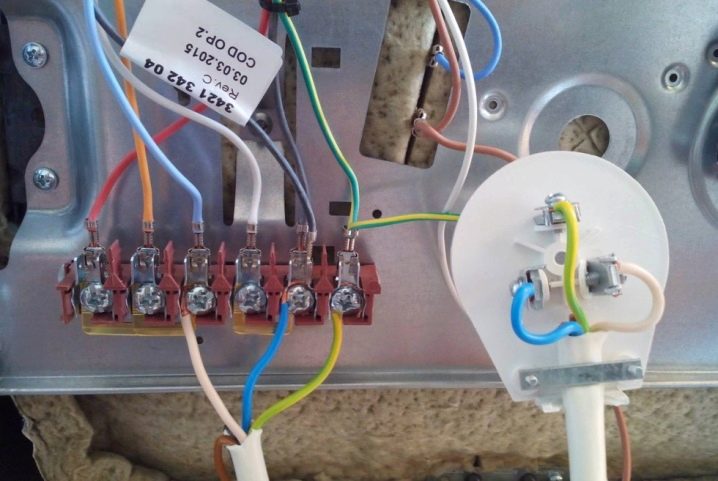
The next step is to connect the technique in question. For a person who has little experience, as many as 6 contacts may be puzzling, but there is nothing complicated about it. Contacts marked 1–3 and L1 – L3 are needed to connect the phase conductor.If it is single-phase, then a jumper should be installed between the indicated terminals and a phase cable should be installed. A number of manufacturers supply devices with a jumper mounted.

Contacts with designations 4–5 and N1 – N2 are the contacts of the zero terminals of the device. There should also be a jumper between them and the specified type of cable can be easily put into any contact. The one with the designation PE is for the protective cable. When all this is done, then the connection with your own hand in the case of a single-phase network is considered complete.
Let's see how to make a three-phase connection correctly. The installation of the outlet for the purpose in question will be slightly different. There will be 5 contacts on the plug and on the socket. And in this case, 1 wire will be protective, 1 - zero and 3-phase. Then the latter will be connected to the contacts located with each other, the neutral wire contact will be located on top, and for the protective one below.

Phase cables must be connected from the plug to pins 1-3 or L1-L3. There is an important point here - if the manufacturer installed jumpers between pins 1-3 or L1-L3, then they should be dismantled. Or then a short circuit is guaranteed. And the protective and neutral wire must be connected, as in the previous version.
Installation rules
The process of carrying out electrical work with an outlet does not present any particular difficulties. It is necessary to have basic knowledge of electrical engineering and be able to work with tools.
Installation includes several steps.
- First you need to stop the power supply in the kitchen and reduce the voltage to zero. To do this, turn off the apartment or house meter.
- Now follows choose a place for mounting the connector... Here you should do it so that it is as convenient as possible. It will be better if the combined or any socket at all will be located behind an electrical device on top or behind a hinged panel. You can also do this near the stove.
- Laying the wire. At first select the required power type cable... For this, a formula is used according to which the sum of all the powers of the burners and surfaces for heating and the oven must be divided by the voltage that will be involved. The result we get from these calculations will be the amount of current that flows through the power cable at full load. But usually in the situations under consideration, a 3-core cable with a 4 mm cross-section is used. This limitation is a consequence of the total power consumption of no more than 7 kW or 32 amperes.
- Installation of protective equipment... We are talking about a circuit breaker of the power category. We will need a 32 ampere solution, which will correspond to the maximum line voltage at full load.
- Before directly connecting the stove, you need to prepare the necessary toolsso that they are always at hand - a knife, a screwdriver, a plug, the socket itself and pliers.
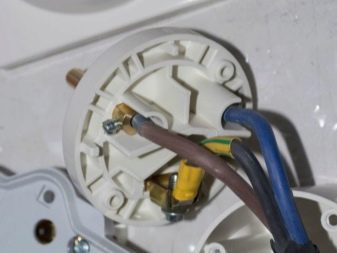
- Now we go directly to the installation of a kitchen outlet. First you need to access the connector such a technique that is located on the panel at the back. We unscrew the bolts to loosen the contacts in the connecting type wiring. We clean the wire and cut the cores. Now the wires with contacts. It should be said that red is phase, yellow is ground, blue is zero.
- Disconnecting cables... First, we open the plug, by unscrewing the mounting bolt, remove the upper part of the case. Below you can see contact-type surfaces with terminals. It is required to connect to the terminals 3 wires that leave the electric stove.
- Now we are installing the outlet. The kitchen socket is mounted as follows:
- we mark the place where it will be placed;
- we punch holes in the wall using a puncher;
- we connect the wires - we loosen the fasteners, each core is connected to the required clamp;
- now we put the socket panel on the marked place and fasten it with bolts.
- Circuit breaker connection... The place for its installation should be chosen so that it is possible to quickly turn it off, if necessary. Installation will take about 7-10 minutes. First, you need to install the base that will hold this machine - a special DIN rail, and also connect the necessary conductors. More precisely, only the phase conductor. First, using a knife, we clean the cable sheath and find a red wire. It should be cut open and the ends cleaned. We connect the wires to the contacts in accordance with the connection plan, which is on the circuit breaker.


An important point in installing a 32-amp circuit breaker will be that the stripped cables must be of a certain length. Such veins should not stand out from the contact group. When the machine is connected, it should be set to the zero position, after which the conductor to the electricity meter is turned on, which is inserted into the control box.
How do I move it to another location?
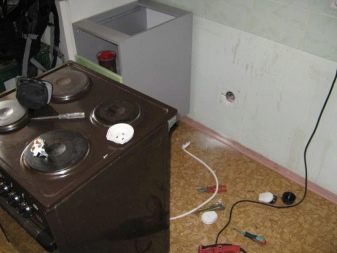
It often happens that when carrying out repairs or rearrangements in the kitchen, it is required to carry out the transfer of the socket for the electric stove. Considering that there is usually only one outlet, all equipment will be tied to the place where it is located, and we cannot install the stove and cooker panel, which are powered by electricity, anywhere else.
There are a number of methods for relocating an electrical outlet. Some are extremely simple and safe, and some are complex and not always safe, so they require certain knowledge and skills.
Let's try to consider the simplest solutions, so as not to overcomplicate what can be done simply.


- The easiest way to move a hob or electric stove is to use an extension cord... Everything will be extremely simple here - we plug the extension cord into the socket that is, and bring the connector to the place we need where the equipment is located. This method is simple and affordable. But it is not always possible to find an extension cord where a 3-phase connection is used. And such a connection cannot be called very reliable. And also the risk of causing mechanical damage to this structure increases, because the wire is usually placed on the floor or passes through furniture. In general, there is a benefit in this case, but there are also enough disadvantages.
- Replacing the power cable for the electric stove from the panel... This method has maximum reliability, but the costs will be maximum here, because you should buy the required cable of a certain length, lay it again, and so on. And often you want such a wiring to be hidden and internal, which means you have to break the wall. There are also advantages and disadvantages.
- Probably, a simple cable extension would be optimal, that there is also its laying to the new location of the equipment. In general, there will be nothing complicated, the cable laying will repeat the steps described above. This method combines the advantages of the two methods described above and has practically no drawbacks. It is safe, reliable, not too expensive and will keep your kitchen appliances working perfectly in a new place for a long time.


For information on how to properly relocate an electrical outlet for an electric stove, see the following video.


The comment was sent successfully.