Molding from the company "Europlast"
Moldings are special decorative elements in the form of an overhead strip with a relief. They can be used to decorate floors, ceilings, walls, arches, doors. These designs give the interior a more beautiful and neat look. Today we will talk about the features of these parts of the Europlast brand.
Peculiarities
Europlast moldings can be of various sizes. They are also made from various materials. But the most commonly used is thermoplastic polyurethane. It is carefully processed and primed for painting.
These products are particularly durable. They will be able to serve for many years. The company's products are distinguished by their neat and modern design. Such moldings can harmoniously fit into various interior styles.
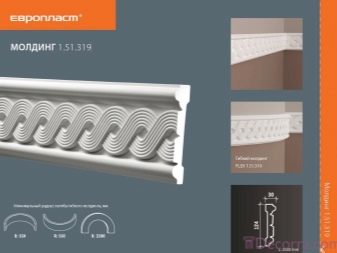
It should be noted that Europlast molding has an affordable cost. Most often, such products are sold in whole sets.
Assortment of moldings
The company currently produces various types of moldings.
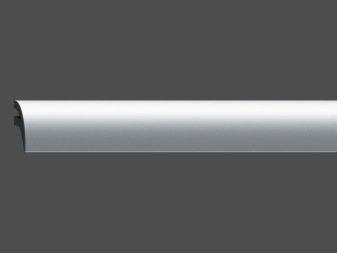
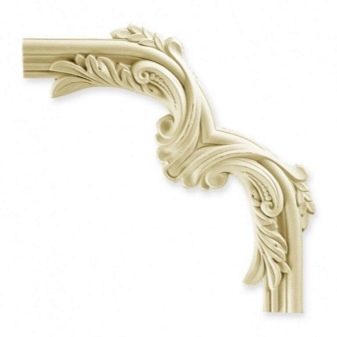
Corner
These models are usually made of high quality polyurethane. They can take many different forms. The range of products includes simple and concise models that will look great in modern interiors, as well as models with more complex patterns, suitable for a classic style. Some samples are in no way inferior to gypsum stucco molding.

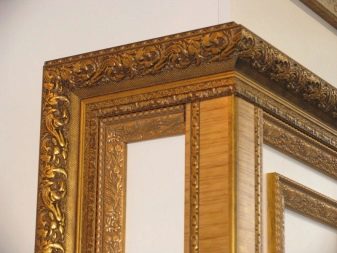
Corner models can be used in the design of ceilings and walls... Sometimes they are purchased for finishing large frames, mirrors or paintings. These varieties make it easy to connect other decorative straight onlays.
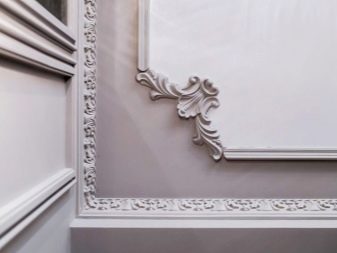
Often, such structures are acquired for framing the outer corners of multi-level ceilings.
Backlit
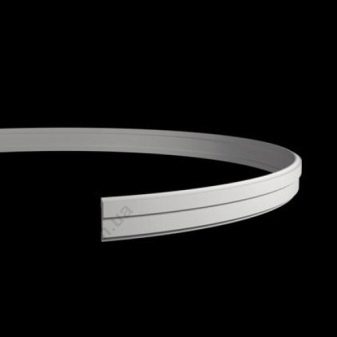
These moldings are supplied with LED light sources. They will provide additional lighting in the room. Often such products are made flexible. These models are most often used for walls. They fit perfectly into modern interior styles.
Illuminated moldings can be located around the entire perimeter of the ceiling covering. Sometimes, with their help, separate zones in the interior are highlighted. In the manufacture of such decorative structures, a special steel mold is used to cast products.
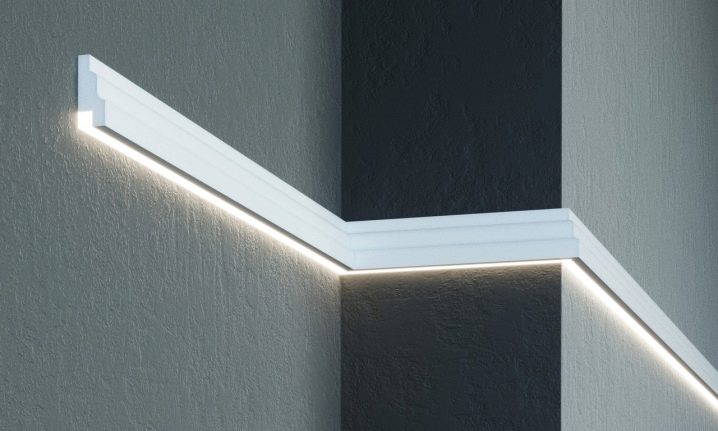
Moldings of this type are usually coated with a polyurethane white primer during the production process, which ensures good adhesion of the finishing layer.
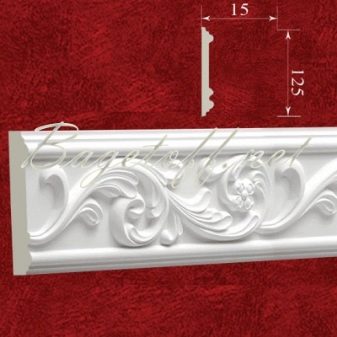
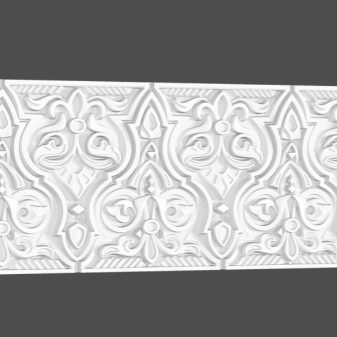
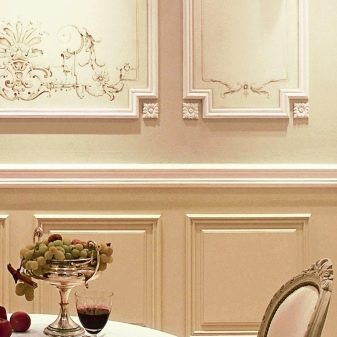
With ornament
The assortment has a fairly large number of beautiful moldings with ornaments. These decorative designs will hide many defects in the wall decoration. In addition, they can visually significantly increase the space.
Such models can also be flexible. They are specially designed for curved wall coverings. Often these polyurethane moldings are used in conjunction with cornices and tiered ceilings.
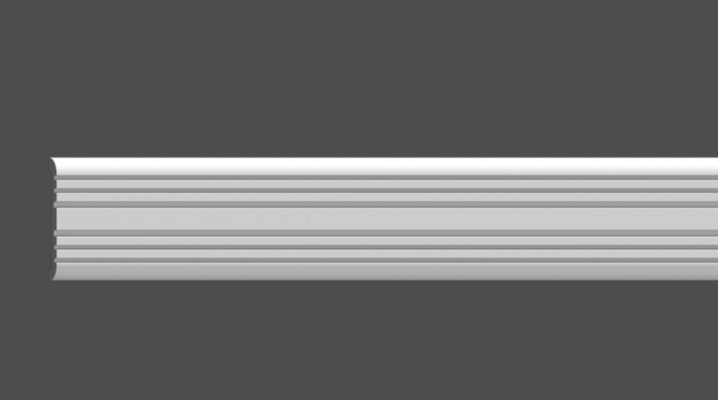
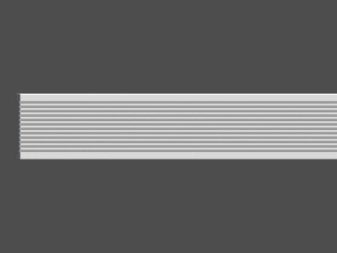
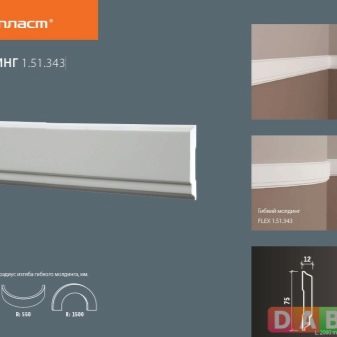
Smooth
These samples are most often made from a composite material. These moldings are considered impact resistant. They will be able to serve for many years. Smooth models will look as neat and laconic as possible in any interior. They are not complemented by decorative elements, ornaments, their surface is absolutely flat.
Such instances can also be flexible. Smooth moldings can be decorated with various coloring compounds.
Other
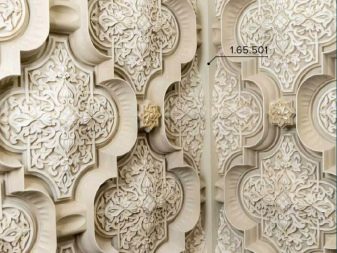
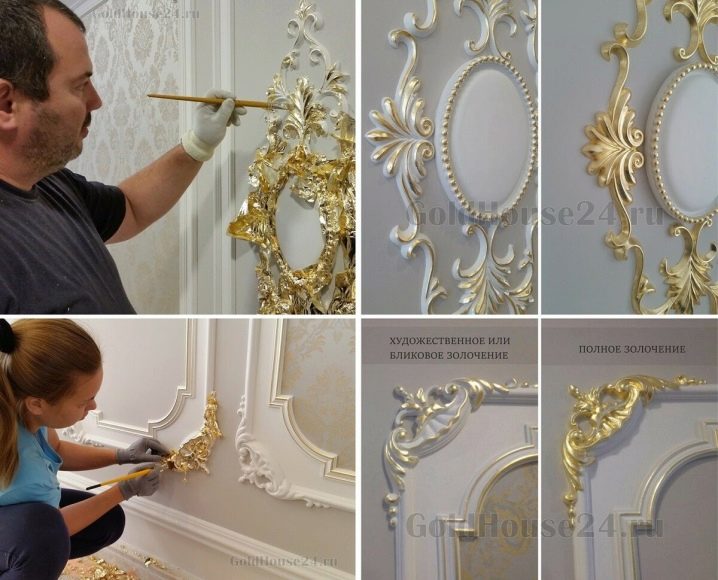
The range also includes moldings for decorative stucco moldings. In their manufacture, it is used duropolymer... Such a modern and safe material is distinguished by its high density, due to which the structures are as strong and durable as possible. In addition, duropolymer products are also considered the most durable and fade resistant.
Moldings made under the stuccoare quite easy to install. They can be dyed in various acrylic or dispersed pigments.
Mounting
Now we will analyze in detail how to properly install the moldings. First you need to do some preparatory work. 48 hours before the start of installation, polyurethane structures must be brought into the room, unpacked and left to soak in the surrounding conditions. The adhesive for installation must be in the same room during the day.
The surfaces on which the moldings will be fixed, as well as the structures themselves, must be absolutely clean. If necessary, the walls are pre-leveled using special solutions, after which they are primed to ensure better adhesion to the glue.
Calculate moldings and cornices in advance. It is made taking into account the joining of drawings, cutting corners.
Remember that the humidity in the room should be in the range of 30-50%, since this indicator affects the quality of the polyurethane. With sharp fluctuations in humidity, products may deform.
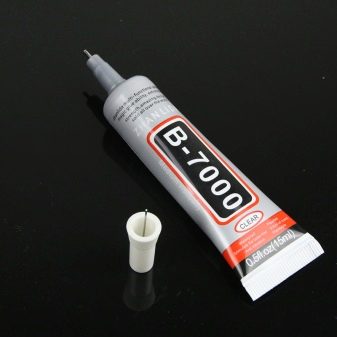
To install moldings, glue and self-tapping screws can be used, or just glue. For such decorative designs it is better to purchase an assembly or docking compound.
Installation of moldings takes place in several stages.
-
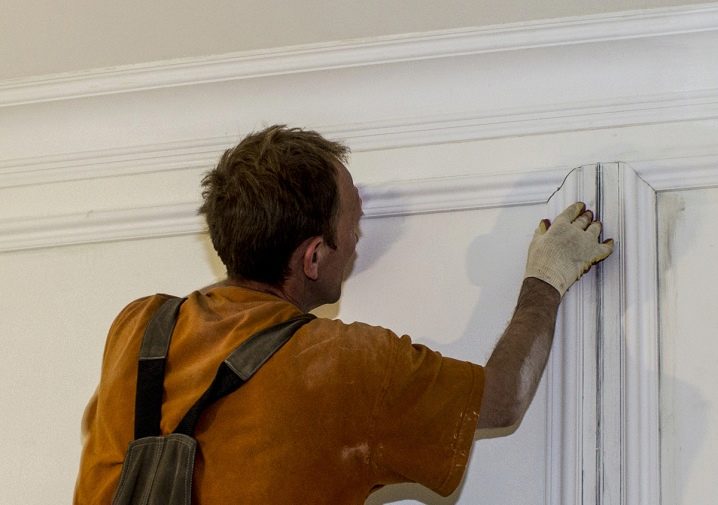
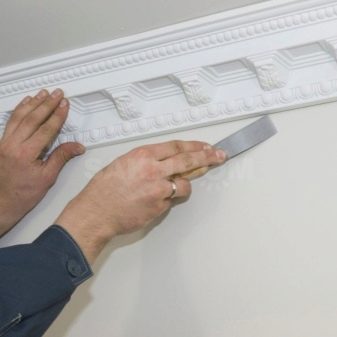
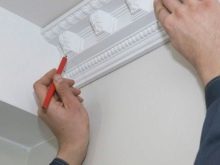
First, lines are marked to connect the elements at a 45-degree angle in the corners of the room. To make the markings as accurate as possible, you should attach the ceiling cornices to the fixation point in the corner and circle their bottom and top and then measure the angle. Further, the cutting line is indicated, for this, the lower and upper points of intersection of the line and the cornice are joined.
-
After that, a hacksaw and a miter box are taken. With the help of such tools, corners are cut off on structures that will be joined at the corners.
-
Then the parts are connected.
-
Mounting or joint glue is applied to the side sections of the moldings. The layer should be distributed as evenly as possible.
-
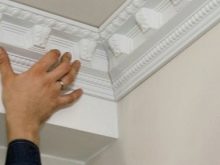
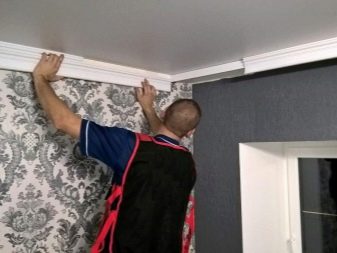
Later, the product is tightly applied to the right place, it is better to temporarily fix it in the lower part with finishing nails.
-
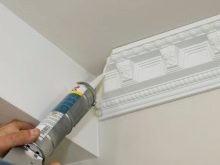
A slight excess of glue is applied to the ends of the moldings... Next, the second part of such a decor is taken with a cut off corner and applied glue, it is also applied, precisely matching with the other part. The joint should be as tight as possible. The glue should bleed a little through it.
-
Remaining glue is better immediately clean with a damp cloth.
-
After you have glued all the decorative details, they are left to dry completely for a day. After a while, finishing nails can be removed.
-
If adhesive remains on the surface of the moldings, it is carefully removed with a knife, then these places are rubbed with sandpaper.
-
If there are gaps in the joints, then they should be immediately filled with sealant.
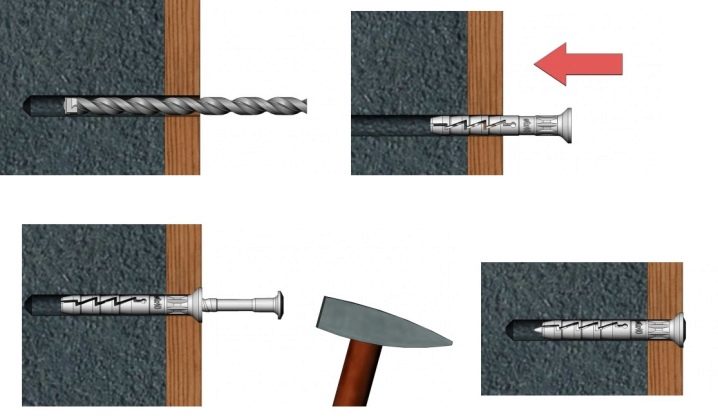
During installation, self-tapping screws are often used additionally. Such fasteners will provide a more reliable and durable fixation. In this case, for every couple of meters, there should be 3-4 self-tapping screws. But first, holes are drilled in the molding for them.
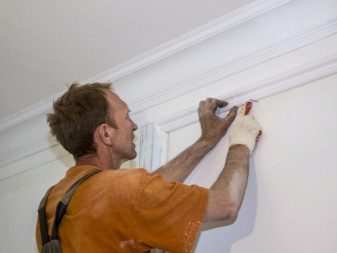
Self-tapping screws are simply screwed into the holes made, the places of their fixation must be puttied. At the final stage, the installed structures can be painted.
Examples in the interior
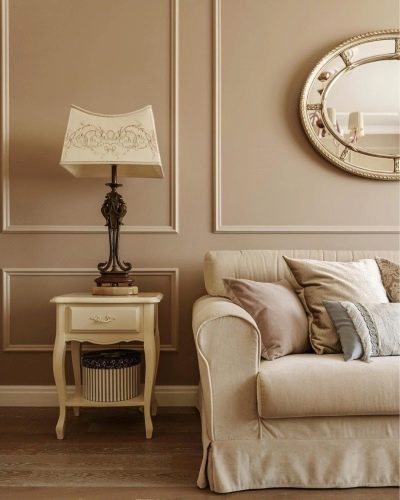
Light smooth moldings on the walls, decorated in beige, light brown shades, will look beautiful and neat.
Moreover, such details can also be used for framing mirrors, paintings. This option is perfect for classic interiors.
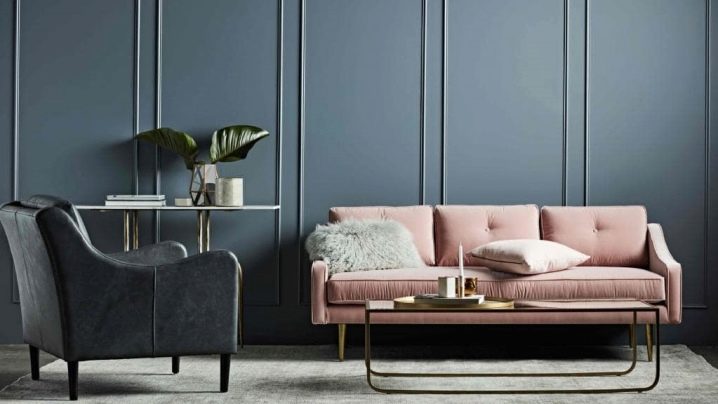
Such decorative products will look good in a modern interior decorated in gray shades.At the same time, it is better to place the moldings themselves on the wall covering, they can also have a gray color. Such additional details will add elegance and sophistication to the interior.
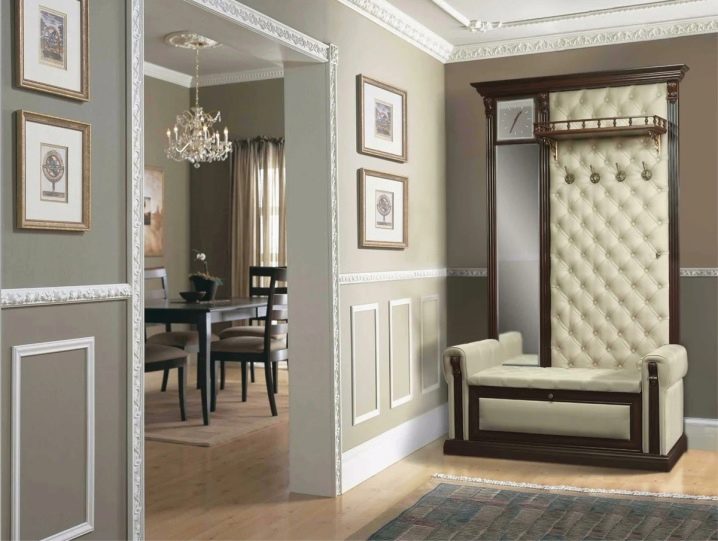
Wide light moldings with an ornament can be suitable for large doorways. Such products will highlight the area, make it more beautiful and interesting.
If desired, moldings of this type are also placed on the wall covering.


The comment was sent successfully.