All about the blind area pie
Knowing everything about the blind area pie is necessary for both builders and those who order construction. The scheme of the blind area with waterproofing around the house has its own subtleties. A separate important topic is the correct arrangement of the paving stone variant.
What is it?
A blind area is a special construction strip located around the house along the entire perimeter, which has a surface impervious to moisture. The main objective - protection of the foundation and higher parts of the building from dampness. If there is no blind area or it is done incorrectly (the optimal scheme is violated), then the base of the house will be constantly moistened. It is absolutely impossible to talk about its long-term operation in such conditions. A serious grief will also be the constant clogging of the house with any precipitation and the inability to calmly move around your home in bad weather.
Preparation of the base
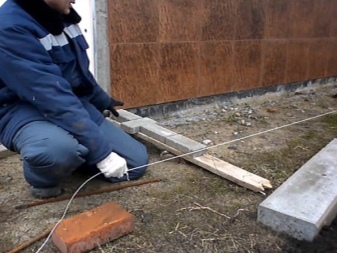
Such work is much easier than it might seem. Start by determining the required width of the protective tape. Draw a perpendicular line from the extreme points of the roof overhangs to the ground. From the detected reference point, they move further at least 50-60 cm. When the final distance is determined, you can pull a cord that will connect the stakes driven into the ground.
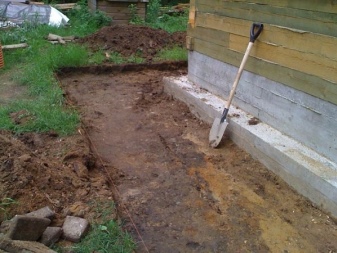
It is impossible to do without excavation. They are labor-intensive, but they are the only possible option. With a typical entrenching tool, the soil is removed to a depth of at least 50 cm. Such a recess is suitable when using boards and polyurethane foam.
If you plan to insulate the blind area with expanded clay backfill, the layer can be increased up to 100 cm, especially in cold regions.
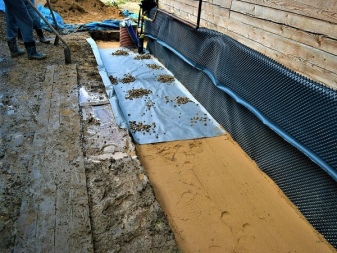
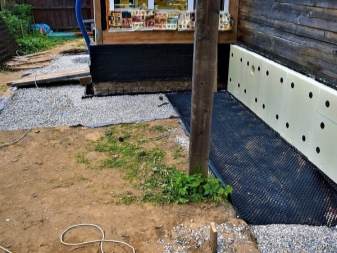
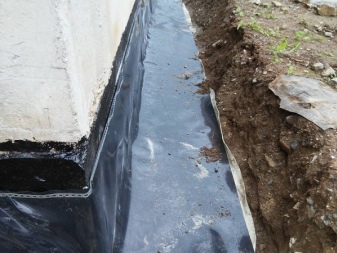
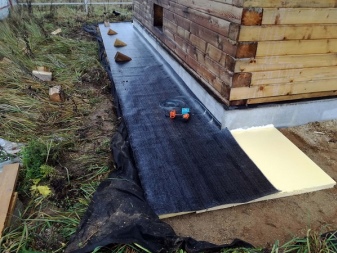
Membrane and drainage
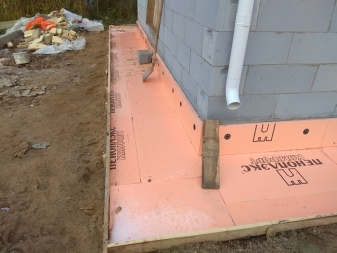
Since the blind area must deal with dampness, it must be equipped with a layer responsible for waterproofing... At the very bottom, a hydraulic lock is formed. Despite all the innovative developments, it is considered the best option to use a clay bookmark. A lot of clay is not required - you only need to use 10-15 cm, but with the obligatory tamping. Important: if the site is already composed of clays and loams, you can simply compact them and not add anything.
A membrane must be placed above the hydraulic lock. Most often it is made from geotextiles. On it, 20 cm of sand is poured, leveled with a slope from the house. The ramming of this sand is done in 2 or 3 passes over the area.
If necessary (which is stipulated in the project), the sand level is equipped with water receivers and devices for storm runoff.
Quality geomembranes:
-
serve for at least 50 years, even in very harsh conditions;
-
tolerate contact with water;
-
perfectly protect against root germination;
-
mounted very simply;
-
can be installed alone;
-
are inexpensive;
-
suitable for dismantling and reuse.
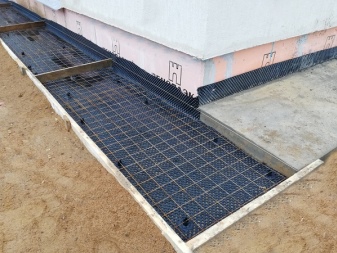
Then comes the time for insulation... If plate types of thermal protection are laid, there must be an extremely flat base. It is very simple to deal with bends: they remove the material and add sand. It is preferable to lay two layers of thinner sheets rather than one thick pad. Builders have long figured out that this technique helps provide much better protection against heat loss.
The drain must drain water efficiently. This design can be performed by all people. The need for drainage appears:
-
on clayey soil;
-
in wetlands;
-
with a high standing of soil water;
-
when placing the base of the foundation below the freezing point of the earth;
-
in the lowlands.
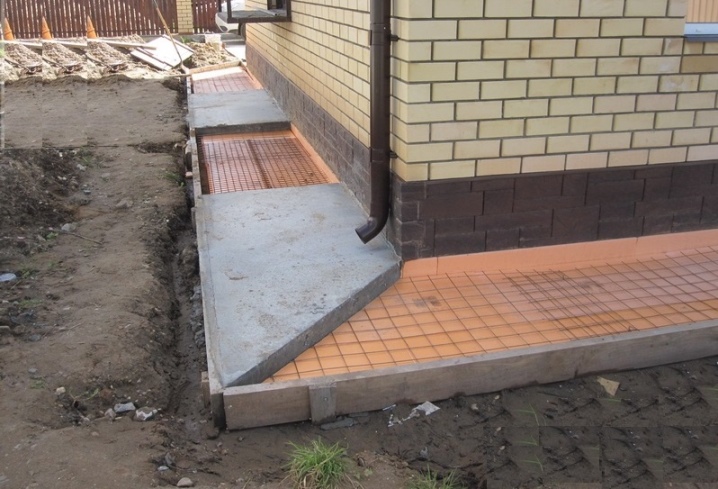
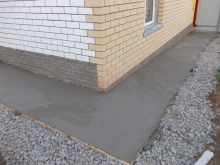
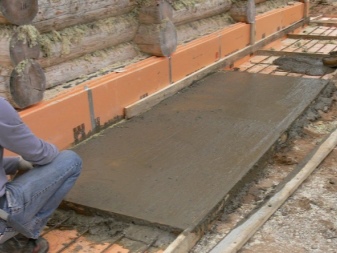
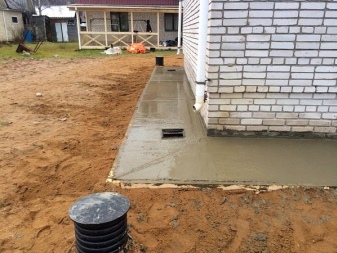
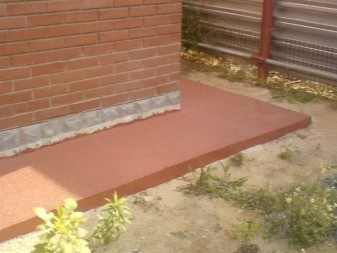
Protective layer
According to the technology, it is made in the format of a concrete screed. A wooden formwork is formed along the entire perimeter. Ideally, it should be made of 150x50 boards. The concrete mass must be leveled after pouring. We must not forget about the seams for compensation, which are obtained from edged lumber with a thickness of 2.5 cm.
It is worth considering that the concrete itself, despite its strength, must also be protected. Already at the time of manufacture of the mixture, it is necessary to introduce water repellents. After laying out the mixture and setting it, special impregnations are applied to the surface. They can have 4 different functions:
-
universal protection;
-
elimination of dust (relevant for frequently visited places);
-
hardening (penetration into the stone by a maximum of 0.4-0.5 cm);
-
decoration (various color mixtures, more effective than mass versions of paint and varnish coatings).
Dry protection is fairly simple and inexpensive. You will have to prepare a mixture of cement and sand in a 1 to 1 ratio. The thickness of the layer poured onto wet concrete through a sieve should be 0.2-0.3 cm. This layer must be rubbed evenly. The blind area is still treated with a hydrophobic drug.
After all the treatments, you can normally use it by waiting 4 or 5 days.
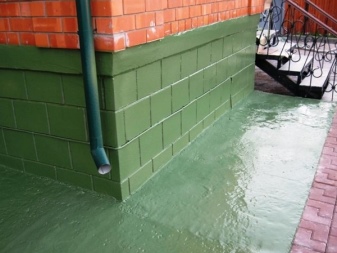
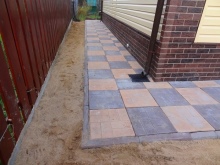
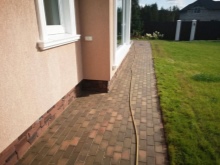
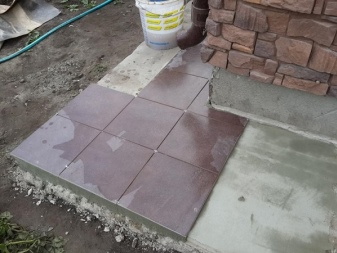
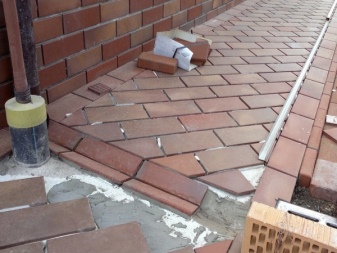
Finishing layer device
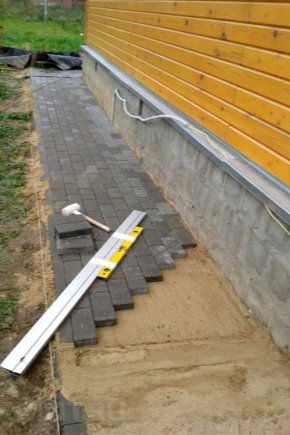
This final level is also very important. Usually it has a purely decorative meaning - but that does not mean that the correct format is unimportant. Most often, the outer shell is laid out from paving stones or other paving slabs. It should be put from the foundation outward, best of all by the "from oneself" method. This approach eliminates problems with the integrity of the substrate.
All tiles are assigned strictly defined places. You can fit them there with a rubber or wooden hammer. It is undesirable to hit the blocks themselves, it is better to put the planks on top. Excessive subsidence of the paving stones is corrected by adding the mixture. You need to install the last:
-
trimmed tiles;
-
edging blocks;
-
border.
You need to complete the work by sealing the seams. To do this, use the same composition as for the topcoat. You can't even change the proportions. The poured mixture is leveled with a broom so that the backfill seeps into the gaps of the tiles. Watering with water will allow the cement to harden, and this is where the formation of the blind area ends.


The comment was sent successfully.