Drywall: characteristics and types of finishes
One of the most common and popular finishing materials is drywall. It can be used for a variety of purposes, from leveling walls to making multi-level ceiling structures. Let's take a closer look at the characteristics of this material and get acquainted with its features.

What it is?
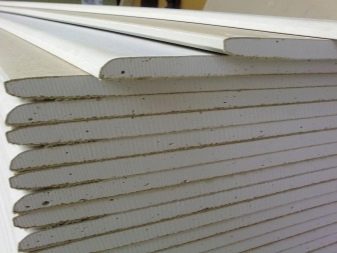
Drywall is a building material, which is a perfectly flat sheet, it consists of two layers of special cardboard and a core. The second component consists of a hard gypsum dough with the addition of various fillers. In addition, drywall contains adhesives and foaming agents specifically designed for gypsum.
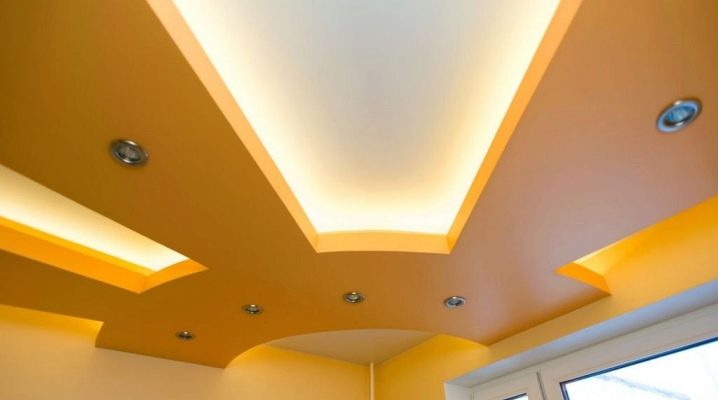
Most often, this easy-to-work material is used to equip smooth skins., light partitions and ceilings (single-level and multi-level). Various lighting devices are often installed in drywall, and this can be not only an ordinary spotlight, but also a full-fledged chandelier.
It is not recommended to hang too heavy and large devices on drywall bases, as they may not withstand impressive loads.


Peculiarities
Such a popular material as drywall is practical. It can be used for various purposes: with the help of this malleable raw material, you can independently make a variety of designs without spending large amounts of money and without spending a lot of time on it.
Plasterboard sheets can be used not only for internal, but also for external decoration, for example, it can be the decoration of the facade of a private house, and with the help of high-quality waterproof drywall, you can create a very beautiful and original composition that will transform the exterior of your home.


Drywall has its pros and cons that you should know about before buying it.
To begin with, let's take a closer look at what advantages this finishing material boasts.
- Drywall sheets have a perfectly flat surface, which is why they can be purchased for leveling rough bases. It can be floor, ceiling, or walls. The main thing is to do all the work correctly and properly prepare the foundations for the installation of gypsum.
- Drywall is distinguished by high thermal conductivity. For example, in a room with walls supplemented with GKL sheets, a comfortable microclimate and optimal air temperature will always be maintained.
- This finishing material can be used for the manufacture of various structures.
- Another advantage of drywall is environmental friendliness: it is absolutely safe for households, since it does not contain toxic compounds.
- Materials made in accordance with GOST are fireproof (do not burn and do not support the flame).
- Gypsum sheets have excellent sound insulating properties.


- Also, this finishing material is distinguished by vapor permeability. Thanks to this characteristic, various bacteria do not multiply on its surface, and traces of mold or mildew do not appear.
- Drywall is inexpensive, so almost every buyer can afford it.
- In the installation of this material, you can use not only the frame: it can be attached with glue and even construction foam.
- Drywall can be combined with insulation. In addition, there are types of panels that protect the insulating sheets from negative external factors.
- It is very easy to work with drywall sheets, you do not need special expensive tools for this.
- With the help of drywall, you can bring to life the most non-standard design ideas.
- This finishing material does not exude unpleasant and pungent odors.
- GKL is easy to process: it can be painted, decorated with wallpaper, tiles and other popular materials.
- Plasterboard, just purchased from the store, can be used immediately for repair work: it does not require special training.


Despite the large number of advantages, drywall has its own weaknesses.
- This material is not recommended for installation in rooms with high humidity levels. This is due to the fact that drywall in such conditions will eventually get wet and collapse due to oversaturation with moisture. Even high quality sheets that tolerate contact with water begin to deform over time.
- Drywall can begin to crumble. It is not recommended to hang heavy objects (lamps, paintings, flower pots) on a nail driven into a plaster sheet. Otherwise, the fasteners may simply fall out of their base.
- You should be careful not to damage the gypsum sheets, as they are not very durable.
- Plasterboard sheets have a rigid structure, so they cannot withstand blows or bends.


What types are there?
A rare consumer knows that there are several varieties of drywall on the market. Each of them has its own characteristics, as well as advantages and disadvantages. Let's consider them in more detail.
First of all, you should consider what categories of this material exist.
- GKL Is a simple gray plasterboard that is versatile. It can only be used in dry rooms with normal humidity levels. There is no protection against moisture and moisture, as well as fire-resistant characteristics of this material.
- GKLV - These are gypsum plasterboards that have a green color. They are highly resistant to moisture. Such finishing material can be safely used in the kitchen, toilet or bathroom.
- GKLO - this abbreviation belongs to fire-resistant drywall, the characteristics of which we will consider below.
- GKLVO - this name is given to sheets of drywall, which have increased resistance to moisture. They combine the useful characteristics of materials such as GKVL and GKLO.

Now let's consider the properties of all types of drywall in more detail.
Stenovoi
This finishing material is designed specifically for cladding floors in a private house or apartment. Typically, the color of the wallboard is gray and the markings are in blue.


Ceiling
Ceiling plasterboard is currently in great demand. It is used for the manufacture of beautiful and voluminous structures installed on the ceiling. With the help of such material, it is possible to form both a simple single-level and a multi-level box.


Arched
The thinnest and lightest are arched drywall sheets. Thanks to such distinctive characteristics, materials can be bent without fear of cracking or other damage. Moreover, before direct installation work, it does not need to be sprayed with water for additional plasticity.
This flexible finishing material can be used to create beautiful columns., interior arches, semi-arches, niches, as well as original rounded or oval walls. The thickness of the arched drywall is 6.5 mm, this indicator is mediocre, therefore, such sheets are most often mounted in two layers.


Acoustic (GKLA)
It is a noise-insulating and perforated material, which is quite rare. A special feature of acoustic sheets is that their surface has a large number of small holes. Their diameter is 1 cm, the back side of the sheet is complemented by a sound-insulating coating, such as spunbond.
This type of drywall is most often used in the decoration of floors and ceilings in recording studios, special music rooms, pumping rooms and other spaces where high-quality sound insulation is required.


Fire retardant
GKLO (decoding - fire-resistant gypsum fiber sheet) - this non-combustible material is also facing and very wear-resistant. Such finishing materials are indispensable in places where there are increased requirements for fire safety. For example, you can sheathe a chimney or fireplace with a similar drywall.
In addition, fire-resistant gypsum is often used in the lining of mines. In the core of such sheets, there is a considerable number of fibers and special additives necessary for reinforcement.


Moisture resistant
This type of drywall is less moody and more practical. It must be installed in rooms with high humidity levels. This material has a core and cardboard, characterized by an unusual composition, thanks to which it is not afraid of moisture.
In addition, special antiseptic additives are observed in the composition of the moisture-resistant canvas, which protect it from the appearance of mold and mildew.


Moisture resistant and fire resistant
This type of drywall is one of the most practical and durable, since it combines the useful properties of both GKLV and GKLO. It is often used when facing production areas with high levels of humidity and high fire safety requirements.


Laminated
Such drywall is considered a new generation finishing material. It is made according to the latest technology developed in Germany. The basis of laminated sheets is a special gypsum board on a woven base.
This high-tech material is durable, easy to maintain, quick and easy to install, as well as the absence of self-tapping screws.
Laminated drywall is also decorative, as it can imitate various materials well: wood, natural stone, brick, different types of fabric. A simple painted sheet cannot boast of a similar appearance.


Façade
Facade plasterboard panels do an excellent job not only with the function of decorating the house, but also with its insulation, as well as protection from adverse external factors. For this, such materials have an appropriate structure - the front layer of the facade panels is impregnated with special hydrophobic agents. This treatment protects the substrate from moisture penetration.
Many consumers choose exactly facade drywall, since it acts as an energy-saving coating that stops the loss of warm air and insulation fibers. This material is installed quite easily and is fireproof. It is inexpensive and does not require complex maintenance.


Reinforced
This type of drywall is very often laid on the floor. It has a special fiberglass reinforcement layer. Due to its composition, this material is also called gypsum fiber. In it, reinforcement occurs immediately from both sides of the cardboard layer, which ensures high strength of the panels.
The back and front sides of the reinforced plasterboard are treated with a special substance - a water repellent agent, which makes the material moisture resistant and more durable.
Reinforced plasterboard can withstand impressive loads, as it is made specifically for the floor. It is also additionally sanded and coated with various impregnations that protect the material from chalking. However, the service life of these sheets largely depends on their correct installation.


Dimensions (edit)
Different types of gypsum boards have different technical characteristics and dimensional parameters:
- wall panels: width - 1.2 m, length - 2.3 m, 2.5 m, thickness - 12.5 mm;
- the ceiling material differs from the wall material only with a thickness of 9.5 mm;
- moisture resistant sheets can have a length of 2.3 m, 2.5 m, a width of 1.2 m, and a thickness of 12.5 mm;
- the parameters of fire-resistant drywall sheets can be: length - 2 m, 2.5 m, 3 m, the width and thickness of such materials remain standard and are 1.2 m or 12.5 mm;
- arched drywall has a very small thickness - 6.5 mm.

For the manufacture of interior partitions, it is recommended to use gypsum plasterboard sheets, which are characterized by a large thickness - 14-21 mm. Such materials have high noise insulation. They are not afraid of impressive loads and mechanical damage.


Of course, the gypsum plasterboard can have a different length than the above parameters. So, some modern companies produce shorter panels. They cost a little more than the standard options, but they are much easier to work with. Such sheets are most often used in the design of the ceiling in the toilet, bathroom, hallway or corridor.
Most manufacturers in the production of drywall still adhere to three basic size standards:
- 3000x1200 mm;
- 2500x1200 mm;
- 2000x1200 mm.


Colors
Each type of drywall has its own color:
- standard drywall is gray;
- moisture resistant - green, and blue marking is applied to it;
- fire-resistant material is painted pink or light gray with red markings;
- moisture-resistant and fireproof drywall has a green color and red markings.


Required tools and accessories
When working with drywall, it is necessary to use various components; you cannot do without them even with the simplest repair work. One of the most important are metal profiles, with their use a strong and reliable frame is assembled, which is then sheathed with gypsum panels.
These necessary elements can be divided into three types:
- for cladding walls and partitions;
- ceiling;
- special guides.

Metal profiles designed for finishing walls and partitions are guides and rack-mountable.
- Guide varieties have a special UD mark. Such parts are used for high-quality fastening of the racks and guide rails of the frame for drywall.
- The drainage profile plays the role of the main rail for the installation of plasterboard sheets, to which the entire cladding is fastened. Such items are labeled CD.
More narrowly focused are special guides. For example, there are special racks designed only for doorways, to which entire entrance systems are subsequently attached.
There are also special arched options that can be adjusted to the desired configuration.

The combination of all the listed components, fastened with a special material, results in a rather strong and reliable frame. A well-made structure will easily withstand significant loads, as well as the weight of the entire plaster cladding. As a rule, the rails are treated with zinc, which protects them from corrosion and slow decay, which makes the frame for finishing almost forever.


To work with drywall, you should stock up on other necessary components.
- Direct suspensions... They are the main elements of the frame for gypsum sheets and represent a rectangular plate. These parts are required to connect the frame posts to the structural floors.
- CD Rail Connectors (another name is "crabs"). This element is required to connect the ends of the profile in a single-level plane.
- Duplex connectors. They are necessary to connect the frame rails crosswise.
- Anchor suspensions. These parts are needed for a drywall base. As a rule, they are used when decorating the ceiling. The main task of anchor suspensions is to connect the base directly to the ceiling.
- Profile extensions. These elements make the frame slats slightly longer. They must be installed in the inner part of the profiles and fixed with self-tapping screws.
- Corner connectors. These parts can also be T-shaped. Such elements should be used if you make a perpendicular joining of the profile to another rail.


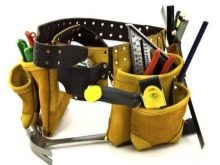
Various tools are required to work with drywall sheets:
- screwdriver - it can be used to fix the frame, for example, on the wall;
- perforator - this tool is necessary for more reliable fastening of the frame to a wall, ceiling or floor, it must have sufficient power for such work;
- electric drill;
- Bulgarian useful for cutting profile parts and cutting off excess parts of the resulting structure;
- circular saw or electric jigsaw useful for cutting drywall;
- electric scissors indispensable for cutting metal, if you need to build a large structure with plasterboard panels;
- assembly gas gun is needed for automatic fastening of self-tapping screws, which saves time on installation of the structure.


From hand tools in working with drywall, you will need:
- special knife for drywall;
- knife-saw for drywall;
- hammer;
- pliers for fastening profiles;
- profile punch;
- plane;
- edge planer;
- needle roller.


When working with GLK sheets, you may need other devices that will significantly simplify and speed up the installation process:
- a device for resting on the floor, which is a special lever with a lock, with its help it will be possible to hold the panel in the correct vertical position;
- Carrying Handles - Curved steel handles needed to carry drywall sheets more safely;
- tape measure, which is necessary for making accurate measurements;
- building level;
- mounting belt;


- lift for drywall sheets;
- special chopping cords;
- runners or boards for leveling the metal profile;
- corner and pencil or marker;
- sealing tape;
- putty for plasterboard corners.


All tools and accessories must be of high quality and reliable, otherwise the structure will not last long and may deform.
Do not forget that a strong and reliable frame plays one of the main roles in a high-quality and attractive plaster finish, so all components must be selected especially responsibly.


Choosing and finishing with your own hands
It is quite possible to finish one or another base with plasterboard with your own hands. All the necessary tools and accessories have been listed above, so you just have to reasonably approach the choice of the gypsum sheets themselves.
The choice of suitable panels mainly depends on the conditions in which they will be located.
- For a bathroom, pool or toilet, it is recommended to purchase an extremely moisture-resistant material, since ordinary drywall in such conditions will quickly fail.
- For the kitchen, it is worth choosing more expensive stoves that are both moisture resistant and fire resistant.
- Plasterboard can also be used in the bedroom or living room.You need to handle it as carefully as possible, since it is rather fragile, but it is inexpensive and serves as long as possible.
- In the hallway and corridor, both ordinary and moisture-resistant materials are used. It all depends on how these areas are used in your house or apartment.


It is recommended to buy the material only from a trusted and well-known manufacturer: do not look for cheap drywall sheets, since this material is already inexpensive. Too low a price may indicate poor quality of the product, such sheets will not last long and will quickly become unusable, so you should refuse to save too much.
In order for the plasterboard finish to last as long as possible and look aesthetically pleasing, you should adhere to the following step-by-step instructions. Consider the stages of installation using the example of wall decoration.

First you need to mark the walls with a level and a special pencil or marker. It is necessary to draw the lines intended for fastening the metal profile. As for the dimensions, they should be removed with a tape measure or a large ruler.
Experienced craftsmen advise to stick special rubber strips on the profiles. before their installation, in another way, these parts are called soles. In this case, they will play the role of seals. Based on the pre-drawn lines, it is necessary to attach the frame. To do this, you need to drill holes of the required size in the ceiling and floor. In the profiles, these actions do not need to be performed, since the necessary holes must be present in them initially.


Vertical profiles must be fastened using brackets or ordinary self-tapping screws in guides, which should already be installed on the ceiling and on the floor. Installation of vertical parts should be done in increments of 0.5-1 cm. The profiles should be fixed as tightly and reliably as possible, as this will affect the quality of fixing the drywall sheet. Often, drywall is laid on various insulation or soundproofing sheets, for example, foam or mineral wool.
With the help of drywall, you can not only effectively level the walls, but also hide ugly wires and various communications behind the wall. The wiring must be carried out before installing the sheets themselves, otherwise they will have to be dismantled.


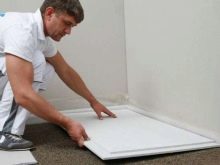
After competent preparation and installation of the frame, you can proceed directly to the installation of drywall panels. For high-quality and reliable fastening, you should use a screwdriver, working with this tool will take much less time and take less effort. The installation of plaster surfaces should begin by leveling them. Keep in mind that for this it is necessary to pre-cut holes for socket boxes and places for installing bulbs.
To make the edges of the gypsum sheets more even and neat, each edge can be processed with an electric jigsaw or a plane.


After carefully leveling, the drywall sheets can be installed on the frame. It is better to fix them with screws, these parts should be fixed in increments of 20-25 cm.If there is a window prem or a door on the finished floor, then the drywall sheet must be fixed along the edge sections of these elements. This is necessary so that the sheet attaches to the base neatly and correctly.
Many home craftsmen wonder how long it will take to install drywall on the frame. First of all, it all depends on the area of the room in which you carry out the finishing work. If we are talking about a very spacious room, then it can take 2-3 days to install GLK sheets.
After installing and securing all drywall sheets, you should proceed to installing such trifles as sockets, switches and lighting fixtures.


When all the most difficult and time-consuming things are left behind, you can move on to finishing, the most difficult moment, as a rule, is hiding the joints between the sheets.For this, it is recommended to use a putty, but before that, a special reinforcing strip should be attached to the unaesthetic elements.
When all the joints become invisible, you can proceed directly to finishing the drywall: everything here depends solely on your desires and preferences. This material can be painted and pasted over with wallpaper, and decorated with decorative stone, brick and many other decorative coatings.


In the bathroom and toilet
Plasterboard installation can be done both in the bathroom and toilet. Of course, for this, you should choose moisture-resistant plates that are not afraid of dampness and moisture.
- In such rooms, you first need to prepare the walls for installing drywall.
- If we are talking about installing sheets without a supporting crate, then first you will need to get rid of all the potholes and cracks on the walls. Ordinary cement will help you with this.
- After this, the bases should be treated with a disinfectant and a primer mixture (resistant to moisture).
- Then you need to use a roller to apply the glue to the walls and drywall sheets.
- All seams and joints between parts should be carefully waterproofed.
- After gluing, go over the finish with a water-resistant finishing putty.


We have already discussed how to install drywall sheets on metal frames.
However, drywall can be used in a bathroom not only for wall or ceiling decoration - it can also be used to make:
- masking box that hides the pipes;
- decorative box or screen for the bath;
- preparation of bathtubs with plaster for future cladding - you can glue tiles or ceramic tiles on drywall;
- sealing of the window separating the bathroom and the kitchen.
In addition, a dressing table, sink and cabinet with a mirror can be attached to the plasterboard walls in the bathroom. Of course, it is recommended to choose lighter items for this.

For the hallway
Drywall is a versatile material, so it can be safely used in a hallway, most often in this room, the owners equip a functional dressing room.
- For the manufacture of such a structure, you will need to attach the guides to the walls, to the floor, and to the ceiling.
- Then you need to fix the racks to which the drywall sheets will be attached. There must be a distance of at least 60 cm between these elements.
- Do not forget to mark the sections of the doorway.
- In the structure, it is necessary to reinforce the racks on which the doors will be attached. This is necessary so that the frame does not deform under their weight.
- Next, one of the sides of the structure should be sheathed with plasterboard. At this stage, foam plastic can be installed in the interior or on the sashes, which will act as a soundproofing sheet. After installing the cladding on one side, go to the other. Having finished it, we can assume that the work is practically completed.
- Now you can proceed to filling and decorating the dressing room.


Bedroom
Plasterboard structures are very common in bedrooms. With their help, you can form not only a multi-level ceiling, but also a comfortable window sill of the optimal size or make a neat hidden cornice especially for curtains. So, for the latter, it is necessary to determine the depth and width of the niche in which the curtains and curtains will be located, and also to measure the position of these parts in the upper and lower planes.

On the marked markers on the wall and ceiling, you need to beat off two lines (on special coated threads). An indent of 20-25 cm should be maintained. After that, adhering to the markings, you need to install the guide profiles for the frame, screws and plastic dowels should be used as fasteners. After that, you can proceed to the direct fastening of frame parts: you need to insert a wider profile into the inner part of the box. It must be fixed along the outer board with hangers attached to the ceiling with self-tapping screws.
Now, along the broken line, you need to drill several holes and insert plastic dowels into them in order to install the suspensions and fix a second wide profile on them.

If you have installed all the necessary elements of the frame, you can proceed to plastering them with plasterboard. To do this, through the frame itself, a strip of gypsum should be screwed onto the self-tapping screws. However, do not forget about the preliminary preparation of the necessary recesses in the areas of dry plaster. They need to be done on the floors where the vertical sections of the profile are installed. It is recommended to screw in the screws in 20 cm increments.
To install vertical stripes, you will need a base to which the drywall will be attached. The collection of these parts should be carried out based on the depth of the niche. So, for example, if this parameter is 10 cm, then it will be quite enough to connect the sides of the guide and the ceiling profile. Leave the ends of the guide protruding from the ends of the profile by 20-30 cm. Of course, the dimensions of the niches can be absolutely any: for each option, you can choose profiles of suitable sizes.

Next, you should start assembling the niche wall. The plasterboard strip must be screwed to a previously prepared base. It is more convenient to do this on the floor, since there will be very little free space between the wall and the place of assembly, which will interfere with the use of a tool such as a screwdriver. The plaster strip should be sawed off, leaving a small margin of width, since then the ceiling plinth will also be glued to it.

Now you can go directly to the installation of the resulting wall. The part just assembled on the floor should be installed along the edge of the horizontally attached drywall. In a similar way, you need to assemble the side parts of the niche, for which only one profile (without a guide) is enough. These elements should also be attached to the plasterboard structure.
The final stage of work will be the finishing of the resulting box. It is necessary to putty the corner pieces, as well as the areas where the gypsum sheathing was fixed with self-tapping screws. After that, you can assemble the frame and make it single or multi-level.


Attic
Drywall is often used for lining the attic. In this case, much depends on the technical condition of the roof of the house. If it leaves much to be desired, then noticeable smudges will appear on the wall decoration with the first rain. That is why any damage to the roof must be repaired before installing drywall.
Also, beams and rafters play an important role. They need to be checked for reliability and strength, and also to make sure that they do not start to rot or dry out. Do not forget to treat all wooden parts with antiseptic agents.


Plasterboard panels in this case can also be installed on a classic aluminum frame.
- First you need to measure the room in which you are going to install the drywall. Calculate everything and buy all the items you need.
- The lathing should be installed starting from the walls. The markings of the future structure should also be transferred to the ceiling and floor.
- The frame guides should now be installed around the perimeter. All sections of the profile must be fixed at at least 3 points. The largest distance between fasteners is one meter.
- Now, the racks should be installed in the guides on self-tapping screws for metal, and then the crossbars should be fixed. At this stage, communications should be carried out.
- Next, a heater should be installed in the frame cells.
- After that, you can proceed to the installation of gypsum plasterboards in increments of 20-25 cm. Finally, finish the material according to the traditional scheme.


Tips & Tricks
When purchasing drywall sheets, always consider the microclimate in your home, as well as the type of surface on which you intend to install them.This will determine what kind of materials you need - moisture resistant, fire resistant or ordinary. Pay special attention to the manufacture of a drywall frame, its stability and reliability affects the service life of the finish and its aesthetic characteristics.
Even thick drywall should be handled with care so as not to damage or break it. In most cases, it is impossible to repair damaged parts.
After purchase, drywall should be stored in a dry and warm room, which is best closed. The room temperature should not drop below 10 degrees. However, it is not recommended to place this material too close to heaters or batteries. The surface on which the drywall will be stored must be perfectly flat.


Manufacturers and reviews
Among the large number of drywall manufacturers, the following companies can be distinguished.
- Gyproc. Consumers choose the products of this company because of their affordable cost, practicality and light weight. Of the disadvantages of this supplier's drywall, people highlight its fragility and subtlety.
- Danogips. Drywall from this manufacturer is very popular. Buyers talk about its flexibility and ease of installation. From this material, beautiful arches are obtained that are not afraid of moisture.
- Knauf. Reviews about the products of this company are ambiguous. Some buyers were satisfied with its quality, while others declare the fragility of this material and its inconsistency with the declared characteristics. For example, some consumers who have purchased moisture-resistant panels have noted that they literally "turn to dust" when the humidity level in the room is high.


Successful examples and options
From drywall, you can create very interesting and beautiful structures that separate rooms. They can be wavy or rounded. Often, small shelves or niches are built in them, in which various decorative elements are then placed.
Spectacular and original ceilings of unusual shapes are obtained from this material., these designs look especially attractive if they are supplemented with LED hidden tape and spotlights around the entire perimeter.
Drywall in the walls can help build niches. They can take many different forms. They often place not only decor, but also various equipment: televisions, stereos and other similar items.


For more information about the technology of installing drywall, see the video below.


The comment was sent successfully.