Tile leveling system: the subtleties of the process
When renovating an apartment, finishing the surface of the walls and floor with ceramic tiles or porcelain stoneware plays a huge role. Dynamically developing technologies for the production of finishing materials offer a wide range of devices to simplify the process. Of course, the easiest way to bring your ideas to life is to hire a professional who understands the intricacies of the process. However, even if you have never done a renovation, a tile leveling system can come to your rescue.
Peculiarities
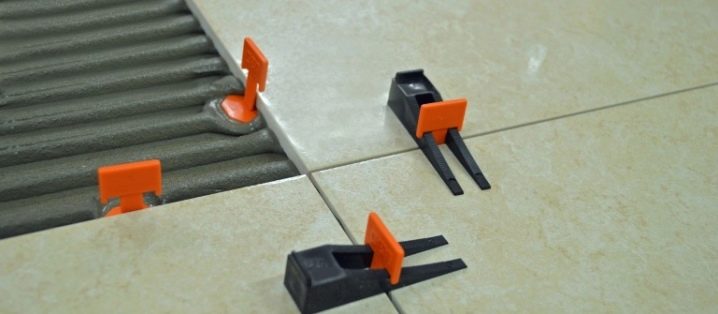
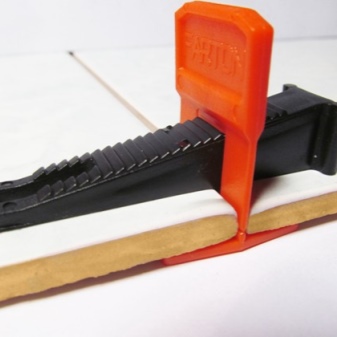
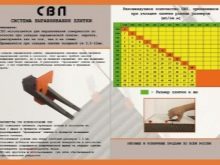
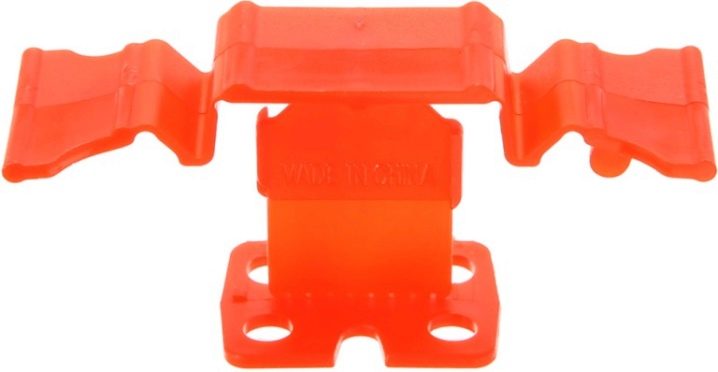
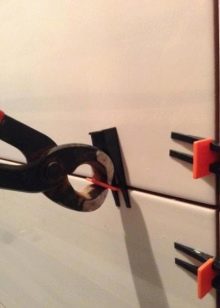
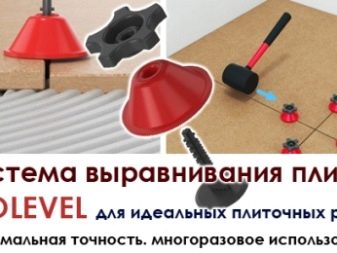
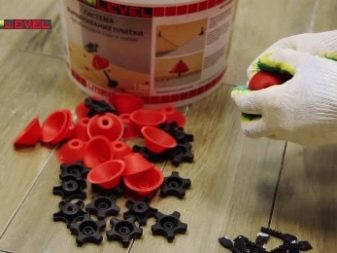
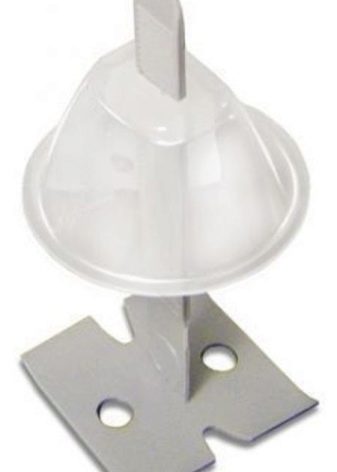
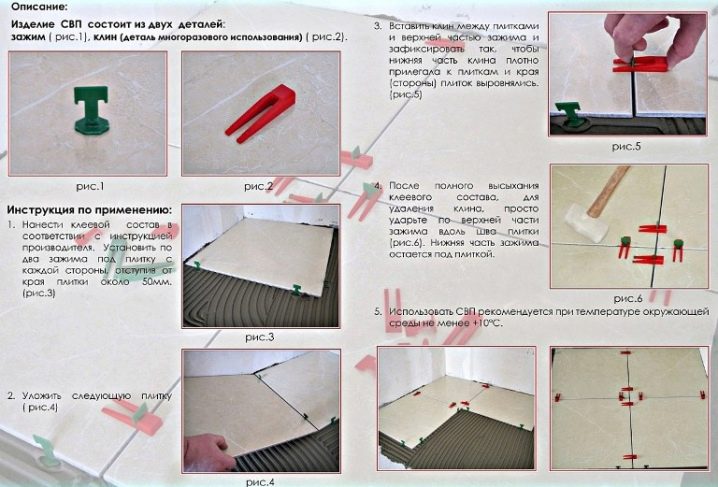
Unlike the standard method of stacking using plastic crosses, the SVP looks like wedges equipped with clamps. The clamp is a T-piece, the upper part of which can be easily separated from the lower part and removed after the glue has dried. The lower part of the clamp - the base - remains under the laid tile until it is removed during the next repair. The wedge can be used from ten to fifty times, depending on the type of construction. With its help, adjacent tiles are leveled in height, and the glue is distributed over the area of \ u200b \ u200bthe coating in an even layer.
The advantages of the SVP are:
- Speed and ease of use compared to traditional methods.
- Uniform distribution and, as a result, glue savings.
- After the glue mixture dries, the tile does not sag, does not bulge or deform under the weight of the furniture installed on it, since during drying it was firmly pressed to the surface and fixed.
- Possibility of re-using the wedges the next time the system is installed.
- An abundance of reviews and video instructions for installing and dismantling this system.

The disadvantages of such systems are:
- Large loss of time for the installation and dismantling of wedges in the absence of experience in their use.
- It is possible to clean the seams and the front surface of the laid tiles from drops of glue and debris only after the complete removal of all parts of the system protruding above it.
- Additional costs for the purchase and delivery of tile leveling systems.
- Inappropriateness of the cost of using when covering small areas in residential premises.
Views
There are different types of these systems:
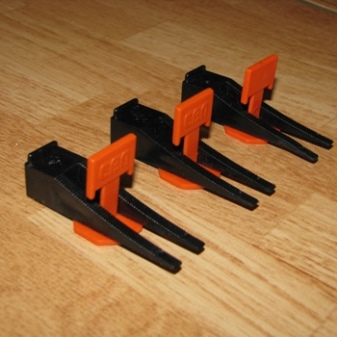
- Wedge - reusable plastic wedges and clamps, which are used one-time, 3D crosses with anatomical ring. They are used for laying tiles with a thickness of 5 to 12 mm. The lower part of the levelers is made in the form of a molded plastic part with a flat base and a protruding crossbar.
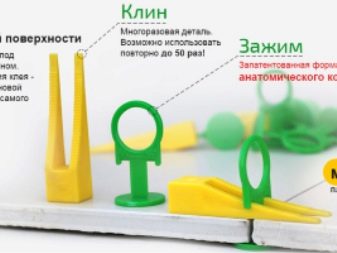
An incision is provided at the junction of the crossbar with the base for easier removal of the crossbar after solidification. The wedge has a horizontal cut in the expanding part so that the clamp moves freely along it and the joint of two tiles is pressed. It is also made of plastic.
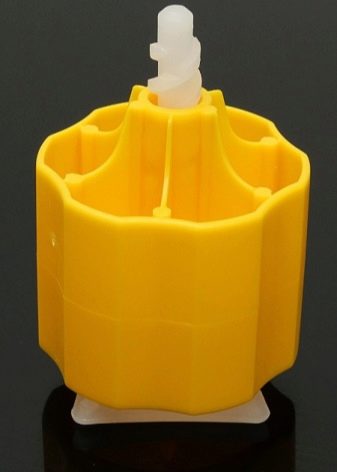
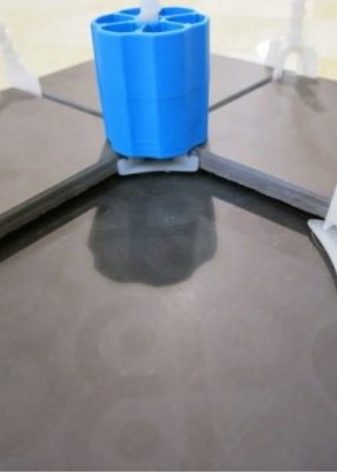
- Cap-type - plastic wedges with a locking lock inside. They are used for tiles with a thickness of 5 to 25 mm. They are a disposable grooved rod and a clamping cap with a clip. To tighten the tiles of this SVP, an additional device is required, which can either be included in the kit or be purchased separately.
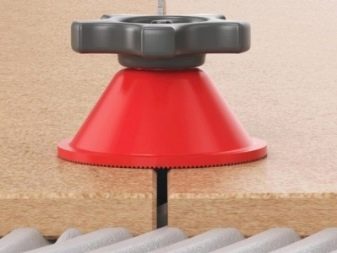
- With manual screw tightening or the studs of the part are connected and tightened with a plastic nut or metal stud by hand. To level adjacent tiles, use the thread on the parts.The screw is hand-tightened, and when using metal tiles, a screwdriver of the correct size or screwdriver will do.

- Whole - non-collapsible wedges that are used one-time. The tiles are aligned in height using two movable latches at the top of the system. This is the cheapest and easiest to use SVP, so it is perfect for hobbyists who are laying tiles with their own hands for the first time. When buying, you need to pay attention to the difference in the number plates on the system. They must match the thickness of the tile used.
You can also make your own tile leveling system from scrap materials. You will need aluminum wire from which you need to bend a rectangular frame. Frame height - 1.5-2 mm and width - 0.8-1 mm. The ends of the wire must be twisted into a small flagellum, which will be able to hold on when installing the wedge.
To simplify breaking after the glue dries at the base, bite the frame at the desired points with simple pliers. The bottom stop can be made from small pieces of metal profile, plate, or other remnants of flat material. A small plastic or wooden wedge is inserted from above under the place where the wire is twisted. To prevent it from shifting, you can also put a small spacer from a fiberboard trim. In 30 minutes, you can easily make up to 100-150 of such clamps and save about 1000-2000 rubles for the purchase of SVPs from well-known manufacturers.
Application area
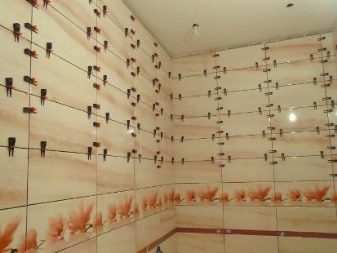
SVPs are used both in the repair of bathrooms, toilets and kitchens in ordinary residential apartments, and in the decoration of large retail or industrial areas. The system is used to level the tiles in a single plane by changing the thickness of the adhesive seam by applying dynamic force to the joints of the ceramic tiles. With the correct calculation, a specialist will not only be able to lay ceramics much faster, but also with better quality both on horizontal surfaces and on vertical ones, laying on which is an even more time-consuming process.

Comparison of domestic and foreign systems
The main difference between the domestic tile leveling system is that it consists of two simple parts: the lower part is placed under the tile and is disposable, and the upper part is a wedge or washer that can be reused. When using it, there is no need for any additional tools and devices. All work is easily done both by professional tilers and by an unprepared person without special skills.
Removal of the upper part of the system after the glue has set can be done with any materials at handincluding hammers, pliers, and even kicking. Foreign counterparts have a more complex design. The clamps are produced both wedge and similar to flexible petals. Consider the pros and cons of domestic and foreign systems using the example of the Russian-made Litolevel hovercraft and the Rubi Tille Level hovercraft made in Spain.
SVP Litolevel (Russia)
Pros:
- low price (from 500 to 1000 rubles in various stores for a set of 150 pcs.);
- reliability (the design is simple and durable, there is almost no chance of damage to parts upon delivery);
- ease of use (even an untrained person will understand the instructions and will be able to start working immediately);
- the ability to continue working the next day (the base area of the clamp is small, but strong, so it can be inserted even into already dried glue);
- eliminates the use of additional tools (when installing you need only hands, and when dismantling the upper parts, you can use any available tool).
Minuses:
- low quality of products (the thread is easy to rip if you apply a little more effort than the system requires);
- breaks of the screed are possible when removing the washer (when dismantling the remains of the system, it is necessary to strike clearly along the seam line, and if you deviate and hit at an angle, there is a possibility of the screed breaking in the wrong place).
SVP Rubi Tille Level of Spanish production
Pros:
- high quality material and innovative technologies (higher quality plastics, reliable fasteners);
- the ability to fix tiles of various thicknesses (flexible petals allow you to reliably fix even tiles of different thicknesses);
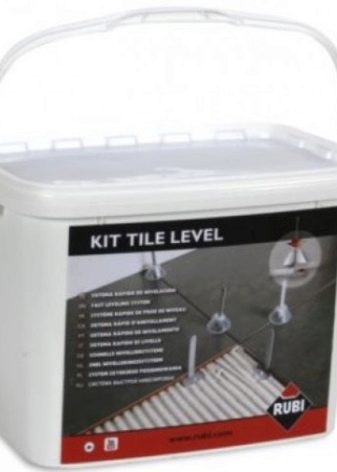
- easy dismantling (before use, it is necessary to place nylon screeds in water for 30 minutes: this will increase their elasticity and reduce the risk of tearing during installation, and they can be easily removed with pliers after the glue has dried);
- always breaks at the intended place (well-realized construction of the screed weakening).
Minuses:
- high cost (from 5000 rubles for a full set of 100 pieces in various stores);
- weak retainer (when glue hits the retainer, it ceases to hold the tile in the desired position);
- service life by 6-7 times (unlike simple wedges or washers, the caps can be reused a maximum of 7 times, they will not be enough for more);
- the impossibility of long breaks (it is almost impossible to insert the screeds into the dried glue due to the large area of the clamp base, and the glue inserted the day before, when the glue dries, becomes quite brittle and torn).
Operating tips
As a rule, it is quite simple to lay tiles with a SVP. You need to follow the instructions, and you will get a beautiful, even masonry with your own hands. Of course, the instructions for the different species can vary significantly.
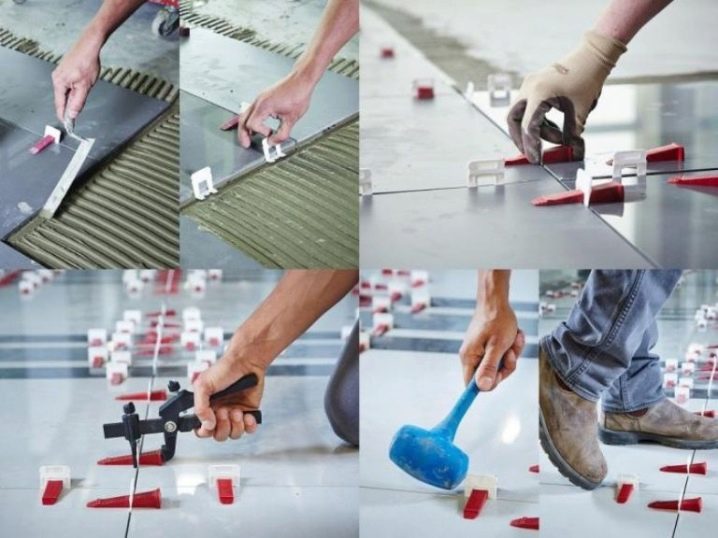
Below is a way to use wedge systems with all the tricks and explanations:
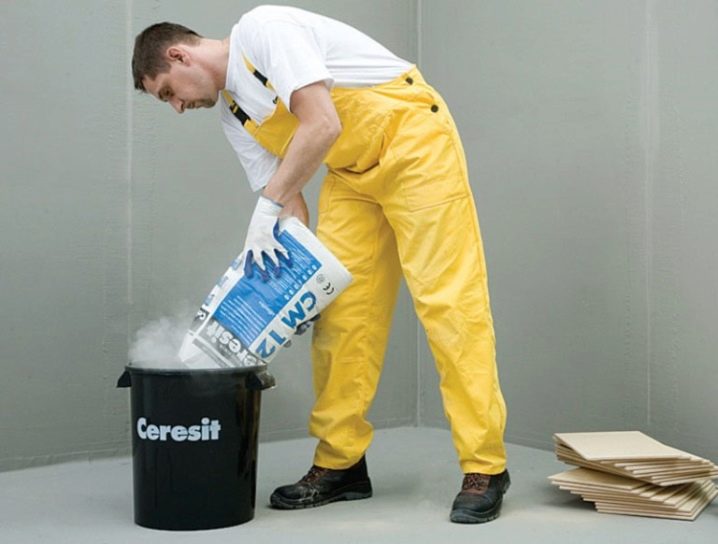
- Prepare the tile adhesive according to the instructions on the manufacturer's packaging. Do not change the proportions of the ingredients, as they are calculated through a lot of research and many years of experience.
- Apply the prepared glue to the work surface (wall or floor), evenly spreading it with a notched trowel. Also apply glue to the surface of the tile itself, which will be attached to the floor or wall.
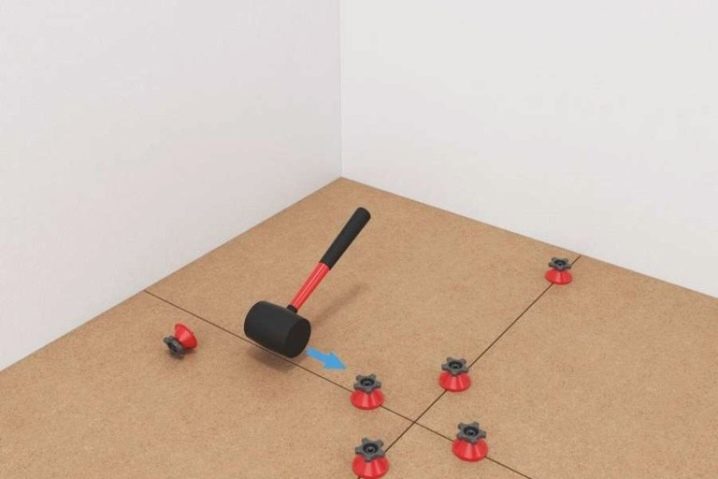
- Lay the first tile using a level or a plumb line if laying on a wall surface. Use small plastic crosses available at any hardware store to evenly space out the corners.
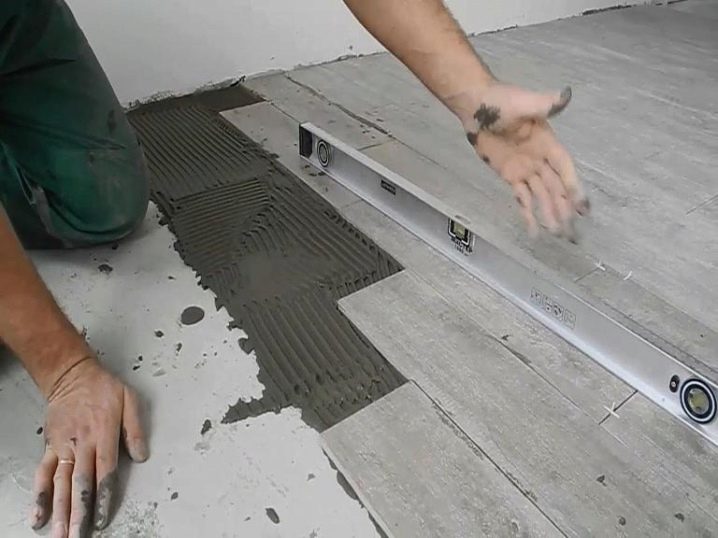
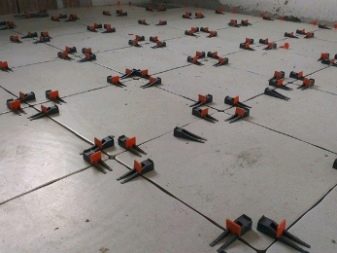
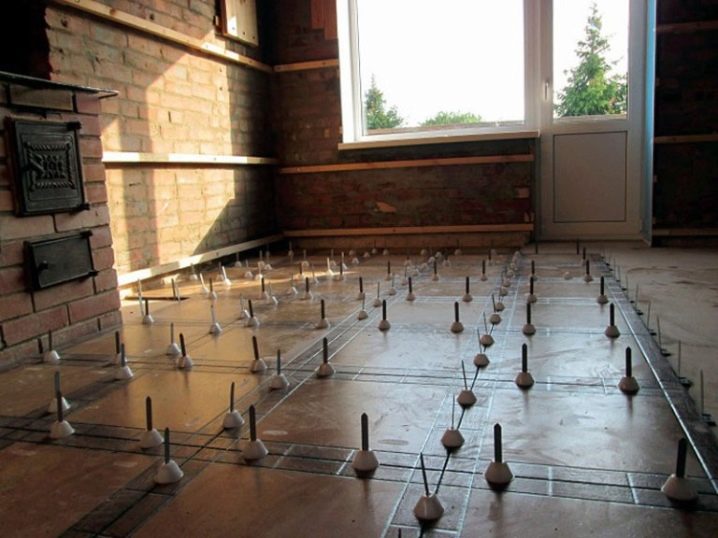
- Place clamps under the first tile on the sides from which adjacent tiles will adjoin it. Accordingly, if the tile is angular, then only two adjacent tiles dock with it, if not angular, then adjacent tiles adjoin it from all four sides. It is necessary to step back from the edge 0.5 - 1 cm to give space for tightening and fixing with clamps.
- Install the second tile following the same procedure. Then, insert the wedge into the clamp, slide it until it stops or clicks into place and lock in this position.
- Make sure that the wedge fits snugly on the bottom surface of both tiles, only in this case the self-leveling system will work as needed. If the wedge only adheres to one tile or does not adhere to their surface at all, try pulling the wedge out and reinstalling it. If this does not work, remove the tile from the adhesive and install a new clamp.
Remember that the use of a tile leveling system is advisable only if there are no large differences in the height of the surface on which the tiles are laid in the room. And also the effectiveness of the system depends on the quality of the ceramics itself. The higher the quality of the ceramics, the fewer defects, chips and bumps on it, the easier it is to work with the SVP.
Never try to level a drop in height on a wall or floor surface with tile adhesive. For such alignment, use a screed or special self-leveling mixtures.
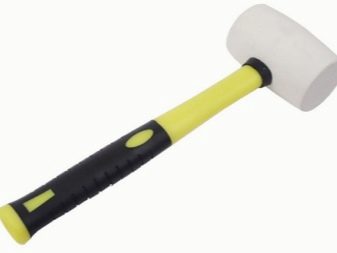
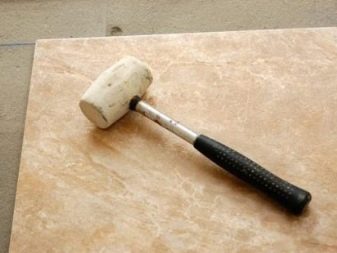
- Further arrangement of tiles and clamps with wedges is similar to the first two.For a more accurate alignment, a rubber mallet can be used to tap the laid tiles on each side.
- The ideal room temperature for laying tiles is 18-24 degrees Celsius. The closer it is to this value, the less problems such as premature glue setting or freezing of water in the adhesive solution. When carrying out work, have a damp cloth on hand in order to quickly remove traces of glue from the front surface of the tile, which are very difficult to remove when dried. Place the tiles in a well-lit and ventilated area.
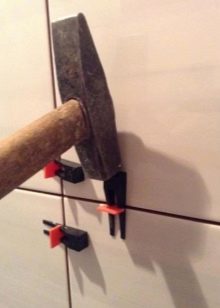
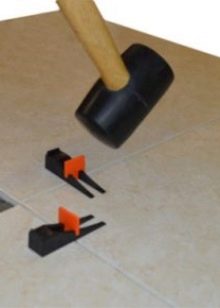
- After the glue has dried, use a gentle blow with a hammer or any other handy tool to break off the parts of the leveling system protruding above the surface. You can also use forceps, you can even forcefully kick the protruding part with your foot. It is very important to strike or apply force along the seam line. This eliminates the breakage of the clamp in an arbitrary place and deformation of the already laid tile.
The wedges can be reused after cleaning from the remnants of the clamp and glue. They can be cleaned either manually or with a washing machine and powder.
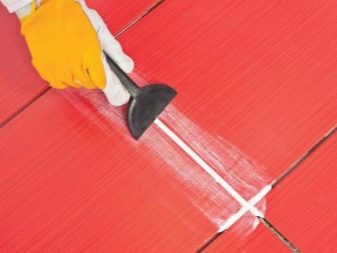
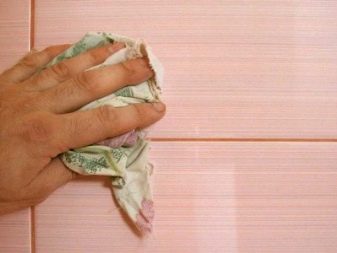
- After removing all parts of the SVP from the surface of the laid tiles, the seams must be rubbed with a special building mixture. Apply it to the joint with a small rubber trowel and let the mixture dry. On average, this takes a day. After drying, clean the floor with a damp cloth.
As you can see, using the SVP does not require any special skills or skill. The maximum effect is achieved with minimal effort. Of course, before starting work, you need to study the reviews about a particular system, choose the appropriate option and clearly follow the instructions. And also do not forget about safety precautions, and then the repair will bring you not only benefit, but also pleasure.
How to make a tile leveling system (reusable) with your own hands, see below.


The comment was sent successfully.