How to lay the tiles in the toilet with your own hands?

An integral part of any room is a toilet, and should not be forgotten if renovations are planned. Before starting the work process, it is important to decide on the choice of building materials, their quantity and costs. It's not just about a quality plumbing and sewerage system. You must select an appropriate surface finish if you want to replace the old one. Tiles are in great demand in this area, as they are one of the most popular types of materials for decorating toilets and bathrooms.


Dignity
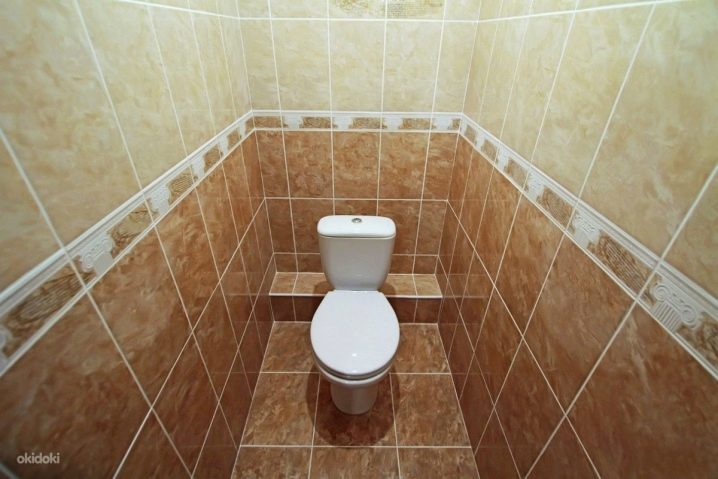
There is a huge range of these products from different manufacturers on the market. If you wish, it will not be difficult to choose the desired finishing option. It differs not only in size, but can have a different texture and color, which is especially important if it is bought with a specific style in mind. Tile is one of the durable finishing materials that remain presentable for many years.
If you decide to do the styling yourself, you will need to study this issue in detail: it is painstaking work where perseverance, patience and adherence to the rules are important. The tile covering is durable and can withstand heavy weight loads. Such material is easy to care for, it is of great importance for connoisseurs of cleanliness. You can choose any shape, texture, surface type and shade that will suit the overall look of the given room, be it compact or spacious. As for the cost, it all depends on the manufacturer you choose (there are more expensive tiles, as well as more affordable options). When buying, it is important to carefully study all the operational characteristics of the material and order it with a small margin for further installation.


Peculiarities
For the manufacture of this material, various raw materials are used. The composition may include clay, broken earthenware, sand and coarse-grained additives that increase the density of products and reduce porosity. The wear resistance of a tile depends on its thickness, it also affects the service life. If you choose a high quality material, you do not have to worry about the shutter speed, as it can take a lot of stress. For production, two methods are used, the first takes place using dry pressing, and the second - with forcing the material in liquid form through the mold.


Why is it relevant?
Such raw materials do an excellent job with a number of factors affecting it. The tile is highly resistant to moisture and can retain its properties during temperature changes. It has a weak conduction of electric current, the material is classified as environmentally friendly. Maintenance does not require much effort, just regular wet cleaning is enough. In this case, you can use cleaning agents, the tile will not be affected by this.


Preparatory work
There are a number of questions you have to solve before starting work to get the result as you expect. In such cases, many are interested in the answer to the question of what steps should be the first. Since we are talking about finishing, the surface must first be prepared for further work. Clean the walls by removing the remnants of the previous finishing material.


Here, a puncher is used, which will help to cope with the work much easier and faster than doing everything manually, which is not always possible.If you notice irregularities, you need to tackle this problem. The walls are leveled, get rid of chips, cracks, cover up all defects. It is important that the surface is flat, otherwise the cladding runs the risk of becoming multi-level. Do not overlook this point: in the future, it will not be possible to correct the curvature of the wall at the expense of the material.


The next step involves the use of a primer that is applied to the walls. It is worth using material marked "deep penetration". This will maximize grip. After processing the walls, you must wait until the material is completely dry. At this time, you can start preparing the floor. Use a building level to determine the bumps, and then get rid of them. This is the screed surface in the toilet.

If you have already come up with a design in which the room will be decorated, you need to purchase finishing building materialsby choosing the appropriate tile option. Experts often use a sheet of paper on which they draw a sketch of the planned cladding. This will help to correctly calculate the material consumption and avoid defects in the mosaic if you decide to make something original.
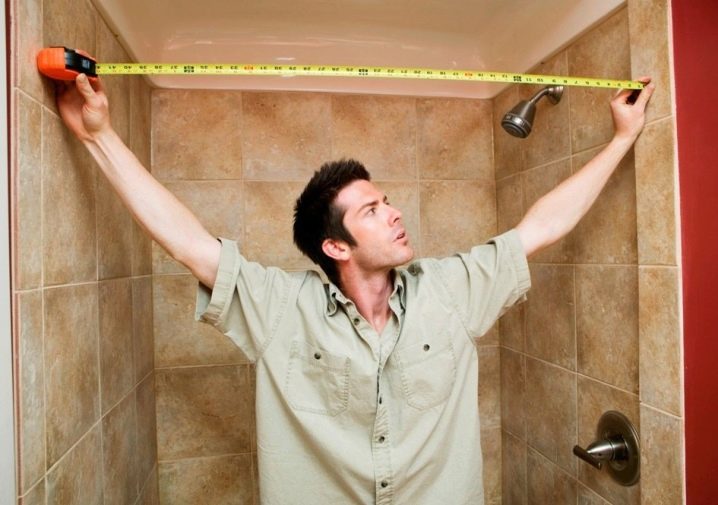
There are several options for masonry, each of which has its own characteristics. Among them, there are traditional, diagonal, modular, offset masonry. If you haven’t worked in this area or tiled before, it is recommended that you choose the first method, so it will be easier for you to cope with the task. All parameters must be measured: you must know how many tiles you need to purchase. Take measurements of the room, take into account the entire perimeter that needs to be covered, as well as the amount of work. It is recommended to take a little more material so that there is a certain margin. So you do not have to run to the store when there is a shortage or search for the same variety in a hurry.

How to calculate the expense?
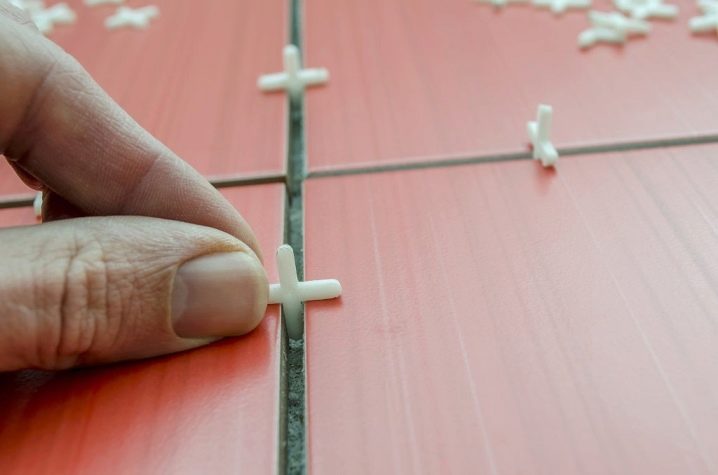
This is quite simple to do, following the usual instructions. You will need to measure the width and height of the walls separately, and then multiply them. To account for pruning consumption, add about 5% to the result. Since glue is required to lay the board, it is important to know the amount you will need. Experts say that the consumption of material per 1 square meter is about 7 kg, if the layer thickness is 10 mm. The glue is often sold in 25 kg bags. You will definitely need plastic crosses for tile joints. Stock up on a gypsum mixture that performs the task of grouting walls, cement (for floors).


Work order
It all starts from the bottom of it (from the floor). If you are interested in wall decoration, remember that these are different surfaces. There are many tiles to cut, so stock up on the appropriate tools and equipment. You need to start laying from the doors and move to the opposite wall. Whole fragments are used first, small pieces are used in inconspicuous places and around the perimeter. During installation, constantly check how everything looks, keep it horizontal, for this you need a building level.


If you are doing repairs in an inhabited area, and a toilet is already installed in the toilet, there should also be tiles under it, so prepare the appropriate material dimensions in advance. Finishing your flooring is a simple process that won't take a lot of effort. However, the pressure of the floor tile is greater than that of the wall tile.


Cladding
Use the following method to mix the adhesive. You need to pour water into the container, then pour the mixture there, while constantly stirring with a mixer, which is previously fixed in a drill. Add glue in small increments to avoid damaging the device. The end result should not be very liquid, as the material will peel off the wall. Tile adhesive should be similar in consistency to paste.High density is not encouraged, as it will be difficult to stretch the composition over the surface.


After mixing the adhesive, the solution should stand for 15 minutes., then it is re-mixed: it should be homogeneous, lumps are excluded. Once the mixture is ready, you can do the cladding. Start from the bottom of the walls, work your way up to the ceiling or the level where the tiles will end. Lay out the first row of tiles, then the next, then the third, and so on. To make sure everything looks level, lay the batten on the floor and use it to guide you.

To ensure the horizontality of the next rows, vertical slats are used, which are attached to the corners of the walls. Drive nails into them, pull the nylon thread, which will serve as a corrector for you while laying the tiles. To apply the adhesive, use a notched trowel to apply the mixture to the underside of the tile. Then the glue is applied to the very surface of the walls. When the tile is applied, it is slightly displaced, then set in place. This must be done so that the glue under it is evenly distributed.


In the first row, insert plastic crosses between the fragments. Their size depends on the size of the tile itself (the larger it is, the larger the crosses), the minimum allowable size for wall decoration is 2 mm. This is enough so that material calibration faults are not noticeable. The seams should not be wide, they are the sore spot of the tile, even if they are treated with a special varnish on top after grouting. When working with crosses, you don't have to worry about the width of the seam: it will always be identical.
In the process, carefully control the level of each paving row horizontally and vertically. In doing so, pay attention to each piece of tile. If the whole square does not fit in a row, use a tile cutter to cut the slice you want. For inexperienced craftsmen, the use of a grinder is recommended, which will facilitate the task. The cut pieces can be used in inconspicuous places where the plumbing system or plumbing equipment will be located.

The finishing of the flooring follows the same principle as with the walls. Move from the far corner to the door. The level will help to check the horizontalness of the rows of tiles. But there is a slight difference, since the glue mixture is applied to the entire surface of the tile, which must be tapped with a wooden mallet after installation. In case of failure, it is necessary to dismantle the tile. Do not wait for the solution to dry, wipe off the remaining solution immediately from the surface: then this will not work. After all the fragments are laid, the solution must be allowed to dry. Leave the cladding for a day, then proceed to grouting.


It is not recommended to select a grout to match. A shade that differs from the cladding looks more harmonious. All seams are filled with grout, tightly distributing the material in them. Then the remains are wiped off with a sponge. To extend the life of the surface, you can treat it with a special compound that adds shine and protects the material.


Helpful hints
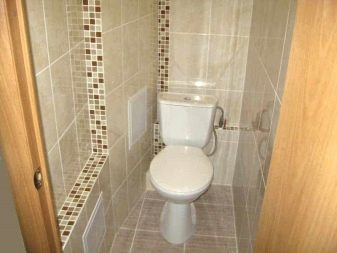
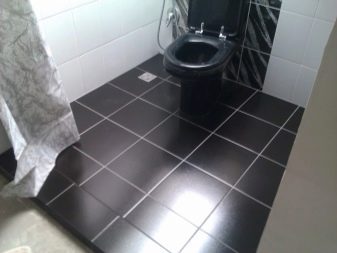
There are several tips, following which, you can do everything at the highest level. If you do not want to spend a lot of time laying tiles, you can choose a plain tile, and for originality you can make the seams contrasting. If your bathroom is combined and looks spectacular, there is no point in putting on a bright cladding that will take all the attention. The background can be made discreet, but attractive with its simplicity and accuracy. Choose a neutral tile option. The color of the floor and wall tiles must not match.

It is imperative to buy products from leading manufacturers, which can give a complete description of the product, as well as guarantee the quality and durability of operation.Such products must be certified, which indicates their admission to construction work. One of the simplest techniques that experienced designers often resort to is laying a light background tile. In this case, the seams can be contrasting, but of a monochromatic base.

Now let's talk about colored grout, which is a cheap and easy method to beautify the background tile. You have the opportunity to get a stunning effect, make your toilet presentable and neat. To ensure that the color of the grout matches the tile itself, follow the procedure below. Before repair work, lay the tiles on hardboard or drywall, and fill the seams dry, this will make sure that you made the right choice, and how harmonious everything looks.


Often, many people think about using squares of different sizes. This is an interesting solution, but it is important to combine and combine everything correctly. Another important fact about seams is that dark tones are better at hiding dirt and mildew if a problem arises. Beveled rectangular tiles, which are traditionally laid horizontally to simulate brick cladding, are in great demand. If your bathroom or toilet has narrow walls, unfold the tile and install it vertically, this will visually make the space freer.
Laying out the tiles with your own hands is simple. This does not require the involvement of specialists. Do not forget to fill before laying. To pour the glue, you need to use cold water. The solution begins to solidify immediately. It will be more difficult to align the fragment after the glue has set.
How to lay the tiles in the toilet with your own hands, see the next video.


The comment was sent successfully.