How to install a food waste disposer on a sink?
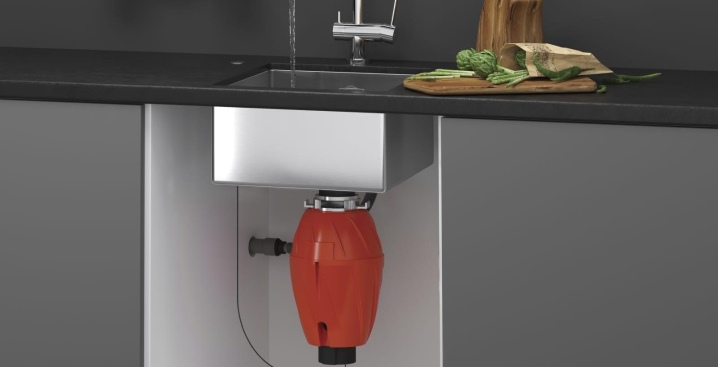
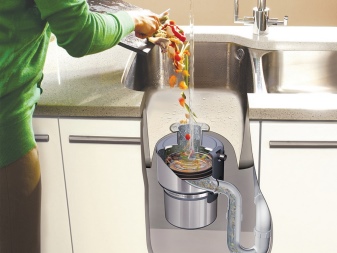
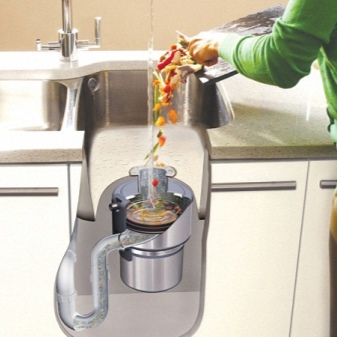
The disposer is able to eliminate the cause of blockages that often form in the pipes under the sink. The device crushes the waste and sends the resulting mass straight to the sewer, preventing the accumulation of product residues in the elbow, the siphon of which is prone to littering. It is very important to choose and install the device correctly, because only in this case it will make your life easier.

Connection features
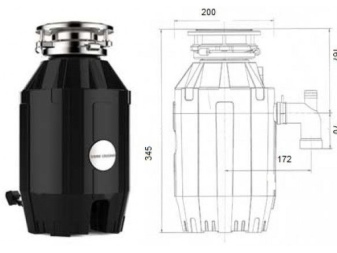
Before purchasing a disposer, it is important to choose the right shredder based on the amount of work, the availability of additional equipment (dishwasher), and the state of the sewage system. The dimensions listed below must also be taken into account.
-
Chopper width and height. The most powerful models are often oversized and may not fit under standard sinks.
-
Sink drain diameter (optimum 90 mm). If the diameter is smaller, then flare the drain. First, a hole with a larger diameter is cut with a special knife, then the edges are rolled under the disposer flange.
-
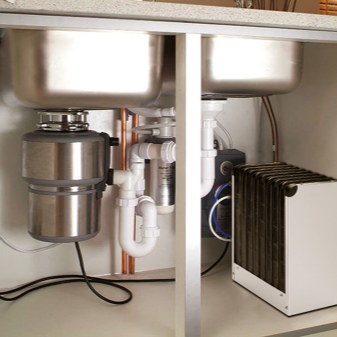
Sewer pipe configuration available. The system can be assembled compactly, excluding the possibility of bulkheads, replacement of elements. In this case, new pipes should be purchased.
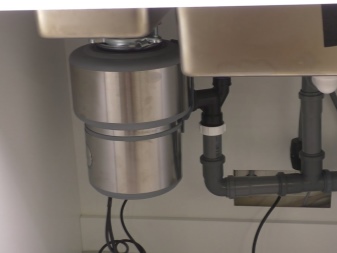
It is better to have the socket for connection at some distance from the sink. This will eliminate the possibility of moisture ingress and, as a result, short circuits. Smooth pipes should be chosen for draining. Residues of ground waste do not accumulate on their walls. For dispensers with a pneumatic button, it is necessary to select the place of its withdrawal in advance.
To install the button, you need to drill a hole, place the button there and secure it securely.
DIY installation instructions
It is not at all necessary to call a plumber to install a disposer. Any model is supplied with detailed instructions, following which installation will not be difficult.
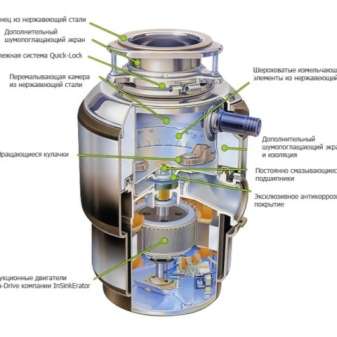
The first step is to check the installation kit against the parts list. The fastening system includes:
-
sink blocker and flange;
-
rubber gaskets and sealant;
-
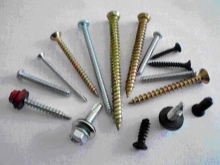
fastening ring and screws;
-
snap ring and removable noise blocker;
-
nuts, gasket, bottom ring.

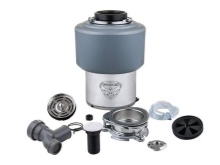
The drainage system consists of:
-
discharge pipes;
-
metal flanges;
-
screws, bolts;
-
gaskets.
All of the listed elements during installation must be connected securely, but with the possibility of tightening and loosening. During the initial stage of operation (from 2 weeks to a month), it is often necessary to tighten the connections.
This is not the result of installation errors, but a consequence of the contraction and expansion of parts during cooling and heating.
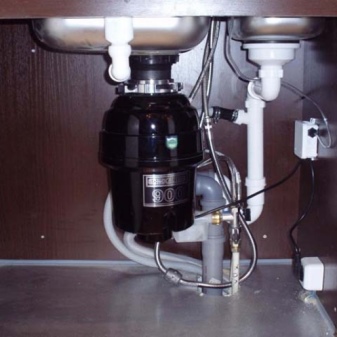
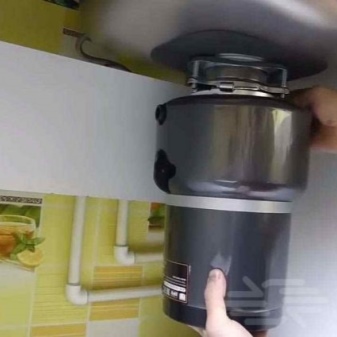
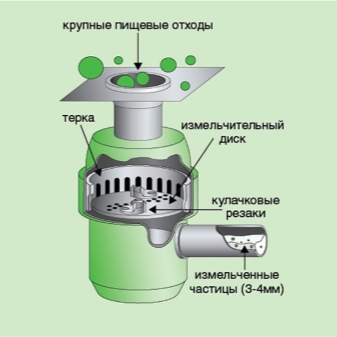
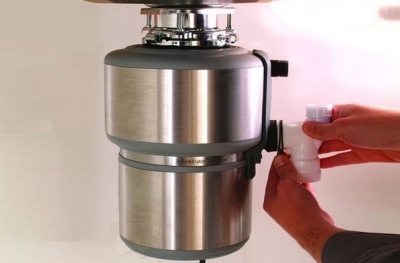
The kitchen dispenser itself is supplied assembled, it only needs to be correctly mounted. The procedure is carried out in several sequential steps.
-
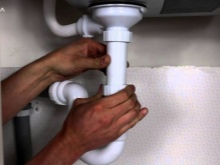
Dismantling of the existing sewerage system. Shut off the water, disconnect the drain parts, remove the sink flange, clean the place of its attachment from dirt.
-
After that, you need to assemble the fastening system of the food waste disposer to the sink.
-
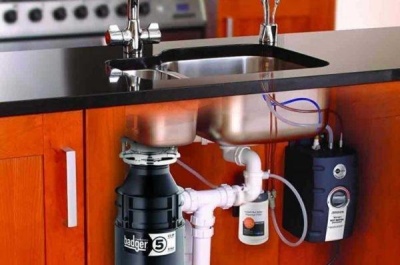
Connect the device and drain pipes to it. One pipe at the entrance, if the drain comes only from the sink, two - when the dishwasher is connected. The dishwasher version includes an air lock to prevent the sink from overflowing.
-
Connect the recycled waste discharge pipe, dock it to the sewer.Connect the shredder to the mains, grounding it according to the type of device (the algorithm is described in the operating manual).
-
Carry out a test run at idle speed, then test the device in action.
If you follow the instructions carefully, mounting a kitchen dispenser under the sink is as easy as cleaning an elbow. In parallel with the installation, care should be taken to place the control system.
The hole for the release of the pneumatic button is drilled in advance.

Advice
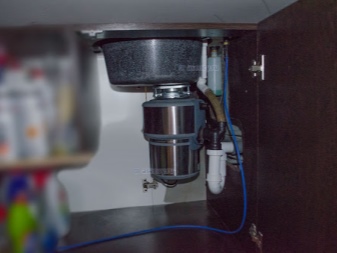
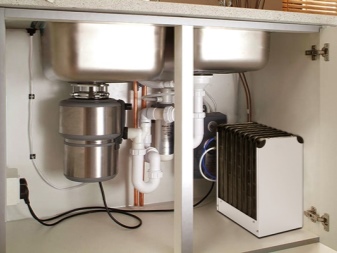
The long work of the dispenser depends not only on the quality of the factory assembly, but also on the correct installation, operating conditions, regularity of maintenance, and prevention of breakdowns. In this case, it does not matter whether equipment is installed in under-table sinks or on sinks glued into the countertops.
Safety precautions when using household waste grinders:
-
control the work of the disposer from switching on to switching off, if children have access to the device;
-
do not use the sink for other purposes, such as shampooing;
-
do not put hands, tableware, inside the grinding chamber;
-
push waste only with the help of special devices;
-
when worn out, replace the diffuser;
-
do not store flammable materials near the dispenser, remove the trash can from under the sink;
-
do not use chemicals, flammable liquids.
To keep the shredder in service longer, manufacturers provide several recommendations.
-
Grind waste only under a strong jet of cold water. The water pressure must be at least 6 l / min.
-
Grind tough waste such as animal bones and fruit pits. This will help in cleaning the camera. Do not be afraid of breakage of the dispenser, it is designed to process such waste.
-
After the end of the working cycle, continue to drain the water for 10-20 seconds. During this time, the sewage will be cleaned, most of the crushed waste will be flushed out of the chamber.
-
Do not litter the space under the dispenser. At the bottom of the device there is a reset button, which must be constantly accessed.
-
Use a magnetic catcher. It is a flexible tape with magnets attached to it. Located on the outer circumference of the sink drain, it prevents metal objects from entering the dispenser chamber. Not all manufacturers include catchers.

In this case, the following actions are unacceptable.
-
Do not pour hot water into the drain during operation. At high temperatures, the fats contained in the waste soften and settle on the walls of the grinding chamber and drain pipes. Over time, their accumulation provokes the growth of oil deposits, a decrease in throughput, and an unpleasant odor. In such cases, the system has to be sorted out and thoroughly cleaned.
-
Do not turn off the water before the end of the grinding cycle, interrupt the cycle. If there is a lack of liquid, blockages occur in the discharge pipes, since the water leaves the grinding chamber much faster than the waste.
-
Do not grind non-food waste. Fragile (glass, ceramics) materials can be thrown out by the grinder or damage pipes. The paper dissolves to a mushy state, clogs the drain. Clay film, threads, hair are wound on rotating elements, making it difficult for them to move.
-
If you want to prevent the drain from clogging, do not chop vegetables and fibrous fruits such as artichokes.
-
The dispenser needs to be washed periodically, as some of the crushed waste accumulates in the chamber, causing difficulties in work and an unpleasant odor. In this case, the use of products containing chlorine and other aggressive components is prohibited.
Recommended cleaning method:
-
unplug the chopper from the outlet;
-
clean the accessible part of the chamber with a hard washcloth;
-
close the sink drain with a blocker and fill half with slightly warm water, then add 2-3 tablespoons of soda or dish detergent;
-
connect the device to the network, start a cycle, remove the blocker - the disposer will be flushed.
Accidents are most often caused by waste stuck. In most cases, the problem is solved by stopping the shredder and then cleaning the chamber. Then you need to wait 5 minutes and restart the device.
In case of more serious breakdowns, for example, inoperability of the motor, you cannot avoid going to the service center.
The warranty for the device is void if there are traces of self-opening, use of the disposer in improper conditions.
How to install a food waste disposer on a sink, see the video below.


The comment was sent successfully.