How to assemble a computer chair?
Buying a computer chair is half the battle. It also needs to be mounted. As a rule, assembly instructions are included with the furniture. However, for most models it is written in a foreign language or the translation is so clumsy that it is difficult to navigate in the order of operations. We will help you quickly and correctly assemble the chair on your own.
Preparation for work
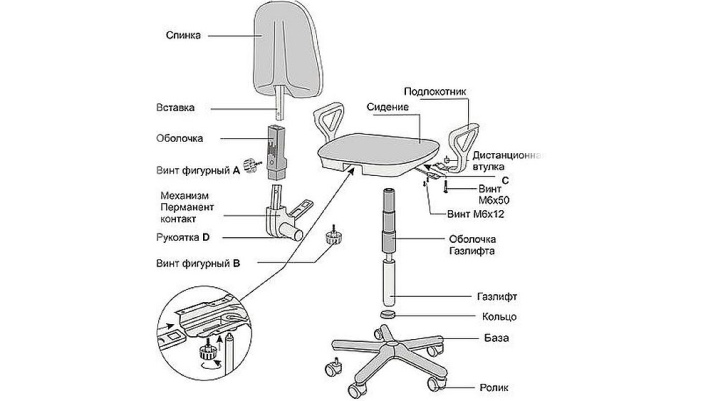
Before starting the assembly, you need to find out if everything is present in the package. Typical kit:
- wheels - their number depends on the modification of the chair;
- crosspiece with overlays;
- lifting mechanism and casing;
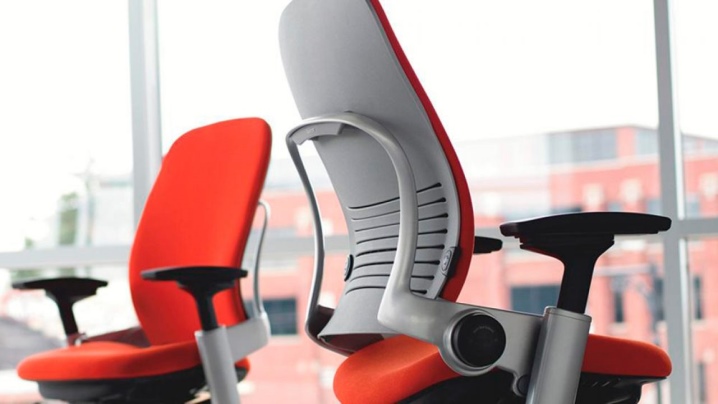
- seat, back (separate or monolithic), 2 armrests;
- a set of bolts and other fasteners;
- a specialized wrench, if suddenly the fasteners have an internal hex hole.

Take a closer look at the elements. They must be intact, free from scratches or abrasions. If everything is in order, you can proceed with the assembly procedure.

Stages and assembly diagram
In order for the chair to serve for a long time and without breakdowns, during assembly it is necessary to perform all actions in stages, as indicated by the assembly manual. An additional hint will be the assembly diagram. A minimum set of tools and basic practical experience in their use are enough to independently carry out all operations.
Installation of rollers in a crosspiece
It is best to start assembling the chair by mounting the casters. It is easy to put them in the sockets of the cross-piece.
- For comfort, it is advisable to put the cross on a flat, hard surface, for example, on the floor or table with the holes up.
- We put the rollers in the slots - this is done easily: the wheel rod is inserted into the hole on the crosspiece and pressed until it clicks. All remaining elements are installed in the same way. It is not advisable to nail the rollers, since they are entirely made of plastic, you can damage them. If the strength of your hands is not enough, you can use a rubber hammer, but only without fanaticism.
- After installing the rollers, turn the cross-piece over, place it on the floor and press down firmly on each branch to make sure that the parts are firmly in place and stable.

Seat preparation and installation
The seat should be turned upside down and the adjusting device installed. It can be of various designs, but, as a rule, it is a design with an adjusting screw, a gas lift mount (gas spring) and a lever by means of which the seat height is set. Attach the part first and check that all the fastener holes align perfectly.

It is necessary to set the adjusting unit correctly - so as not to confuse the sides of the location of the fasteners for the gas spring and the adjusting screw. Then the installation is carried out, 2 washers are installed under each screw - a large one, which increases the pressure zone, and a small one, it serves as a stopper and does not allow the screws to loosen during use.

Armrests are attached. Everything is quite simple here: the part is installed in place of fixation and pressed with screws. The main thing is not to confuse the position and install the armrests with the required side. The backrest is being installed.For this, the console support piece (bracket) is installed in its place, then screws with washers are installed and overtightened.

Installing the gas spring in the crosspiece
Before installing the gas spring, the safety caps must be removed from its ends, otherwise they will interfere with the normal functioning of the shock absorber. Following this, the lower part of the gas spring must be inserted into the central hole of the cross, press on it to fix it in the desired position. A casing is put on the gas spring from above and fixed by means of a latch on the crosspiece body.

The telescopic cover is intended for belaying, it protects the seated person from fallingif the lifting mechanism fails. In addition, it performs a decorative role, hiding the gas lift. The casing is assembled according to the type of telescopic systems - one part is inserted into another, they are fixed by means of protrusions in the body of the casing. When the supporting base is prepared for fixing the seat, you can proceed to the final stage.

Combining chair components
Be very careful when fixing the assembled seat to the support base. Our main goal is to carefully place this component on the hoist.
- The upper part of the chair must be carefully placed on the gas lift rod. There is nothing complicated here, the main thing is to precisely align the stem with the hole so as not to spoil the details of the structure.
- Then press down hard on the seat, or better yet, sit down. At this moment, a strong adhesion of the elements will take place.

It is undesirable to assemble the chair by any other methods. The product is ready for use, it remains to test how well the work was done.

Quality checking
It is very simple to test the suitability of a computer chair for use by means of simple operations. The reliability of the lifting device is the first aspect to be considered. When testing it, you need to sit in a chair, push on the handle of the chair height adjustment mechanism (piastre) - under the pressure of your body weight, the seat will begin to lower.
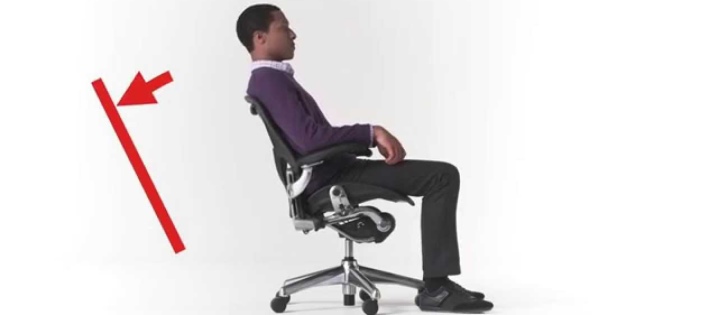
When the required level is reached, it is necessary to stop pressing on the handle. If you pull it up and rise from the seat, the chair will return to the starting position. Quiet and stable operation of the lifting mechanism is the second condition that will indicate successful assembly work. And finally, the fasteners and component connection areas must be lubricated with machine oil.
You can learn about assembling a computer chair in the video below.


The comment was sent successfully.