How to properly embed a lock into an interior door?
Only mortise locks are inserted into the interior doors, since the overhead locks will look somewhat cumbersome and too noticeable from one of their sides. It is not difficult to do this work, especially for those people who have dealt with such a thing at least once. In this article, we will consider how to choose, install and adjust locks of this type correctly.
Castle selection
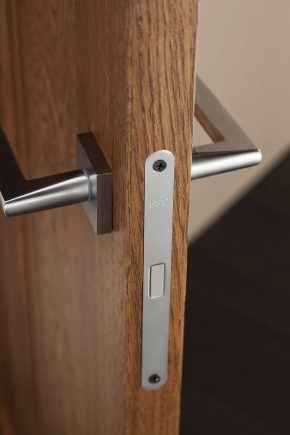
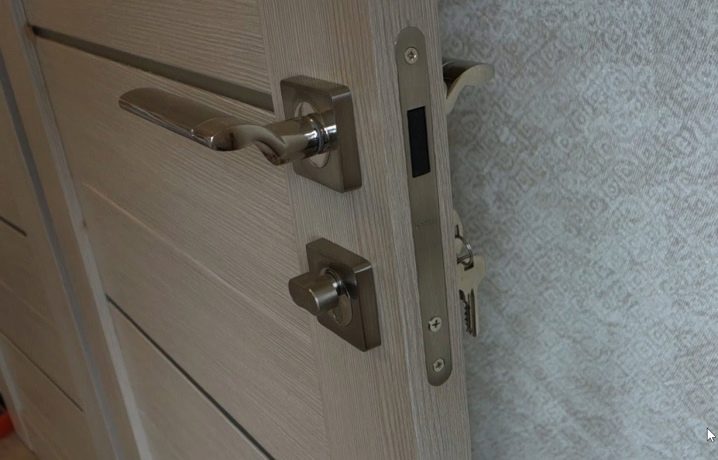
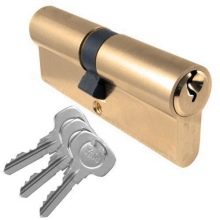
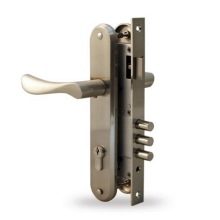
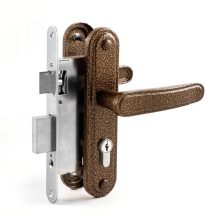
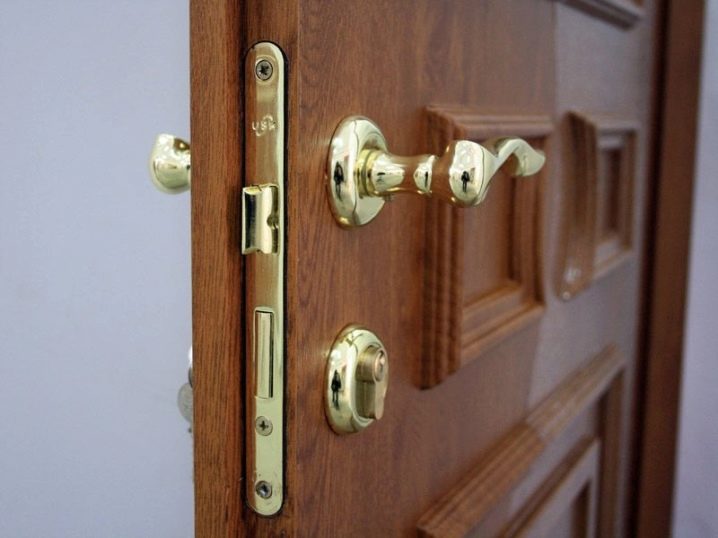
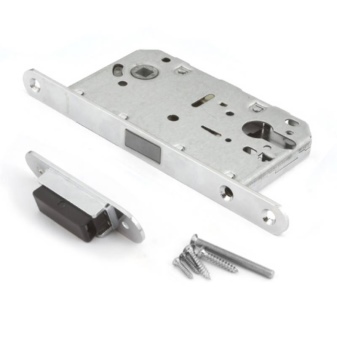
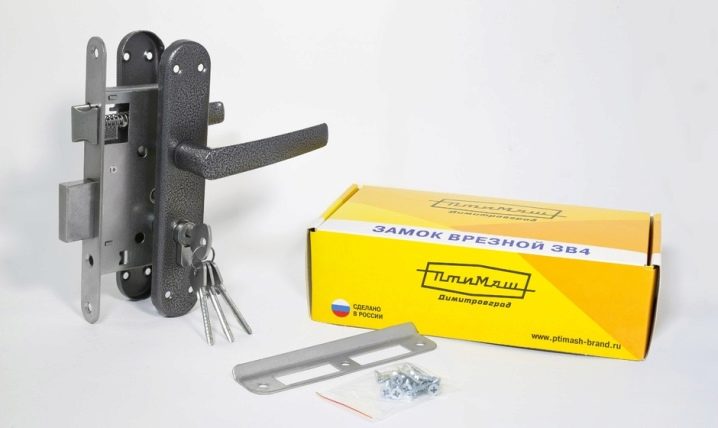
The most common version of a lock for a wooden interior door is a cylinder mechanism with two round or L-shaped handles and a latch. They are available in several versions, for example with or without a locking device. In the first case, it is possible to close the door on one side, thereby blocking its opening with the handle on the other side. That is, you can lock yourself in the bedroom and relax without fear that someone will enter the room and find you naked. A lock without a locking device is installed only so that the door can be tightly closed with a latch, protecting it from drafts, smells from the kitchen or noise from other rooms.
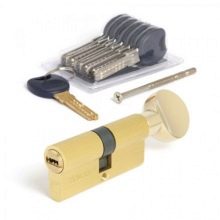
The locking device does not have to be a key mechanism. There are also locks that have conventional locks of various shapes embedded in the main handle, for example, levers or buttons. The range of locks in building materials stores is quite wide, so there should be no problems with the choice.
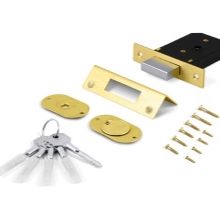
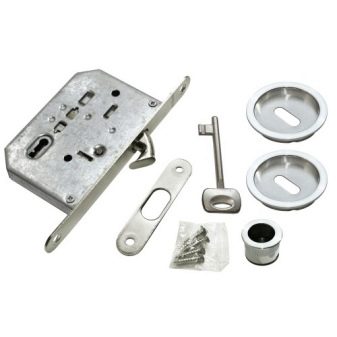
The variant with the larva and keys is, in fact, a simplified device for the front door lock. Such a lock can usually be unlocked from both sides without fear of becoming a prisoner in your own office, as in cases where a lock with a blocker is installed on the door. The tongue in such doors is activated by pressing the handle. If the door serves as a simple barrier from drafts, and does not serve as a fence of personal space (with a locking device), then it is better to choose a lock with a plastic latch. There is less noise from it, which is very annoying at night in the process of opening and closing the door with family "night owls".


If you look at it, then different options for devices are placed on the doors of rooms with a specific function:
- locks with key cylinders on both sides are suitable for cabinets;
- for bedrooms, toilets, baths and showers - devices with interlocks from the inside;
- for children's rooms, newfangled and expensive magnetic locks are ideal;
- for kitchens, halls and utility rooms, you can limit yourself to ordinary locks with handles and a latch.
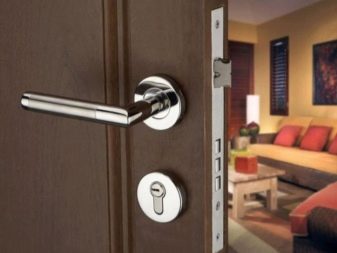
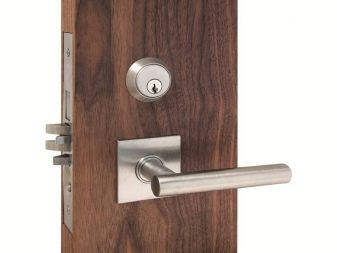
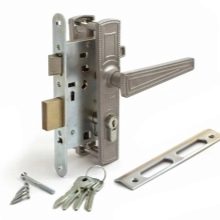
But in any case, all devices must be mortise. When choosing, be sure to make sure that the interior linens in your home have the appropriate thickness for the chosen fittings. Standard doors usually have an uneven door leaf thickness: some - at least 35 mm, others - 45 mm. It is for them that the appropriate fittings are needed in order to avoid the fact that the lock will be equal in thickness to the door.

In addition, when choosing accessories, you need to pay attention to the general interior of the home and rooms in particular. The door array is also of great importance. For example, locking devices designed for a door weighing 40 kg cannot be cut into a door leaf weighing 70 kg. It would be a bad idea to embed a lock with miniature handles and a weak return spring into the canvas, which has huge dimensions.
As for the magnetic lock mentioned above, such a device has inside a movable positively charged core (bolt), which starts to act only when the door is closed. In this position, it is opposite the negatively charged magnetic strip installed on the door strip. The crossbar is attracted by the bar and securely fixes the door in the closed position. To open the door, you need to turn the handle that disconnects (unlocks) the magnets. After opening the door, the force of interaction of opposite-pole magnets no longer acts on the bolt, so it returns to its place. A completely silent device is gaining popularity, which is so far held back only by the rather high price for this type of construction.
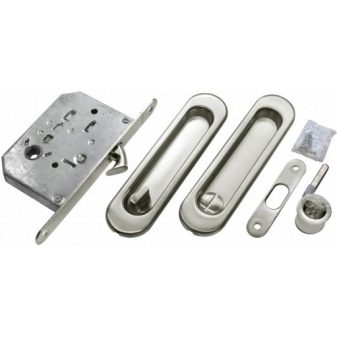
There are also special locking devices for sliding interior doors. They cut into the canvas, have the same rotary handles and a bar on the box. The main difference between such devices is their hook-shaped latch, which is why this constipation is called "harpoon".
Preparation
It doesn't matter which lock was chosen for a particular interior door, the preparation for installation is not much different from its type. You can give advice: if you plan to embed locks on all the interior doors of an apartment or house, then it is best to do this on the door leaves removed from the hinges. Any professional will tell you about it. If you decide to put the locking device in only one door, and removing it from the hinges presents certain difficulties, then it is better to mount the lock in the "standing" position.
Before approaching the door with the tool, you need to carefully consider the purchased model of the locking mechanism, once again check the presence of all the necessary parts and fasteners with a description of the configuration, fully read the instructions and understand the installation diagram of the device. All this must be attached to the product.
Armed with the knowledge and making sure of the completeness of the kit, you should decide at what height you will need to install the device. Typically, locks are cut at a height of 100 to 150 cm from the floor surface. Having chosen the height, you can make a preliminary mark on the canvas and think about the tool that will be needed to insert the existing lock.
Required tools
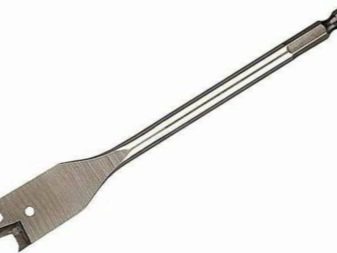
Consider the option of inserting the simplest device with two handles and a latch.
For work you will need:
- chisel;
- electric drill with drills;
- pen drill 22 mm;
- cutter for wood with a diameter of 50 mm;
- screwdriwer set;
- hammer;
- measuring instruments (ruler, square, tape measure);
- washable marker or pencil.


An electric drill is needed not only for drilling holes for fasteners, it is also useful for working with a pen drill and cutter. You will need to drill a hole for the lock with a feather drill, and recesses for the decorative overlays of the handles with a milling cutter. Of course, it is more accurate to perform such work with a special tool - a milling cutter, which is adapted precisely for such cutouts in a tree, but because of its high cost, it is more often used by professionals who earn their living as a carpentry business.
Making a groove
When installing the lock, it will be necessary to make grooves for the latch base plate on the end side of the door leaf to a depth of 3-5 mm (depending on the model), as well as for the back strip on the door block.
This is done by hand using a chisel and a hammer using the following technology:
- the strips are applied to the place of their future location, and are traced around the perimeter with a pencil or thin marker;
- according to the marked dimensions, the platform is carefully cut with a chisel and a hammer to a shallow depth;
- further work must be continued, monitoring the depth - it must be strictly along the thickness of the plates, since neither excessive deepening nor too shallow groove is desirable;
- having cut out the grooves, they are cleaned of irregularities and debris.
In case of excessive deepening, you will have to eliminate the error with a layer of plastic or other material, which, of course, will not improve the operational reliability of the device.
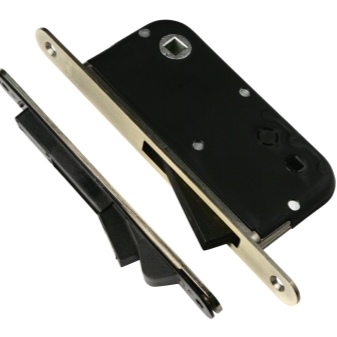
Mounting the device
Before you cut in the lock, you need to make a markup. All plunge-in operations, starting from the markup, are easy to carry out on your own. Usually, such hardware is installed right in the middle of the door leaf from one of its edges. Therefore, a small line using a tape measure marks the middle of the canvas (for a standard door from its bottom, this will be a distance of 95 cm or so in either direction). Then, from the edge of the canvas, at which the lock will be cut, with the help of a square, 6 cm is marked until it intersects with the previous mark.
A prominent point is placed at the intersection of the two marks. It is this point that will be the center through which the axis of the handles and the lock will pass, if the lock needs to be assembled with a lock. There will also be a center for drilling a recess for decorating handles.
All further operations are best performed according to the algorithm.
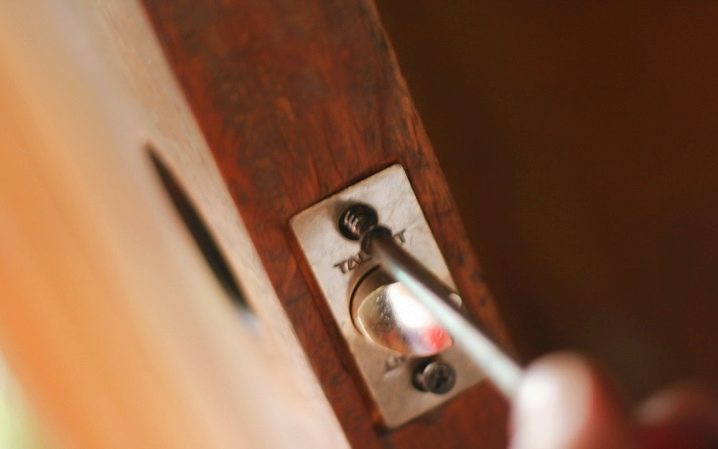
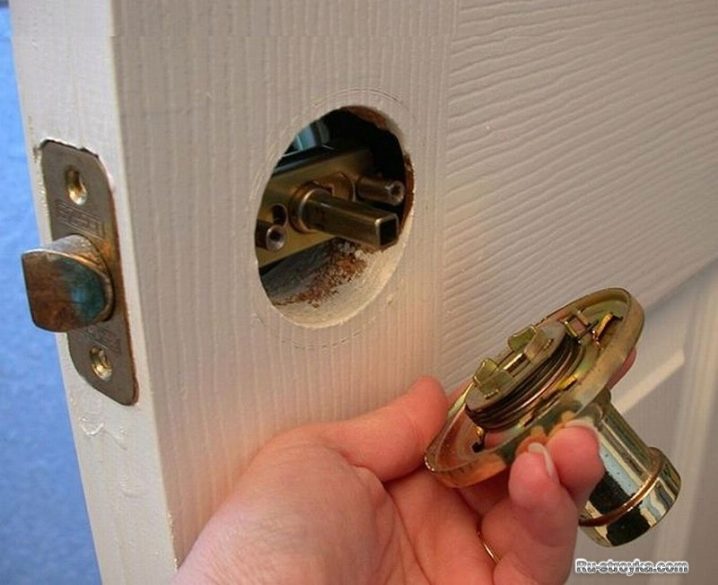
- Using the same square, we transfer the center point to the side of the door, right in the middle of the thickness of the leaf. Here will be the center of the cylindrical body of the lock (latch, tongue).
- Now you need to take a feather drill, insert it into an electric drill and drill a hole for the lock case. In this case, a strict perpendicular position of the drill axis with respect to the sidewall of the door leaf should be maintained. The hole depth is about 35 mm.
- You need to change the core drill in the drill to the milling cutter. With this tool, a hole is drilled for the handles. Here, too, you need to carefully monitor the position of the tool so that it is perpendicular to the door both in the horizontal and in the vertical plane. In addition, the door must not be drilled through on one side. The milling cutter has a sharp tip protruding along the axis, like the pen of the previous drill, so it will serve as a guide for completing the work. When this tip drills the opposite side of the blade, then they move with the cutter to the other side and drill a hole from there to avoid damage to the blade at the point where the cutter exits.
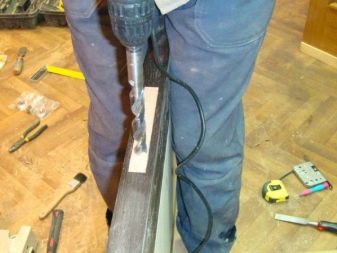
- The next step is to adjust the size of the exit hole for the latch using a pen drill. It should be within 23 mm (we had a 22 mm drill). To do this, you just need to adjust the hole to the size by inserting and trying on the lock cylinder to the hole.
- After that, it is necessary to clean the resulting two holes, connected to each other perpendicularly along the axes, from dust, sawdust and burrs.
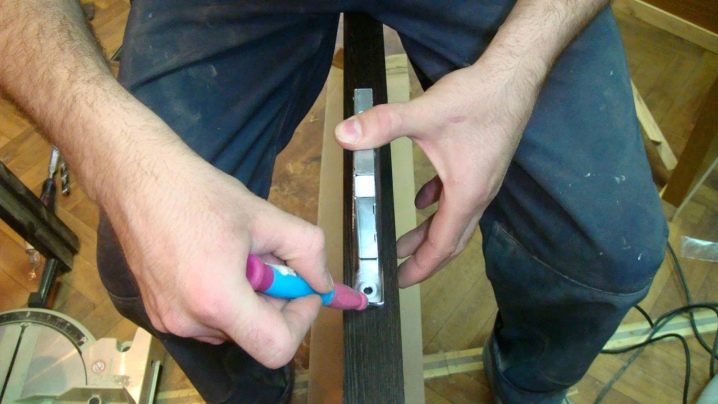
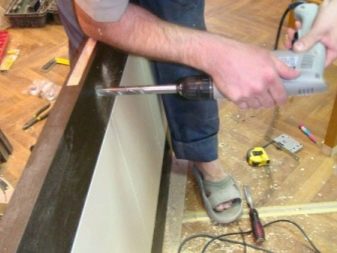
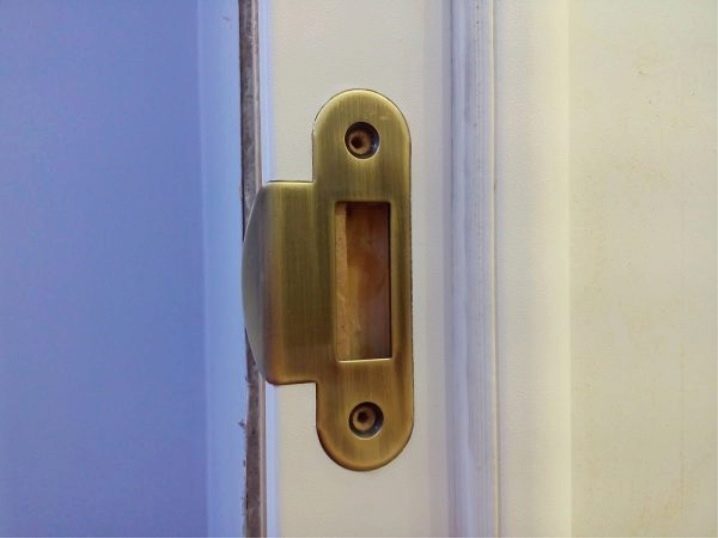
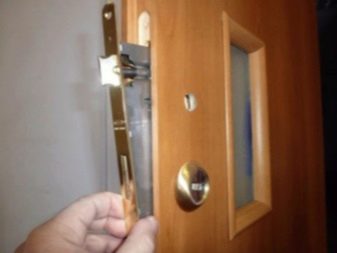
- We insert the lock cylinder into the corresponding hole and cut the groove for its base plate using a chisel and a hammer in the manner described above. When the seat for the latch is ready, we install it in place, drill the holes for the fastening screws with a thin drill and attach the lock to the door with them.
- Now you can, by inserting one of the handles into the hole in the lock, mark the exact location of the striker. To do this, the tongue is covered with some dye and, holding the tongue in a recessed state with the handle, the door is closed to the end. After making sure that the door is closed tightly, you need to release the handle, the latch rests against the door block and makes a mark. And already at this mark, you can calculate the location of the mounting plate. Make a sample for it with a chisel and a hammer, as described above. At the end of the groove, set the bar in place and secure with self-tapping screws.
Installation of door locks using a submersible router is much better and easier. The milling machine is also supplied with various templates for working with many well-known types of locks. With the help of the carriage and these templates, all the work is done to install not only various accessories, but also to correctly install the door itself.
Assembly and adjustment
It remains only to finally assemble the lock, adjust, if necessary, its work, and finally fix all the fasteners. It should be noted right away that you do not need to be too zealous with fasteners, especially in those locks where parts of the device are fastened together from different sides of the canvas. Tightening the screws too tight can deform the body and make the locking mechanism difficult to work, even to the point of jamming.
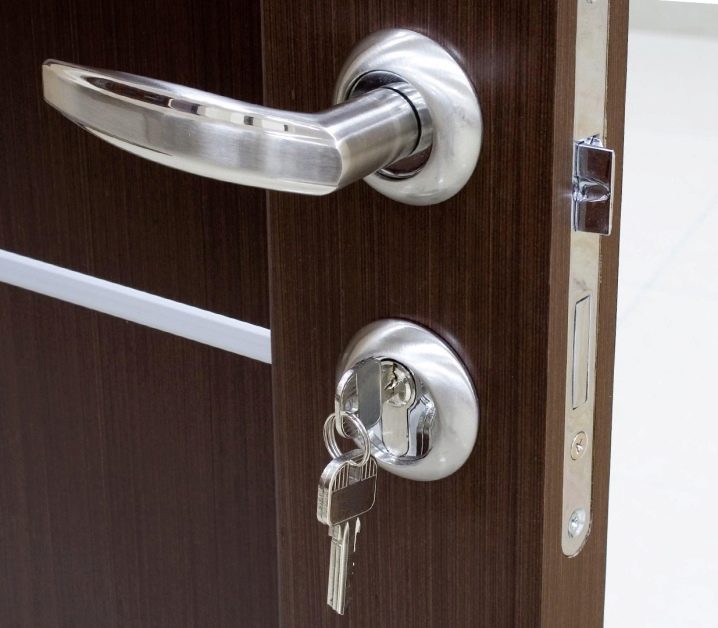
Since the latch is already in place, you need to insert the handles. The first step is to install a handle with fastening screws, which must be unscrewed before installation. After that, the handle is inserted with its square axis into the hole of the lock and into its own hole in the canvas until it stops.
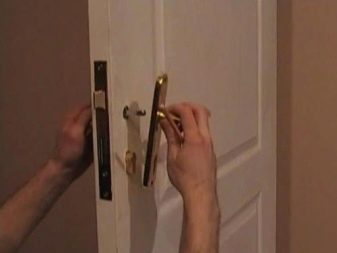
Another handle in modern models is often fixed to a cylindrical body and has a removable decorative strip. First, the handle and the decorative strip must be removed from the body by drowning the latches, and only then the body is installed in the corresponding hole in the canvas towards the square control axis from the opposite handle, pushed onto this axis until it stops. Then the fixing screws are inserted into the holes, and with them the two sides of the handles are fastened to each other.

Now all that remains is to return the decorative strip and the handle to the case, drowning the latches on the case. They are threaded onto the body until the release of the latches that come out of the recess into the fastening grooves of these elements.
The installation of the locking device is completed, and it is necessary to adjust the free movement of the lock mechanism and its precise operation. This can be checked by turning the knob. It should move easily and without gaps, and after releasing it, it should immediately return to its place. In case of hard movement or jamming, loosen the fastening screws a little. On the contrary, if there are extraneous sounds and backlash in the mechanism, then the fastener screws must be tightened deeper.

Checking work
After adjusting the locking mechanism, check the operation of the system as a whole. To do this, close the door and check the correct installation of the return bar. If there is a slight play of the latch in the bar or, conversely, a millimeter displacement of the hole relative to the latch, then all this can be eliminated by unbending or bending the adjustment plates of the hole in the reverse bar.
If the lock works correctly, then there should be no backlash between the latch and the back strip, the door closes tightly, the lock works easily and without unnecessary noise.
How to properly embed the lock into the interior door, you will learn from the video.


The comment was sent successfully.