All about stitching patterns
The door construction has a lot of fittings. Parts such as locks and hinges require complex assembly work. It is difficult for a layman to embed them without damaging the canvas. In this regard, a template is used for mounting hinges and locks. If you have never used a template before, then first of all you should get to know this device better.
Peculiarities
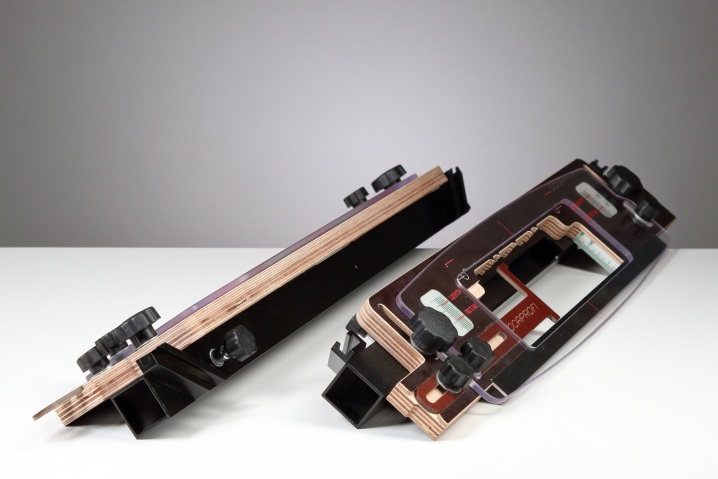
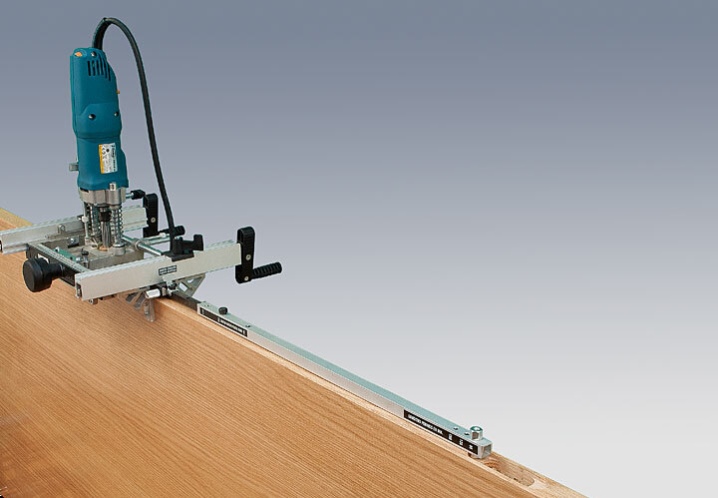
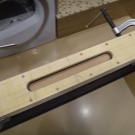
The device is a blank, a kind of matrix, which has a cut-out window corresponding to the details of the fittings configuration. The device is also called a conductor. Fix it on the sash or box - where the tie-in is planned.
The edges of the window clarify the outline of the future deepening. Cutting can be done with a chisel, drill or router, without fear of spoiling the wood outside the template.
The device allows you to quickly install the fittings.
Review of the best models
Next, we will consider multifunctional templates and carriages for installing locks and hinges in a door structure. Let's find out what their differences are and understand which model is the best. Let's analyze their features and advantages.
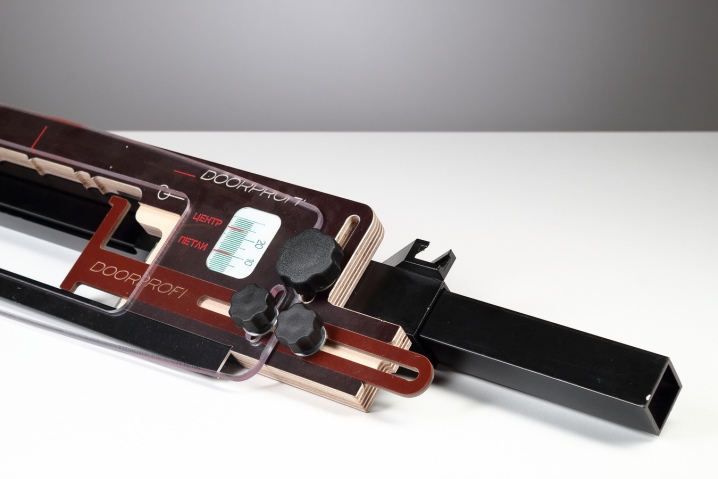
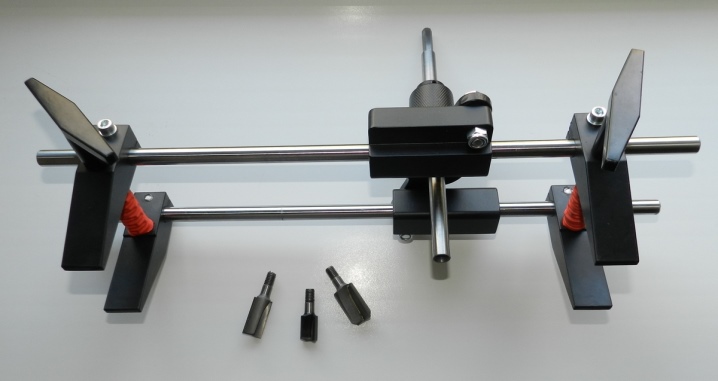
"UFK-Profi" (universal carriage for the router)
Many door installers and professional carpenters choose this particular attachment for their electric milling cutter. The reason for this is the following qualities of the device:
- does not need auxiliary elements - it provides insertion of seats for absolutely all hinges, locks, crossbars and the like that are currently available on the market;
- quality of fittings insertion - as at the factory, that is, without errors;
- the template is lightweight and easy to use - it does not require huge skills to work with the device;
- high-speed insertion - adjust the template for the parameters of the lock or hinge and you can embed in a couple of minutes;
- elementary and quick setting of the dimensions of the embedded parts;
- suitable for all types of electric milling cutters;
- the ability to embed the hinges immediately parallel into the door frame and door leaf;
- the template helps to embed crossbars of various sizes;
- insertion of all available hidden hinges;
- you can put locks on the installed door, the carriage is fixed tightly, you can only tear it off with the door;
- lightweight and small-sized template - 3.5 kilograms (easy to move, does not take up much space).

Even when new fittings with dimensions that do not meet the standard appear, the presented device will help to embed it, it is multifunctional, its work does not depend on the dimensions and configuration of the fittings.
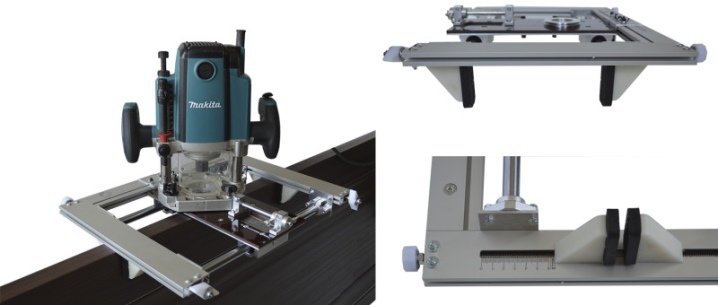
Virutex device
Not a bad attachment for an electric milling cutter with a factory insert, which has some disadvantages:
- works exclusively with Virutex devices;
- difficult to set up and prepare for work;
- expensive - you need to buy 2 devices: a separate conductor for installing locks and a separate one for hidden hinges and hinges;
- it is not possible to simultaneously insert into the door frame and sash;
- does not cut crossbars;
- has a large mass;
- inconvenient during transportation - the device is massive and heavy.
Taking into account that the device for a manual electric milling cutter for wood is not cheap, the purchase becomes impractical, even if you professionally install wooden doors - the product pays off for a long time and is uncomfortable in work and transportation.
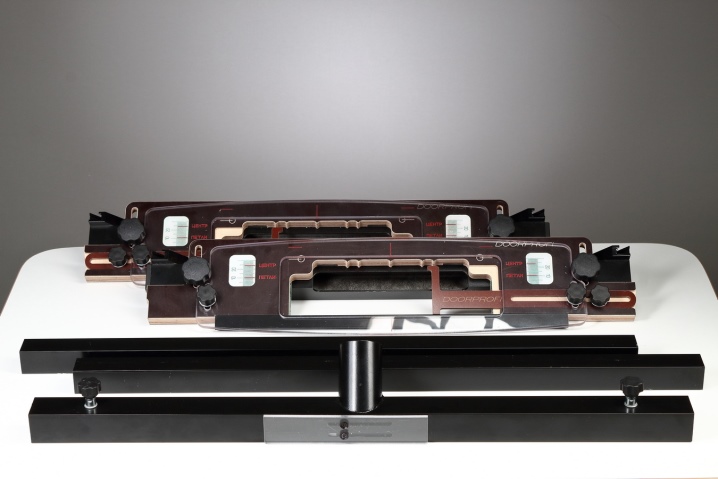
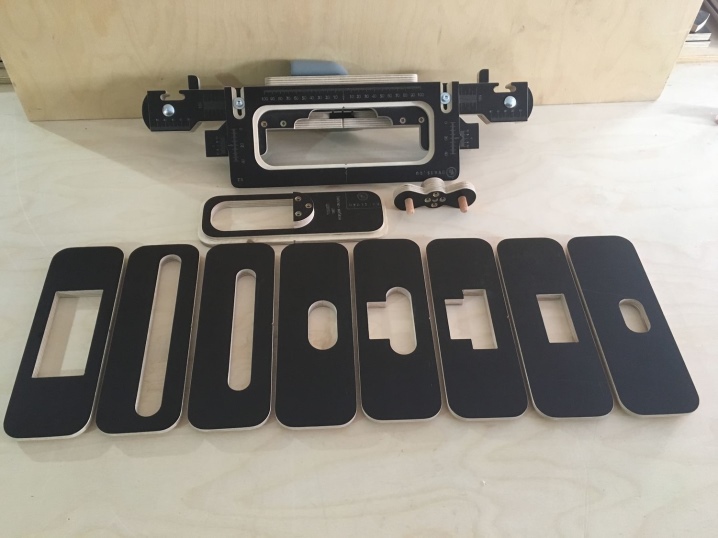
All kinds of sets of templates (strips) for installing fittings
The key difference from the devices presented above for inserting landings for hinges and locks is that these devices are not multifunctional carriages. This is a set of templates made of steel, PCB or organic glass.
Main disadvantages:
- an extremely huge number of templates for inserting seats for fittings, each template is designed for a specific lock or hinge;
- carrying a hundred templates with you is cumbersome;
- finding the right size is doubly inconvenient;
- if you do not have the template you need in size, then you will need to purchase it additionally (if, of course, it is on sale) or wait until it is made to order;
- the purchase of all the templates available from the manufacturer is not a guarantee that he has taken into account all the accessories that are available on the market, the variety is extremely huge;
- on the official portal of manufacturers it is indicated that templates are on sale exclusively for the most demanded hinges;
- the assortment selection of fittings for wooden doors is increasing from year to year - an inexpedient race, where you will incessantly have to "buy".
Conductor Gidmaster
Advantages of the device (according to the manufacturer):
- preparation for work takes little time;
- the convenience of setting up for the required operation of installing a door lock in the door leaf enables a specialist to mount, in fact, all locks;
- the conductor will easily replace the router and do the job for the top five;
- real money saving;
- The jig is designed for fastening to the door using clamps, at the same time centering of the cutter takes place.
A satisfactory device, but there is a significant disadvantage - the Gidmaster template cuts only locks and exclusively with a drill.
If you decide to purchase this template, then you need to be aware of the following nuances:
- not exact installation of dimensions, but with a tolerance - the option for setting dimensions for the fittings to be installed was illiterately executed;
- due to the fact that the drill does not have such high revolutions as the electric milling cutter, during operation, torn edges may come out or chips may appear on the enamelled door;
- you need to use cutters only with a thread on the collet, ordinary cutting tools are not suitable.
Summarize. Based on the feedback from professionals, we can say that the palm tree (in terms of cost, convenience and ease of operation, quality of the insert, functionality) undoubtedly belongs to UFK-Profi.
How to use the fixture?
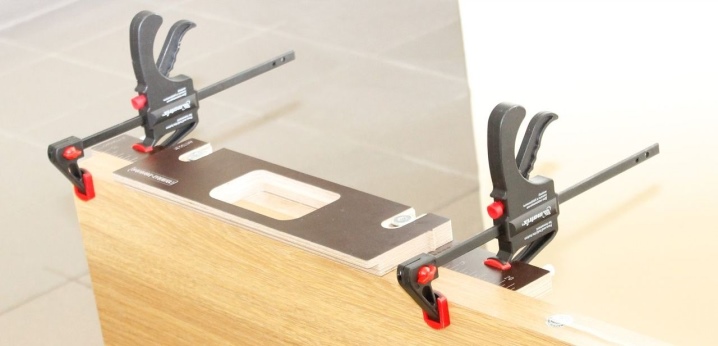
Install loops
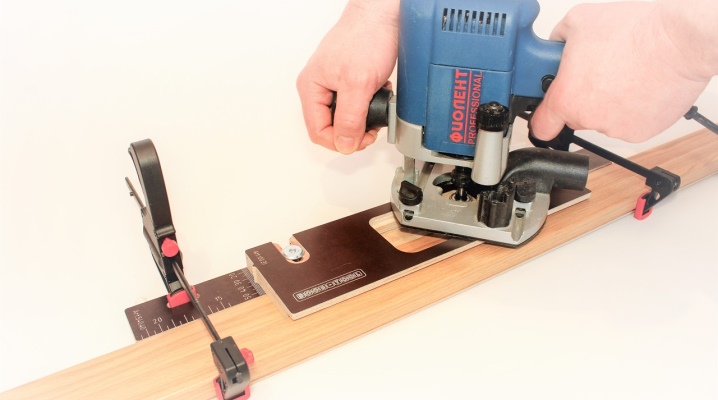
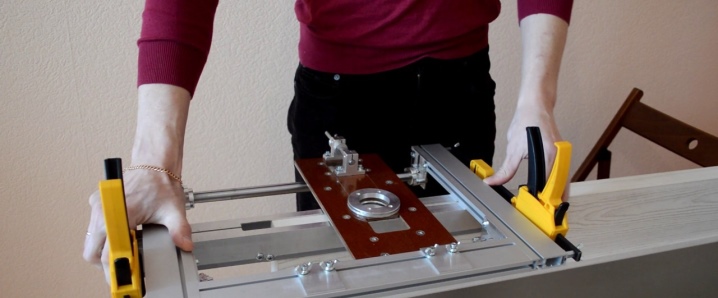
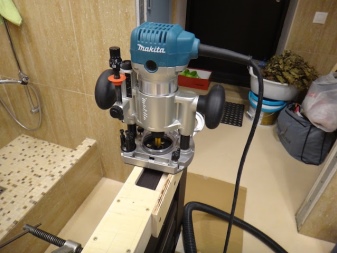
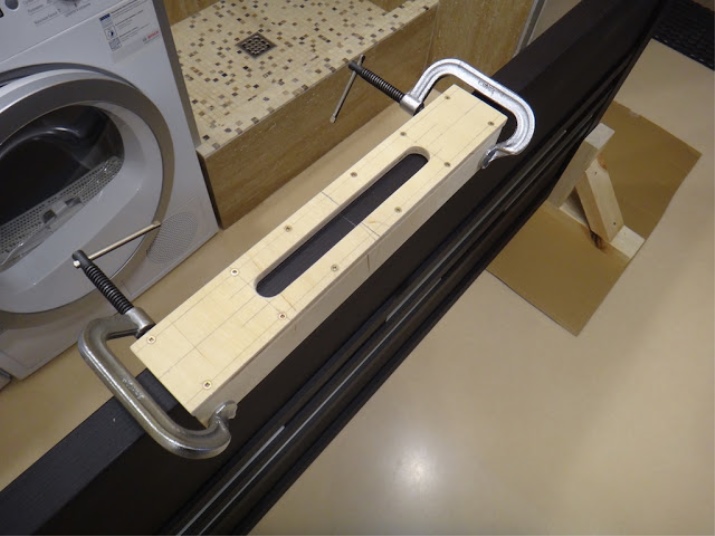
The installation of hinges begins with the installation of the template, only before the toolkit is prepared. You will need a manual electric milling cutter, chisel, screwdrivers. The tie-in process includes the following activities.
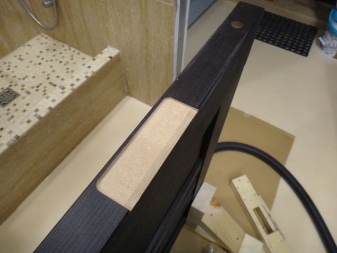
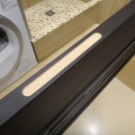
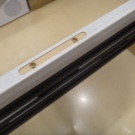
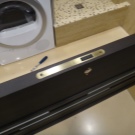
- The canvas is securely fixed to the floor, placing it with the side end up. Places of fittings are marked. It is enough to outline the canopy mounting plate with a pencil.
- The conductor is fixed to the end of the blade with screws. The overhead plates adjust the size of the window in strict accordance with the applied markings.
- Adhering to the boundaries of the template, they remove the chamfer with an electric milling cutter or chisel. The notch must match the thickness of the hinge fixing plate. If more material is inadvertently removed during the tie-in, the hardware will not function properly. The door is sideways. You can reduce the notch by placing rigid cardboard under the hinge mounting plate.
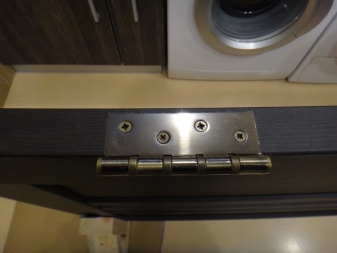
- As soon as all the grooves are made, the installation of the hinges begins. They are attached with self-tapping screws.
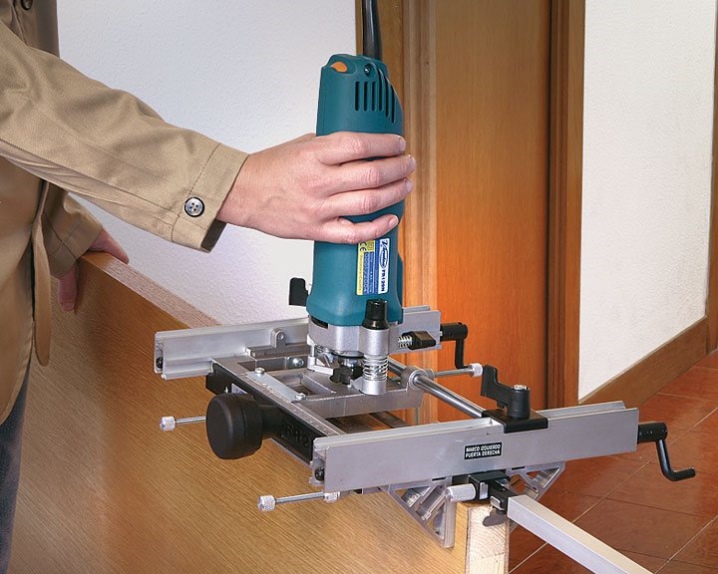
Installing the lock
Installation of the lock using a template is carried out according to a similar technique, only the cutout in the end of the canvas is made larger. The procedure includes the following steps.
- The canvas is securely fixed to the floor with the side end up. Mark the place of the tie-in. The lock is attached to the end of the canvas and outlines it.
- A template is set on the label. Corrects the alignment of the borders of the template with the drawn lines.
- The wood is selected by means of an electric milling cutter. In the absence of an apparatus, holes are drilled with an electric drill, and the remaining jumpers are removed with a chisel. The depth selection must match the length of the lock body.
- The template is removed from the door leaf. The lock is attached to the front of the canvas, the holes for the lock hole and the handle are marked. Holes are made using feather drills. The lock is pushed into the prepared recess, secured with self-tapping screws.
- The canvas is hung on the door frame. When closed, mark the location of the striker. A template is attached to the trap, the window is adjusted according to the mark, and the recess is sampled with an electric milling cutter or chisel.
- The work ends by fixing the striker with self-tapping screws, testing the functionality of the lock.

Installation of furniture hinges
The installation of hinges is an important step in the assembly of cabinets.
To make it easier to install furniture hinges, use a specialized template. The main thing when working with him is to adhere to the size and sequence of all actions.
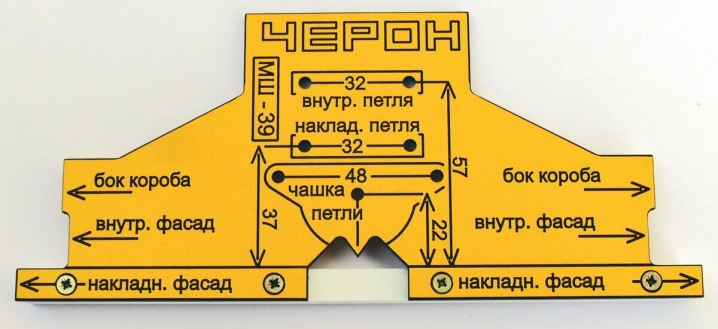
Application features
- The template is made from reliable materials, but it must be handled with care. Therefore, drilling through it is prohibited. This can shorten the life of the product.
- When marking, it is imperative to retreat 1.1-1.2 centimeters from the edge.
- Hinges from different manufacturers may differ slightly in size, this concerns the distance between the centers of the screws. Then the template is used to find a place for the cup. This hole is universal for all fasteners. The cutters are selected based on the material of the facade. For fixing, it is advisable to use reinforced self-tapping screws.
You can see the direct use of the template for cutting loops in the video below.


The comment was sent successfully.