How to make a frame extension to a house?
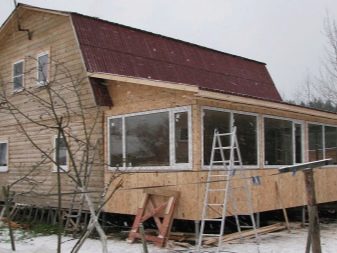
Building a frame extension to a private house is a quick and economical way to increase the area of your home. Nowadays, structures of this type are beginning to be in great demand, since their construction does not require special skills, and building materials can be purchased at any building materials store. If you strictly adhere to the construction technology and correctly calculate each component of the extension, then it will serve for many years without requiring major repairs.
Peculiarities
The extension to the house has its own characteristics, which depend on its purpose, since different requirements are imposed on the kitchen, veranda, bathroom and additional living room. In particular, an extension of another living space can be compared in complexity with the construction of a small house.
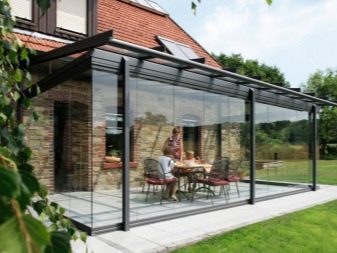
There are special requirements for foundations, thermal protection of walls, floor and ceiling. It is much easier with the construction of a summer veranda, because it is a light, unheated structure, for the construction of which there is no need for a strong foundation. In general terms, the construction of a terrace is limited to the construction of walls, roof and floor. Although some homeowners prefer a glass veranda. The main thing is that the extension does not stand out from the general style of the house.
Problems arise with the kitchen and the bathroom, especially when the water supply system to the house has already been connected and additional communications will need to be carried out to the newly-made premises. Problems with the heating system can also begin. You should think about communications before building the foundation, so you can save money and time in the future. At the worst, you should equip or at least outline the exit points for water and heating pipes. Regardless of what will be added to the house, this process includes such standard steps as:
- design;
- foundation erection;
- wall frame construction and cladding;
- roofing device.
It turns out that adding an additional room to the house with your own hands does not differ from the construction of any other structure. And the strength of the entire structure will be determined by the quality of the foundation.
Projects
Work on the construction of an additional room in the form of an annex includes the design procedure, selection of materials, preparation of estimates, distribution of communications, communication with the house, arrangement of space.
The creation of a project and a drawing, as well as the calculation of an extension to any house (old or newly built, log, country house, panel board, brick, wooden and others) begins after the type of structure and dimensions have been determined.
In turn, when choosing an additional room, you can opt for such as: veranda, terrace, summer kitchen, living room, garage, porch, bay window, awnings. At the same time, it is important to provide for the condition of the adjoining walls and, if necessary, replace the rotten areas. It is necessary to adhere to a uniform style.
The dimensions of the frame extension should not exceed 2/3 of the house area. For example, the area of a veranda is usually equal to approximately 20% of the area of the house. In this case, the main thing is not to disturb the exterior of the facade.To make changes in the structure of a residential building, permission from the Committee for Architecture and Urban Planning is required. All the necessary drawings are prepared.
It is problematic to use ready-made standard projects, since they need to be tied to the existing structure of the house and the condition of the soil. They are taken as a basis, making changes of varying degrees of complexity depending on the needs of the customer, as a result, an extraordinary solution can be obtained.
DIY construction
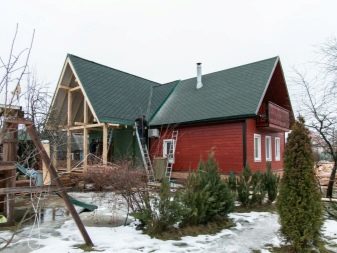
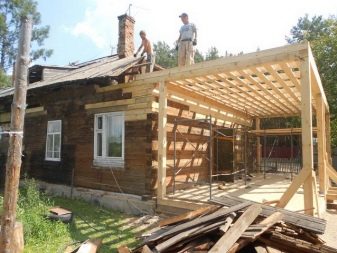
The construction of a frame extension can be implemented by yourself, the main thing is to adhere to the advice of professionals in this matter. After the detailed design of the future construction is ready, you can start building. This process includes several essential steps, which will be guided by step-by-step instructions.
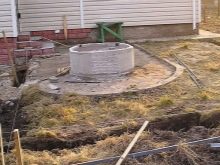
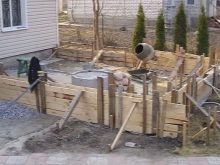
Site preparation and foundation pouring
Before building the frame, you will need a foundation. It can be lightweight, columnar or strip, but in most cases, a strip foundation of a monolithic type is chosen as the base, which is the most reliable and durable.
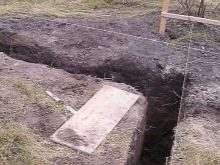
To create a foundation, you should perform such actions as:
- you need to mark the site. Small pegs should be driven in the corners of the future building, tying a cord (fishing line) to them. This will allow you to clearly see the outline of the future foundation;
- it is necessary to dig a trench (ditch). Its depth depends on the dimensions of the base of the main house. The trench should be 150–170 mm wider than the future walls of the extension;
- the bottom should be covered with fine gravel or sand with a layer up to 15 cm, thoroughly tamped;
- it is necessary to lay a layer of waterproofing directly on a cushion of rubble or sand;
- on top of the waterproofing layer, you need to arrange a reinforcing mesh to increase the strength of the concrete;
- you need to fill the reinforcement layer 1/3 with a concrete solution, wait until the solution sets, and then pour another solution 1/2 of the depth of the ditch;
- formwork should be installed. As a material for creating forms for laying concrete, you can use wood, metal, plastic, or their combinations;
- it is necessary to pour the upper part of the foundation and let the concrete dry. Depending on the weather, this will take about 14 days;
- after the solution has completely dried, it is worth removing the formwork and performing external waterproofing with rubber or roofing material.
Important: the foundation of the main structure and the annex should be common, therefore, even before the stage of pouring the concrete solution, it is necessary to determine the method of joining. If the construction is carried out on unstable soils, for example, loose or clay, it is required to give some time for the foundation to shrink.
Articulation of the frame extension with the main structure
Regardless of the quality of the foundation, due to the difference in the magnitude of the load with which the house and the extension act on the soil, it is still possible that over time they will shift in relation to each other. Guided by this, experts highly discourage a hard way to attach an extension to the main house.
It is more rational to use an abutment similar in principle to a groove-comb type. To install it on the wall of a capital building, you need to fix two beams, and put a vertical beam between them, which is a component of the frame wall of the annex. This method of abutment will create conditions for leveling mutual movements. Of course, you can use a metal frame instead of wood, in this case, all embedded elements must also be metal. Otherwise, you need to make a swivel connection with bolts.
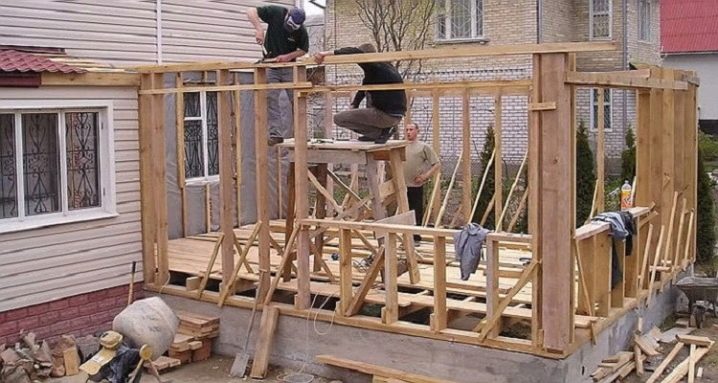
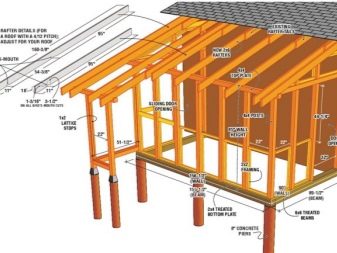
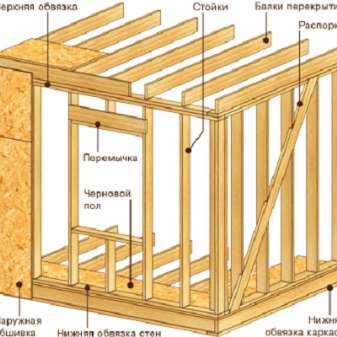
Construction of walls
After the final leveling of the surface of the ground part, you can proceed to the construction of the walls of the frame extension. They are based on wood beams treated with protective components.
The process of building walls is represented by the following algorithm of actions:
- you need to make the bottom strapping.There are several ways to connect the timber, but more often they use an inclined connection or use the half-board method. We seal the voids between the timber and the plinth with expanded polystyrene;
- to give the harness additional strength, corner joints must be secured with anchors or dowels. The timber is fixed to the base in the holes made in advance;
- floor boards are fixed to the lower strapping with a step of 60–70 cm, it is better to fasten them with liquid nails or self-tapping screws;
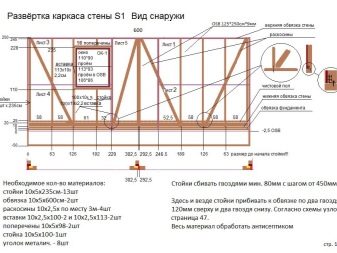
- frame racks for walls must be fixed to metal corners and self-tapping screws. They must be located at a distance slightly less than the width of the thermal insulation;
- it is advisable to construct the upper strapping only after the installation of all wall racks, so that the structure has sufficient rigidity by this time. The upper harness should be mounted in the same way as the lower one;
- to reinforce the frame, you can put diagonal beams.
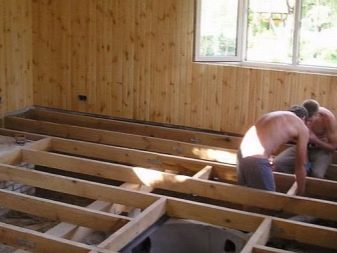
Having finished with the construction of the walls, it is necessary to install the floor lathing on the prepared logs of the lower base. For this, it is better to use ordinary boards with a height of 40 mm. It is best to arrange a finishing floor (topcoat) only after wall cladding and roofing.
Important: when constructing a frame base, it is necessary to use a building level, since even a slight roll can provoke deformation of the entire structure.
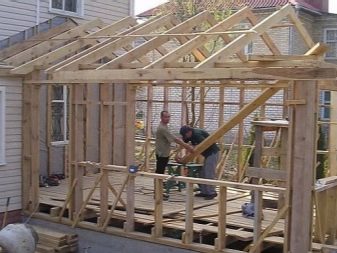
Roof
Even at the stage of wall mounting, it is necessary to lay the ceilings every 60–70 mm and fix them to the upper trim using metal corners. At the same time, you can sew up the ceiling with sheets of thick plywood or boards, which will give the frame even more rigidity. After that, a layer of insulation must be laid on the rough structure of the canvas.
If you plan to use flexible material for the roof, then another layer of lathing is required on the rafters for the vapor barrier device.
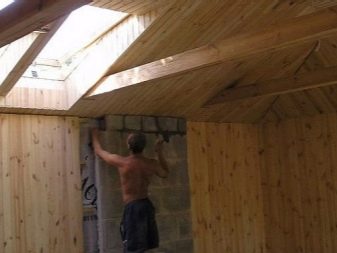
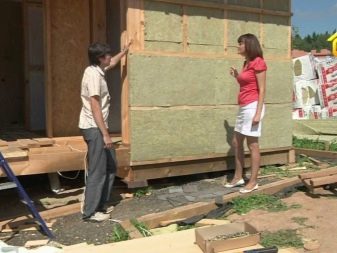
Warming and finishing
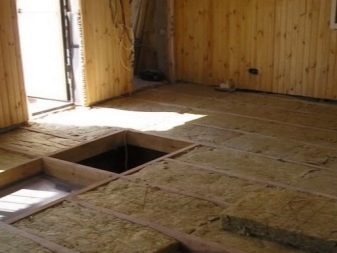
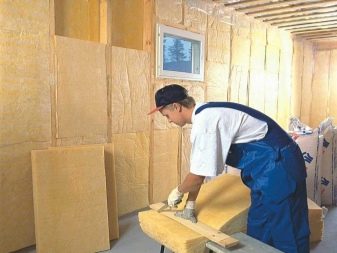
After installing all the elements of the frame structure, you can proceed with the insulation of the extension. Mineral wool, expanded polystyrene or ecowool are usually used as insulation. Insulation plates are placed in several rows between the frame supports. Particular attention must be paid to the mating points of the slabs to avoid gaps. To do this, the insulation is shifted in different layers relative to each other.
In a similar way, thermal insulation is laid between the ceiling and the floor. For outbuildings, it is advisable to carry out insulation from the outside. It does not reduce the useful area of the room and retains heat well. As soon as the thermal insulation is laid over the entire surface of the annex, you can start installing steam and moisture insulation. The material should be placed strictly with the villi towards the facing, and the smooth side towards the surface of the thermal insulation. To protect from the winds, the extension is sheathed from the outside with a film or roofing material.
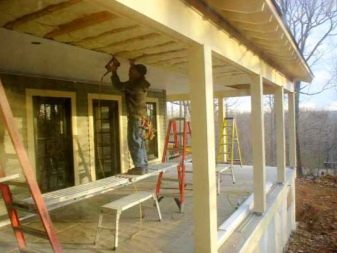
The walls of the extension must be insulated not only from the outside, but also inside. For this, a superdiffusion membrane (film), foil material and insulation are used. The Super Diffusion Membrane is a modern insulating breathable material. To save money, they practice plastic wrap instead, however, this material accumulates moisture, as a result of which mold forms on the walls of the house.
Foil materials are applied to the wall with an overlapping aluminum side and are fixed with ordinary slats. At the final stage, the walls are faced with plywood, OSB boards or drywall. Subject to all the technology of using the proper materials, a self-constructed frame extension will serve the owner for many years.

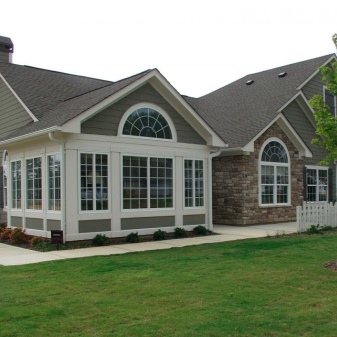
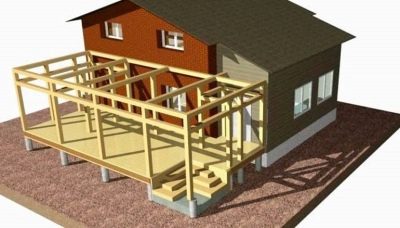
Beautiful examples
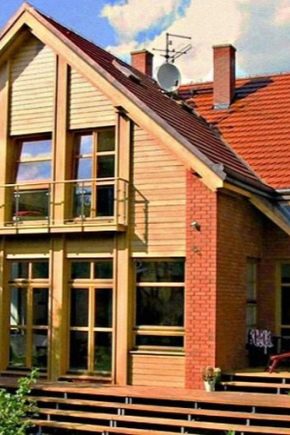
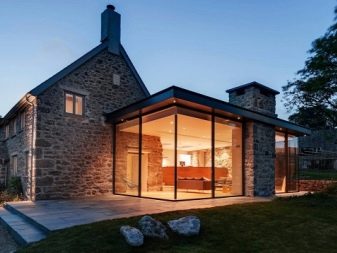
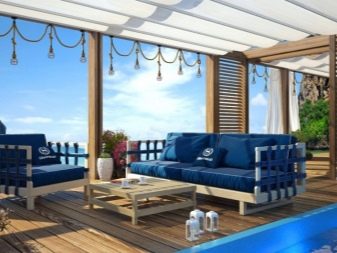
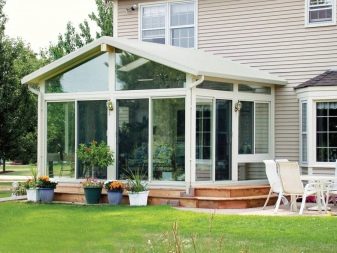
The classic veranda is a roofed frame structure built on a columnar or strip foundation. It can be glass or partially glass walls.Statements that the veranda should be built from the same materials as the main house, with the advent of the latest styles and fashion trends in architecture, have lost their relevance.
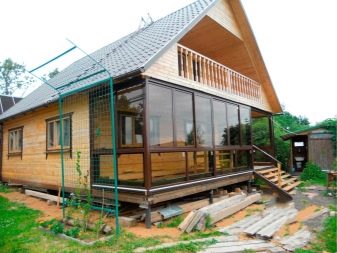
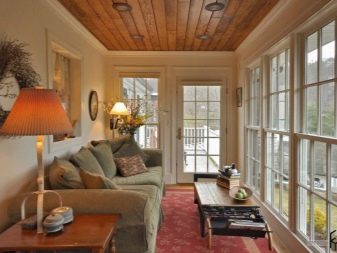
In this small, cozy veranda, it turned out to equip a small living room with a reading area. The elements of interior decoration in rural style in this case turned out to be in place.
For information on how to make a frame extension, see the next video.


The comment was sent successfully.