The subtleties of the design and construction of the cellar
Storing various items and things in cellars is considered very practical and convenient. But in order for such a wish to be realized in reality, you need to carefully design the structure and complete all the work as it should. And to begin with, clearly understand what the cellar is and what is its specificity.
Peculiarities
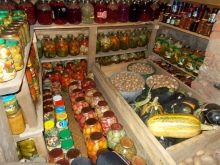
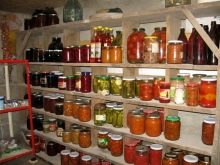
The vast majority of people think that a cellar is a place just underground where something is stored. And the difference from the basement is only in the name and in some design details. In fact, there is a difference, and no small one. So, in the cellars they often store:
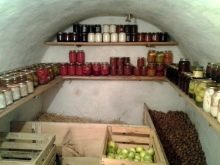
- homemade canned goods;
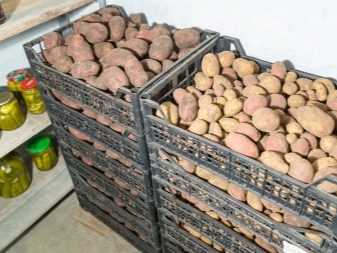
- vegetables;
- fruits;
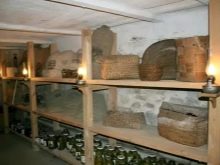
- homemade wines;
- everything else that should be stored at a temperature of 10 to 14 degrees.

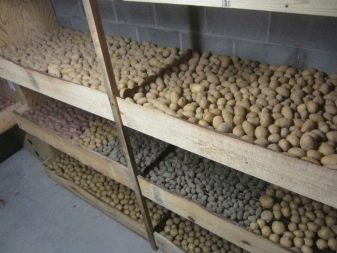
There is another type of cellar - with a temperature of 8 to 10 degrees. It is not intended for long-term storage of a vegetable crop, but it is ideal as a potato warehouse. What is important, if the basement is always located under some ground building, then the cellar can also be an autonomously located structure. In addition, it is not always completely buried; there are even superficial versions. Therefore, protection from the accumulation of groundwater is fully ensured.
The cellar belongs exclusively to the number of cold rooms, but the basements are quite warm.
The maximum height of the walls of the cellars is limited to 190 cm. In basements, such a height is just beginning their list of sizes and is acceptable only for vegetable stores. When organizing a technical floor, the building must reach at least 220 cm.And a full-fledged residential basement generally requires making the distance between the floor and the ceiling at least 2.5 m.

It is necessary to finally determine the purpose of the construction even before the start of work, only then it will be possible to complete everything as it should. Depending on the purpose of the premises, a list of necessary waterproofing and insulation measures is determined. In addition, having determined the size of the space, it is easy to find out what exactly will be located in the underground structure. The cellar differs from the basement also in the function of the walls, because their key task is the fence. Thanks to these walls, the foundation pit does not crumble, and harmful moisture does not penetrate inside.
Appointment
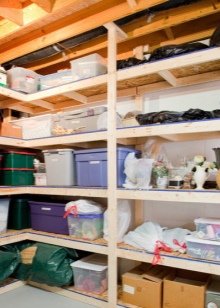
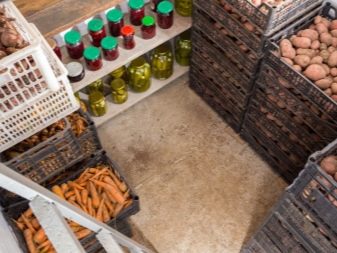
A variety of products can be stored in cellars, and therefore the approach to their organization cannot be made universal. Most often, in Russian conditions, such drives are used to store vegetables and preparations for the winter. Even the largest household refrigerators cannot provide the same capacity. In addition, the underground reserve by nature itself is kept in a suitable condition, does not consume electricity and almost does not need maintenance.
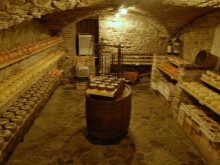
According to experts, the cellar, isolated from houses and other buildings, does its job best.

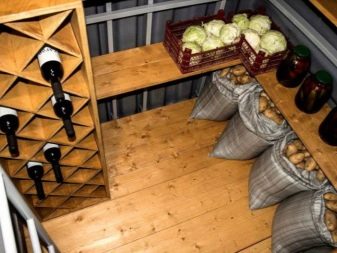
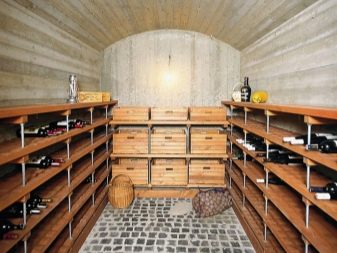
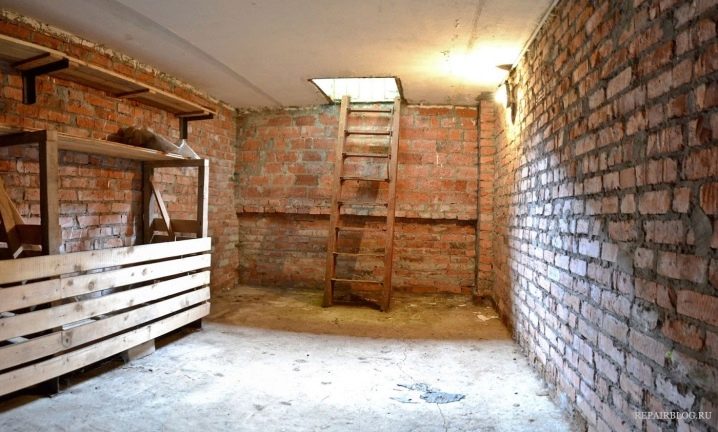
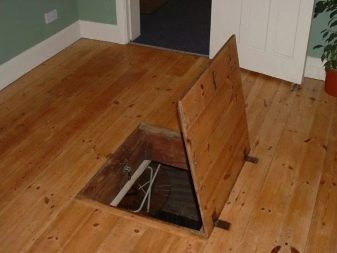
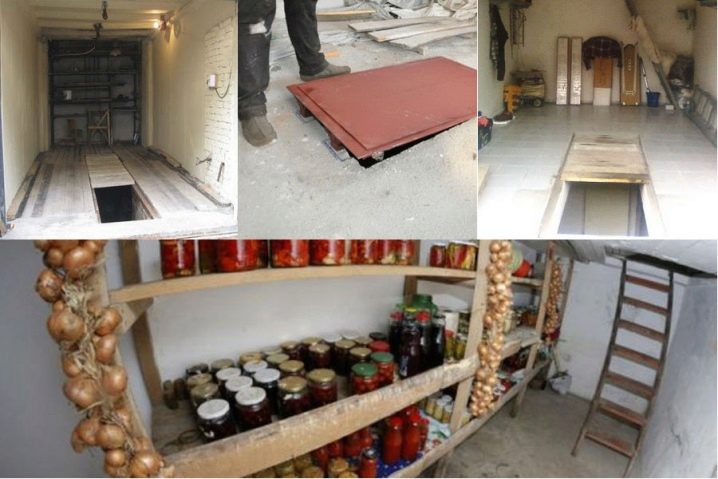
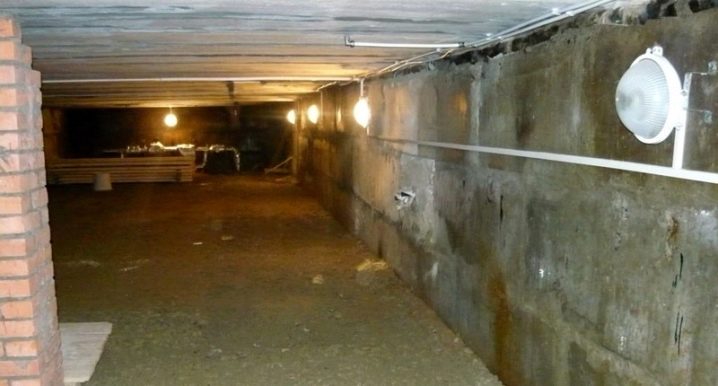
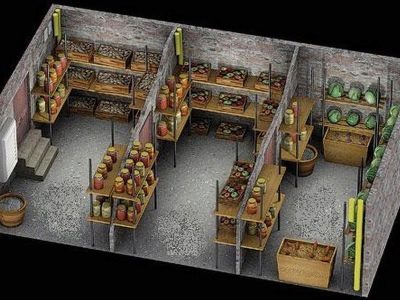
In an autonomous structure, it is easiest to achieve sufficient space and form high-quality ventilation. Of no small importance in the development of a new site is the fact that a free-standing cellar can be used as a decoration of the surrounding space. The underground block is most often divided into sectors, in each of which certain vegetables are laid out. Wall shelves are also equipped. The so-called cellar (the part of the building located above the ground) includes a door, a hatch leading downward, a roof, walls and a vestibule compartment.


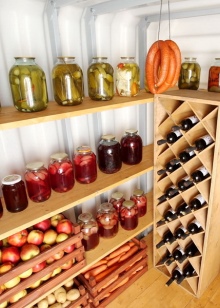
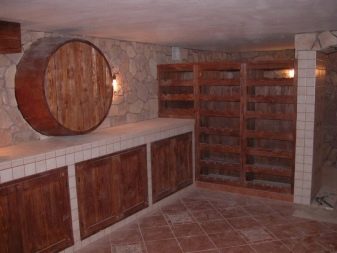
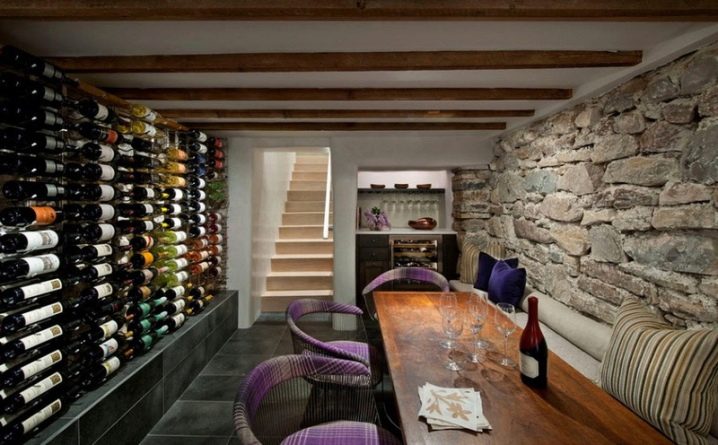
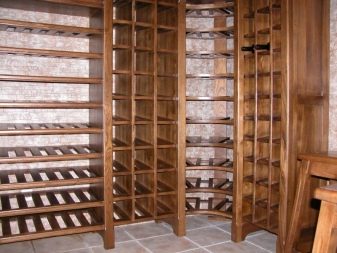
Homemade canned food and alcoholic beverages can also be stored along with vegetables. The microclimate of a well-built cellar allows you to do this. Still, more often than not, the wine cellar stands out especially because it has its own specifics. Basically, such structures are made in houses, even sometimes in city apartments. This is quite understandable: few people want to walk or even travel far for one or two glasses of wine.
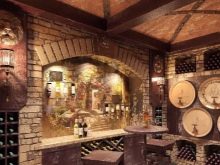
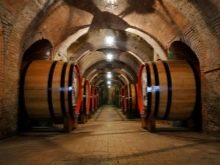
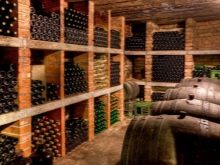
Given the purpose of such a cellar, it is mainly made with the help of professional designers. The harmonious and comfortable design allows for an optimal atmosphere inside. At the same time, experts can give recommendations on storage regimes for noble drinks. They try to divide home wine cellars into sectors according to their functional purpose:
- storage area;
- tasting block;
- place to rest.


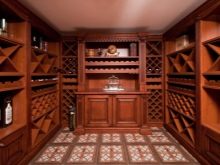
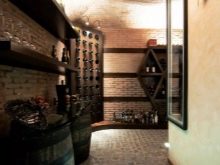
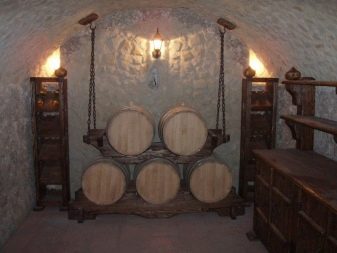
Solid wood furniture becomes the optimal design solution. The decor is most often dominated by sophisticated dark colors. They try to give wardrobes and shelves an unusual external shape in order to create the feeling of an original and carefully thought-out space.
Neon lighting is often used to accentuate certain places. The widespread country style seems to move the owners of the cellar several centuries ago. Art Nouveau decoration is also quite common, where glass and metal surfaces predominate.

Returning to the more familiar storage of vegetables, it is worth pointing out that the choice of a surface or underground option depends primarily on the height of the groundwater.
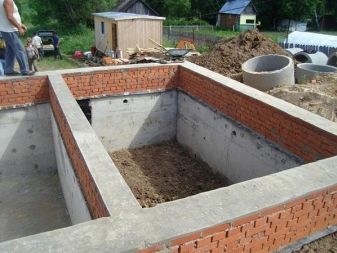
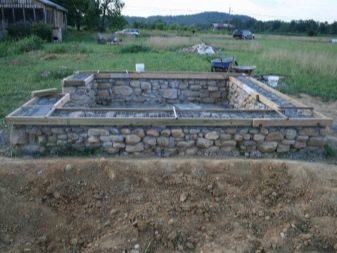
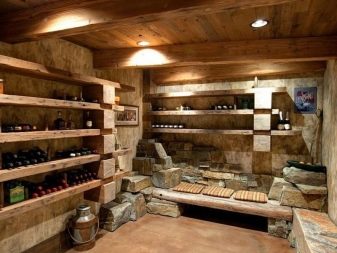
Clay rocks are considered the best type of soil, they are very dense and allow a minimum of moisture to pass through. Sandy soils must be compacted, ideally overlapped with a layer of concrete. When there are certain material resources, it would be more correct to build a cellar for vegetables from brick or natural stone. It is both more durable and better for products according to the created microclimate.
You can reduce the flow of warm air in summer by equipping an entrance from the north wall. Insulation of walls and roofs is strictly required. The volume of the room is calculated in advance, while taking into account three considerations at once:
- placing everything that needs to be stored;
- free arrangement of vegetables and other food;
- reservation of free space for passage and various works.
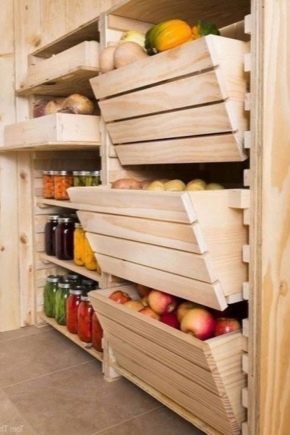
Since the cellar with the vegetables stored in it becomes extremely attractive to rodents, when choosing methods of thermal insulation and waterproofing, you need to choose solutions that are resistant to attacks by these animals. Treatment is required to protect against microscopic fungi. If with the help of wall and roof insulation it is not possible to achieve the optimal temperature inside, it is recommended to also insulate the floor. You can make the storage of vegetables and root crops more convenient with the help of boxes. It is not necessary to buy them ready-made, exactly the same products are easily made by hand.

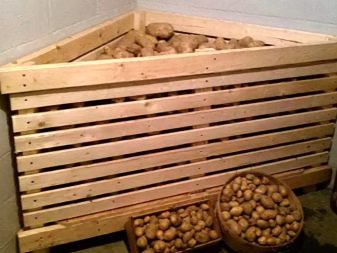
Arrange containers and other containers with some gap from each other. This will increase air circulation and prevent food from rotting.
Important: the lowest shelf is designed in such a way that you can put things in order without moving the boxes.
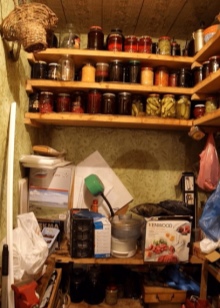
Rooms for vegetables and fruits, if possible, are equipped separately from each other. But most often there is no such chance, and therefore they are simply removed as much as possible within one cellar.

Views
The shape of the cellar plays an important role, because it directly affects its practical characteristics. Enthusiasts often use a round type of room, starting from:
- required areas and volumes;
- structural strength;
- temperature and humidity conditions;
- service life.
Most builders traditionally give preference to a rectangle or its variety - a square.The second option is at least 5% more economical than the rectangular design in terms of material consumption. But in a cellar, designed as a rectangle, it is easier to mount shelves, put shelves and sedentary containers. Round options are actually no less traditional. They were built for centuries in the past, because there are several advantages at once:
- the ability to withstand stronger pressure from soil masses;
- reducing the need for materials by 10-12% compared to even a square;
- the elimination of corners makes it easier to maintain the required temperature and humidity;
- a simplified design is easier and faster to build.
After choosing a geometric shape, the scheme should characterize the inner diameter, the exit feature and the height of the building. Side entry structures are preferred because they allow for more convenient placement of significant quantities of inventory.
A built-in staircase with a carefully selected angle of inclination allows you to use the cellar every day without unnecessary problems. Optimum quality and long service life fully justify the increased costs of building a side entry storage facility. Such a structure can stand both under the house and directly next to the dwelling, under the cover of a canopy.

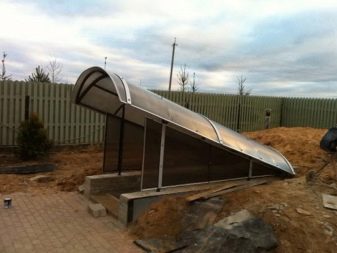
The structure with a side entrance can be placed in a completely open area, it can be easily converted into one of the objects of landscape design.
It is recommended to equip any cellar in the summer in order to less struggle with groundwater during construction.
When choosing any form, attention should be paid to the functionality of the interior decoration. The upper entrance is chosen for the most part by tradition in order to get into the cellar directly from the house. However, no one can prohibit equipping the storage with two types of passages at the same time.
Materials (edit)
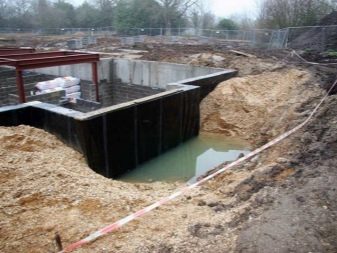
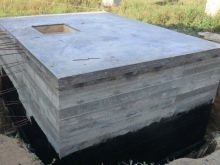
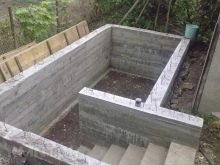
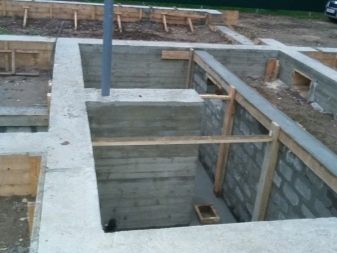
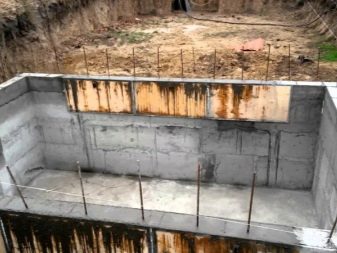
A concrete cellar is used very often. And this solution should be safely preferred to any handicraft vegetable pits. Important: harvest storage is best organized in a separate room. The monolithic type of construction dramatically improves waterproofing. If this is not possible, it is better to try to choose a solution with a minimum number of seams. Concrete storage is more profitable than other options, even when ordering the delivery of ready-made mortar.
On areas of the wall saturated with water or subject to active heaving, a minimum of 250 mm of concrete should be formed. If the soil is dry, and the GWL is relatively low, a reduction of this indicator by 30-40% is allowed. It is not recommended to do even less, because this will already lower the bearing capacity. In most cases, the concrete tank floor is placed 3 m below the soil surface.
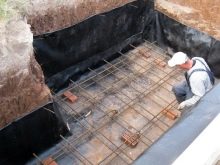
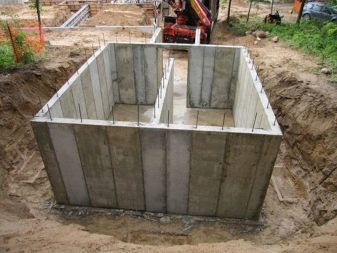
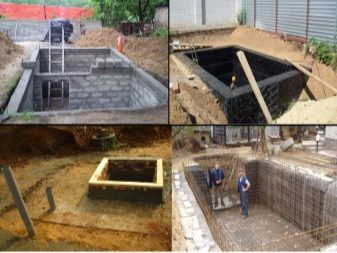
When working, you can use either blocks (FBS, homemade structures), or pouring mortar into a pre-laid formwork.
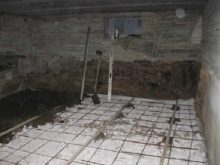
In the first case, composite type reinforcement is used, in the second - steel. This solution is optimal for soils with significant heaving and high concentration of loamy mass. The floors are equipped with water protection and drainage means. Filling at the bottom is carried out at 200-250 mm. It is advisable to form the floor as a reinforced slab, this significantly increases the strength of the structure as a whole.
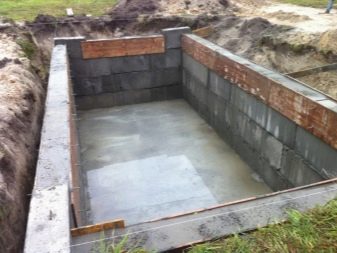
The prefabricated version is invariably more expensive than the monolithic version, in addition, moisture retention deteriorates. The masonry can crack due to uneven ground pressure. It is very important to check what kind of communications (water, gas, cables, sewerage) there are, where they are located. A sufficiently deep excavation, especially on stony soil, is very difficult to dig without the involvement of equipment.
It is necessary to thoroughly think over the contours of the mastered site and correctly mark them on the ground. Verification involves drilling the well to the full planned depth. This structure allows you to find out if there is groundwater and how deep.

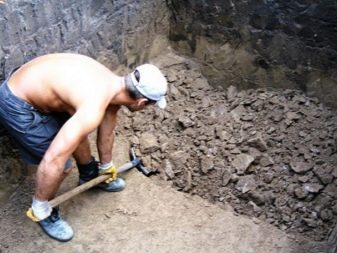
If there are wells, wells or cellars nearby, it is still worth using an instrumental check.Then it will be possible to exclude any surprises. The last third of the pit is not dug by an excavator, but by hand - this will avoid many mistakes.
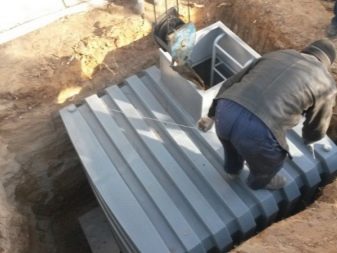
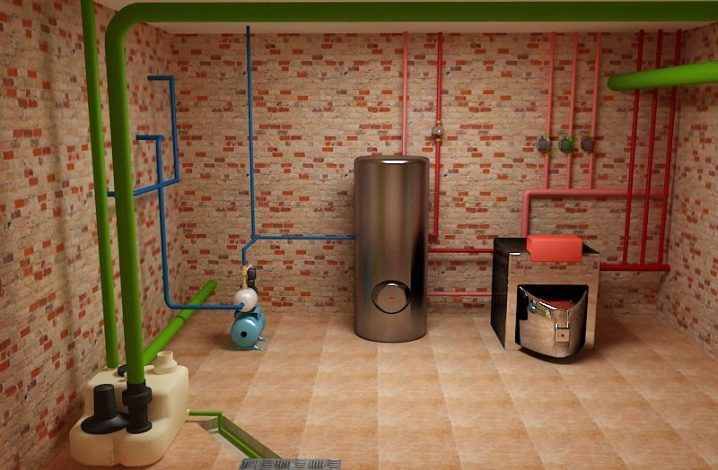
The metal caisson turns out to be quite a technological choice. It more reliably protects everything that is stored inside from the penetration of soil water. This design will be very useful for installation in lowlands. It is guaranteed that the appearance of nests of microscopic fungi is excluded, subject to regulatory requirements. You can put the caisson in any arbitrary place. The reliability of the structure, its anti-vandal characteristics and resistance to theft can also only be welcomed. The metal caisson also has weaknesses - it is heaviness and a tendency to corrosion. Only walls 1-1.6 cm thick will be able to withstand the pressure exerted by the soil and soils.
Anti-corrosion treatment of the installed unit is mandatory.
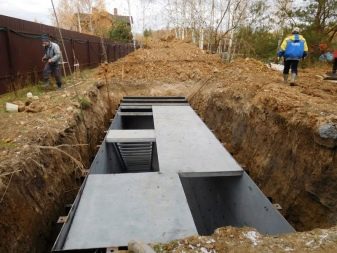
Logs that act as restraints help to increase the accuracy of installation. Most often, the lowering of the caisson into the pit is carried out using a crane, only in isolated cases the capabilities of the winch are enough.
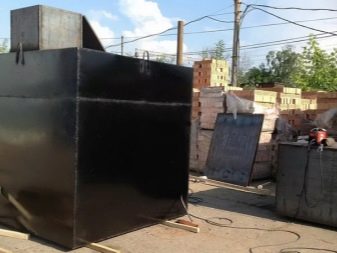
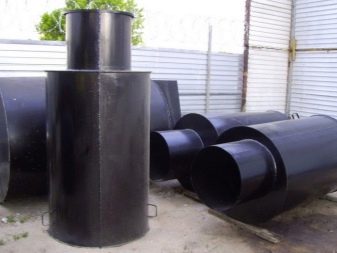
In order for relatively thin sheets of steel to be strong enough, they are reinforced with stiffeners. The typical height of a metal structure is 2 m (a little more or a little less), this allows any adult to freely use the cellar. In large cellars, two aisles are mounted, one of which is intended for loading products.
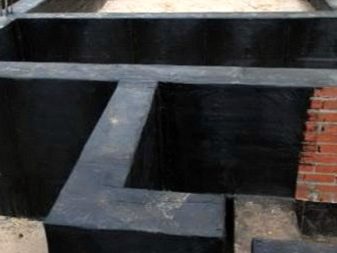
When buying a ready-made caisson, it is advisable to carefully control the quality of the welds. All irregularities and burrs that can create a lot of trouble are carefully cleaned out. It is necessary to paint a metal structure in several layers, the first of which is bitumen-based mastic.

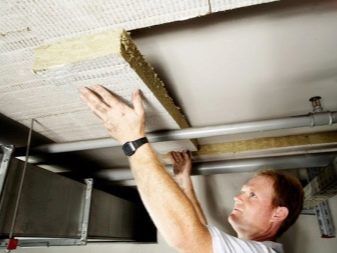
To avoid the occurrence of condensation, heat protection of the bottom and walls of the structure is required. External insulation is the best and is guaranteed to prevent the walls from freezing. But for metal, the insulation material must be insulated from the inside. The selection and installation of thermal insulation material is done in such a way as to reduce the risk of rotting.
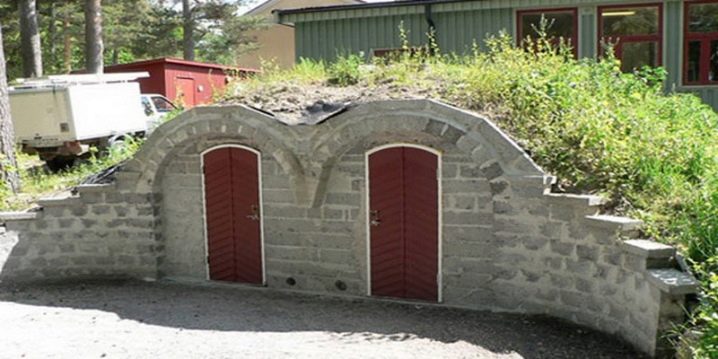
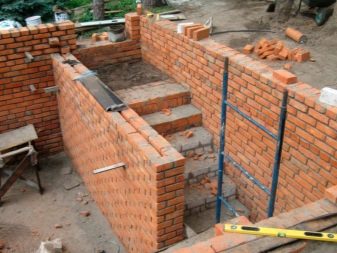
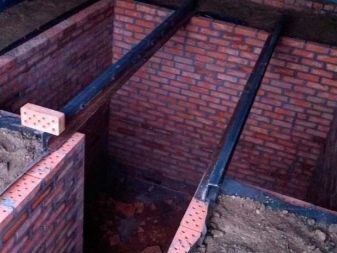
Brick cellars are quite widespread. The ceramic variety of this material stands out favorably:
- resistance to heat and cold;
- fortress;
- long service;
- excellent acoustic protection;
- environmental neutrality;
- ease of installation.
As part of the basement, the cellars are made of bricks of the M-150 brand, and separate structures are made of material of the M-100 category. The high cost of red brick sometimes forces you to opt for its silicate variety. Mechanical strength and frost resistance are optimal, but dry soil is a must. Excessive moisture leads to rapid destruction. When calculating the need for bricks, it is worth leaving a stock of 2 cubic meters. m at least.
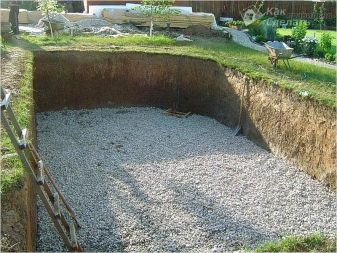
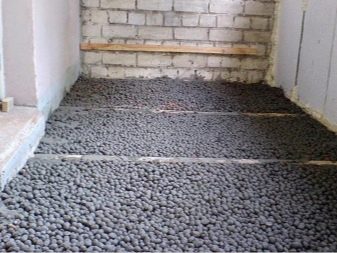
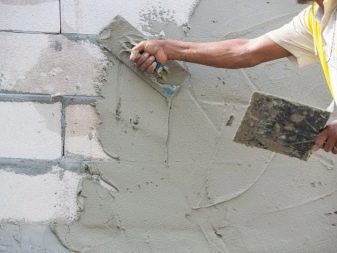
The bottom of the pit for a brick structure must be carefully leveled, freed from debris and uneven soil. By all means, 0.2 m of large crushed stone is laid out, which becomes the base of the drainage. Then a mixture of greasy clay and water is formed, the floor is poured with concrete. In large cellars, it is worth considering the location of the brick columns that hold the floors. Drying of the concrete base takes from 14 days, and ideally 28 days from the date of installation.

After mixing the cement with sand, the dry mass should be sieved to achieve a homogeneous material.
It is worth pouring water carefully, in portions, so as not to disturb the proportions. As in the construction of houses, rows of masonry lead from corners or from doors. The laying method is the simplest - it is staggered with tight pressure. The change is carried out according to the scheme "whole - half - whole" until the very end.

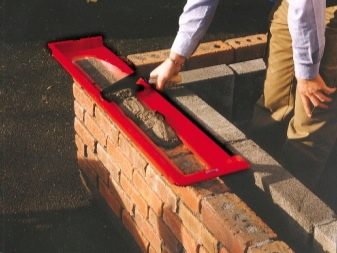
The outer wall, looking towards the earthen slope of the pit, is laid with oily clay. If the gap is large, a brick break is added to the clay mortar.All rows must be checked with building levels. The slightest errors and deviations are categorically intolerable. Only having dried and hardened masonry, you can proceed to the next stages of work.
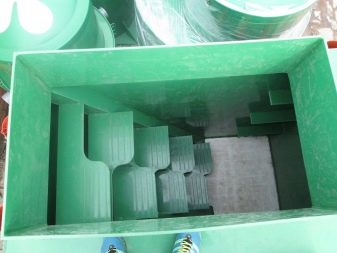
Modern cellars are sometimes made of polymer materials. They are compatible with any kind of soil and hardly suffer from soil water. Builders are relieved of the need to scrupulously coordinate the level of groundwater and the depth of freezing. The work can even be done under already built houses, sheds or garages. By default, the plastic construction does without additional finishing, its decorative properties are already high.
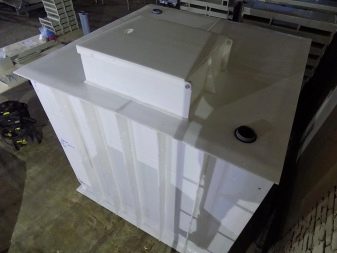
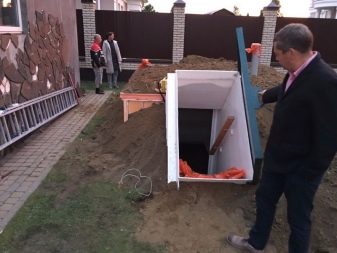
Humidity and temperature fluctuations practically do not have a detrimental effect on the food stored inside. The ease with which they can be backed up is highly dependent on how well the ventilation is done. It is extremely difficult for rodents and insects to overcome the plastic layer.
There is nothing to say about disinfection, brick and concrete walls are much harder to clean. The absorption of odors into the walls is excluded, in contrast to porous materials. It should be remembered that plastic cellars are 50% or more more expensive than simple storage. Moreover, this price does not include transportation and installation of the case. Standardized dimensions limit the choice and tighten the requirements for the accuracy of design and construction of the excavation.
Such disadvantages are of a private nature and are fully justified by the optimal design characteristics. It must be remembered that it is practically impossible to get the job done without special machines.
Where to place?
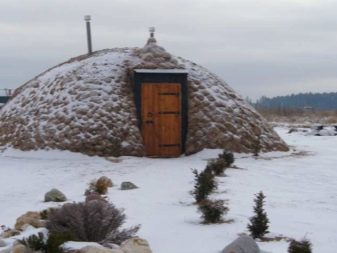
It is almost impossible to imagine summer cottages and even cottages without cellars. But the arrangement of the storage facility on the site is of great importance. Consider landscape, comfort and style. Depending on personal preferences, the cellars are placed either hidden (outwardly invisible) or underlined expressive in appearance. To build an object in the spirit of "hobbiton", that is, a pit, you need to use hills and other forms of relief, take up a lot of space.
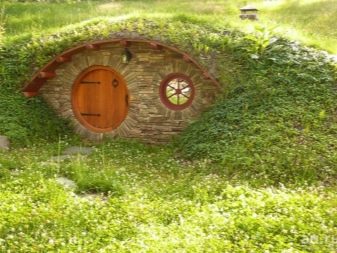
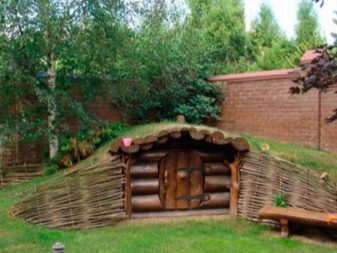
Such a cellar allows you to withstand temperatures from 3 to 8 degrees year-round. But underground storage cannot be created if there is groundwater on the site or the area is swampy. It is recommended to lead the entrance to the north in order to radically reduce the heating of the internal volume by the sun's rays.
To camouflage the reservoir, the following can be used:
- Czech rolling pins;
- alpine slides;
- gravel gardens;
- gabions;
- flower beds.

Wine cellars are located mainly under residential buildings. This not only makes it easier to warm up, but also saves on space and allows for easier access. When the house has already been built, it is advisable to use the cellar in a separate place. The cellar in the house should be perfectly dry and moderately warm. The disadvantages of using it are due to errors in design and construction, and not to objective weakness.
The construction of cellars adjacent to the foundations is unacceptable. This can lead to temperature spikes and worsen the safety of the created reserves. Whenever possible, it is worth placing the storage under an unheated part of the house. This will improve the formed microclimate.
Significant occurrence of depth leads to excessive expenditure of money and effort. It is much more accurate to calculate the rational depth and use reliable thermal protection. If it is necessary to store very small volumes of products, you can use elementary objects - a glacier, a pile. Ground vegetable stores are appropriate for the accumulation of root crops and other vegetables weighing over 3 tons. The underground under the houses is buried at least 150 cm (in wooden dwellings).
A cellar with a shallower depth quickly heats up to 8 degrees, the quality of food storage is reduced. When calculating thermal parameters, they are guided by a corridor of 0-5 degrees.In addition to the construction of cellars, at the house or in the area around it, quite a few people build them in the garage. This arrangement allows for more efficient use of the occupied space. Typical garage cellars are 170-190 cm deep and 200-250 cm wide.
Even in cases where there is sufficient space, it is undesirable to increase the width of the cellar beyond reasonable limits. An obligatory stage of the work is the formation of a drawing and a careful calculation of the need for materials.
To make it easier to mount the side hydraulic protection, they make an indent from the walls by at least 50 cm. The floor of the inner cellar is raised 30 cm above the strip foundation. This technique is acceptable only if the foundation is stable after all work is completed.
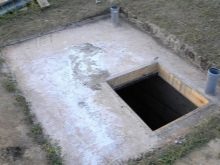
A partially recessed pit is usually constructed in the same way as a viewing pit. But individual owners of the "car house" get a good result using a tank buried in the ground. Incomplete deepening justifies itself even in wet areas, since the bottom is located at a depth of 70-100 cm.
For finishing the walls, either plain concrete or cinder concrete is used. An alternative to them is a brick; as hydraulic protection, both clay locks and pasting, coating structures are in demand.
Most garage owners prefer 100% in-depth options. Almost always they are turned on at 150-300 cm: lower values are impractical, and large ones add too much work. In any case, do not forget about the mandatory distance to the aquifer of at least 500 mm. Before starting construction, in addition to groundwater exploration, they always get acquainted with the documents and dig a hole of 2-3 m. This will definitely avoid problems with public engineering systems.
In ready-made garages, it is hardly worth equipping buried cellars. If there is no alternative, it is required to strengthen the prevention of destruction by underground liquid. It must be remembered that there is no way to completely block the flooding of the basement after the completion of construction. Therefore, at the preliminary stage, a circular drainage is constructed. The choice of material for a garage cellar is determined primarily by the cost of products.
The speed of construction using a reinforced concrete slab is very high, but the fees are also quite significant. It is much more profitable to use monolithic concrete or "wild" stones. Not all ceramic bricks are suitable for this purpose, it is required to choose high-quality fired blocks. Cinder blocks and silicate bricks are unacceptable. When assembling the formwork, it is worth taking a solid board. You can reduce the cost of waterproofing by using a molten resin, or other roll coating.
The bottom of the pit is covered with 30 mm of crushed stone or brick debris. From above, 40-50 mm of concrete mortar is poured. The completely hardened stone allows you to start waterproofing. Along the perimeter, protective rolls are laid out 100-150 mm beyond the wall contour. When the waterproofing is over, the formwork is mounted and filled with mortar.
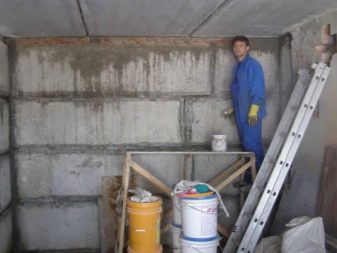
When the cellar under the garage is made of bricks, the laying is done using the simplest technology. Be sure to make sure that the walls are strictly vertical throughout. Any seam should be rubbed thoroughly on both the outer and inner contours. It is advisable to cover the inner walls with lime. When using reinforced concrete slabs, the floors must be insulated with glass wool or a mixture of cement and sawdust.
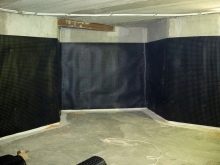
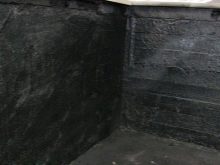
Waterproofing of a garage cellar is most often done with bitumen lubricants. It is beneficial in material and production terms. The lubricant is recommended to be laid out in two layers, separated by an interval of roofing material. Above, coarse sand is sprinkled.
It is preferable to treat internal walls with compositions of waterproofing penetrating into the material. Such protection cannot be destroyed, at least as long as the wall itself is intact.Moisten the substrate thoroughly before use to ensure optimum results. The layer thickness reaches 0.2 cm. The penetrating waterproofing can penetrate into the wall capillaries up to 90 cm. Water-insoluble crystals will appear inside.
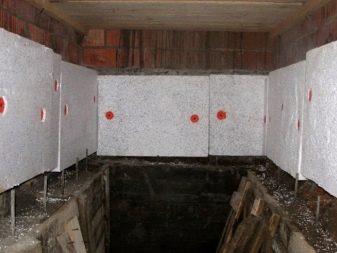
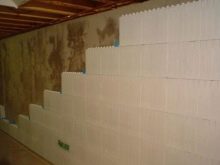
The floor in the garage cellar is most often laid out of reinforced concrete slabs. Self-pouring should be done using a reinforcing mesh on special rods. The preferred insulation is expanded polystyrene, it is easy to install even outside. In most cases, the walls of the cellars are insulated with PSB-S-25 with a total thickness of 0.05 m. It is recommended to cover the wall both inside and out; by limiting itself to internal processing, condensation can be provoked.
A balcony basement is installed on the ground floors of apartment buildings. Of course, there can be no question of digging a hole on the balcony itself. However, it is not difficult to do this on earth. It is only required that the base of the site extending beyond the front line of the house is located at a low height above the blind area. Most often, these requirements are met by apartment buildings with 9 floors, erected in the 1970-80s.
Even in such a house it is impossible to organize a cellar under the loggia, since the base of this element is inextricably linked to the foundation. Since there will be a redevelopment of the living quarters, all work and their features should be coordinated with the official authorities in advance and registered in the prescribed manner.
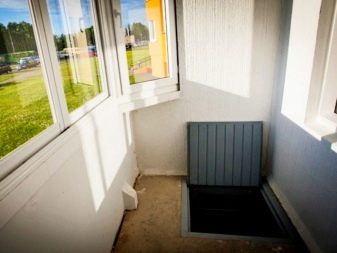

We must not forget that by increasing the total area of the apartment, you will have to pay more for the maintenance of the dwelling. Digging a pit is carried out to a depth where you can stand quietly without bending.
It is useful to study in advance all safety standards, soil structure and laid communications. If you notice the risk of the walls collapsing, you should immediately reinforce them with any durable material. This solution is temporary, until the real cause is eliminated. The soil base is recommended to be laid with roofing material. So that the sand laid on top of it is strong enough, it is rammed before filling it with rubble.
The final section of the pavement is made of either asphalt or cement. The difference in strength between them is very small, but it is quite difficult to get asphalt mass and bitumen in a hot state, and quickly lay them out. But the asphalt is fully operational immediately after cooling. A cement screed is made on top of crushed stone and sand pillows. To make the tightening layer even, self-leveling self-leveling floors are used.
As in other cellars, in the balcony version it is worth taking care of reliable ventilation. It is done by pulling pipes, the destroyed blind area around the places of their introduction will have to be restored. The best hoods are considered to be pipelines made of metal or asbestos-cement with a cross section of 10 cm. The outlet is equipped with an umbrella based on galvanized steel. It prevents the penetration of water, various dirt and dust.

A cellar in a private house on the street can also be equipped. The most difficult thing to do such work on a flat area, if you do not purchase ready-made assembled structures. You can recognize the high location of groundwater by the summer growth of moisture-loving plants. At the same time, there is no reservoir nearby, no one watering them, but even with a prolonged drought, they wither later than in other places. Important: the removal of the sod layer and the digging of a hole for the cellar in the personal plot should be carried out without equipment.
The walls of the cellar must not be formed from materials that emit toxic substances. When a pit is dug in a loose place, its top is marked 300-500 mm more along the entire perimeter than the bottom. The ventilation of the private cellar is provided through the corner opposite from the entrance door. There, a niche is cut in the ground from top to bottom, where a pipe with corner bends is mounted. For waterproofing, a polyethylene film is placed in the floor layer.

How to do it yourself?
According to modern requirements, it is considered correct to make ventilation with two pipes. For 1 sq. m of underground space should have 26 cm2 of the air channel. But natural blowdown is not always sufficient. The supply air duct is always located so as to exclude filling with snow and ice. The open fragment is placed 400-600 mm above the floor. The opposite end, when the pipe passes through all the ceilings, rises 0.8 m above the cellar roof.
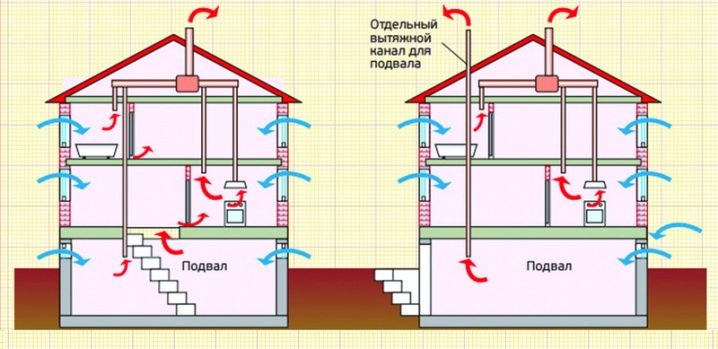
The use of valves (gates) allows you to protect the hood from freezing and the movement of drafts. Most often, fans are mounted in an exhaust duct, it provides an artificial vacuum. If the cellar is very complex in shape, it is recommended to equip the inlet duct with a fan as well. When only the inflow is used, and the exhaust is provided through the hatch, the diameter of the inlet is increased additionally. In order for the work step by step to give a good result, you should not put the inlet and outlet for air next to each other, this simply will not allow you to achieve good ventilation.

Arrangement
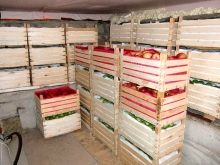
But even a well-ventilated cellar, designed as it should, needs to be additionally equipped. When arranging shelving and other structures, it is recommended to highlight three key areas:
- fruit;
- potato;
- vegetable.

When choosing which shelf height to use, you need to focus on the required dimensions of cans or other containers. When the cellar is at least 200 cm wide, shelving can be placed on one side and on the other. In this case, a passage of at least 90 cm should be left. To avoid deflection of the shelves under load, each of them is made no longer than 70 cm. The racks are most often made 190 cm in height, but in any case they are guided by the height of the structure.
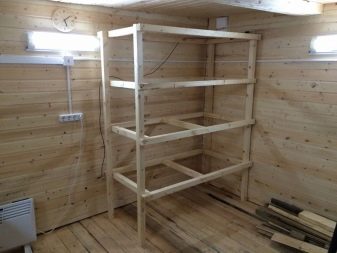
The rack, which is placed on a long wall, is usually made non-separable. But if the room is satisfied with dampness, it is better to put disassembled structures. Their parts are much easier to ventilate and dry. It is recommended to make shelves of concrete or plastic sheets. Both are moisture resistant and plastic is also relatively cheap.
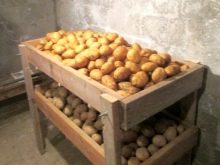
If you are sure that the cellar will always be dry, you can safely use a wooden bar for the shelves. Typical cross-section - 10x10 cm. Horizontal communication lines in racks are made of boards 30-40 mm thick. Longitudinal ties are made from bars with a width of 80-100 mm, their length is equal to either the total length of the rack, or the length of a single section. As in other damp places, wooden parts must be carefully treated with antiseptic preparations.
The steel corner is taken with a shelf width of 50 mm. You can work with it and tie it together only by welding. Racks are most often advised to bring up to the ceiling. If you need to cut costs, you can limit yourself to connecting them to the top shelf. It is allowed to fasten steel frames using 80x20 mm bars.
Sometimes the vapor barrier of the cellar is not carried out; instead, an air drying device is mounted. Cooking boxes for vegetables also involves the use of a bar and a board. Do not make containers too large for fruits, maximum - 600x400x300 mm. Wooden and concrete surfaces must not be in contact with each other. An essential feature of a good cellar is high-quality lighting. The maximum voltage in the power supply network is allowed 42 V. It is allowed to install wiring in an open version without rollers and insulators. For camouflaged installation, it is impractical to use steel pipes thinner than 0.2 cm.
Each lighting device and other electrical equipment is mounted strictly in a sealed version. It is forbidden to leave a switch, even a spare one, directly in the cellar.
Advice
In order for the finished cellar not to disappoint its owners, you need to know exactly what temperature there should be and how to maintain it within a given range.Whatever the temperature conditions "on the street" and in heated rooms, the storage must maintain an air temperature from +2 to +4 all year round. An exception to this rule is allowed only in the hottest moments, but even then the temperature rise should not be more than +5 - +7. It is recommended to consider many factors:
- the level of thermal conductivity of the soil;
- instrumentation of the cellar;
- humidity level;
- quality of ventilation;
- depth of laying;
- wall material and thickness.
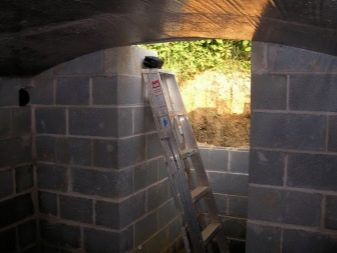
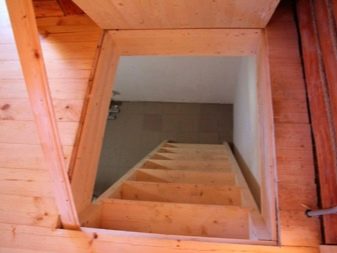
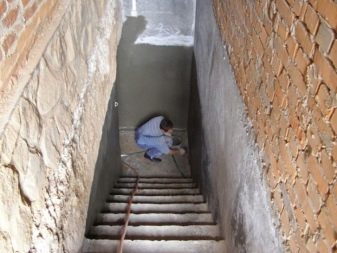
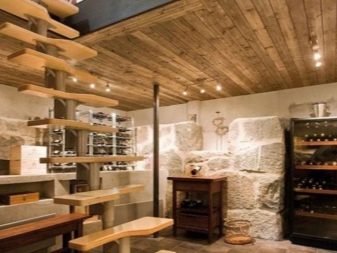
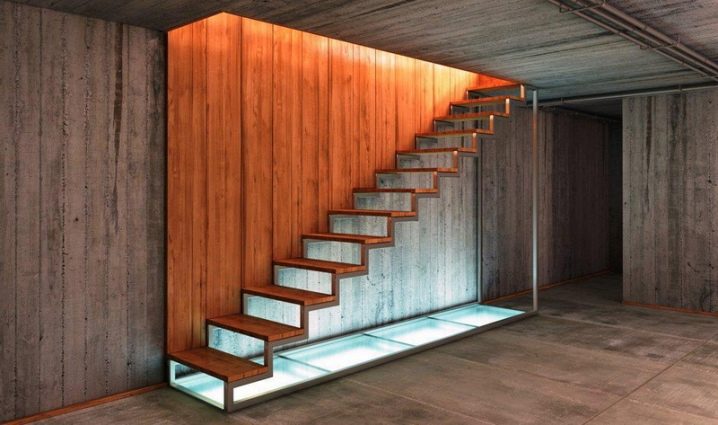
The convenience of using the cellar largely depends on the stairs. A stationary structure is much more convenient than an attached one, and only with periodic use of the storage facility can homemade wooden structures be installed. A width of 0.5-0.6 m is much more practical than 0.3-0.4 m; ascent and descent are easier. When it is necessary to lower and raise large things, heavy loads, ladders should not be made less than 800 mm. The recommended step height is 150-200 mm and the width is 250-300 mm.
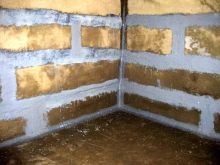
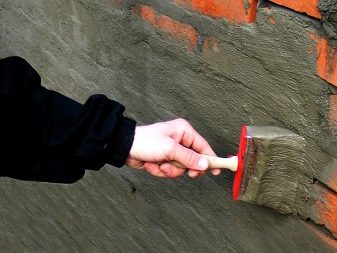
Plastering of brick walls from the outside is carried out with cement mortars. Then the coating is smeared with bitumen-based mastic, pasted over with roofing material. Only then can the soil be filled up. In case of insufficient ventilation, it is worthwhile to provide for the arrangement of boxes that absorb moisture from the air. Experts warn that it is unacceptable to accumulate fuels and lubricants, paint and other substances with pungent odors in the cellars.
Before placing food in the cellar in the summer months, it is always dried and ventilated. Only then can the unpleasant musty odor be avoided. If you have to break through "windows" in concrete for organizing a storage facility and reinforce the floors with massive channels, it is better to consult with specialists. A high-quality alteration implies the formation of structures with a doubled safety factor. Removing the floor boards before preparing the cellar, the remaining logs should be reinforced with a transverse beam, it will not allow the structure to fall apart.
The entrances are usually made in the form of a square or rectangle, the size of the side is 60 or 70 cm. When digging the soil, you should carefully monitor whether there is any danger of damaging something. Strengthening the lower part of the structure and increasing its resistance to water is provided by a geological textile lining. In most cases, the ceilings and walls of the cellars are formed from homogeneous materials.
For information on how to build a cellar with your own hands, see the next video.


The comment was sent successfully.