Plasterboard interior arches: a stylish solution in the interior
Today, interior doors are no longer surprising. Gone are the days of communal apartments, and the desire to isolate oneself from household members has also disappeared. More and more often people come to the idea that the door is an extra detail of the interior. Some take it off in the kitchen, removing the mezzanine along the way, others in the closet, and still others somewhere else.
And at this very moment a reasonable question arises about what to do with the resulting opening. Arches are one solution to this problem.
Views
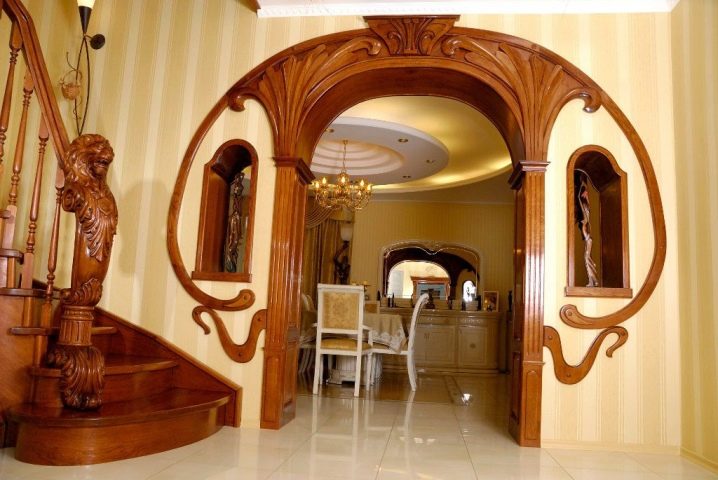
At the end of the last century, arches in apartments were associated with luxury. They were available mainly to wealthy people, since the material from which they were created was purchased in European countries. Local carpenters could also make something similar, but the tree had to be constantly processed from the external environment and protected from pests.


As the years passed, technologies developed, competition appeared in this industry, thanks to which the arches began to be sold at affordable prices. Today, any designer is sure to strive to add an arch to the layout of the project of the future premises.
Interior arches have been known to many people for a long time. They were among the first to enter our market. In terms of production and aesthetics, there was nothing extraordinary about these designs. Most often they met in minimalist rooms.
Some types of arches:
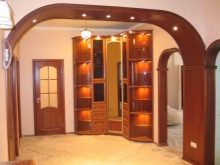
- A small step forward in the development of interior arches steel options with shelves... Although these were again ready-made solutions, thanks to the innovation, additional space appeared for storing vases, cups and a kitchen service. But it was necessary to take care of products with shelves, periodically wiping off the dust, since such structures were not equipped with either glass or a mirror.
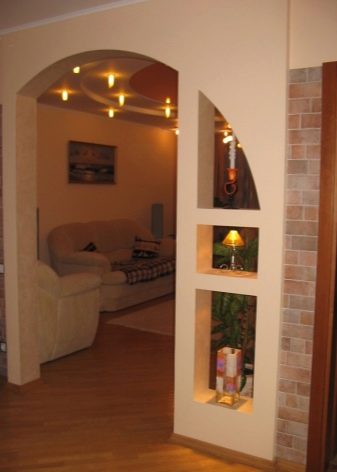
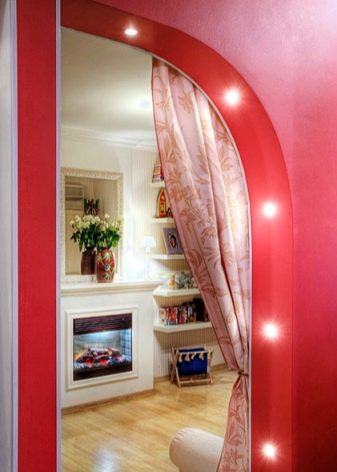
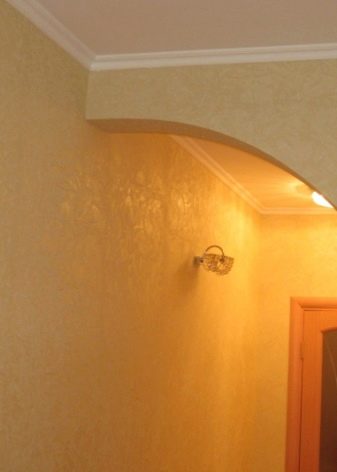
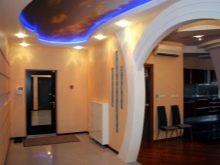
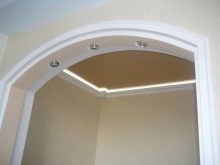
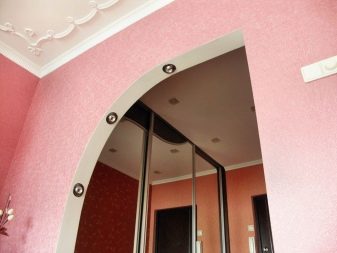
- Over time, people who installed arches in the corridor needed additional lighting. The specialists responded to these requests and after some period presented backlit arches... Luminaires could have been installed around the entire perimeter, but in small rooms, three bulbs in the upper part turned out to be enough.
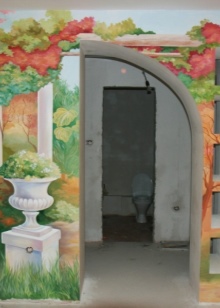
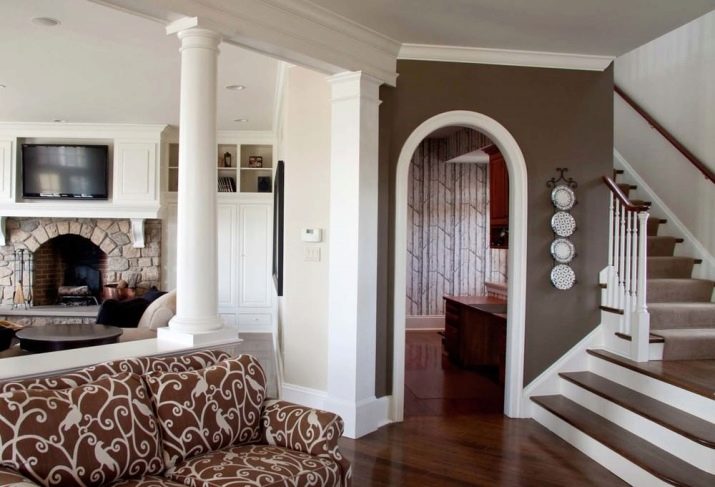
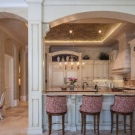
- Column arches, due to their massiveness, to this day it is best to install only in country houses. Often, such structures are initially laid down in the project of the future cottage before the start of construction. In this case, the columns play the role of supports. The number of openings can be any, one should just not forget about harmony.
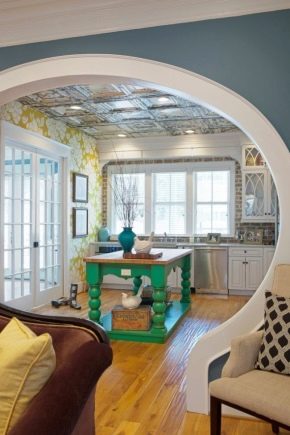
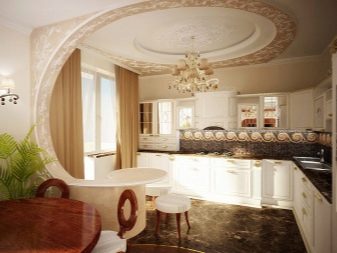
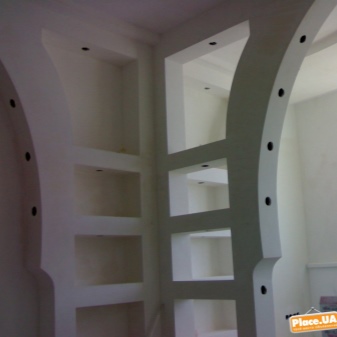
- Ceiling arches or as they are also called arched ceilings have become popular in the last decade. These are such drywall constructions that can take any shape of the opening. If ready-made solutions are manufactured at the factory, then drywall arches are built on site. Thus, the original ideas of the designers or the owners of the premises are embodied.

By the way, a large number of niches, walls and openings can be created from drywall.
If the dimensions of the structure allow, then in addition partitions can be built into the arch or, conversely, protrusions can be made. Equipping drywall arches with lighting will also not be difficult at all, this material is easy to cut.
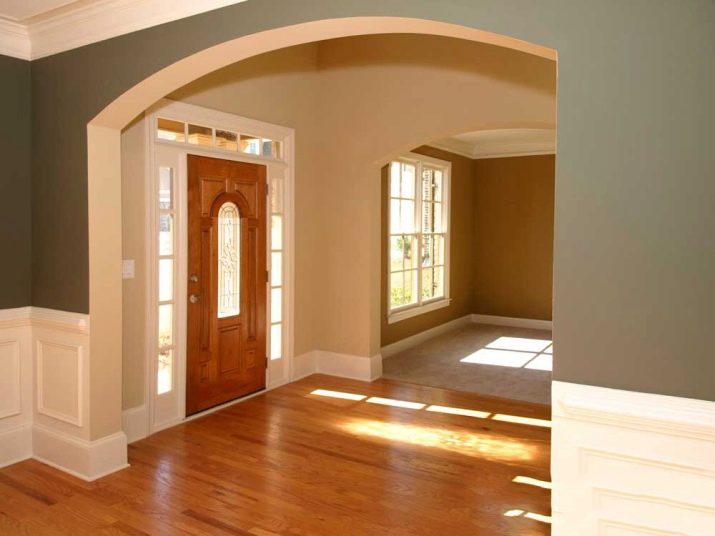
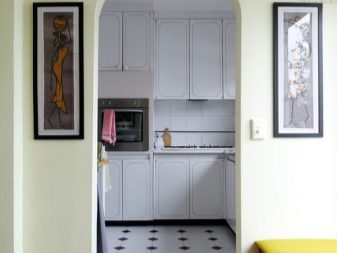
Door arches can be not only semicircular, but also rectangular. They are popular with city dwellers.To install rectangular arches, you do not need to sheathe the wall with plasterboard or break out part of the wall, so they can be installed in just a few hours.

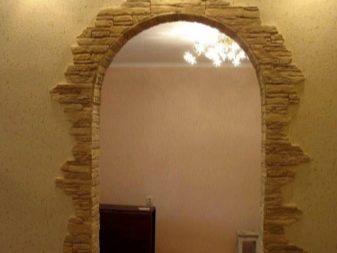
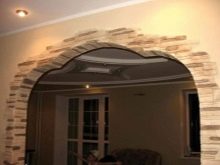
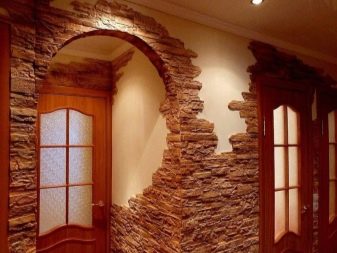
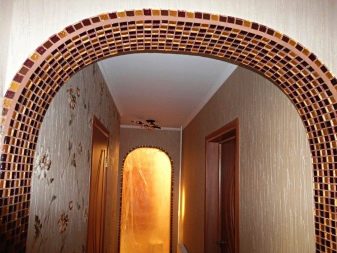
Do not forget about the decorative finishing of the arches. Natural stones, mosaics, and plastic of various colors are also used. There are also works of art at all - Atlanteans, holding the wall in their hands. In other words, everything that is enough for the imagination and financial condition of the customer can be realized.
Competition in this market segment has led to the fact that today beautiful arches are found not only in expensive cottages, but even in small apartments. Arches have become a generally available furniture solution; they differ only in size and shape.
Sizes and shapes
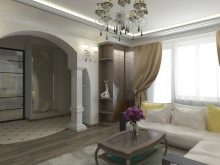
Of course, no one argues that large arches look better in spacious rooms. Arches can be part of the hall, kitchen, dressing room. In small apartments, they will be less noticeable, and somewhere they are completely contraindicated.
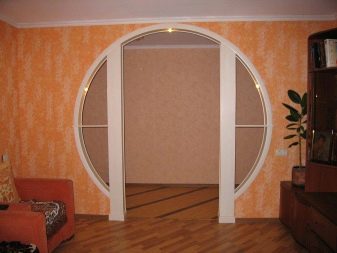
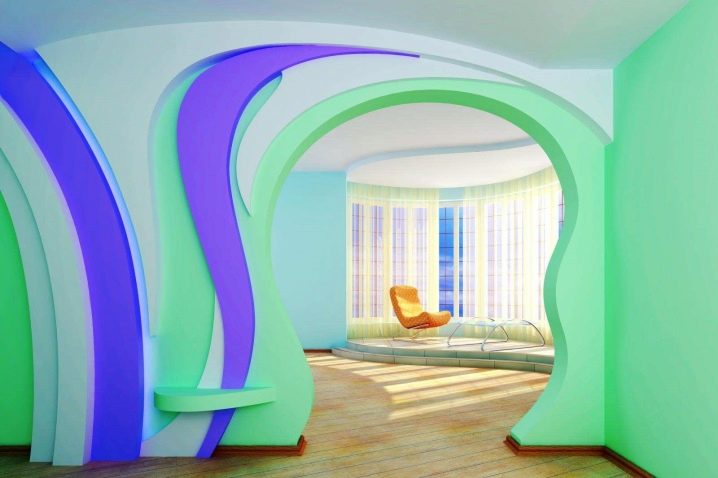
Most often, for city apartments, designers recommend arches that are unusual in shape and size. The size can be adjusted using the previously mentioned drywall. Due to the fact that the weight of the arches does not affect the side walls in any way, the structure does not loosen over time.
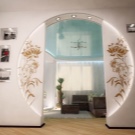
In this regard, experts also recommend equipping curly arches with glass or a mirror. The mirror visually enlarges the space, which will be useful in small rooms. As for glass, due to its physical property (it transmits light), it will be possible to provide additional lighting of the room from the opposite side.
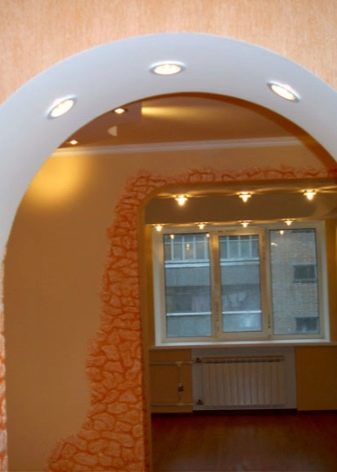
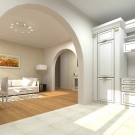
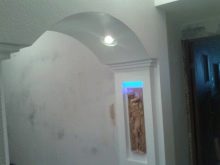
In recent years, the semicircular arch has gained popularity among customers, especially in the so-called Khrushchev buildings. The openings in houses of this type are not very large, and if you also reduce them with your own hand, then you can enter the room only with your head down.
A semicircular arch is a kind of intermediate state between a rectangular structure and the usual round one. But at the same time, it, in turn, is also equipped with switches and lamps, which means, from a functional point of view, it is in no way inferior to them.
Materials (edit)
The frame of the future structure is made of a metal profile. By the way, not only openings for arches are made from the profile, but also niches for cabinets, and with its help they even erect entire walls. The profile is either aluminum or steel. Both the first and the second, when using additional tools, lend themselves to deformation, and therefore it is possible to make not only straight, but also figured structures.
In the future, the resulting metal base is sheathed with plasterboard. Based on the name, it is not hard to guess that drywall is mainly composed of gypsum. Construction paper, which resembles cardboard in its appearance, acts as a protective layer.
Drywall in its original form is of little use for processing. It will be difficult to glue the wallpaper or paint the wall in any color.
For these purposes, fiberglass was invented in due time.
Fiberglass is an absolutely natural non-woven material. On its basis - mineral fiberglass, you can both glue wallpaper and paint. Therefore, decorating the future structure will not be difficult.
Accommodation options
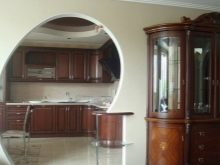
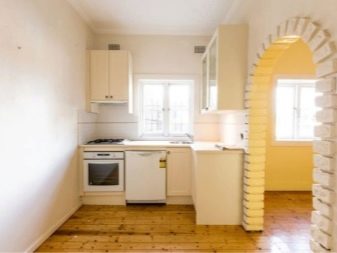
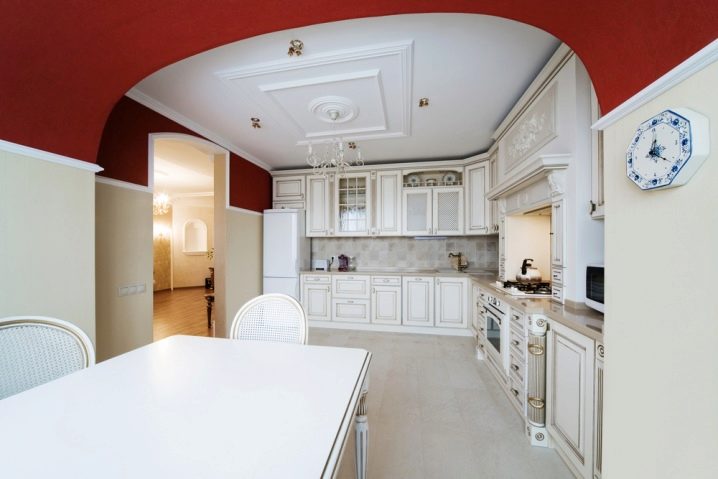
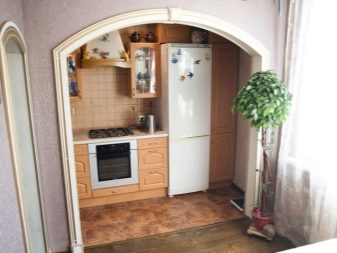
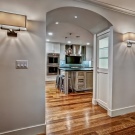
- Quite often in living quarters there are kitchen arches. Most likely, this is due to the fact that it is no longer fashionable to install a door to the kitchen. Something similar is implemented in studio apartments, where guests can freely move between the living room and dining area.
Of course, from a safety point of view, it is impossible to demolish a load-bearing wall in an apartment building, but you can easily equip it with an arched opening.
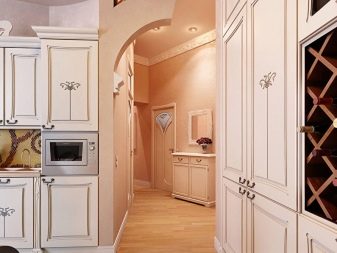
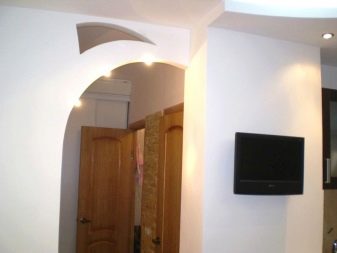
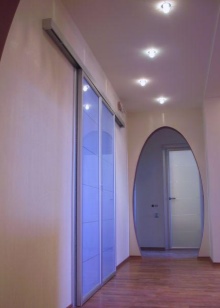
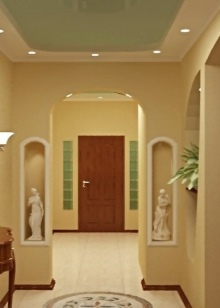
- But the most popular place for their location is still the hallway. Both round and semicircular options are suitable for the corridor.If a built-in wardrobe is already installed in the hallway and plasterboard cladding is, in principle, impossible, rectangular arches are suitable as a solution. As previously noted, backlit arches are installed in the hallway. Thanks to the illumination, the corridor will not resemble a closet.
- It is somehow not customary to install arches in the bedroom in an apartment. And this is understandable, yet the bedroom is a secluded place. In a room designed for sleeping, you can rest in the daytime, so a door is needed in it.
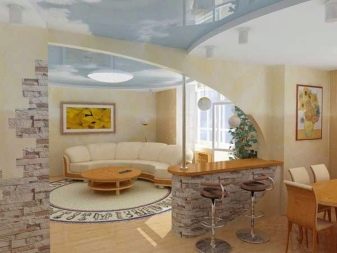
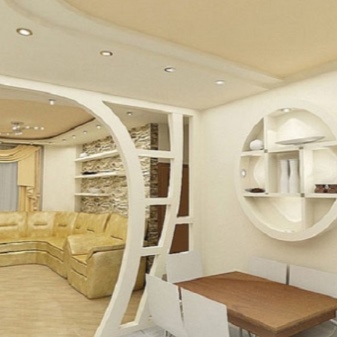
- But in the hall, arches with shelves are most often ordered. On the one hand, this is an additional storage space, on the other, it is a complete replacement of the display case. This means that there will be no difficulties with the placement of the collection. This niche can be equipped with additional glass.
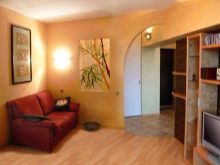
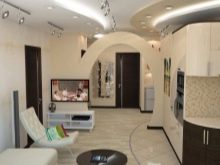
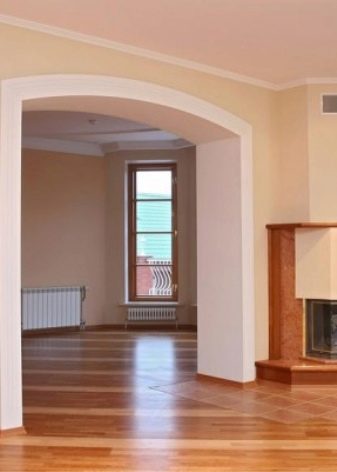
- But if in an apartment the flight of imagination is limited by the size of the room, then there are no restrictions in your house. Arches fit into any interior: both classic and modern. They can be an additional touch to a wooden staircase or to an entrance group. And the arches located in the living room, as in studio apartments, can be a logical continuation of the kitchen.
How to decorate the arch?
It would seem that there is nothing easier than to take and sign an agreement with a company that is engaged in finishing work. A team of craftsmen will arrive on the appointed date and will cope with the task in a few hours. But at all times, any man always wanted to personally equip his home.

It is generally accepted that if a man is a head, then a woman is a neck. It is not surprising that it is women's whims, as a rule, that a man has to fulfill. With the light hand of the spouse, a sketch of the planned is created, and the task of the husband is to bring the plan to life.
The finishing of the arch just begins with the plan. First of all, it is necessary to decide in advance what material this operation will be performed with. Do you have enough money for natural materials or you can get by with building materials of general consumption.
The part of the wall pasted over with wallpaper, adjacent to the arch, also looks appropriate. Frankly speaking, in most cases it is the wallpaper that decorates the arch. Of course, you have to tinker a little when cutting and adjusting the wallpaper, but in terms of saving money and time, this is the best option.
And if you also use special wallpaper for painting, then you can make another cosmetic repair after a short period of time. Painting helps out even at the moment when it is simply too lazy to rip off and glue the wallpaper over again.
You can also refine the arch using plastic panels. As early as the beginning of the new century, plastic was often used in the renovation of office and government institutions.
But it is worth remembering that plastic is susceptible to mechanical damage, and among other things, it is highly flammable.
A comfortable room arrangement is a guarantee of the well-being of any family. If the owner of the house responsibly and competently approaches this process, then not only the decoration of the arches, but also the manufacture of any structures will be up to him.
Who knows, maybe in difficult economic times, this skill will allow you to earn extra money, or maybe even become your main job. It is especially pleasant when work brings not only money, but also pleasure.
How to do it yourself?
Within the framework of this section, I would like to dwell on two points in more detail. The first moment concerns the construction of arches from a metal profile and drywall, and the second is devoted to decorative finishing.
If a frame is to be erected in one of the rooms, you must first prepare the site.
To do this, you need to remove the existing door from the hinges and dismantle the door frame:
- If the door has been manufactured and installed in recent years, then there should be no special problems.Using a Phillips screwdriver or a screwdriver, we unscrew the screws located in the door leaf. The door should be removed to the side and proceed with further dismantling.
- Using an ordinary flat screwdriver, remove the platbands. Under them the polyurethane foam "hides", on which the whole structure is held. Using a kitchen or building knife, free the door frame.
- Be very careful. There is a high probability that wires are hidden under the trims. Very often, telephone wires and wires related to burglar alarms are walled up from prying eyes. Their damage will lead at least to the call of a specialist.
After carrying out a number of simple actions, the opening for the future arch is ready. The dismantled door leaf can be offered to friends or relatives, provided that the dimensions of the doorway are the same. Most modern houses are built in the standard series, which means that the chance of this is great.
The dismantling of old doors looks different, they, as a rule, are held on by nails. And from this it follows that it will not work to keep the product in its original form. You will have to use a hammer, nail puller and other tool to dismantle.
The most time-consuming dismantling is for those people who want to install an arch in a room if the door frame is metal. Or if there is a desire to slightly expand the opening. Since part of the wall will have to be broken out using additional tools.
After the site is prepared, the next stage of work is ahead. This can be either installing the finished product with your own hands, or creating a drywall arch. The finished arch must first be ordered through intermediaries, the production time can be up to two weeks. During this time, it is necessary to dismantle the door frame.
On the day the product is delivered, all that remains is to install it. The easiest way is to mount a rectangular arch, according to the principle of door installation. Only you do not need to hang the door leaf on the hinges.
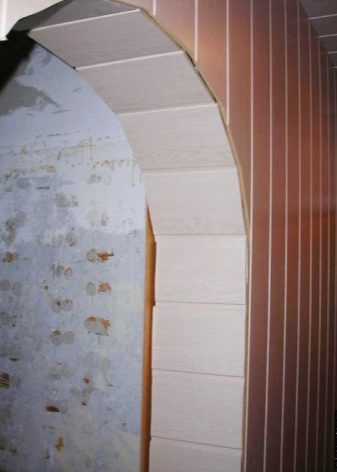
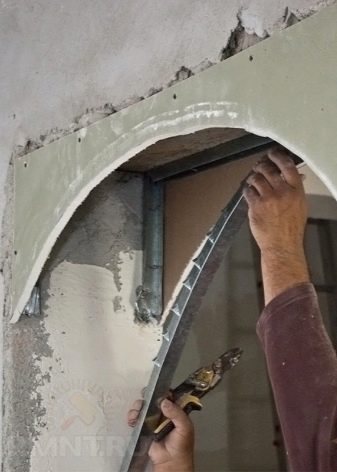
In order to achieve the usual roundness at the arch, you should use a sheet of fiberboard. Having made accurate measurements, we cut off unnecessary parts using a jigsaw or an ordinary saw. To fix the fiberboard sheet, we will use construction foam.
You should not save on polyurethane foam. Since, if the contents of the can is of poor quality, then at best there will be a long wait for hardening, and at worst - the sheet will not fix at all and after some time will make itself felt.
Alternatively, self-tapping screws can be used. To screw them in, you need a hammer drill and a screwdriver. Fastening should be done in several places, it is also not worth saving on this. The resulting cavity can be repaired with the remnants of a fiberboard sheet, adjusting them to the size, and screwing it back onto the self-tapping screws.

At the same time, you can putty the walls. In the future, this will save time and nerves in the further finishing of the arch. In principle, you can postpone this lesson to the far corner and proceed with the direct installation of the product.
Do not forget about one important point. After the installation of the arch, the doorway will narrow in height and width, which means that it is likely that it will be difficult to transport bulky items and household appliances, including the refrigerator, around the apartment. You should take care of this in advance.
Moving on to the final work:
- To do this, you can use liquid nails or polyurethane foam. Platbands in most cases eliminate all errors and shortcomings. Remember that if there is a need for an institution under the wire platbands, this should be done at the beginning of the final stage.
- The same principle is used to install or decorate arches made of plastic panels. The main feature of plastic panels is that they fit together like a puzzle.This is a stable mount, the plastic will not open during the period of operation, and the panels will not fly like a house of cards.
- The plastic is cut out again with a jigsaw or wood saw. Errors are eliminated with plastic corners, which are attached to liquid nails, the joints should be treated with a white sealant.
But there are often cases when it is impossible to do without the construction of a frame. Drywall is a common building material for solving this problem. It is resistant to temperature extremes, moisture resistant, and everything else is sold at affordable prices. A universal solution for both wealthy and less well-off people.
In this section, we will consider the simplest way to erect a skeleton:
- To create a base on which the drywall will be attached, a metal profile is required. In most cases, a steel metal profile is used. Because the version made of aluminum is more expensive.
- By the way, sometimes it becomes necessary to level the walls; for this purpose, drywall is first glued. Using a building mixture - putty and PVA glue, we fix the drywall to the wall. To fix the result, we will use self-tapping screws. We periodically check the evenness of the structure with a building level.
- Drywall is easy to cut, so small pieces are best. Irregularities that appear on the front side are eliminated with the same building mixture.
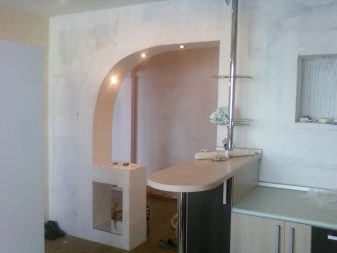
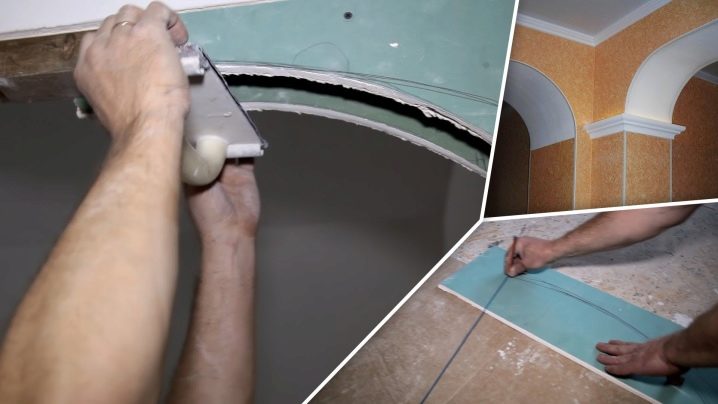
- To create a platform directly under the arch, it is enough to glue drywall only in the upper part of the doorway. This work takes about half an hour. If alignment is to be done along the entire perimeter, the time to work will increase in proportion to what was intended.
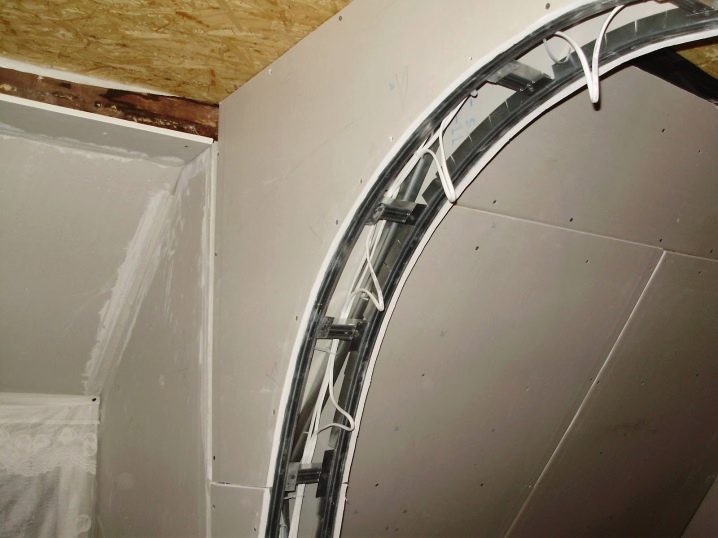
- It will take about a day to completely dry. Then you can start securing the metal profile. But first, a piece has to be made - a template for a future design.
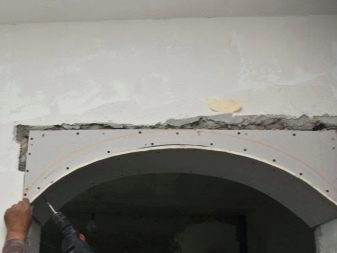
- To do this, a sheet of drywall is attached to the top of the opening and a pencil sketch is made. To make an exact circle, you need a compass. In a construction environment, a compass of such large dimensions is made from scrap materials - a profile, a pencil and a self-tapping screw.
- Since there are two sides, the number of templates will be the same. Sawing is easiest to do with a jigsaw. All that remains is to sand the surface.
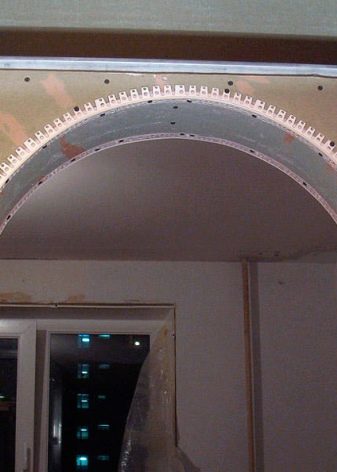
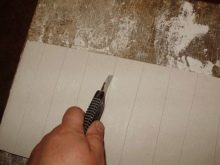
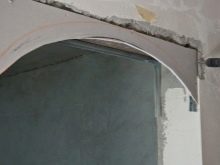
- In the future, you need to cut drywall, intended for the cavity in the central part, on one side, so that you can bend the gypsum into an arc without hindrance. You should retreat 4 cm each. For this work, you should use a clerical or construction knife. It remains only to slightly break.
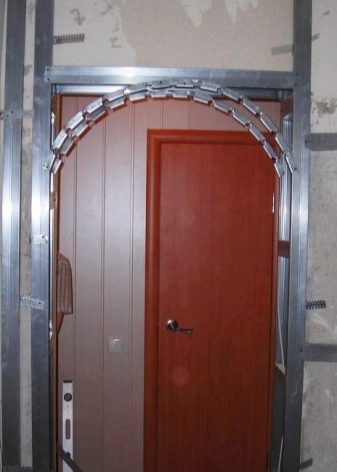
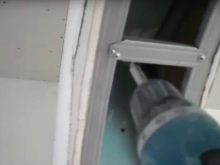
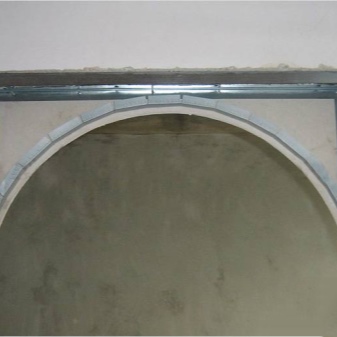
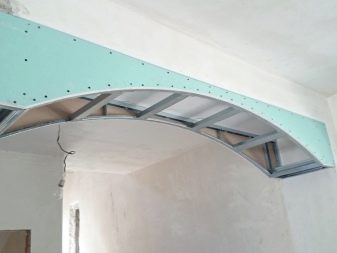
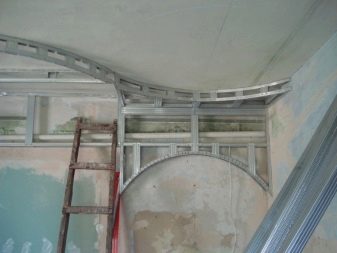
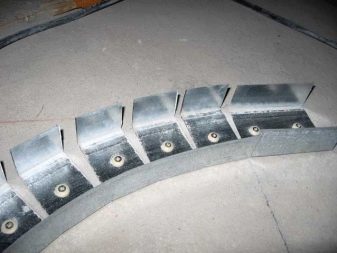
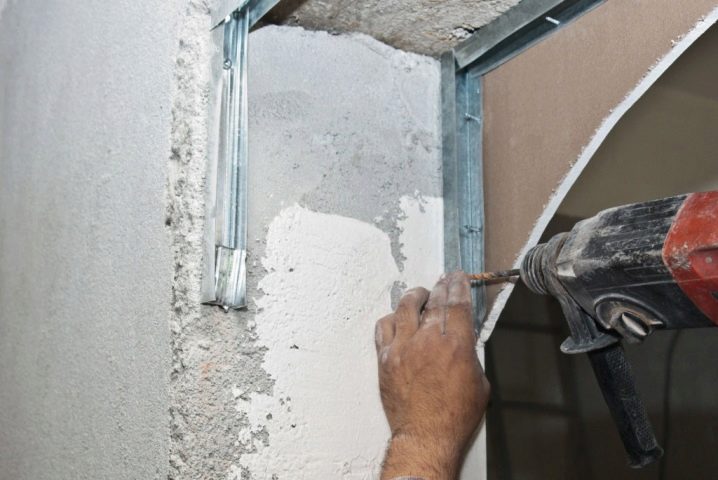
- After that, you should attach the steel profile to the wall with self-tapping screws. Remember that you need to retreat from the edge of the slope a few millimeters (the width of the drywall sheet), otherwise the sheet will stick out. Using metal scissors, we make cuts every three cm at the metal profile, which will complete the steel frame. There should be two such details.
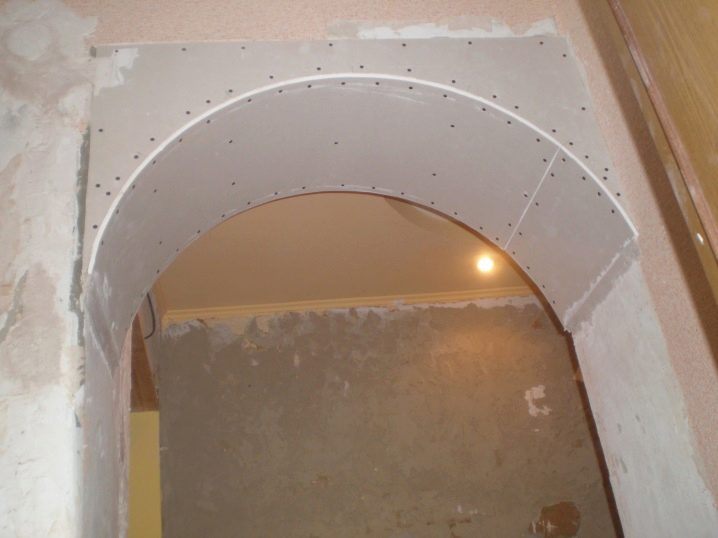
- Attach the resulting parts to drywall templates on the table. Directly in the opening, only their fixation is necessary.
- We fasten the prepared pre-cut drywall with self-tapping screws to the metal profile.
Thus, the simplest design is ready, it remains only to use the tips for finishing the arch. More intricate structures are constructed in a similar way. Plasterboard and metal profiles in tandem contribute to the construction of semicircular arches, and arches with niches, and with ledges. The list can be endless, it just can't be described.
Let's take a closer look at the backlit version.
The process of modernizing ready-made solutions also does not take much time and effort. Therefore, we will assume that the simple frame described above is already in the room and, moreover, the cable has already been laid.
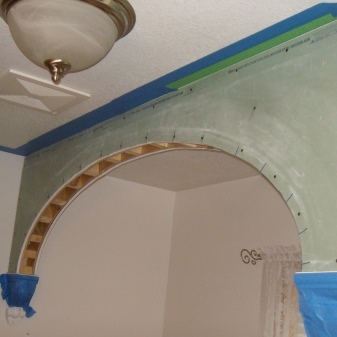
- If a ledge for spotlights is to be created, a comb must first be introduced into the structure. The ridge in the language of the finishers is a ledge constructed from a sheet of drywall, it is attached to the wall using a construction stapler and metal components. Remember that the resulting structure needs to be putty.
- Using ordinary wood crowns, a cut is made on the ridge. A previously prepared circle cut from drywall is inserted into the resulting opening. And all further actions are done directly with this circle.
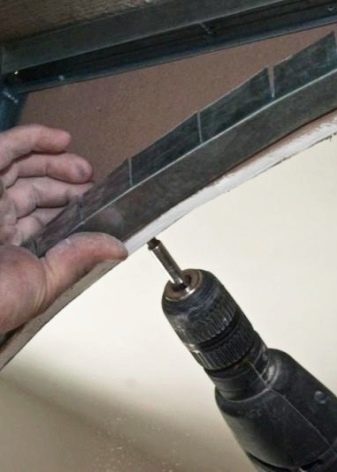
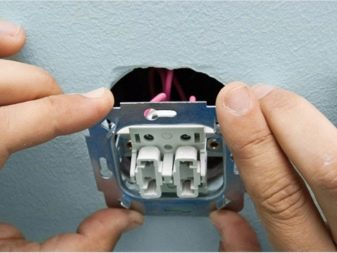
- Cut a hole in the circle to fit the size of the future spotlight. Its size must be indicated in the instructions. The easiest way to do this procedure is with a screwdriver and a special nozzle. All that remains is to connect the wire and the spotlight, periodically glancing at the attached instructions.
If the head of the family has knowledge of electrical engineering, it will not be difficult for him to install not only spotlights, but also switches.
- Along the way, you can prepare the arch for decoration, namely for wallpapering. To do this, you need to glue wallpaper for painting on a pre-treated surface. The thing is that the paint will hide all the errors, they will be known only to the person who made the repair.
- The wallpaper that goes into the plastic corner is easiest to cut with a clerical knife. It turns out an even cut. But you should prepare in advance for the fact that the blades will have to be changed very often.
- It will be useful and, taking a brush and paint, lightly walk around the corners. Unfortunately, wallpaper glue is not enough to keep the wallpaper joint evenly. To fix the effect, the excess edge can be cut off with a clerical knife.
- After the wallpaper glue has completely dried, it is painted. The paint can be taken in any color, it is only desirable that it be suitable for the future interior. Remember that light colors tend to visually expand the space, as opposed to dark ones.
- Quite often, when making a frame, you have to dismantle the old skirting board. Instead of a worn-out plinth, it is more expedient to buy a new one. Moreover, modern options are already adapted to hide the wiring from prying eyes.
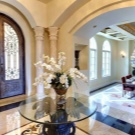
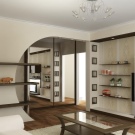
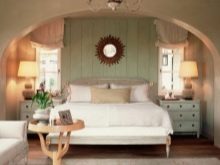
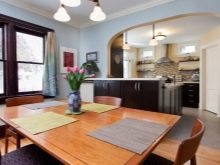
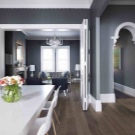
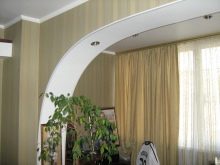
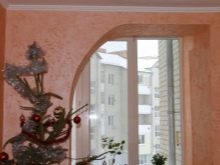
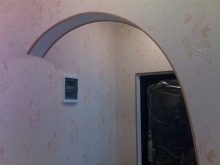
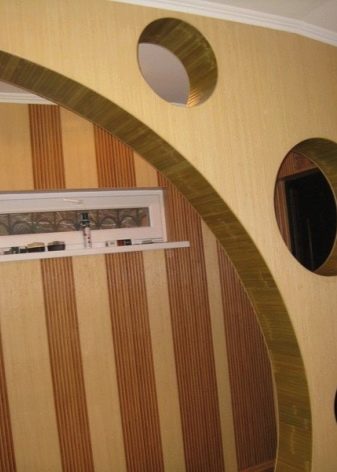
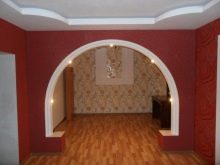
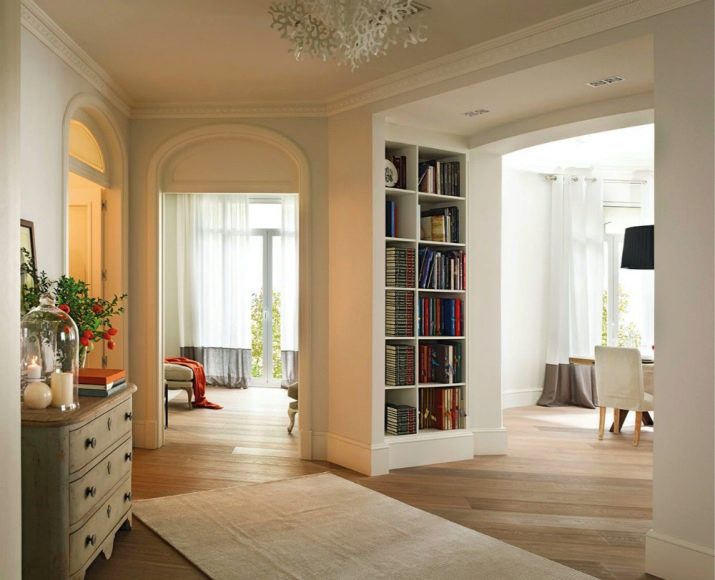
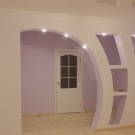
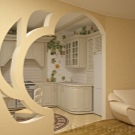
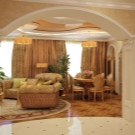
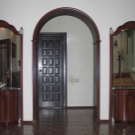
Beautiful photos of arches in the interior
In conclusion, I would like to note that any adult man, having a small set of tools, can make interior arches from drywall. They can be equipped with shelves and lighting, decorated with glass or mirror inserts.
As a guide, the most successful solutions will be posted in this section. It is possible that the presented photographs will prompt some of the readers to take specific actions.
For even more information on how to make a drywall arch with your own hands, see the next video.


The comment was sent successfully.