How to make candles from wax and wax with your own hands?
Candles are one of the most affordable, but at the same time, stylish decor items for decorating a space. Although shops today offer a pretty good selection, many people choose to make their own, for example, from wax and wax.

Required materials and tools
In order to make a candle, you need to choose whether it will be made of foundation or melted wax. Natural wax is purchased in the form of granules.

Then a wick is selected - in its role, a finished part from specialized stores, as well as cotton or jute twine, can be used.
It is important that the threads do not have a metal core, the particles of which get into the air during combustion.

The use of other materials and tools already depends only on the wishes of the master: whether he will add aromatic components, how comfortable it is for him to cut the foundation, and whether he will wet the wick for better burning.

If the candle is made in a mold, then it is better to take silicone containers designed for cupcakes or for candles. Before pouring the wax, they are additionally lubricated with liquid soap, dishwashing detergent or oil.

It is not forbidden to use non-water-based food coloring, wax crayons or special pigments as a color scheme. A variety of ingredients can be used to add flavor to the candle. You can use both natural ingredients and essential oils, for example, apple, clove or blue spruce. The wax melting pot is recommended for use with a double bottom.

Basic rules of work
The candle making process is quite simple, but the main key to its success is the use of quality material.
It is better to take natural beeswax by buying from trusted suppliers.
It is good if the beekeeper can pick up the material, since the highest quality product may depend on both the season and the amount of pollen present.

Another important rule says: the larger the diameter of the candle, the thicker the wick should be.
When a candle is created from foundation, the length of the wick is equal to the width of the sheet, to which is added from one and a half to two centimeters.

You should work in an apron made of thick cotton. If possible, it is best to cover your hands with a shirt or sweater, as hot wax on exposed skin will cause burns.
During the warming up of the wax, it is necessary to constantly monitor its condition, since an excessively high temperature leads to ignition.
Experts recommend not even leaving the stove, especially if the procedure is performed for the first time. It is impossible to extinguish ignited wax - it may explode. But baking soda will help to quickly cope with the situation.

When heating the wax, it is necessary to adhere to a temperature between 70 and 75 degrees Celsius. It will be possible to determine accurate data using a thermometer. By the way, when buying a special wax for candles, on the packaging you can find data on the temperature at which the flavoring agent should be added, when to pour the substance into the mold, and other useful data. A spatula or spoon will help dilute the food and chop up too large pieces.

The process of making from wax
The simplest master class for making candles at home involves the use of foundation.To implement the idea, you will need one sheet of foundation, a wick and, if desired, herbs. A brush, scissors, knife and ruler are also useful.

The foundation is sold in specialized stores for beekeepers, and all other tools are always found at hand.
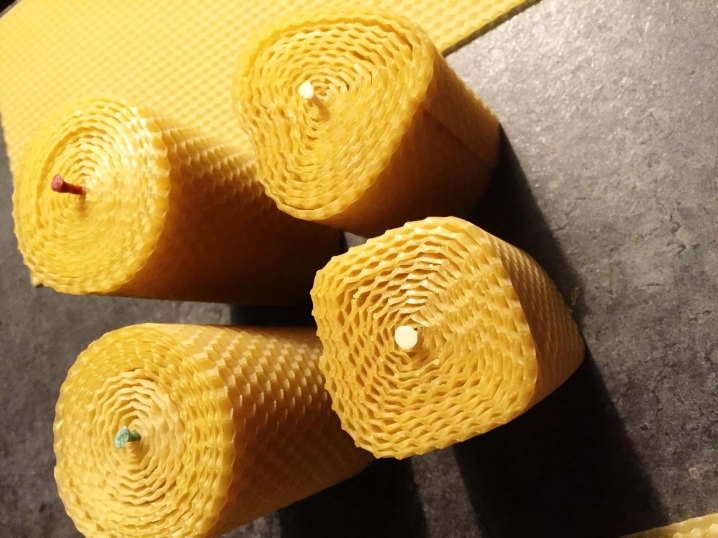
To make a high-quality candle, the foundation will need to be twisted very tightly, otherwise voids will be found inside that interfere with full combustion.
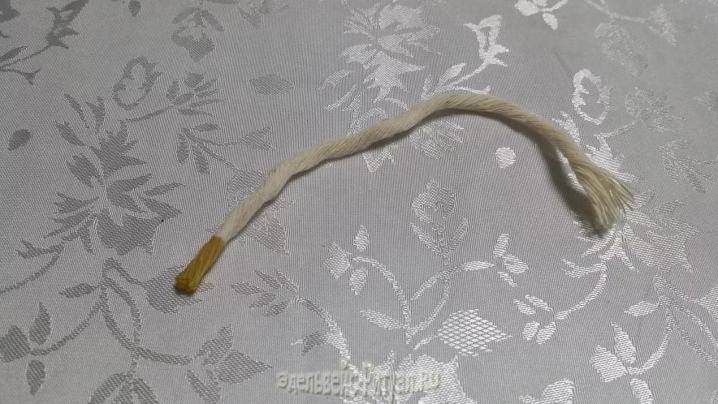
Experts recommend choosing a cotton wick and pretreating it. To do this, an approximately 3-centimeter piece is dipped into molten wax, then when the candle is lit, it will just melt, and not burn.
The herbs will need to be dried in advance and then crushed to microscopic pieces, actually dust. It is more convenient to perform this operation using a coffee grinder. It is important to ensure that there are no large pieces of herbal left, otherwise, during the burning of the candle, they will flash or irritate with a strong crackle. From herbs, you can take mint and St. John's wort - it is believed that this way a candle will create a pacifying atmosphere in the house.

The required piece of foundation is cut off with a knife or scissors, as it is convenient for anyone. The size, for example, can be 21.8x8.5 cm. The trimmed foundation is heated slightly over the burner to obtain better plasticity and the ability to twist it as needed. If you have time, you can just melt it slightly in the sun. The size of the wick is determined according to the height of the candle. For a piece with the above parameters, you will need 11.5 cm of wick.


The part is placed on the edge of the foundation and pressed inward a little. Herbal powder is scattered on top of the piece, which will be very helpful with a brush. The layer should be even, but not too thick.
The foundation is twisted in such a way that no voids are formed. Otherwise, homemade candles will begin to burn out without a trace.

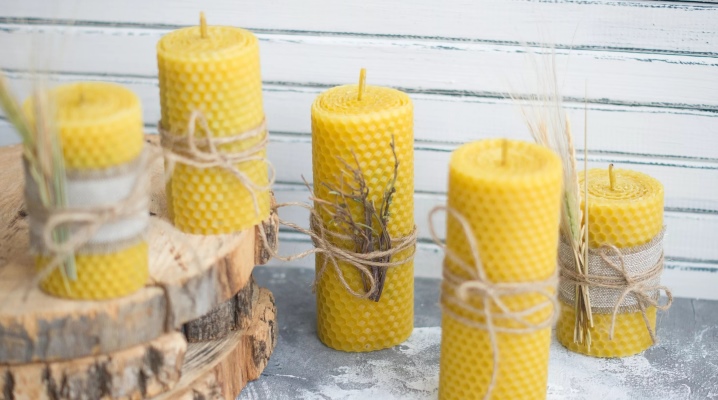
Although the finished candle looks very beautiful on its own, it can be decorated with some unusual decor. For example, first, the element is wrapped in lace, the length of which corresponds to the volume of the object, a sprig of cypress is placed on top, and the whole structure is fixed with a satin ribbon.

How to make wax candles?
Making a candle from wax, usually beeswax, is a little more difficult with your own hands. First of all, the material is cut into small pieces, after which it will have to be melted in a water bath. For this, a saucepan or other container is placed on a very small fire (from two to three).
The melting wax must be controlled as the superheated substance can ignite.
As soon as a homogeneous substance is formed, it is necessary to dip the thread that forms the wick inside. The thread should not be simple, but consisting of many separate threads twisted together. Next, the wick must be fixed in the chosen shape, which will be helped by an ordinary toothpick.


If you plan to make a removable object, then the walls of the mold are pre-coated with vegetable oil. At the same stage, the components are added - candles can be with herbs, ground into powder, cinnamon, vanilla or other ground spices. The wax will have to be poured into only half of the entire volume of the form, after which an additional component should be added and the rests topped up. The wax will harden starting at the edges of the candle and moving towards the center. When the candle has acquired the required consistency, all that remains is to remove the auxiliary toothpicks and cut the wick to the required length.
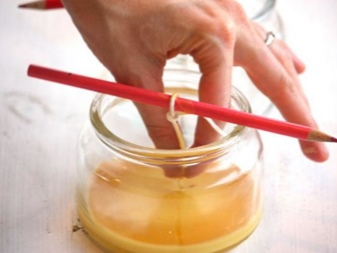

There is, by the way, a more complex, but also more reliable method of fixing the wick. First, a weight is fixed in its lower part, which will prevent the thread from moving while pouring the wax. If a hole can be made at the bottom of the mold, then the weight is not needed - the wick is simply threaded outward and tied in a knot.The thread itself is waxed, and its upper part is tied to a pencil or stick, which will allow the structure to be positioned on top of the form.

Another unusual way to create a decorative element is the dipping technique.
The resulting candle burns for three hours.
The process will require beeswax, cotton threads or ready-made wicks from specialized stores, as well as a saucepan that can hold a jar or bottle with a sufficient neck diameter. Pieces of wax are put into the jar, and water is poured into the pan. Having created a water bath in this way, it is necessary to completely melt the material. Next, a cotton cord or wick is dipped into the substance. As soon as the excess drains into the jar, the cord must be moved at a distance and wait on the weight until it dries. Then the process is repeated until a candle of the required shape is formed.


It is required to dip the wick into the wax in one clear motion, without lingering for a long time in the container, otherwise the already applied layer of wax will melt under the influence of the fresh one.
In addition, the better the candle can cool down, the more wax it will take on the next immersion.
At a candle of the required thickness, the bottom is cut off and the wick is shortened. It should be noted that the dipping method makes it easy to make several candles at the same time, since the wax cools down rather quickly. Leftover wax can either be left in the container until next production, or poured into water to create a compact wax mug. By the way, during direct dipping, the temperature of the hot wax should be kept at a level not higher than +56 degrees Celsius.

It should be added that soy wax can serve as an alternative to traditional honey wax. This product appeared on the market quite recently, but quickly began to gain popularity due to its environmental safety. Soy wax is made from soybean oil and mixes seamlessly with a regular bee product. This material is very good at absorbing both colors and odors.

The following video presents a master class on how to create several types of candles from foundation with your own hands.


The comment was sent successfully.