How to make a lock on the gate with your own hands?
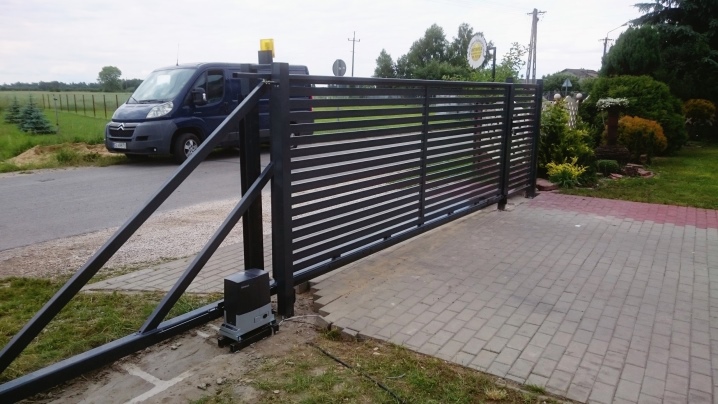
The owners of summer cottages or country houses seek to protect their property from the penetration of burglars, intruders and other unauthorized persons. One of the ways to protect the territory is to install a fence with massive gates. To increase the protection of the gate, they are equipped with bolts and other mechanisms that can create an obstacle in the event of an unauthorized intrusion. It is worth taking a closer look at how to make constipation yourself.

What might you need?
Despite the fact that the modern market is represented by a large selection of bolts and constipations, many tend to make them with their own hands. This is due to the fact that the self-created locking mechanism is an individual device that can increase the security of the territory.
The design of the bolt directly depends on the dimensions of the gate, the material of the locking device itself and a number of other characteristics.
Today, the following options for sliding elements can be distinguished.
- Turntables. This is the name for constipation, in the middle of which an axis of rotation is provided. During pivoting, the devices are locked with both flaps, providing reliable protection.
- Barriers. A subspecies of turntables. In this case, the axis of rotation of such constipations is not located in the middle, but on the edge of the bolt.
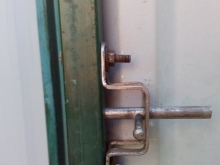
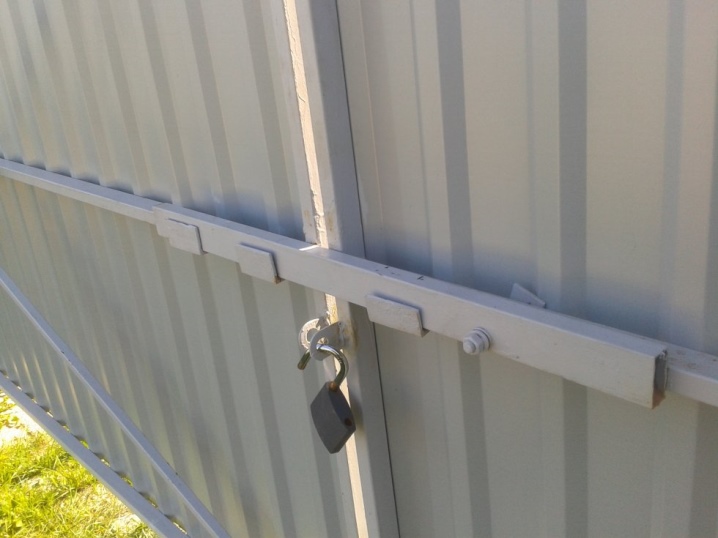
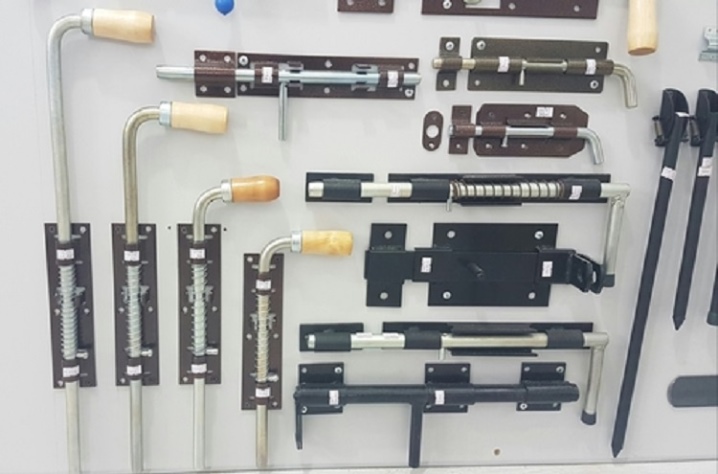
- Espagnolettes. Gate valves are also included in this category. Such devices are considered the most popular due to their low price and ease of manufacture. Espagnolettes are great for servicing gates. With the help it is possible to fix the gate leaves in the required position. Sometimes the structure is reinforced using padlocks.
- Locking bolts. They are used to fix the doors of large vehicles.
- Flask locks. The advantage of such devices is their high reliability. With their help, you can quickly close the gate and provide the necessary security.
Also, manufacturers produce locking devices, the principle of which lies in the fact that the flaps are hidden when the handle is turned. This mechanism is also used on safes. At the same time, it is possible to simultaneously achieve fixation of the flaps in the desired position. Almost any device can be made independently using materials at hand.
Making different varieties
The main task of suction is to ensure the safety of the territory. With their help, it is possible to reduce the risk of intruders entering the site.
When making a latch for sliding or swing gates, attention should be paid to the reliability of the mechanism. The appearance of the mechanism is not so important, since the bolt is installed from the inside of the courtyard.
It is worth considering in more detail how to make the most common types of closures with your own hands.
"Turntables"
It is often found on the gates of garages and other buildings. A spinner is a device with a simple mechanism of operation, the movable part of which is a wooden block. The main parameters of the part:
- length from 1.5 meters;
- thickness from 5 to 10 cm.
Wooden beams are attached to channels, which are fixed by means of bolts. This approach allows you to achieve maximum structural immobility. Work may require a welding machine or drill, if the first is not available. The beams are attached to two channels, one of which is installed slightly higher, the other slightly lower.

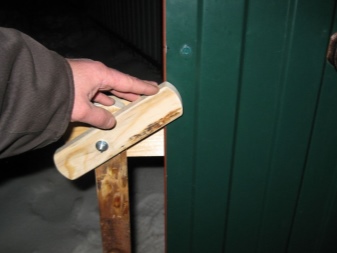
Rotation of the "Turntable" should be counterclockwise.
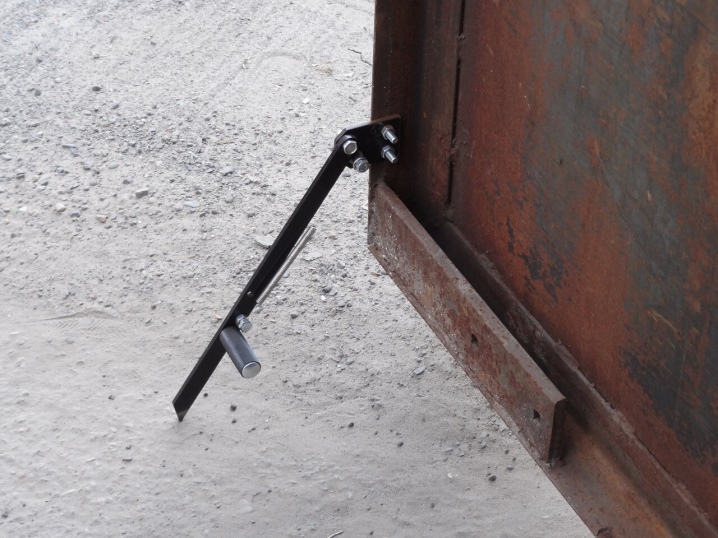
Features of assembly and installation of the bolt.
- If there are no channels at hand, then the mechanism is made of iron strips up to 5 mm thick or bars. If a profile strip is used, its length should not exceed 2/3 of the door width.
- The spinner is twisted using a bolt installed in the fixing flap. The height of the bolt must be 60-70 cm from the ground in order to easily ensure the locking of the flaps.
- On each door leaf, groove profiles must be welded, where the strip will subsequently fall when the gate is closed. The height of the profiles is 60-70 cm.
- The strip of the "turntable" in the closed position should slightly protrude beyond the edges of the profile. This clever approach will help extend the lifespan of the mechanism and ensure that the flaps are securely held in place.
So that during the rotation of the bolt there are no problems, it is worth putting two washers on it. It is also recommended to grind off the head of the bolt from the outside and paint it over so that it becomes invisible.
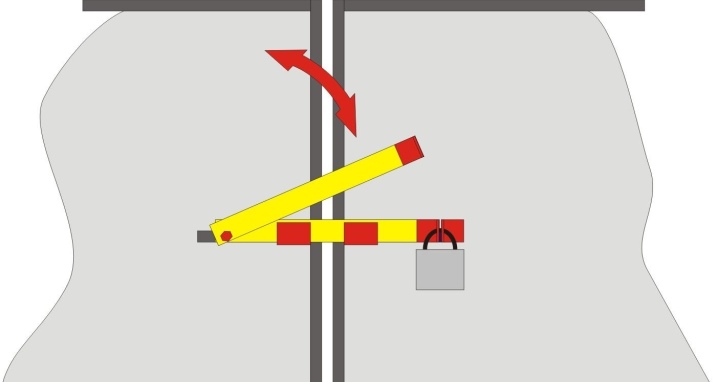
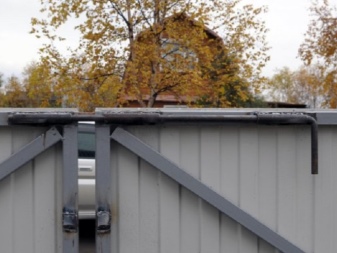
"Shlagbauma"
This is a kind of turntable with a similar design. The only difference is that the steel strip is fixed using a channel welded along the short side of the sash.
It is also sometimes welded on the lugs at the end of the channel in order to use a padlock in the future.
A barrier for street gates can be made independently, the mechanism is quickly assembled.
- A wooden beam or a steel plate is taken as a basis. The length of the product must be less than 60 cm.
- The structure is attached to the sash using bolts as fasteners. The distance at which you need to screw in the bolt is 1/3 from the edge.
- Next, take two channels up to 10 cm long and welded. The width of the profile should not exceed the width of the timber. If a steel plate was used, then the profile can be replaced with a cut corner. In this case, it is necessary to ensure that the part is tightly embedded between two elements - the corner and the sash.
Sometimes the barrier is reinforced with a lock. To do this, a loop is welded to one of the sides of the plate, where the constipation will subsequently be attached. The second ring will need to be secured to the sash.
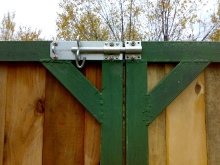
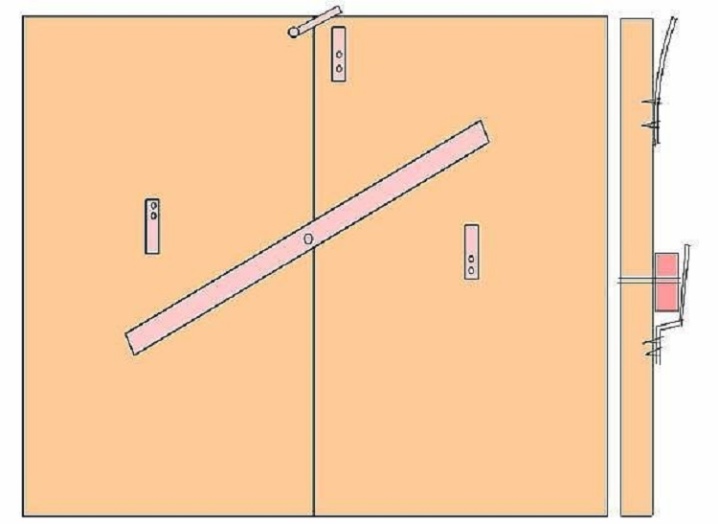
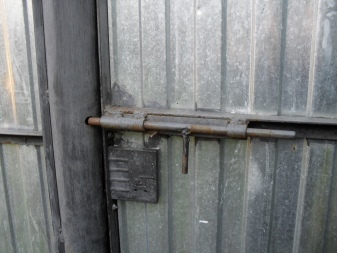
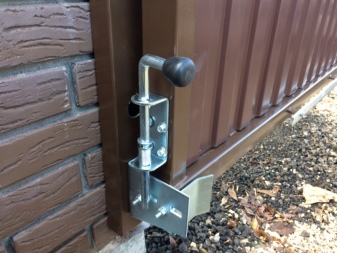
"Espagnolette"
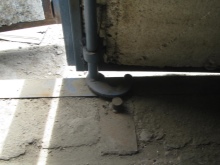
There are two types of latches: vertical and horizontal. The latter represent a simpler design, which is installed on one side of the fixed sash. Such latches are made in the shape of the letter G. To assemble the mechanism, reinforcement with a diameter of 12-14 mm is used, the length of the rod is 70 cm. To assemble the vertical bolt, you will need the following.
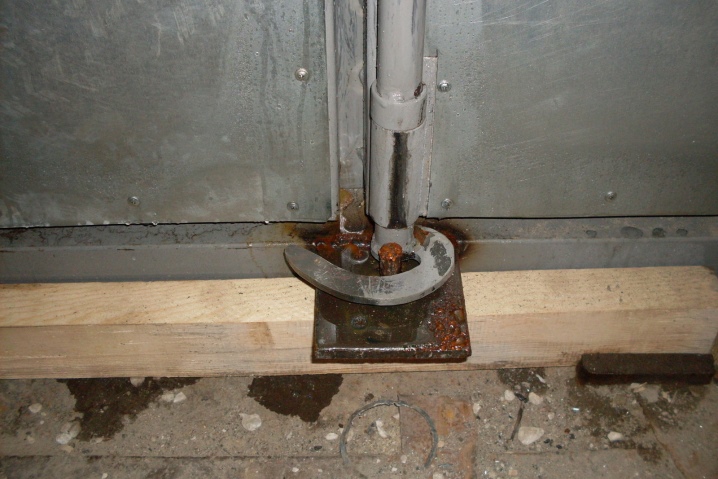
- Weld pipe pieces of the same size to the lower edges of the flaps. The diameter of the stationary pipe must be selected so that the reinforcement rod can enter the hole.
- Cement two more pieces of pipe on both sides of the garage floor. They act as retainers for the shut-off valves.
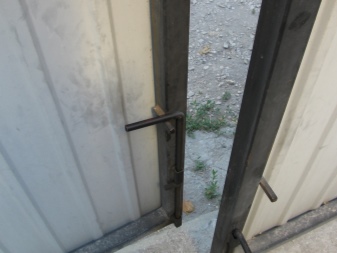
The last stage involves cutting the reinforcing bars to the desired length and then using the bolts. To open the gate more conveniently, it is recommended to weld fixing grooves on both sides of the shutters. Horizontal latches are considered to be more functional.
For the manufacture of such a constipation, a metal pipe with a diameter of 10 mm or more is required. The material will subsequently need to be cut into three pieces.
The length of one should be 10 cm, the rest - 5 cm each.
The assembly of the bolt is as follows.
- First, the longest tube is welded to the bottom of the door leaf. The piece is placed horizontally.
- Next, take short pieces. One is also welded to the edge, placing it opposite the first tube.
- The third stage involves threading a bolt assembled from a T-shaped pin into both pieces. For assembly, a rod is used, the diameter of which is selected so that it can easily enter the pipe.
- Then the bolt is moved until it stops. The remaining piece of metal pipe is welded to the edge of the finished mechanism.
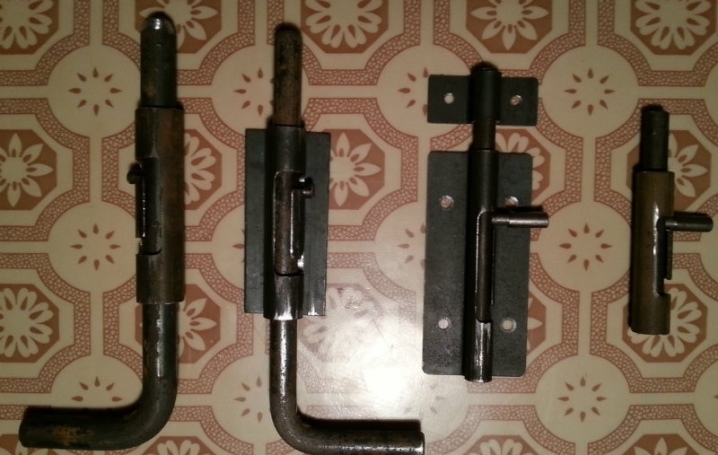
The last step is to secure the lock by attaching a piece of metal plate. It is placed under the handle. If you plan to use a padlock, ears are welded onto the bolt, where you can fix the constipation. It is noteworthy that the latch does not provide complete fixation of the sashes. To achieve this result, you need to use several valves or assemble a constipation with a more complex structure that can press the sash.
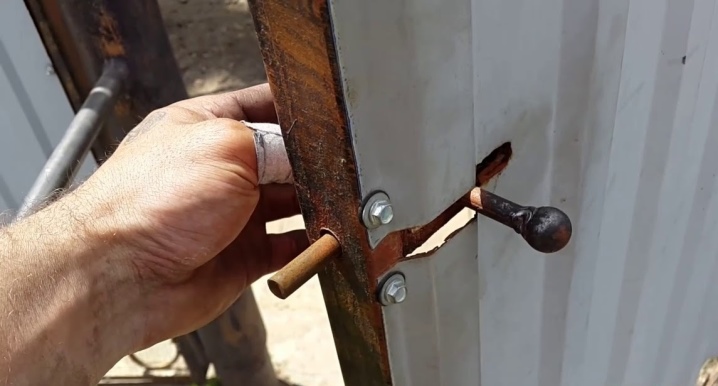
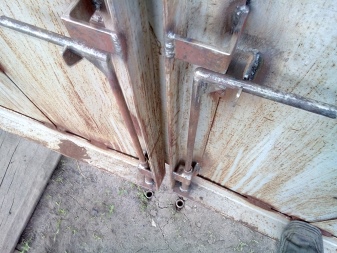
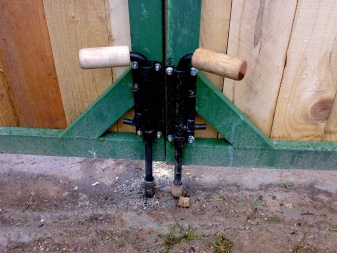
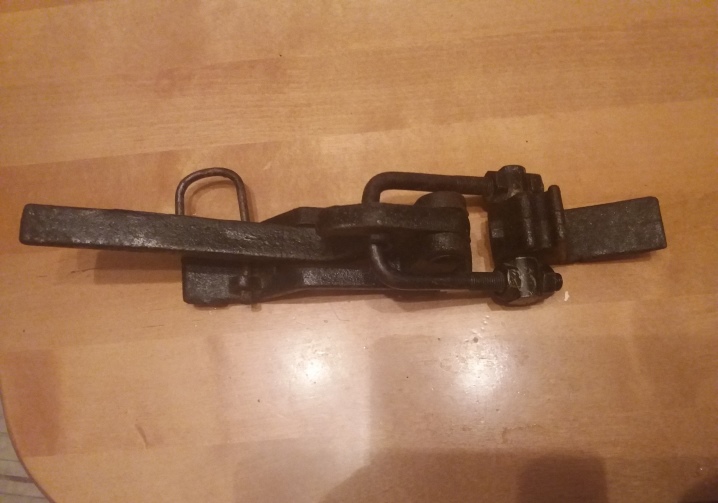
One of the common designs of the locking mechanism is the "sea container" bolt.
Such a bolt will be appreciated by any garage operator, because with its help it will be possible to fix the doors in the required position, you will not have to bend or stretch when opening or closing the gate. Assembly of the mechanism involves the following steps.
- First of all, in three places of the pressing flap, fasteners in the form of rings, equipped with a leg, are mounted by welding. The leg will subsequently wrap around a smooth pipe, the diameter of which is 15-16 mm. The rings are welded in different places: one - at the top of the frame at a distance of 20 cm down, the second - in the center, the third - 20 cm from the floor.
- Next, two hooks are mounted on each end of the pipe.
- The third step involves welding on the top and bottom of the frame with retainers that will hold the hooks.
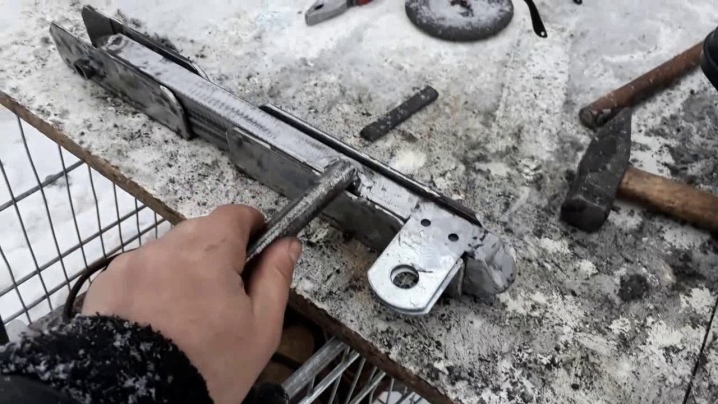
The last stage is putting the mechanism into operation. When the pipe turns, the hooks will fix the sash in the desired position. To make turning the mechanism more convenient, it is recommended to weld an additional piece of pipe in the middle of the rotating shut-off tube. The length of the additional pipe should not exceed 30 cm. It will then be used as a handle.
Recommendations
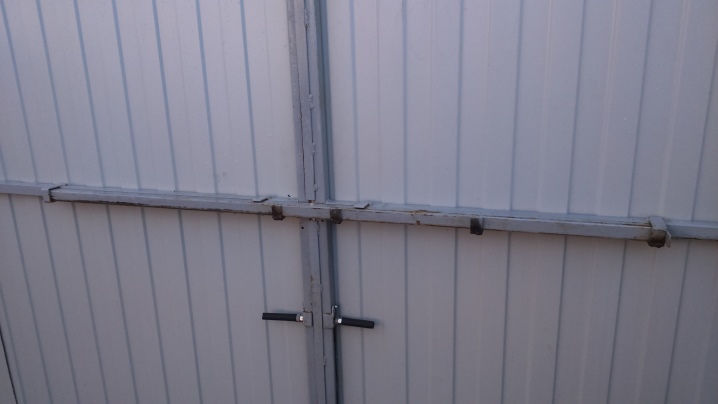
Many people think about what is better: buy a valve or do it yourself? In the case of wickets, it is recommended to buy a gate valve, but for a gate, you can do it yourself. The explanation for this decision is simple.
- The wicket is used more often, and purchased mechanisms are more resistant to mechanical damage. These bolts will work for a long time and still look beautiful.
- In most cases, wickets have standard sizes, so it will be easier to choose a purchased mechanism.
- The gates are individual, various designs and materials are used for their manufacture. The result of this approach is the disappearance of beauty into the background. The functionality of the structure and its safety are more appreciated. Therefore, homemade latches, barriers, latches and turntables are more in demand in this case.
When making homemade bolts, you can use improvised means and secondary raw materials in the form of leftover pipe scraps or other metal products. The final choice of the type of constipation depends on the owner of the site.
How to make a lock on the gate with your own hands, see below.


The comment was sent successfully.