Installation of a shower cabin: the order and subtleties of installation
Many turn to specialists to install a shower stall. But most apartment owners can cope with this on their own, using the necessary tools, as well as having studied all the methods of such installation.
There is a huge variety of shower enclosures in different shapes and sizes on the market today. Some of them are sold pre-assembled and just need to be installed correctly. But they are not popular. This is due to the fact that they are not always comfortable due to their size, which does not fit into the doorway. Showers requiring assembly are the most demanded. Many experts advise paying attention mainly to these models.

Cab types and equipment
It should be noted right away that all types of shower cabins differ in shape, materials of manufacture and method of installation relative to the bathroom space. Let's analyze each type in more detail:
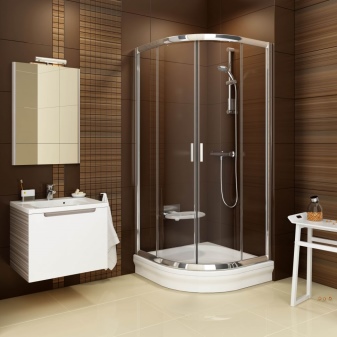
Closed models
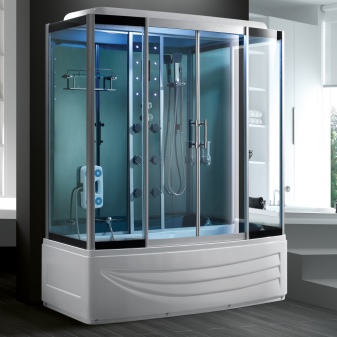
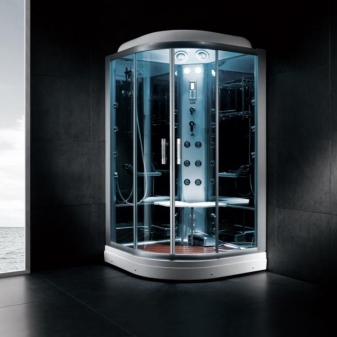
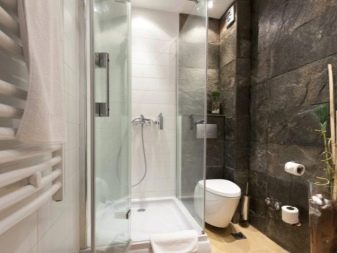
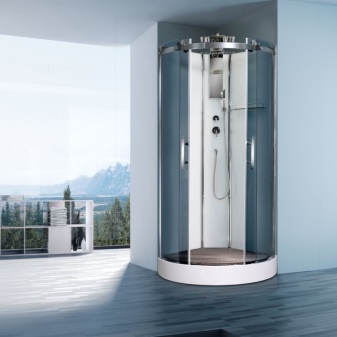
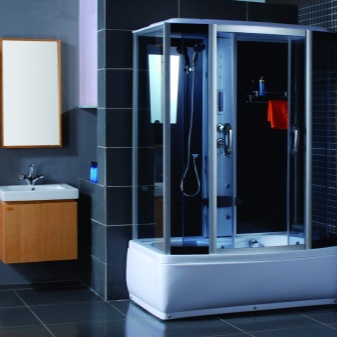
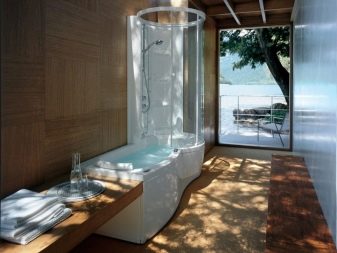
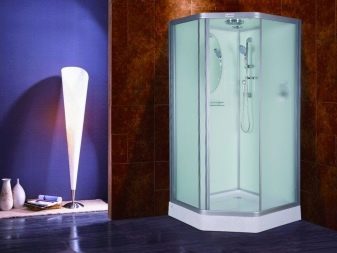
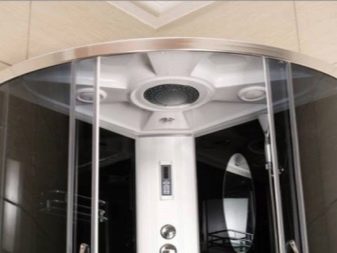
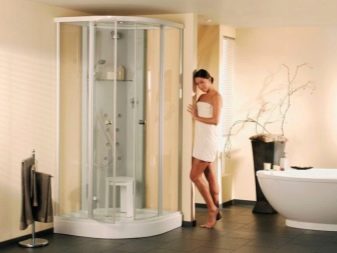
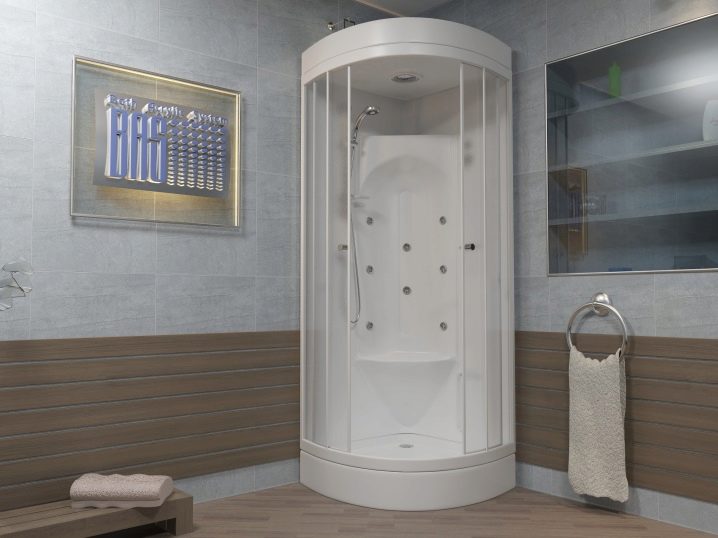
They are the most common option. Every second person who prefers shower cabins can find exactly this kind. It is characterized by closed walls and is a separate small room. The enclosed shower also has a door, tray, roof and shower head. Inside, additional functions are built in, which are necessary for a comfortable shower. Optionally, you can install a water heater and even a radio. The main disadvantage of this type of shower cubicle is the cost, which is higher than the average on the market.
Much depends on the manufacturer, as well as the material from which the booth is made. One of the main advantages of such models is good sound insulation. The benefits also include additional features, a variety of models on the market and quick installation.
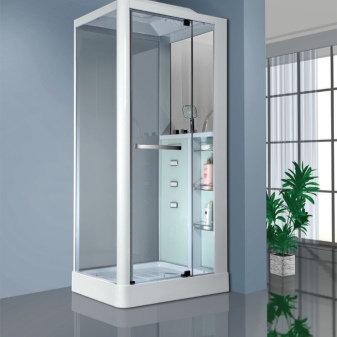
Open cabins
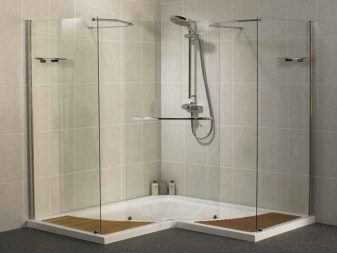
In this case, the wall will be the wall of the room itself. The complete set of this type of shower stall includes only a door, a pallet on which a person stands, and a shower head. The option is quite simple and does not have any additional features. Mostly these models are installed in the corner of the bathroom. Of course, their main advantage is cost. Such a booth is the most budgetary among all those on the market. It also provides the possibility of constructing a cabin of any area that will be necessary for comfortable use.
Their main drawback is the difficult repair of sewer and water supply units. Open models do not have a top base, i.e. a roof. Thus, a "tropical shower" is not possible in this case. A regular shower head is used, which is connected to the mixer. This type of shower stall is intended only to simply wash, but not to relax under warm water.
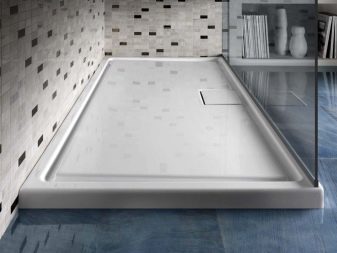
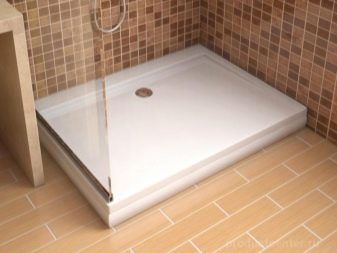
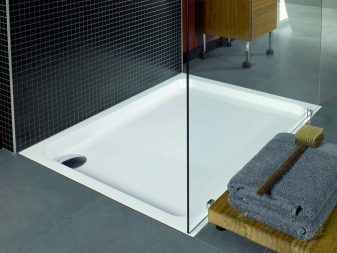
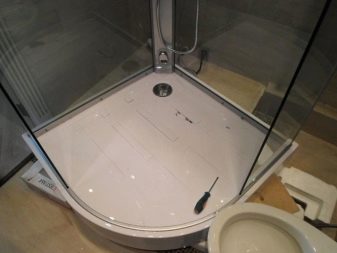
Pallets are needed to collect water, as well as to drain it into the sewer. According to their shape, the pallets are divided into corner and rectangular.
When choosing it, first of all, pay attention to the depth, which is divided into:
- Deep or high pallets. They are very similar to a small bathtub, in which you are given the opportunity to sit and draw water.
- Medium pallets.They are considered the most versatile and are used much more often than other types.
- Low pallets. They are quite compact. They are often called flat. This is due to the fact that they are practically invisible. Such pallets require a special water drainage installation technique. Otherwise, problems may arise and the water will not go down the drain.
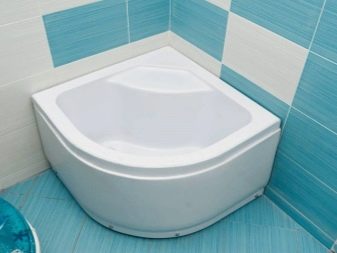
The most common pallets are made of acrylic.
You can also find products from other materials:
- cast iron;
- steel;
- faience;
- made of artificial marble;
- natural stone.
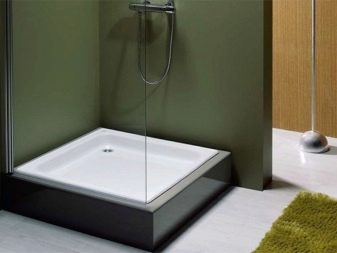
As a rule, the most popular and often used is precisely the acrylic pallet. It is durable, easy to clean and inexpensive. The most expensive is a pallet made of natural stone. Its main advantage is fast heating. As a rule, the shower tray keeps warm for a long time, which makes the shower more comfortable.
Walls are essential shower accessories. Their main function is to protect against water ingress, which can go far beyond the booth. The raw materials for the production of doors are plastic, glass or aluminum. Glass doors are the most popular. They are presented on the market in two versions: frosted and tinted glass.
The following elements are standard in the shower cubicle:
- pallet;
- rear panel;
- roof;
- racks.

Dimensions (edit)
There are a large number of shower cabins of different sizes on the market. When choosing, it is important to first decide on the size, and then look at the design and equipment. Due to the small size of the apartments, many people prefer to install shower cabins rather than baths. This saves space and is also the most convenient way to shower.
In the event that none of the presented model options is suitable for the buyer, then it is always possible to manufacture a shower cabin to order of a non-standard shape and size.
Width
The smallest width parameter is 0.75 m. It is possible only for asymmetric models. Works well in a small bathroom. Such a small size significantly saves space in the bathroom, which makes it possible to install it even in the smallest room. The only negative is the inability to completely relax.
In such a shower stall, you can only be in a standing position. Sitting or lying down is out of the question. Additional functions are usually not included in the package. But it's worth noting right away that this size is suitable only for medium-sized people. For example, tall and massive men will feel uncomfortable in her. Therefore, before buying, you need to go inside and assess the situation. Such an action will help you not to make a mistake with your choice.
The minimum width of standard models is 0.8 m. They are very popular among users. This is due to the fact that the largest number of rooms allocated for the bathroom are small. This option will save a lot of space and will allow you to install additional appliances or furniture in the bathroom. The cost of such a shower cabin is low and the average person can afford it. The functions that the booth may have will create the ideal atmosphere for taking a shower.
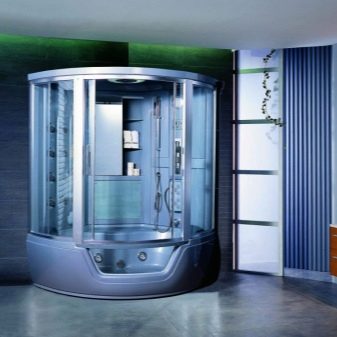
The maximum width of shower cabins can be up to 1.8 m. This is the most convenient option, which makes it possible to accommodate two people at once. This model is usually used in large rooms connected to a toilet. Due to its large size, the shower cabin can include a number of additional functions, for example, hydromassage, aromatherapy, radio, telephone, and more. The cost of this design is much higher than the previous one. But it justifies the investment.


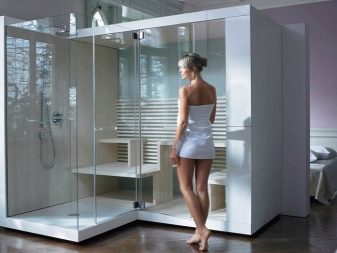
Models of shower cabins are also produced, which are made together with a bath. They are also called combined. Walls are located along the perimeter of the bath, and the top can be either open or closed. Unlike shower cabins that are common to all, this design is quite large, so it is only suitable for large rooms. The user is given the opportunity not only to take a shower while standing, but also to relax in a horizontal position. This design has advantages and disadvantages.
Pros:
- You can take both a shower and a bath. Perfect for those who like to bask in hot water.
- Spacious shower cubicle. This is due to the rather large size of the bath.
- Most reliable. High sides provide safety and also control the water level in the sump.
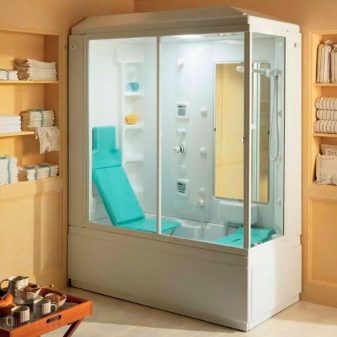
Minuses:
- When leaving such a shower stall, it is necessary to step over a large pallet, which is not convenient for all people.
- Price. The price of this option is quite high compared to a conventional shower, even the largest.
- The structure is quite high and can reach 2.5 m.
It should be understood that the wider the shower cubicle, the more convenient it is to use it. There should be enough space inside for movement while taking a shower.
The height of the shower stall is also an important factor when choosing. The smallest height is 1.98 m. It is comfortable, but not suitable for everyone. The highest cabin is 2.3 m. The comfortable height of the curtain is 2 meters.


It should be noted that the height is selected individually. In this case, it is necessary to take into account the growth of each family member when buying. It is desirable that there is a "reserve". Therefore, it is recommended to immediately take the largest shower stall. As a rule, the ceilings in the bathroom will allow such a structure to be installed.
If the size of the shower stall is selected correctly, then its installation will not be a problem for the user. The main thing is to be guided by the market of the presented models. The most popular and demanded are side models of shower stalls. This is due to the fact that their walls fit snugly against the walls of the bathroom, which is the most comfortable and safe option. The installation of such a cabin is also quite simple.
A widely presented option is precisely the square shape of the shower stall. But it is not very popular, although the installation of this model is not difficult.
Preparation and tools
Preparing all the necessary tools that will be involved in the work is the very first step in the installation. Thus, the installation of a shower room will not seem like a complicated and problematic task.
You will need the following:
- various types of screwdrivers;
- gas key;
- water hoses;
- sealant;
- siphon;
- drill;
- polyurethane foam.
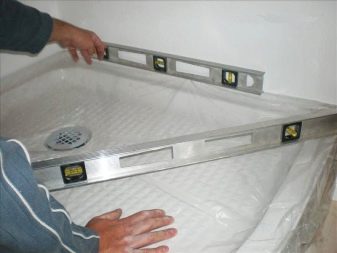
Before starting the installation, make sure that the floor is sufficiently level. In case of problems, it is necessary to level the surface, for example by laying tiles.

Stages of work
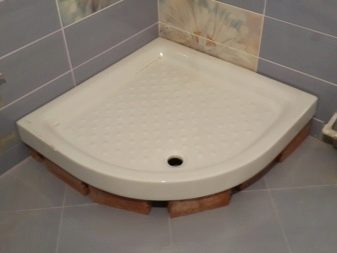
As a rule, the assembly of the shower room always begins with the installation of the pallet. Do-it-yourself box connection can take place both on the frame and without it.
Each method has some nuances that must be taken into account.

Pallet assembly
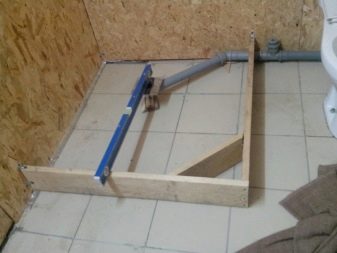
The pallet is installed on a frame made of metal. The most important thing is a reliable fixation of the structure. The frame is presented in the form of a frame structure made of metal beams, which are fixed crosswise.
All actions must be performed sequentially:
- Studs are screwed into specially designated holes in the pallet until they stop.
- Two nuts are screwed onto studs. One is attached from below, and the other serves as a support.
- The frame support is installed on the previously screwed in pins and nuts.
- The center leg is screwed in and secured using a washer.
- Further, the fixing beams are fixed with screws.
- Brackets are substituted, which function as a support for the screen.
- The pallet is placed.

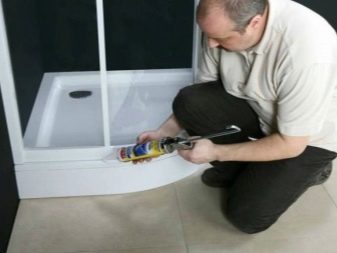
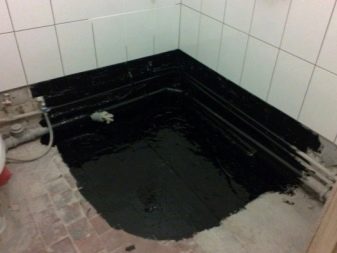
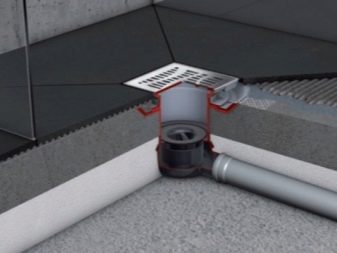
The correct organization of the drain when installing the pallet is the main task. A siphon should be installed if it has not been placed. The main thing is to check the tightness at the junction of the pallet and the siphon. If a leak is found, it can be easily eliminated with a sealant.
If the pallet is small, then the frame is not required. In this case, it is necessary to install the siphon correctly. The hose is disconnected from the clamp. The siphon is connected to the pallet, having previously passed the sealing at the joint in order to avoid leakage. Wait until the sealant is completely dry. Then the hose and clamp are put back in place.
After everything is fixed, it is necessary to check the structure for leaks. For this, water is poured and it is checked if there is a leak. This is quite an important point and it is better to do it at the very beginning, when it will be possible to fix everything in case of problems. Then the structure should be raised by about 5 cm and filled with polyurethane foam.
The pallet must be loaded. Moreover, the weight should be large enough. Construction bags filled with cement are suitable for this. It is advisable to spread the entire load evenly.
Communications
An important part of installing a shower stall is bringing it to the sewer.
To do this, you need to perform a number of works:
- There is a protective film around the drain hole, which must be removed.
- The top rubber gasket is best replaced with a silicone sealant.
- Next, the siphon is screwed on.
- The bottom connection and threads are treated with a sealant for reliability.
- Next, the siphon is connected to the sewer. It is worth noting that the connection must be treated with a sealant for reliability.
It is important to choose the correct location of the shower stall in the bathroom and consider what else is planned to be installed, in addition to the stall. The electrical network that goes to the water supply and water heater must be isolated. Waterproofing in a small apartment must be extremely reliable.
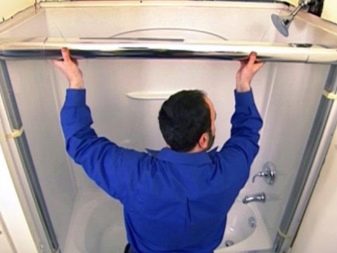
Walls, doors and roof
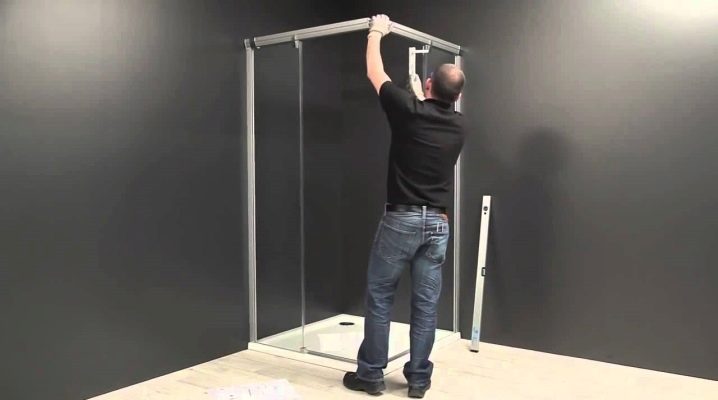
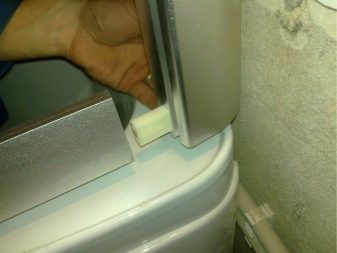
This stage is the easiest to install a shower stall. But it's still better to ask another person to help you. This makes the installation process even easier. During installation, it is advisable to follow the manufacturer's recommendations, since all shower cabins have some differences from each other. The walls are fixed with special bolts.
Stages of work:
- The protective film is removed from the top of the pallet, but the bottom remains protected.
- The wall is installed after the pallet is moved away from the wall.
- The holes in the pallet should be connected to the corner and fixed with self-tapping screws. It is advisable not to make special efforts to this. The movements in this case should be soft.
- It should be noted with a marker the corners that have special holes.
- Next, remove the partition and apply a small layer of silicone.
- The baffle is returned to its place and excess silicone is removed.
- The pallet with a partition is moved up to the wall and the central part is tried on.
- Apply silicone to the joint between the side panel and the center panel.
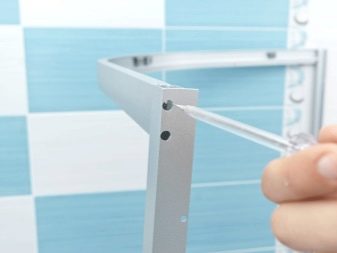
- The wall and the center panel are linked.
- Similarly, the next wall is attached to the first.
- The profile is finished with silicone and the partition is installed.
- The lower and upper profile is being installed. Silicone should be applied to the bottom.
Roof assembly:
- By unscrewing the ventilation grilles, the protective film is removed.
- Sealant should be applied to the watering can. This is done so that it fits snugly to the attachment point.
- The ceiling is installed without the use of silicone so far. Tightened from below with four self-tapping screws.

- The hoses are connected to the rails with clips.
- Wires must be connected based on colors and markings.
- Next, you should connect the cabin and check the water and electricity.
- Bottom perimeter and B-pillar are silicone treated.

Door installation
Installing doors is the final step in working with the shower. As a rule, there are never any problems with it.
Follow these steps:
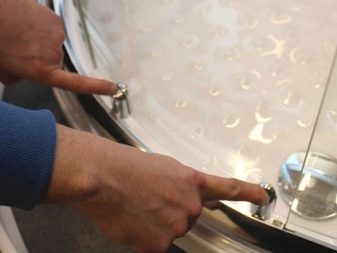
- first you need to screw the rubber stoppers onto the screws from the inside;
- handles are screwed to the doors;
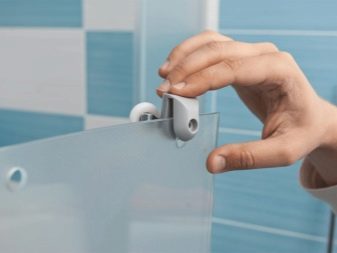
- special moldings equipped with magnets are attached to the doors, rollers are installed with wheels outward;
- doors are installed on the upper rollers, thus securing them;
- Installation is complete. You should immediately check for the smoothness of the door movement, as well as the tightness of the junction.
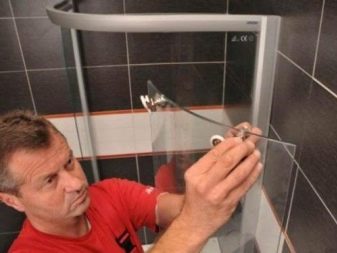

Screen installation features:
- propping up with wedges, the screen is installed;
- the structure must be removed and special marks should be made opposite the brackets, which will facilitate further work;
- then you should adjust the mounting bracket;
- the structure is leveled and holes are drilled opposite the marks;
- the screen is screwed onto self-tapping screws.
After installation, the shower stall should be checked for operability, as well as for leaks. It is important that nothing leaks anywhere. In which case, all parts must be treated with a sealant.


Operating tips
It is advisable to use a liquid detergent and soft cloth to wash and wipe the shower stall. Do not use products that contain ammonia, acetone and organic solvents. There are also special products that are designed to polish shower cabins and give them a shine.
Often, a white coating appears from the water, which settles on the doors. It can be removed by pre-soaking a soft cloth in mild lemon juice.
Metal parts should also be wiped with a soft cotton cloth only. Never use a hard cloth.
Glass panels and doors should be cleaned with a clothpre-soaked in a special detergent. Sliding doors are often removed from the frame before washing. Do not use special scrapers for cleaning.
Not only the doors, but also the pallet should be kept clean. The drain must not be clogged. Watch out for foreign objects that may get there.
To clean the whirlpool system, fill the tub, add liquid detergent and leave it for 5 minutes, then turn on the shower. Further, after the performed procedure, you should repeat everything in the same sequence, only without chemistry.
To install a shower in a wooden private house, certain conditions must be met. High-quality waterproofing must be present, and the water supply must be performed by a professional master according to a special scheme that excludes leaks.
For information on how to assemble a shower stall, see the next video.


The comment was sent successfully.