How to make a do-it-yourself miter saw from a circular saw?

A miter saw is a device that every builder needs to take "into service". However, it is no secret that a high-quality professional tool on the construction market is quite expensive. That is why those who want to save material resources, as well as show their skills, should try to make a miter saw with their own hands. The starting material for this will be a circular saw.


Varieties of miter saws
There are several types of miter saws (popularly also called “miter saws”). Let's get acquainted with these varieties.
Pendulum
The basic part of such a saw is the bed. A table is attached to the bed, which must have a swivel mechanism equipped with a ruler. It is this mechanism that allows the cutting process to be carried out at a certain angle, adjusting it to the specific individual needs of each user. Moreover, this angle can be changed by moving the desktop directly in relation to the bed.

As for the saw itself, it is fixed in this device by means of a lever, and is also spring-loaded by means of a hinge. Thanks to the pendulum, which gave the name to this type of miter saw, the saw moves up or down.

Combined
When using a combined saw, the cutting angle can be changed in 2 directions. The device, like the previous version, contains an additional hinge. In order to change the cutting angle, it must be adjusted and retracted to the side opposite to the place where the drive is mounted.

With a broach
This device is considered the most versatile, since the saw can be displaced not only around the axis, but also along the cut in a straight line.

How to make a circular trimmer?
If you do not have the ability or desire to purchase a ready-made miter saw, then such a device can be made yourself. However, it will not work to make it completely from scratch. The initial design should be a hand-held circular saw and drawings.

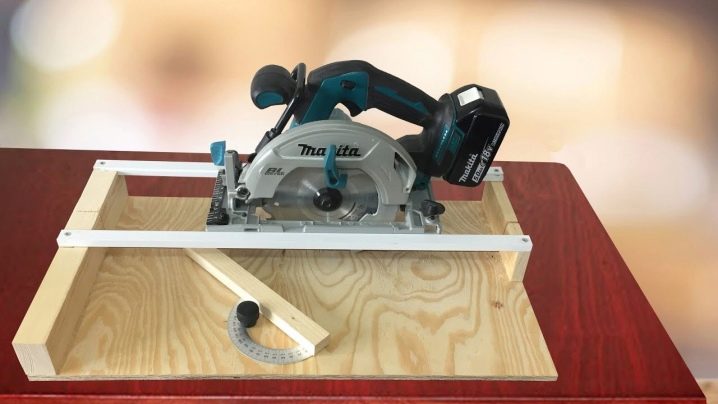
So, in order to make a trimming with your own hands at home, you need to make a box that will serve as a base... As a raw material for the manufacture of the box, you can use chipboard (chipboard).

In the process of whipping and assembling the box, experts recommend using confirmations consisting of 1 element - they are inherently ordinary ties for connecting wooden parts. The final box for the base for trimming must have the shape of the letter "P".

When making a box, it is important to ensure that it does not move. It is often attached to the work table using special clamps (the tool used to fix it). Next, on top of the shelf, you need to screw the manufactured base under the saw.

Important: When attaching the base, you must maintain a 90 degree angle, otherwise you will not be able to align the blade sole.
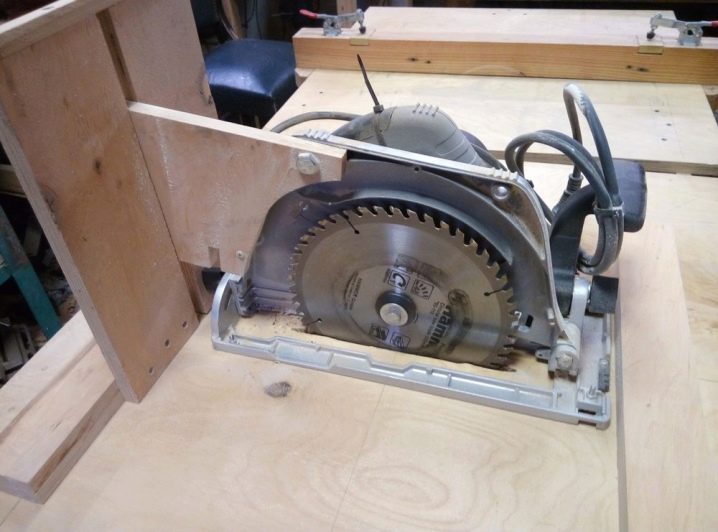
On both sides, using self-tapping screws, it is necessary to fix small pieces of chipboard. Thanks to this manipulation, you will adjust the position of the sole of the instrument. The next step in transforming the circular is to fix it. Moreover, this should be done using all the same clamps, and you can also use wing clamps.

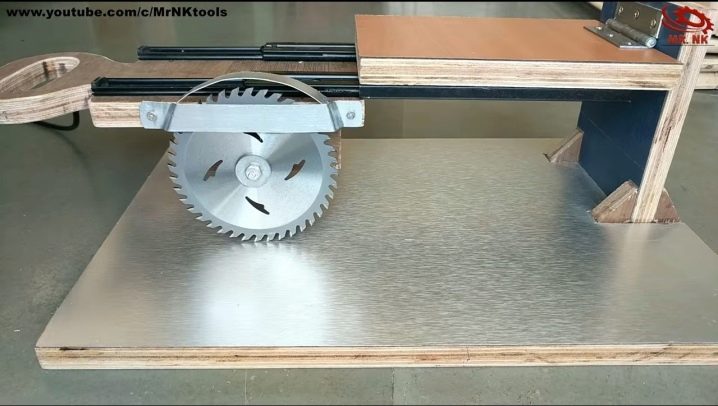
Next, you should proceed to the installation of the so-called table. It should be fixed near the base of the table. However, keep in mind that in the process of carrying out this activity, you reduce the cut in depth by 1.5 centimeters, so try to put the profile as close as possible in relation to the saw element.

After carrying out the above described manipulations, you can proceed to the test cut - you should get a cutting line based on the stop. If so, then you did everything right.

As you can see, it is quite possible to make a miter tool from a circular hand saw. The main thing in this is to strictly follow the instructions and recommendations, as well as make a little effort and be patient.

Advantages and disadvantages of a homemade device
Like any other device, a homemade miter saw, obtained from a hand-held circular saw, has its own characteristics and features. Some of them are positive, while others are negatively colored. One way or another, it is necessary to take into account both those and other signs.

Pros.
- The first and most important benefit of a homemade miter saw is the significant financial savings. So, buying a ready-made tool will cost you quite a lot (the average cost of a device is 10,000 rubles), and making a tool with your own hands from a material point of view is available to almost everyone.

- Another advantage of a hand-made device is the fact that all parameters of the saw (for example, cutting depth, speed, power, length and width of the base) are selected individually. Thus, this device will be more effective for personalized work than a purchased unit.

- In addition, having made the saw yourself, you will be well acquainted with all the constituent parts, which, in turn, means that in case of any breakdowns and malfunctions, you can easily repair the tool.

Minuses.
- Often, the available tools on the farm are used as starting materials for making a miter saw with their own hands. It should be noted that such materials are not always of high quality. That is why the life and quality of service of a homemade device can be very short and low.
- In order to make a unit, you must have at least minimal technical knowledge and skills. A beginner will not be able to cope with a task of this kind.
- Homemade trimming is not suitable for jobs that require high power saws. If you need just such a unit, then for its manufacture you will need professional parts, extensive knowledge and a fairly large amount of time. Thus, it is easier to buy a ready-made device.
- The miter cut, which you make yourself from a circular saw, will not have the proper safety indicators and may turn out to be traumatic during operation.

For more on how to make a miter saw from a circular saw, see the video below.


The comment was sent successfully.