Slab and Epoxy Tables
Epoxy furniture is becoming more popular every year. Users are attracted to her by a very unusual appearance. In this article, we'll take a closer look at slab and epoxy tables.
Advantages and disadvantages
Epoxy resin furniture in combination with other materials such as slab is insanely popular today. The most common tables are made from similar raw materials. They look very impressive and unusual. If you want to decorate the interior with something unique, then such furniture will be a winning solution.
Epoxy and slab tables, like any furniture construction, have their own strengths and weaknesses. Let's get acquainted with both the first and the second. Let's start with the pros.
- A table that is properly constructed from slab and epoxy is a very durable and hard-wearing structure. It will last for many years without losing its visual appeal.
- Such furniture boasts a truly beautiful design that is hard to take your eyes off.
- The considered pieces of furniture are resistant to mechanical damage. It will not be possible to break, split, scratch and somehow harm the table made of slab and epoxy. If you want to put strong and durable furniture in your home, then a table made of similar materials will be a good solution.
- The considered furniture structures are moisture resistant. This is a very good quality, since epoxy tables are often installed in the kitchen, where the humidity level is high.
- High quality slab and epoxy resin tables are highly durable. Together with durability and durability, this quality makes such furniture "not killed".
- Every single piece made of epoxy resin is exclusive, existing in a single copy. This is good news for people who want to brighten up the interior with rare and original details.
- Using different dyes in the manufacture of the table, you can achieve a very unusual and attractive color.
- Various elements can be used to decorate the table models under consideration.
Slab and epoxy resin tables are very high quality and reliable, and therefore attract many users.
However, such furniture is not without its drawbacks.
- Designer tables made from the materials in question are very expensive. If a large budget for the purchase of such an item is not planned, then it makes no sense to choose furniture made of epoxy resin.
- The technology for the production of epoxy resin and slab furniture is very complex and delicate. There is no room for error here. Even the slightest defect made during the manufacture of a table or any other item can lead to defects that cannot be corrected.
- When epoxy comes into contact with fire, it starts to release harmful substances.

What are they?
A table made of slab and epoxy can be different.
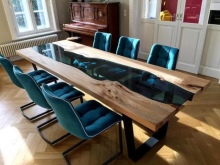
- Large rectangular dining tables look beautiful and impressive. Such a design will take a lot of material, but the area where the whole family gathers will be truly elegantly decorated with such a piece of furniture.
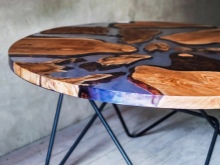
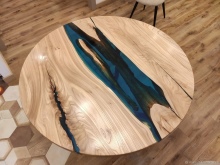
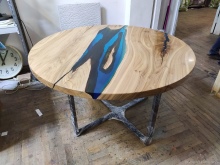
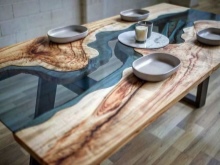
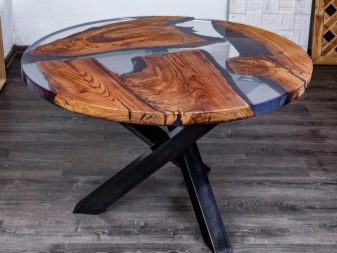
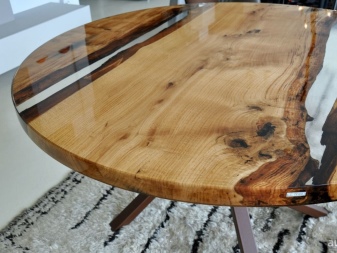
- Equally attractive is a slab and epoxy round table. This can be either a dining or a coffee table. Most often, such designs are made in combination with wood, as a result of which real works of art are obtained.
- These can be tables of an unusual abstract shape. Today such furniture is very popular because it looks very non-trivial. True, it is not suitable for all interior styles, which should not be forgotten.
The design of the table from the materials in question can be completely different. It can be either a classic or a futuristic design with non-standard shapes.
Manufacturing technology
A beautiful and reliable table made of slab and epoxy can be made with your own hands. You need to be prepared for the fact that making it is not as easy as it might seem at first glance. Remember not to make mistakes when working with epoxy.
Let's consider in detail and step by step the technology for the production of a table from epoxy resin and slab.
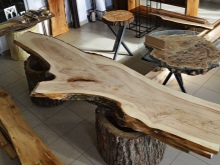
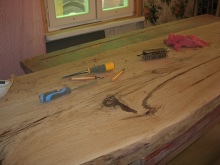
Slab selection and preparation
The first thing to do to make a table is to choose and prepare a slab correctly. Many craftsmen purchase this material at the nearest sawmills. For example, a cut of elm or oak is quite suitable for work. It is recommended to select materials that have a more pronounced woody structure. The material should be thick, dense, dry, with interesting edges.
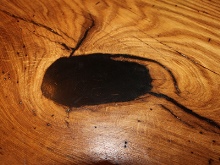
It is advisable to choose materials in perfect condition, without defects or damage. However, there are craftsmen who like the slightly rotted speck in the middle of the slab. It looks attractive and natural in its own way, so you should not be afraid of it.
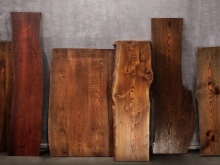
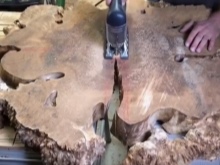
From the purchased material, you will need to cut the desired length, picking up a more structural part.
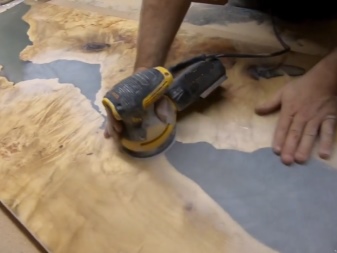
It is better to take on such manipulations with a special machine. They will be able to make neat cuts. Any irregularities that are present on the slab need to be sanded well. It is not recommended to do this with a plane.
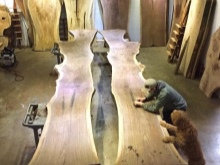
It will be necessary to remove the extra parts of the slab. This is the bark, the outer parts of the cut. After that, you can saw the wooden and prepared part lengthwise to get 2 halves.
Tabletop stabilization
The worktop can be successfully stabilized with metal. This is how it is done.
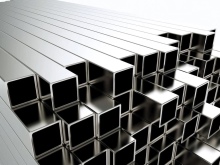
- Prepare 2-3 sections of a 20x20 mm profile pipe. The pipe length parameter should be 10 cm less than the part width parameter.
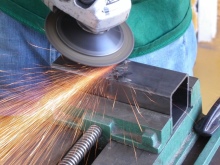
- Grind the pipes with a grinder. The grinding wheel must be P50.
- Treat the pipes with acetone. So it will be possible to degrease them and achieve, as a result, better adhesion with the adhesive solution.
- The grooves must be cut in the wood in accordance with the dimensions of the pipe. To carry out these works, a hand-held milling cutter will be sufficient.
- If the pipe in the groove does not sit tightly and firmly enough, then you can wind electrical tape on the ends of the pipes. This prevents the adhesive from squeezing the metal components out of the grooves.
- Add PUR glue to the groove, then insert the pipe so that it is flush with the top of the tabletop or slightly recessed. Leave the glue to dry according to the instructions on the package.
- When the composition is dry, remove the adhesive residues with a grinder, clean the top of the countertop.

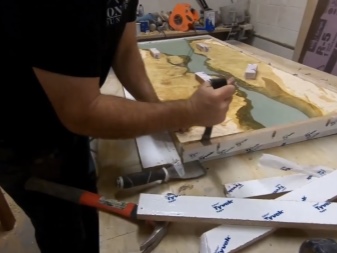
Assembling the form
To assemble the form for subsequent filling it will turn out like this.
- First, put a sheet of plastic on the work surface.
- Align the plywood sidewalls in accordance with the dimensions of the tabletop. Screw them to the work surface.
- Take the sealing tape. It will be necessary to glue the place where you will pour the epoxy resin, as well as all the seams - the areas of contact between the walls and the plastic base. This must be done so that the resin with its liquid consistency does not start to flow out.
- Now move the finished countertop into the assembled mold, fix it well. Press down using clamps and weights.
Resin handling
Epoxy will need to be poured in layers up to 20 mm thick. In this case, it will be necessary to withstand intervals of 7-12 hours. For this reason, it is advisable to prepare this material in portions. It should be borne in mind that the layer thickness indicator, as well as the time that will be spent on drying, are different for different products from different manufacturers, so it is important to study the instructions for all components.
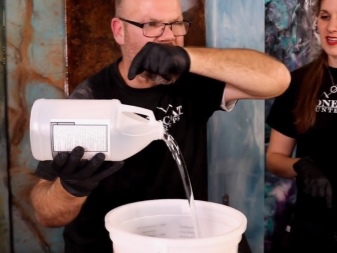
- Mix resin and hardener in a plastic container in the proportions indicated on the original packaging. Calculate the required amount of mixture for one layer. This can be done using an online calculator.
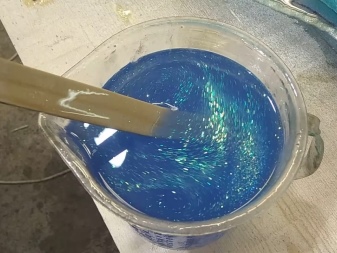
- Stir the solution very carefully and slowly using a plastic or wood stick. Stir for 5 minutes. It is important to do this without too much haste, act slowly, otherwise air bubbles form in the epoxy, and they are not needed there.
- Add a coloring component to the solution, as well as metallic pigments of different shades if you want to simulate the lava effect. It is enough to add a few drops of dyes. Mix the composition, evaluate the color and add more paints if the planned shade has not yet worked out.
Pouring and drying
At this stage, the progress of work will be as follows.
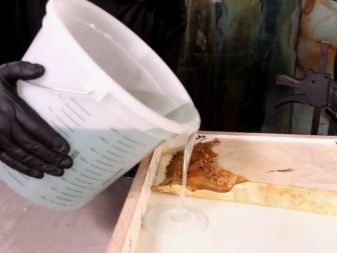
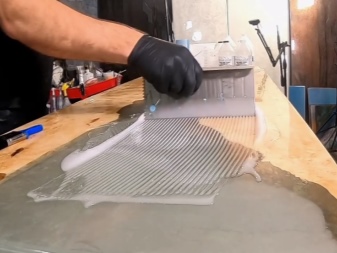
- Pour the resin into the lava bed. Distribute the composition. Make sure that it covers the entire desired surface.
- It is allowed to gently hold a stick over the epoxy to form some kind of drawing.
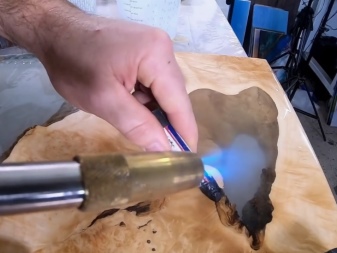
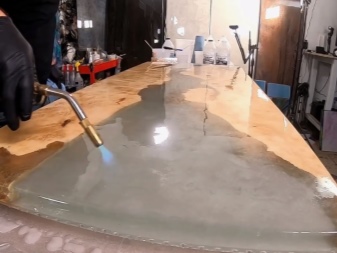
- If there are air bubbles, remove them with a gas burner. It should be moved with accelerated movements literally 10 cm from the surface of the material. Do not overheat the resin, otherwise it will boil and will not be able to harden.
- Fill any cracks or knots with epoxy with a wooden or plastic spatula. After a few hours, this procedure will need to be repeated again.
- Let the resin dry until it becomes sticky. It will take 7-12 hours.
- Then pour in the second and third layers of resin. The layers should be 10 mm. You need to proceed further in the same way as when laying the starting layer. The final filling should be done with a small margin, since a certain percentage of the epoxy will have time to be absorbed into the slab.
- When the final coat is poured, let the epoxy cure until the end. This takes different time, but most often 48 hours.
Finishing works
Consider what finishing work will be needed to complete the manufacture of the table:
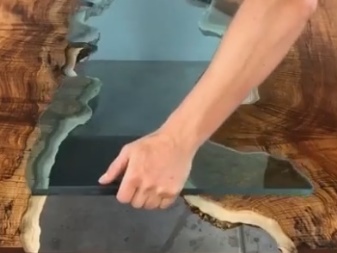
- when the resin is completely polymerized, it is necessary to disassemble the walls and the casting mold;
- using a grinder with a P50 disc, it is necessary to remove all resin smudges and clean the surfaces on both sides;
- using a special plunge-cut saw, it is necessary to cut off the end parts to make even edges;
- sand the surface of the wood (abrasive P60, 100, 150, 200 is suitable), make a chamfer around the perimeter.
The top layer should be poured according to the following scheme.
- A clear resin is prepared. The volume should be sufficient for pouring the countertop into a layer of 6-10 mm.
- The solution is poured onto the base coat, spreading well.
- Air bubbles are removed with a burner.
- Allow the resin to harden. After 48 hours, grind the finished surface with grit up to P1200.
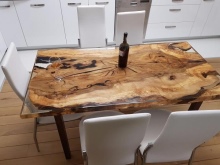
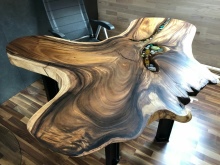
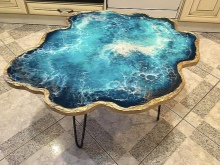
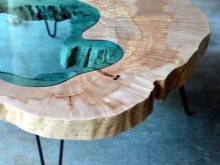
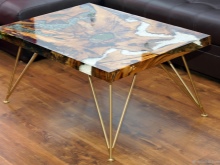
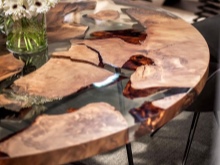
Beautiful examples
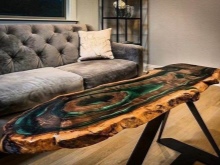
A well-made table made of slab and epoxy resin can become a real work of art. Such furniture is rarely ignored, because it looks amazing. Let's look at some beautiful examples of such furniture.
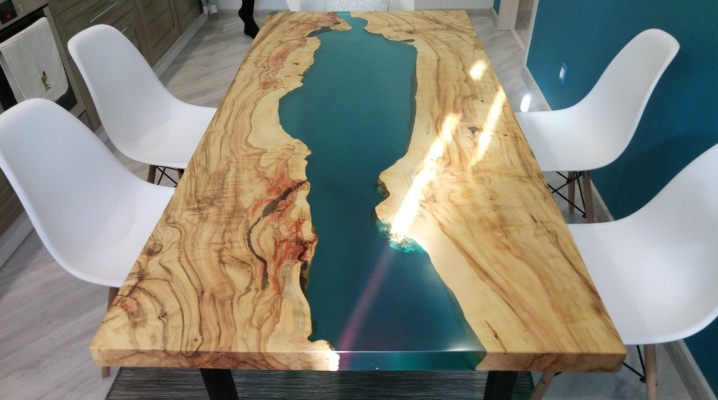
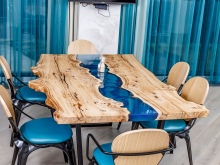
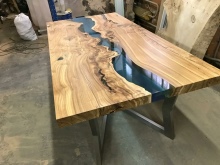
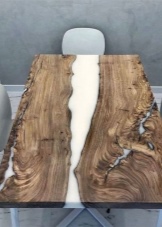
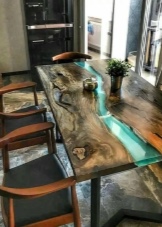
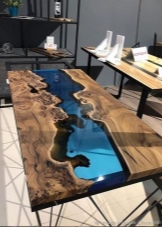
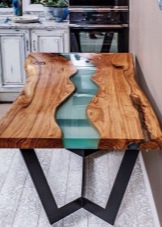
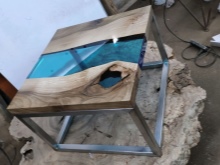
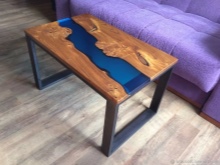
- A very interesting look will have a small coffee table with a rectangular table top, in which the tree is divided into 2 halves, and between it a blue-turquoise epoxy mole "spreads". Such furniture will look especially attractive if it is made of wood of light shades.

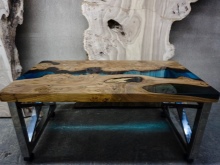
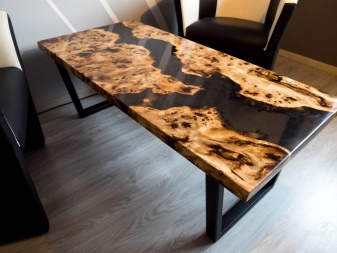
- An unusual solution is a table made of a slab with a slight burning effect and epoxy resin with a dark pigment. A similar structure can be placed on black metal supports. It will turn out to be a wonderful model of a table for a loft style.
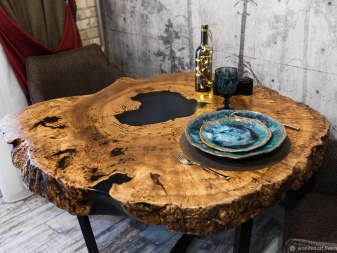
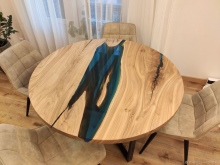
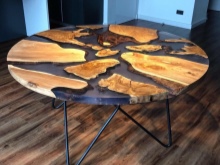
- When making a luxurious table from slab and resin, it is not at all necessary to use paints and pigments. A small table with a round table top, in which a slab of wood is diluted with transparent epoxy inserts, will look interesting and stylish.Original furniture can be complemented by crisscrossing square legs made of black painted metal. A similar table is also suitable for a loft-style loft.
Watch the video on how to make a table from slab and epoxy with your own hands.


The comment was sent successfully.