Do-it-yourself Whirlpool washing machine repair
The washing machine is one of the most demanded and necessary technical devices in the household. Any housewife will say that this technique can significantly save time and save the delicate skin of women's hands from the destructive effects of hot water and washing powder, as when washing by hand.
One of the most famous brands that produce washing machines is Whirlpool. The brand's products have won the sympathy of housewives around the world due to their ease of management and operation, reliability and practicality. But any technique can break down. Let's try to figure out what problems there are, and how to fix them on our own with our own hands.

Design features of Whirlpool washing machines
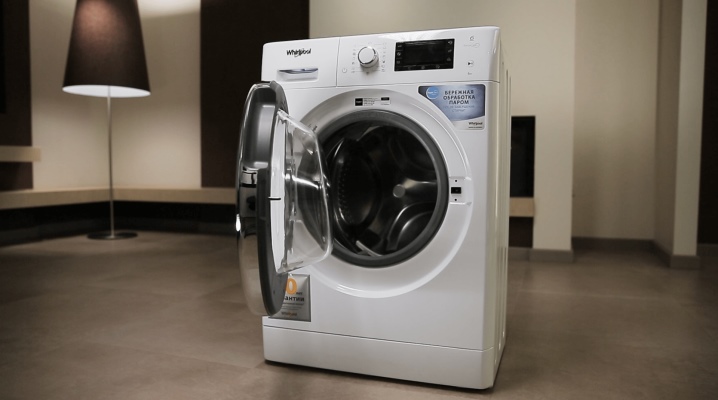
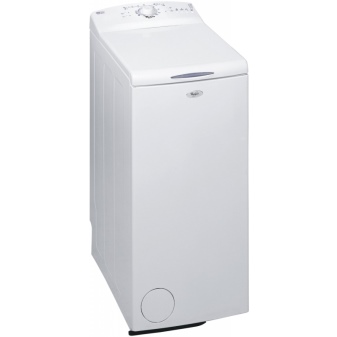
Structurally, Whirlpool washing machines are not too different from similar equipment that is produced by other well-known brands. The manufacturer from the USA has two types of washing machines in the assortment:
- front loading;
- with vertical loading.
Thanks to this, the user has the opportunity to find a convenient solution that will satisfy his needs as much as possible. To understand some of the technical features of a particular model, as a rule, is possible only if there are drawings, and then only in the context of the location of certain elements or parts inside the device.
There are no serious differences between these types of machines - they can only be in the technology of loading the laundry.
Causes of breakdowns
It must be said that not all problems the Whirlpool washing machine can notify its owner by highlighting a certain code on the display. There are some basic problems that sometimes arise for various reasons. Let's try to figure out what these phenomena are and how they can be caused.
- Water leaks. This is usually caused by a buildup of dirty fluid in the cuff. If it is not removed, then over time the cuff becomes thinner and torn or burst. You should carefully pull back the central part and inspect its condition. If necessary, the part should be replaced.
- The device does not heat up the water. Here we are dealing with a malfunction of the heating element or thermistor. To find out how they work, you need to measure the resistance of the contacts of these elements using a multimeter.
- Control Panel Problems... The point is that the program selector knob does not work, or the required information is not normally displayed on the display. This malfunction may be associated with a malfunction of the control board or indicate that the microcontroller is faulty. Usually, it is not possible to fix this problem yourself - you need to contact the service center.
- The device does not drain water... This may be due to a clogged drain pipe, hose, drain filter, or an electrical drain pump has failed. Usually the problem is solved by checking and cleaning the specified elements or by replacing them.
- Noise in the typewriter during operation. Usually it appears due to the ingress of some objects into the drum, as well as if it is necessary to replace the oil seal or bearing, because often the mentioned parts work as a shock absorber. Here you will need to completely disassemble the device and dismantle the drum.
- Spontaneous opening of the doors, as well as corrosion of the top cover... These issues are specific to top-loading brand models. In this case, you can change the cover and the necessary elements at home.


Naturally, these are not all breakdowns that can be, which will be discussed in detail below.
Diagnostics
Speaking about diagnosing problems with Whirlpool washing machines, let's say that for the most part, certain problems can have several causes, and if you know about this, then, in principle, it is possible to find the cause yourself. True, there are also problems that are extremely difficult to identify yourself.
For the most part, we are talking about about problems with the control board and microcontroller. In this case, you will have to contact the specialists of the service center because they have special devices that can quickly check the performance of these elements and their serviceability.


Required tools and spare parts
Everything here will depend on what problem the user is facing. That is, in which case a cross or a belt may be required, and when - brushes and drum flanges. In general, everything is individual.
If we talk specifically about the necessary tools, then in any case, you will need to have on hand:
- flat head screwdriver;
- Phillips screwdriver.
If you have to work with electrical elements, then you need to have a multimeter on hand and something to clean the contacts. But this short list is good enough. In some serious cases, it is better to entrust the repair of the device to a specialist of the service center.


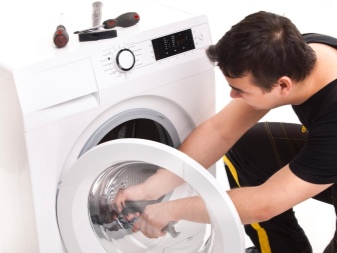
Disassembling the case
Let's try to understand how to disassemble the body of the Whirlpool machine. Let's consider the algorithm of actions.
- First, dismantle the top cover of the device. It is held in its standard position by several bolts located at the top of the rear panel. When they are unscrewed, you need to press down the cover from the front and lift it.
- Now you need to remove the powder tray. There is a special plastic key here, which is usually located in the center of the tray. We press on it and pull it towards us, after which the element should come out of the grooves.
- We remove the control panel. It is secured with a pair of bolts. The first is located directly under the powder tray and the second is on the other side of the panel. Unscrew the bolts. Now you need to carefully dismantle it and put it on top, because it is still connected to other elements by cables. They need to be carefully disconnected.
- We dismantle the service panel. There is no need to unscrew anything here. It is enough just to press on 2 latches, which are located on the sides, and on the third, located in the middle.
- The next step is to dismantle the front wall. It is necessary to remove the rubber clamp located on the loading hatch. It is held in place by a small spring that must be tucked in. The cuff can now be removed in a circular fashion using pliers and screwdrivers. Then you need to find all the latches that hold the front panel. In addition to them, there are special hooks here, and in order to dismantle them, the panel must be carefully lifted.
- It remains to pull out the back. This is done very simply - you need to unscrew the fixing bolts that are located along the perimeter of the device.


Typical malfunctions and how to fix them
Before repairing, the equipment should be prepared, namely: disconnect from the mains, and turn off the water supply valve.
The first and most common problem is the failure of the device to drain water after washing. There are usually three reasons for this:
- clogged drain or filter;
- pump malfunction;
- blockage in the drain or hose.


First you need to unscrew the filter. It is located in a small compartment under the loading hatch. Open the door, substitute the basin, unscrew the filter plug with counterclockwise movements. We are waiting for the water that remains inside the device to be drained.We remove debris from the filter mesh and inspect the pump impeller. If it is blocked, then it should be cleaned of debris.


Check the hose. If it is clogged with debris, then we clean it. If everything was done, but the drain did not get better, then you should pay attention to the pump and the pipe. For this we put the machine body on one side, after which we take out the powder dispenser and unclench the pipe clamp.
It should be dismantled, cleaned from blockages and rinsed with warm water. Now follows check the pump – if it is faulty, then a replacement is carried out. To do this, disconnect the wiring from the pump contacts and unscrew the bolts that hold the pump.


Another common problem is that the machine does not heat the water. A special element - heating element - is responsible for heating. Often scale forms on it, which becomes the cause of its breakdown. To check or replace this part, follow these steps:
- remove the top cover by unscrewing the screws at the back;
- remove the back cover by unscrewing the bolts that hold it;
- turn off the wiring, take out the thermistor from the heating body;
- we check the health of the heater;
- if it is broken, then unscrew the nut located in the center, and then push the bolt inward;
- take out the old heater, clean its socket from scale and debris;
- we install a new heating element.


Another common problem is that the spin does not work. This can be caused either by faulty motor brushes or by problems with the drive belt. In motors of the collector type, the current flows to the rotor through the brushes located on the sides of the housing. The brush shafts are quite soft and wear very quickly, which is the reason for work stoppages. To check their status, you need to perform the following actions:
- we remove the back wall of the machine;
- remove the drive belt, which should be inspected - if they are stretched and worn out, it should be replaced;
- if the primary replacement of the brushes is carried out, then it will be better to get the engine out of the case;
- unscrew the bolts, disconnect the wiring;
- now you need to disconnect the brush terminals, then pull the brushes out of the case;
- if there is severe wear, then the brushes should be replaced, and then the wiring should be connected.
By the way, bearing wear can be the cause of spinning problems.


It so happens that the Whirlpool washing machine simply does not turn on. This could be caused by a problem with the control board. Repair will require knowledge of electronics, as well as control board circuitry. But it is better to entrust this work to a specialist. And for inspection, you need to do the following:
- remove the top cover;
- get out the powder tray;
- unscrew the screws located around the perimeter of the control unit;
- disconnect the wiring;
- dismantle the upper protection by unfastening the latches.
If there are oxidations and burnt spots on the surface of the board, then this means its malfunction.


It also happens that the device for some reason does not collect water, although there is water in the tap. There can be only two reasons for this:
- Gulf valve malfunction;
- the filter of the inlet hose is clogged.
The filter can be easily cleaned if desired, although it is usually simply replaced. The same goes for the filler valve.


It is quite common to encounter the problem of casing corrosion, which can lead to leakage. Let's say right away that damaged panels should be replaced, and painting the situation will not solve.
One of the reasons for the leak can be damage to the hatch cuff, because rubber is very sensitive to long-term accumulations of moisture. If you do not wipe it in time, the cuff will wear out, crack and, as a result, will leak. And here only a complete replacement can help. To make it, it is necessary to bend the seal, then pry the clamp with a screwdriver and remove it. Now you need to fill the rubber inside the drum.
To remove the inner clamp, either dismantle the front panel or loosen the clamp screw through the top cover. The rubber can now be carefully removed.Installing a new one will be done in reverse order.


Repair Tips
The first important tip to delay repairs as such is to take care of your Whirlpool washing machine as thoroughly as possible while in use. The same rubber seal must be wiped dry after each wash so that it does not wear out faster than it should.
The mechanical parts of the washing machine must be lubricated at least periodically in order to ensure their high-quality and reliable operation over a long period. In addition, when carrying out any repair work, you should not only have a diagram of a specific model of the manufacturer in question at hand, but also clearly understand what exactly you are doing and why. Without blueprints for your existing Whirlpool washing machine, there is a high chance that repairs may be done incorrectly or incorrectly, which will only worsen the breakdown.
If you wish, you can talk to a specialist from a service center located near your home.

For repairing your washing machine, see below.


The comment was sent successfully.