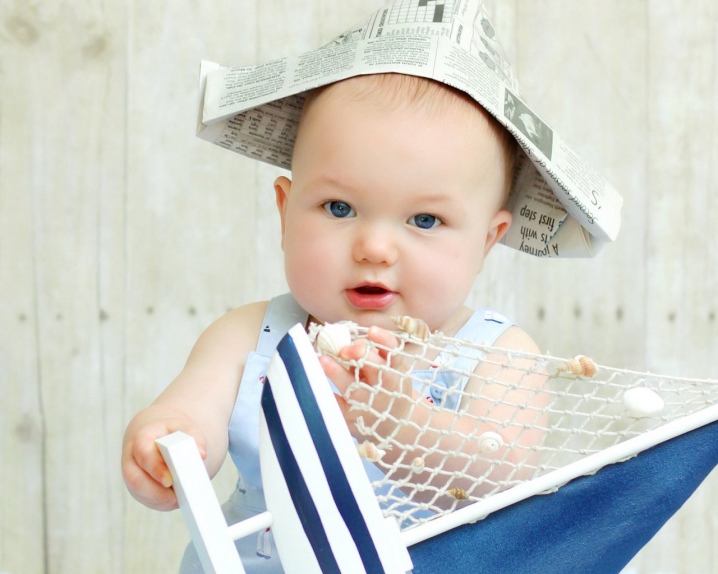
How to make a newspaper hat?

Repair work is a very easily soiled business, and the craftsmen are very interested in ensuring that dust and paint at least do not get into the face. One set of clothes will be ruined in any case - most likely, no amount of washing will help to restore the original cleanliness of things. In this case, the maximum load, of course, would lie on the headgear, which should always be on the head - even if there is no dirt, when working on the street, it protects a person from the sun's rays.
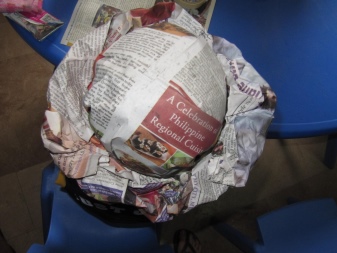
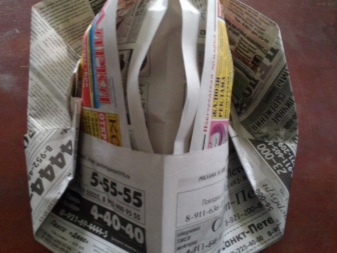
Real hats would have to be changed too often to keep the hair from getting dirty, and it would be too expensive. Back in Soviet times, our fellow citizens came up with a win-win, simple and cheap way to design hats from improvised material - newspapers. A properly executed design turns out to be durable enough to last until it is completely dirty, and at the same time it costs nothing - most people buy newspapers, and hats are made only from old, already read copies.
Tools and materials
The simplest version of the headgear, widely used by domestic builders and repairmen for many decades, does not require almost any materials and devices. All that is required is an ordinary large-sized newspaper and the corresponding skills, because making a simple painter's hat is pure origami.
In today's world, where the Internet allows people to create and share their creations with the whole world, there are many options for paper hats.
It will not be difficult to find any arts, up to a cowboy hat from a newspaper with a step-by-step description of the manufacturing process. Of course, such a task will already be a little more difficult, and more materials and tools will be needed - in addition to a newspaper, you need scissors, glue, paints, decor, and so on. But you can refuse to decorate the headdress, focusing on its practicality - for example, add a visor to the hat, which additionally protects from the sun.
Methods for making hats
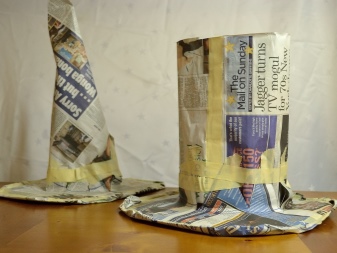
You should not take paper design purely as a way to solve current construction problems - in fact, you can make any hat from a newspaper with your own hands, up to Napoleon's cocked hat. On the street, of course, you are unlikely to walk in this, but you can please the kids a lot. If you get down to business creatively, do not be too lazy to properly assemble and glue the hat, paint it in the appropriate colors, then it will be quite suitable for theatrical needs, and even for some kind of carnival. In skillful hands, ordinary paper sheets turn into real works of art, and although you are unlikely to succeed in making them beautifully right away, the training material is not so expensive so as not to at least try.
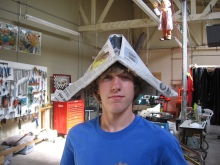
Painter
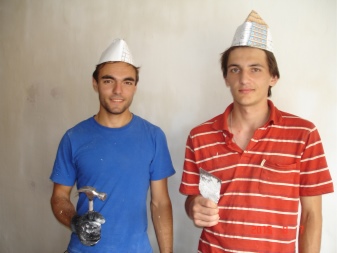
Probably, it was the painters who were the first to invent newspaper caps - they have such a specificity of work that during the repairs carried out on a daily basis, the hair should be especially carefully protected from contamination.
It is clear that the masking cap would have to be changed out of respect for oneself every day, because the folding scheme is extremely simple and does not imply any complex manipulations.
Anyone can build a construction hat for any household work or joke - especially for this, we have prepared step-by-step instructions:
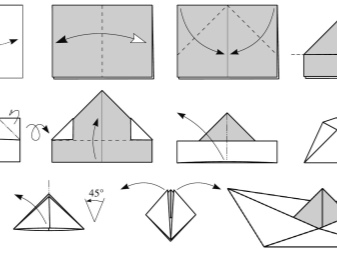
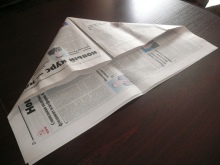
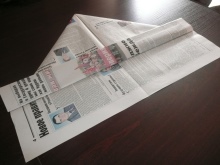
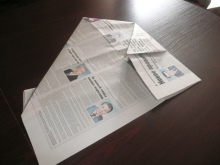
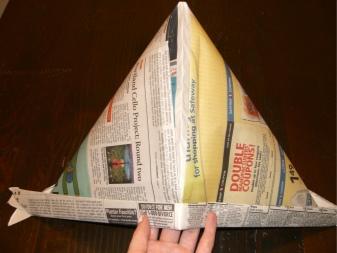
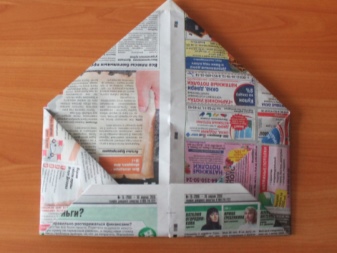
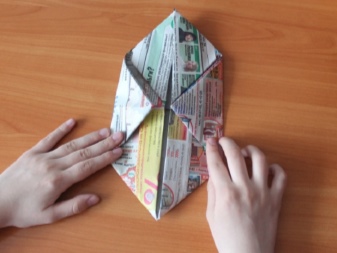
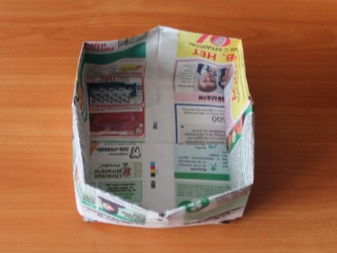
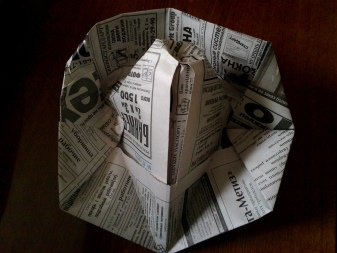
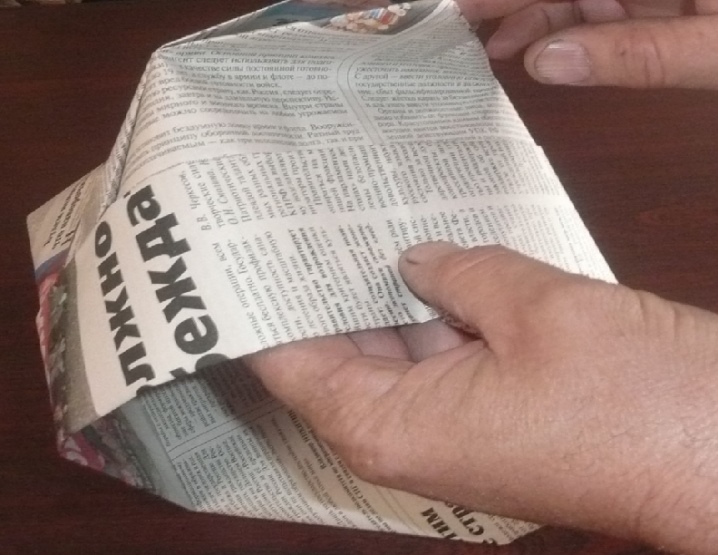
- take an ordinary double newspaper sheet and fold it in half, and when a fold line forms, lay the sheet flat on the table so that the fold protrudes upward;
- the upper corners obliquely from the fold line to the edges of the sheet are wrapped inward - so that their tops are in close proximity to each other;
- in the lower part, wrap the top of the newspaper sheets twice with a small strip upward, carefully smooth out the formed seams;
- turn the workpiece over to the reverse side and double-fold the sheet that has not yet been subjected to such an operation with a strip;
- bend the protruding side corners so that they do not protrude, level;
- wrap the edges of the resulting workpiece inward - this will help the product maintain the correct shape during wear;
- all that remains is to straighten the product - and it is ready for use as intended.
The special charm of this design is that during the repair process you will not take care of it at all, which means that you will be able to concentrate on completing the main task. Due to dirt, sweat and trivial wear and tear, such a product will deteriorate regularly, but this will not be a problem either, because a new copy can be made in one minute, and one issue of the newspaper is enough for several of these paper hats.
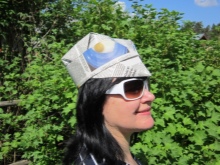
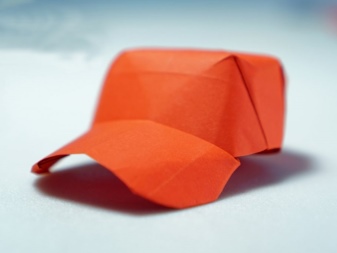
With a visor
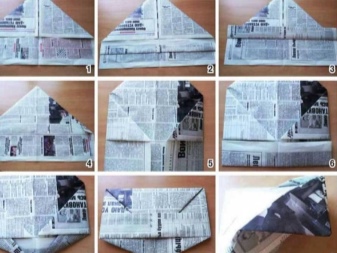
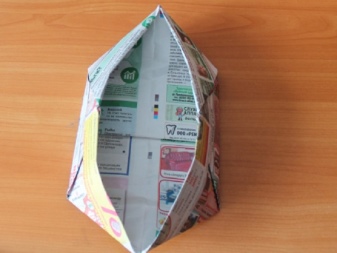
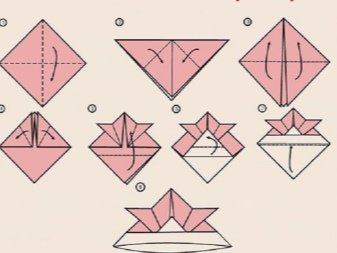
The above-described version of the "boat" already allows you to cover your head, but still does not solve the problem of protecting your eyes from the bright sun. The Soviet school of origami and applied repair offers a solution to this problem as well, and a diagram of how to fold such a hat out of paper step by step is in front of you:
- spread out a double sheet of paper on a flat surface, bend the two upper corners on it and align their edges;
- the lower part of the top sheet is folded upwards, and then this procedure is repeated with an overlap, but only on one side of the future cap;
- turn the workpiece over, bend the protruding corners of the already wrapped layer inward again;
- along the edges, the edges are folded vertically;
- tuck the bottom with a small strip, then bend it again, but at a slight angle, and fix it by tucking it into the existing folds;
- turn the layout over to the back side and fold its upper corner in a horizontal plane, tuck in the top of the cap;
- the resulting structure, after straightening, has two corners - one of them will need to be wrapped and hidden in the folds, and on this the newspaper headdress is ready.
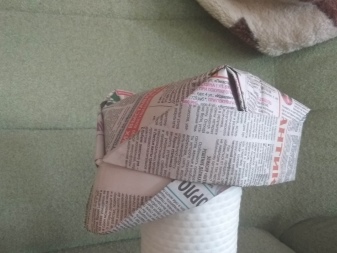
In addition to protection from the already mentioned sunlight, the visor is also useful in that construction dust and debris fly less into the eyes with it.
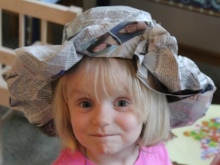
In some cases, a similar headdress is made for the entertainment of children., but then the end consumer will certainly want additional decor, so the product must be made immediately from colored paper or subsequently painted.
Other
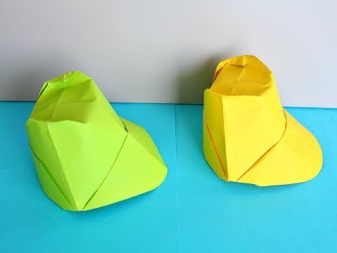
One of the most popular newspaper headwear for a beginner that does not involve the use of glue is a skullcap. The scheme is very similar to the one used for the manufacture of a regular triangular paint brushes cap, only the outer corners are not bent - instead, the upper corners are turned off near the middle so that the workpiece is in the shape of a trapezoid. It should be noted that this the headdress is oriental, and for greater authenticity it is often painted with beautiful patterns... Considering that such a "garment" requires a significant expenditure of energy, good skullcaps are made from quality material, such as very thick, printed paper.
The same skullcap, which is almost ready to be worn, can be turned into some other headdress with a slight movement of the hand. at the last stage of folding. There are triangular protrusions on the sides of the almost finished workpiece - pull them out, and you will have a cap - the same one that jesters wore at one time.
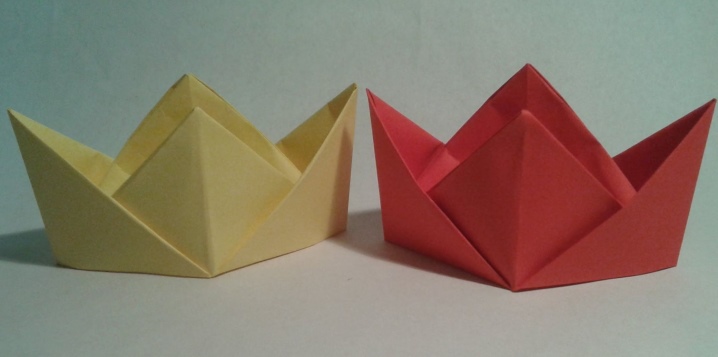
Stretching out the third ledge, as well as straightening the corners, you suddenly find yourself holding an academic cap in your hands - like those in which students like to take pictures.
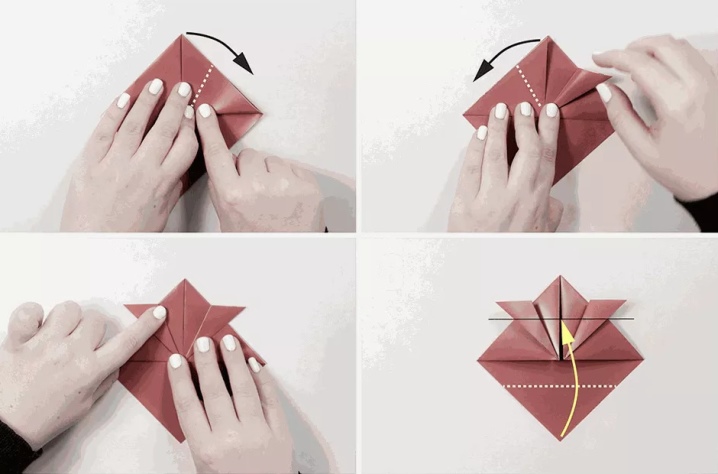
A cowboy hat can be bought in many supermarkets today, but why spend money if you have an old newspaper and a creative urge. To make a brimmed hat, follow the following sequence of steps:
- fold a newspaper or magazine sheet in half;
- bend the resulting rectangle along the center line so that the fold is drawn clearly, then unbend the workpiece again;
- turn the corners from above to the center so that they touch each other;
- from the bottom, tuck a strip of sheet towards the bent corners;
- after that, turn the workpiece over and do the same;
- on the sides, make one more wrapping - if everything is correct, you will get a complex figure in the form of a house (a triangular "roof" over a rectangular "building");
- stretch the central part of the product so that you get a square, bend the opposite corners to the center so that they form a diagonal bend - a triangle will come out again;
- in the resulting triangle, the central points are stretched again, and then the workpiece is unfolded, receiving the next square at the output;
- after that, it remains only to stretch the corners of the upper part, but not to get carried away much at the same time - otherwise the same "boat" will be formed, only with the sides of increased height.
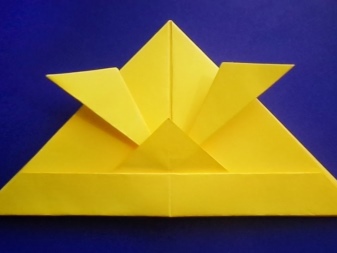
Another simple hat paper craft that does not involve the use of scissors and glue is a samurai helmet. It would be strange if origami did not play up the Japanese theme in any way, and for children this color will definitely only be an advantage, so consider the instructions for this case as well:
- take a square piece of paper - a square is needed to make a samurai helmet;
- the existing sheet must be folded diagonally twice in succession - you get a small triangle;
- in this triangle, the sharp corners must be folded together, after which the bottom of the outer layer must be bent up;
- the resulting folds must be bent on both sides;
- at the top strip, fold the bottom so that it is slightly lower than the planned bottom of the product;
- wrap the bent corner with the bottom layer of paper;
- turn the workpiece back and wrap the bottom - that's all, the design is ready.
Naturally, with all the imagination, without the help of scissors and glue, it will not work to make a huge variety of different hats out of a sheet, but if you also connect the above tool to the case, then the creator's flight of imagination can be almost unlimited. At the same time, as a rule, no one glues anything from newspapers, because the complex process of cutting and gluing assumes that the result will be something aesthetically attractive.
However, the first time a beginner will still not succeed perfectly, so it makes sense to start practicing on the newspapers.
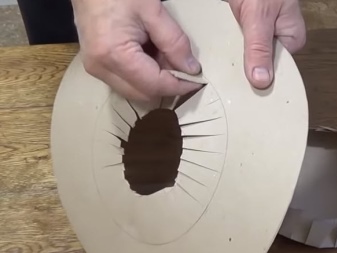
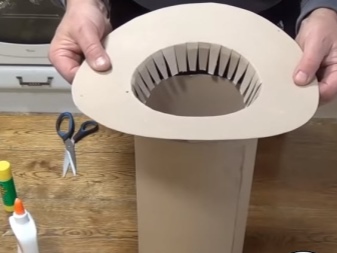
You can start with the classic cylinder:
- cut out a rectangle of the required height from paper, wrap it in a tube so that the edges overlap each other;
- cut one of the sides of the future cylinder with two-centimeter cuts with a distance of 1-2 centimeters between them;
- on thick cardboard, draw two circles of different sizes, one inside the other, with a common center for both, and the inner circle should be equal to the diameter of the glued circle;
- cut out a cardboard "donut" and paint on it;
- pass the cylinder into the bagel so that the cuts are at the bottom, grease them with glue and bend them, gluing them to the crown;
- the remaining "middle of the donut" can be made with the top of the cylinder by gluing it using the same fringe method;
- you can hide the gluing places with a second layer of cardboard.
Recommendations
Depending on what kind of headdress you make, you need to choose the material for its manufacture. It is clear that for the "production" of a repairman's hat, usually those materials that will be at hand are used, but in fact it is worth remembering that even for them you should not choose too soft or thin paper - it will not keep its shape. Because of this, very delicate material should be weeded out right away, unless you want to constantly correct and "repair" your own designed cap. However, the average sheet of paper from a newspaper or magazine must meet durability requirements.
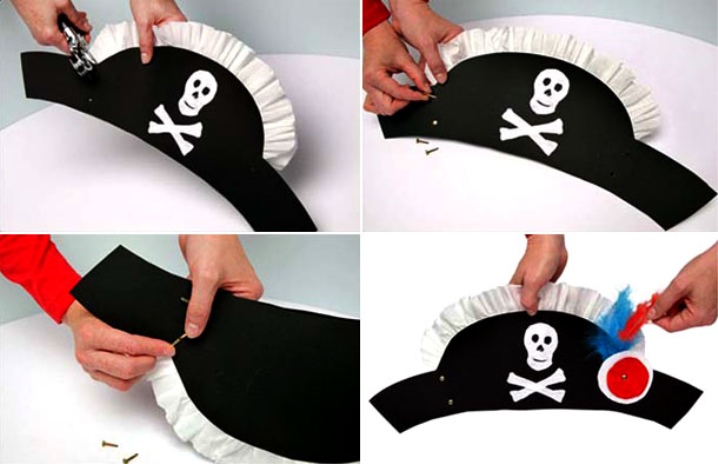
If you decide to go even further and, in your creative impulse, even undertook to glue a hat from cutouts according to patterns, then it is very important that the final result keeps its shape well, is similar to the original one and is generally preserved. If children's panamas are still made from newspapers, then the same garrison cap is often constructed from a dense plain sheet, more often green or blue. Children's caps are made from wrapping paper or even whatman paper. Stage sets, such as cowboy hats or pirate hats, are already made of cardboard to withstand childish pranks.
How to make a hat from a newspaper, see below.


The comment was sent successfully.