Subtleties of repairing vacuum cleaners Electrolux
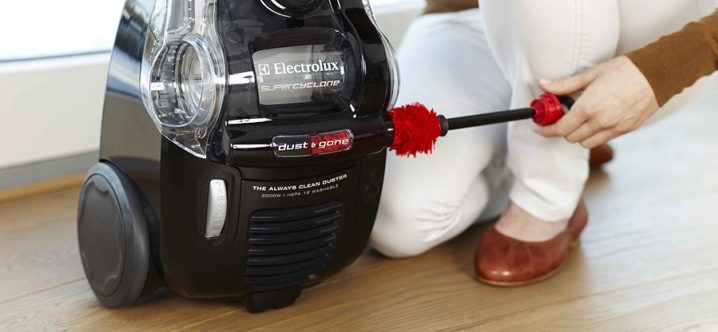
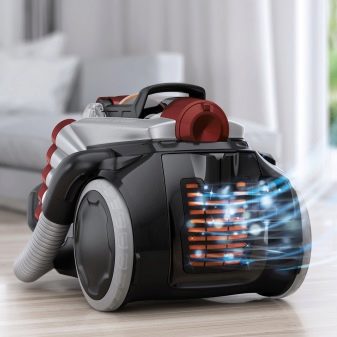
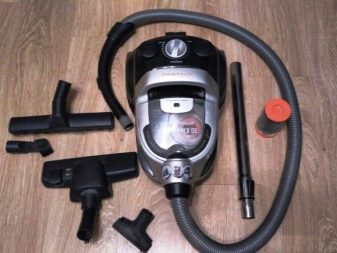
A vacuum cleaner is one of the most essential devices in every home, without it it is incredibly difficult to cope with cleaning the room. However, such units often break down, and many owners have to resolve the issue of repair. This article will focus on Electrolux equipment and methods for self-disassembly of devices.
Peculiarities
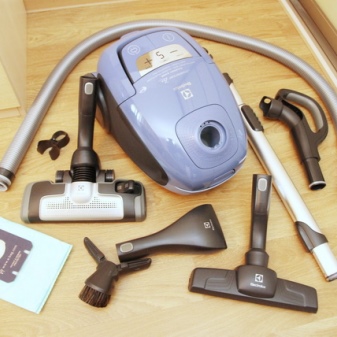
The Electrolux vacuum cleaner has many models, but they are all similar in their internal composition. The only difference between different models may be:
- brushes;
- filter;
- frame;
- a container that collects dust.
An Electrolux vacuum cleaner will last for many years if properly cared for. In the event of a malfunction, it can be disassembled for DIY repair.
Diagnostics of work
Before starting the repair, you need to figure out what kind of breakdown happened:
- the problem may be mechanical, such as a clogged filter, a broken hose pipe or wire;
- it is also quite easy to damage the body itself with the help of the impact force;
- the most common mechanical failure of all vacuum cleaners is the wear of bearings, brushes and nozzles;
- the malfunction can also be electrical: the collector sparks, the contacts of the electrical board are damaged, or the graphite shield of the engine is worn out.
Before disassembling the vacuum cleaner, make sure that it is really broken, because due to simple overheating, it sometimes temporarily stops working. For example, Electrolux ZV 1030 has some features, it has a bimetallic plate that turns off the technique in case of engine overheating.
Disassembly
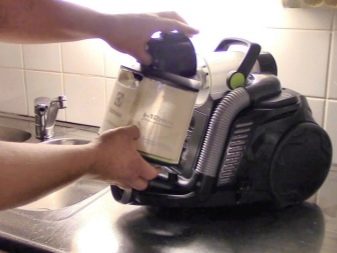
To disassemble a standard Electrolux vacuum cleaner, it is necessary to do this in several stages.
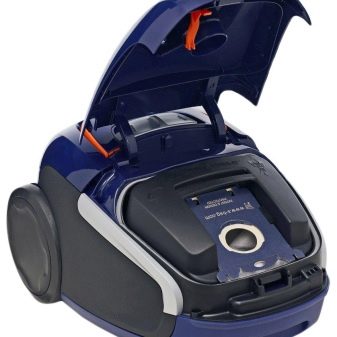
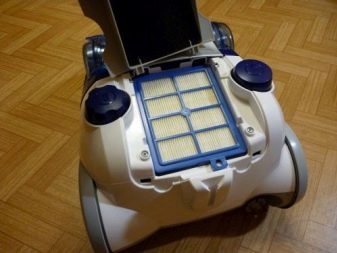
- Open the cover of the compartment where the dust container is located, then unscrew the screws and remove the plastic grill. Pay attention to whether the grille is secured with additional screws. If so, you need to unscrew them and remove the grille.
- Remove the dust container cover and take it out. Consider how the dust bag is attached. It can be fastened with simple latches or screws.
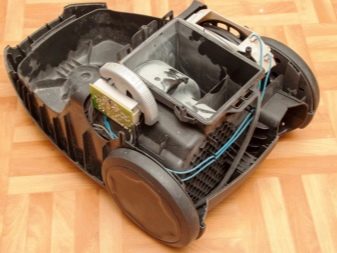
- Then separate the housing from the base and remove the filter that separates the inlet and the motor.

When performing all actions, be careful, look at the presence of all screws and gradually unscrew them before pulling the parts out of the case. After that, you need to carry out a few more showdowns.
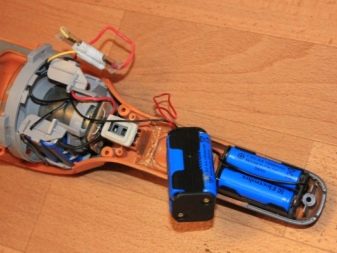
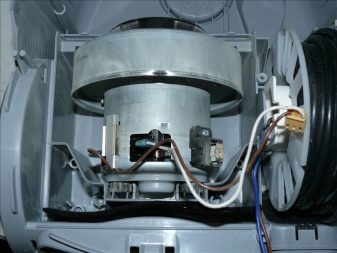
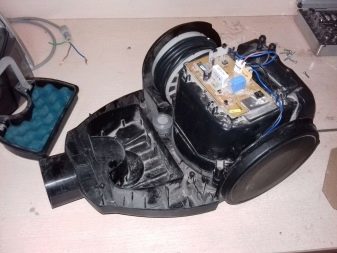
- Disconnect the motor from the wire, unscrew the screws that secure the motor.
- Disassemble the engine itself by pulling out the casing using thin pliers or another thin object, a screwdriver will do.
- On the engine fiber, you will notice a special glue that lubricates the nuts. Apply glue solvent to the nuts and wait for it to work. Then unscrew the nuts with pliers or a wrench.
ErgoSpace
It is also not too difficult to disassemble the Electrolux ErgoSpace model. It has automatic monitoring of the filter and dust collector condition. The vacuum cleaner of this model has a double body, an electric motor, a power regulator board, and a reel with a power cord.
To disassemble the technique of this model, you must first unscrew the screws under the cover of the dust container compartment. Then, carefully remove the top cover without jerking so as not to damage the power switching boards. Next, pull out the motor and dust container. After disassembly, diagnose and investigate the problem.


ZTF7615
When disassembling this model, follow this plan:
- use a screwdriver to unscrew the four screws that are located at the bottom of the case;
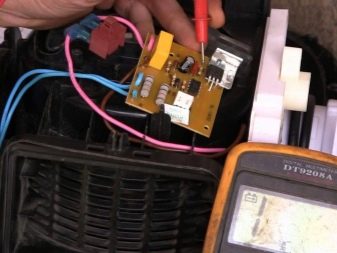
- remove the case and unscrew the screw that secures the power switch board, then carefully remove the board itself;
- unscrew the screws that secure the engine and carefully pull the engine out;
- After completing these simple steps, inspect the motor.
UltraSilencer
It is very simple to disassemble such a vacuum cleaner, for this you need to pull out the filter located under the handle, unscrew the screws on the control handle and remove it, and then unscrew the top cover. Pull out the lid along with the dust bag and remove the handle. After that, remove the case itself and inspect the parts inside the equipment.


Subtleties of repair
If your cord does not wind up well or the winding reel does not work, inspect the reel itself and its mechanical trigger. Inspect the device for debris, which is often the reason for poor wire rewinding. Use scissors or fine pliers to remove it.
If your vacuum cleaner shuts down without even running for a few minutes, the problem lies in the overheating of the motor. Here you need to inspect the dust collector itself, clean it if necessary, also check all the inputs and outputs of the filters. If you wash the filters, make sure they are free of moisture. Moisture can be the cause of the shutdown of equipment.
If you cannot adjust the power of the vacuum cleaner, check the circuit and inspect for mechanical damage. Often the cause of this malfunction is the destruction of the power control knob itself.
One of the common breakdowns is engine contamination. If this happens, you will hear extraneous noise inside the equipment or a strong whistle. It is necessary to disassemble the vacuum cleaner, remove the motor and inspect it. If you see dust on it, this is the reason for the incomprehensible noise inside the equipment. Clean the motor using a regular brush.
If, when examining the disassembled vacuum cleaner, you notice that the filter or brush is worn out, they must be replaced. They are inexpensive, you can buy them in a special store.
After repairs, you need to reassemble the vacuum cleaner in the reverse order. First fasten the motor and the dust container, be sure to screw the parts tightly. Connect each terminal, install the power switch board, and bolt if present. After all parts are in place, close the case. Secure the case with screws and be sure to collect all the parts and bolts, inspect if there are any little things left outside. Then turn on the vacuum cleaner and check its operation.

Exploitation
Remember that the Electrolux brand vacuum cleaner is a quality technique, made to last. The units are durable and wear-resistant, but only under the condition of correct operation.
- Use the equipment correctly, for example, do not vacuum in the garage or on the stairs, where there are many stones - this can damage any device.
- Do not let the device overheat, it should "rest" every 15 minutes. As soon as it cools down, the vacuum cleaner can continue to work. Many Electrolux vacuum cleaners have a built-in overheating control and turn off automatically.
- Systematically you need to take care of the components of the vacuum cleaner. The dust bag must be cleaned after each use. Check all filters, gaskets and hoses regularly and also dust them.

For repairing the Electrolux Cyclonic vacuum cleaner, see the following video.


The comment was sent successfully.