Subtleties of Bosch vacuum cleaner repair

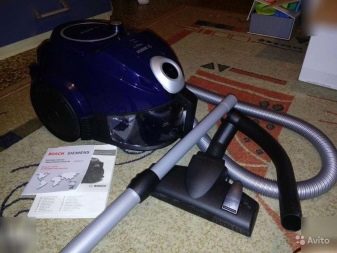
Complex household appliances, including those from the world-famous Bosch brand, require special attention, since with prolonged use, deviations from normal operation and malfunctions of certain mechanisms and component parts of devices may appear. In this regard, the question of the production of maintenance and repair at home becomes relevant. This article discusses the stages of repairing Bosch vacuum cleaners at home.
Preparatory stage
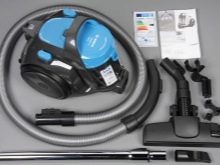
Initially, for the maintenance and repair of vacuum cleaners, it is important to have documentation, where there must be an electrical circuit. These attributes are an integral part of the repair of complex household appliances. A prerequisite for performing repair work with vacuum cleaners is the presence of a special tool. In this case to repair Bosh equipment you will need: screwdrivers (flat and cross-shaped), Torx wrenches, pliers, round-nose pliers, a set of heads of various sizes, a soldering iron with solder. In addition to the tool, you need to prepare a sufficient amount of machine oil (household), graphite grease, grease for electrical circuits.
In order to disassemble the vacuum cleaner, you should prepare the place. A flat table, workbench, which should be clean and free of objects that will not be used, are very suitable for this.
At the preparatory stage, it is necessary to diagnose possible malfunctions, during which the reasons for the failure of the device are determined, ways to eliminate the identified breakdowns, the selection and then replacement of spare parts to bring the vacuum cleaner into working condition.
During the initial diagnosis, it is worth paying attention to the following aspects:
- check the performance of such elements as control buttons and wire reel;
- assemble the telescopic extension and check its tightness;
- when turning on, check whether the motor is running, whether it gets very hot (determined by the ability to hold the back of the hand on the body next to the motor);
- inspect the housing for external damage.

Repair features
When starting diagnostics and repairs, it is important to pay attention to the disassembly procedure, which should begin with disconnecting all tubes, brushes, telescopic extensions, which, after removal, must be inspected for cracks, breaks, dents, etc.
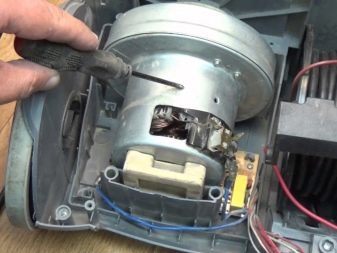
If you find a problem with the specified optional equipment, you must take action to replace it using the prepared spare parts. Further, if the vacuum cleaner does not turn on, that is, the motor does not work, we determine whether the electrical or mechanical part is the cause, for which we disassemble the case (it is important to disconnect the device from the electrical circuit), inspect the motor inside. All wires must be fixed, must not have dark (from brown to black) color, burnt contacts. In this case, you should definitely pay attention to the presence or absence of a characteristic burnt chemical smell. If it is present, then somewhere there is a strong heating of the electrical circuit. Accordingly, we carefully check all electrical connections, wires, motor winding. If a place of charring is found, we take measures to remove this wire, button, etc. from the electrical circuit and replace them.When inspecting, it is important to remove dust, dirt, and other objects, if any, from the engine compartment.
When inspecting the motor, you should pay attention to the condition of the bearings, connector blocks, control board. Before installing the bearings, both new and used ones, must be lubricated, including the seat of bearings, motor shafts, etc.
The most suitable lubricant for vacuum cleaners is graphite lubricant, which must be taken care of in advance.


In cases where the vacuum cleaner turns on, but pulls poorly, does not suck, we pay initial attention to the condition of the brush, and in some models (for example Roxx'x or Maxima 41) - the turbo brush included in its kit. We clean it from possible foreign objects, dust, hair, wool, etc. We check the pipe, extension cord, if any foreign objects are found, we remove them. Then we repeat the check.
In cases where a button or an adjusting rheostat fails, which are connected to the control board, we inspect the return spring, its condition and the condition of the seats. If melting, mechanical damage is found, we replace the button with a new one. She and the rheostat of the control system cannot be repaired.
When inspecting the vacuum cleaner internally, we pay attention to mechanical damage to the motor, control board and electrical part. If such malfunctions are found, we must change the damaged area.


Expert advice
If the electrical part of the motor itself (stator or rotor) fails, the entire assembly must be replaced. The rewinding of the field windings, as a rule, does not lead to a positive result. After a short time, the vacuum cleaner again fails for the same reason. Also, if this breakdown is detected, it is worth deciding whether it is necessary to repair this device or purchase a new one, since the cost of the motor unit is often comparable to a new vacuum cleaner.
Experts advise using spare parts purchased from specialized stores approved by the manufacturer of Bosh equipment., a list of which can be found on the official website of the campaign.
Also, professionals note that it is economically profitable to carry out minor repairs on your own. If serious problems are found, you need to contact a specialized technical center or make a decision to purchase new equipment - of course, Bosh.


What to do if the Bosch vacuum cleaner does not turn on, see the video below.


The comment was sent successfully.