How to connect and configure a digital set-top box to a TV?
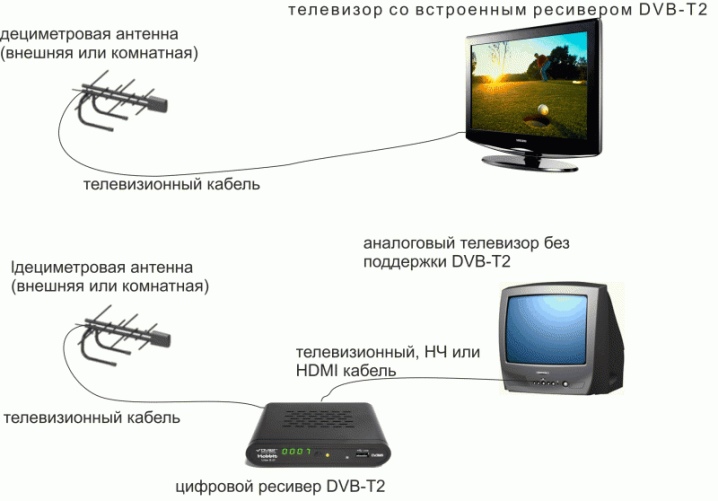
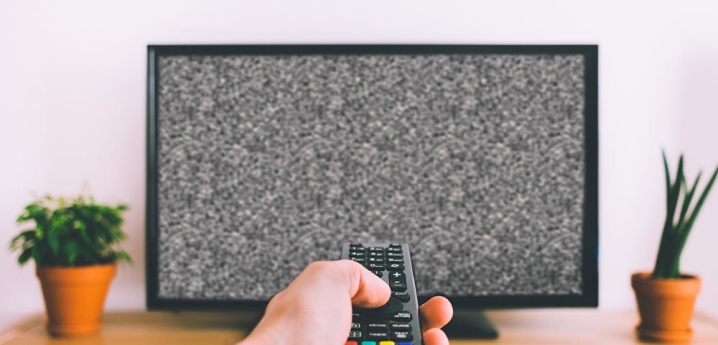
Nowadays, analog television is literally becoming history before our very eyes, and digital format is taking its place. Given such changes, many are interested in how to properly connect a digital set-top box to a TV and set it up. It should be noted that this format compares favorably with its predecessor in terms of picture quality. With the transition to digital, two dozen federal channels became available to residents of the Russian Federation. It is important to remember that for a TV to work in such a mode, the presence of an integrated receiver of the corresponding signal in the equipment itself is required. However, not all users have new TV models, and therefore they have to connect with the installation of set-top boxes.
Necessary equipment
Presently there are different ways of connecting, namely to satellite dishes, cable TV, as well as to the Internet. At the same time, to use digital broadcasting, you will need a receiver, the main function of which is to decode the signal. As already noted, the vast majority of modern models of television equipment from the factory are equipped with similar devices.
You can get information about the presence or absence of this unit by examining the documentation that came with the TV set. It is also important to clarify the list of supported formats.
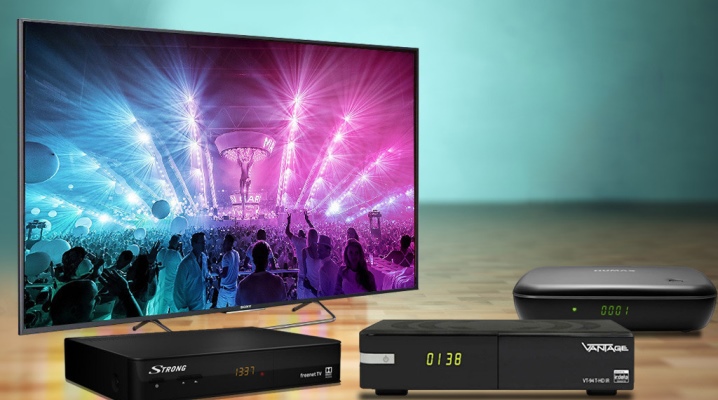
If you do not have an integrated receiver, you will have to purchase it separately. When choosing a set-top box, it is important to remember that by and large it can be connected to almost any device, regardless of its model and year of manufacture. Unless, of course, we are talking about frankly antique pieces of equipment.
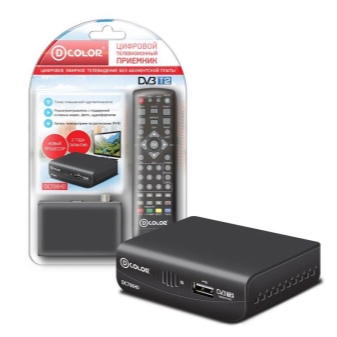
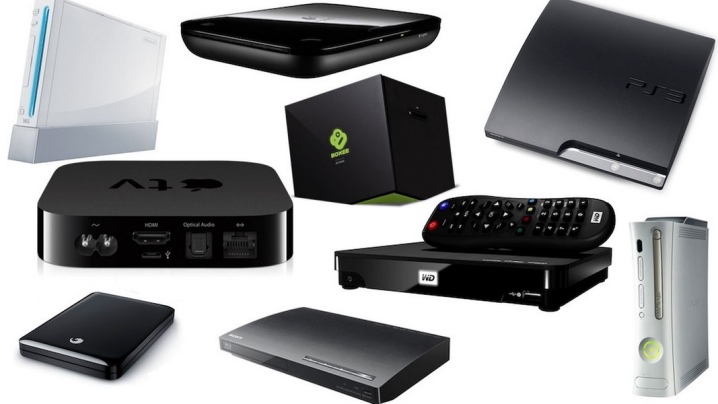
In the corresponding segment of the modern market for digital devices, there is more than a wide range of receivers from different manufacturers. All of them differ from each other in build quality, reliability, service life, functionality and, of course, cost. Given this variety, inexperienced users often make mistakes when choosing a set-top box. As practice shows, unreasonably expensive models are often purchased. Experts strongly recommend that when buying a device, put your own needs and financial capabilities at the forefront.
It should be noted that in terms of signal reception quality, the vast majority of set-top boxes are almost identical. Naturally, an exception will be the cheapest options belonging to the no name category.
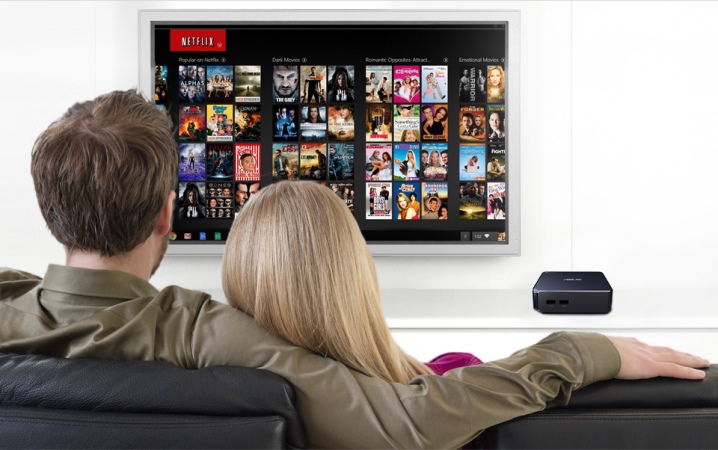
It is also important to foresee the tasks to be performed by this electronic device. Often we are talking about both broadcasting TV channels and using the set-top box as a media player and for connecting to a phone, as well as other mobile devices. In such situations, the choice in favor of more expensive options will be justified, that is, models that have a whole arsenal of additional functions in the form of schedulers, Nime Shift options, and others.

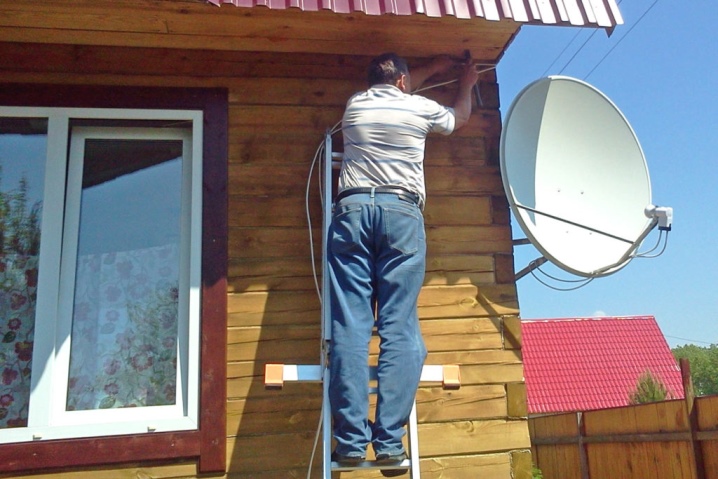
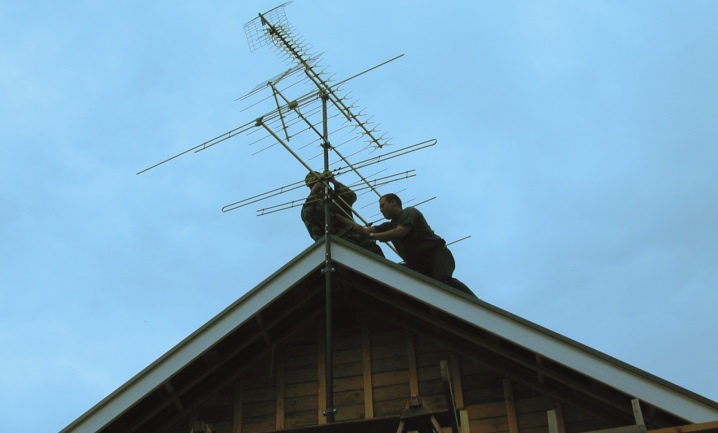
But still, the main task is to receive a digital television signal. As a rule, in large settlements, there are no problems with this, since it is enough just to contact one of the providers for advice.Otherwise, the situation may arise in rural areas, where it will be necessary to install a suitable antenna for the decimeter range or a satellite dish. As practice shows, and according to numerous user reviews, the second option is more effective.
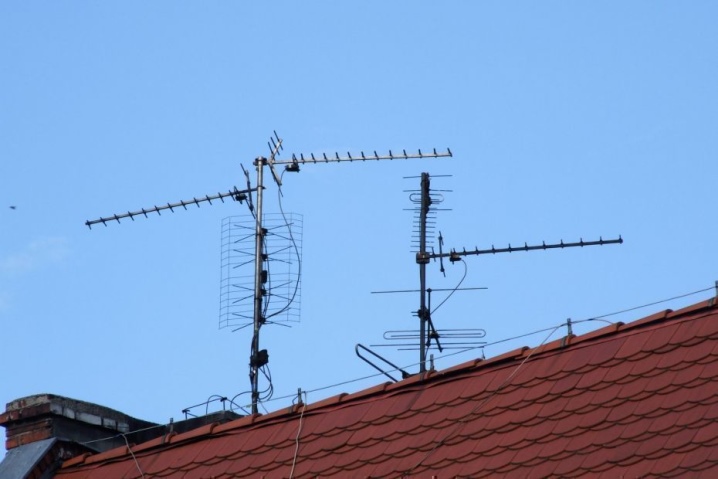
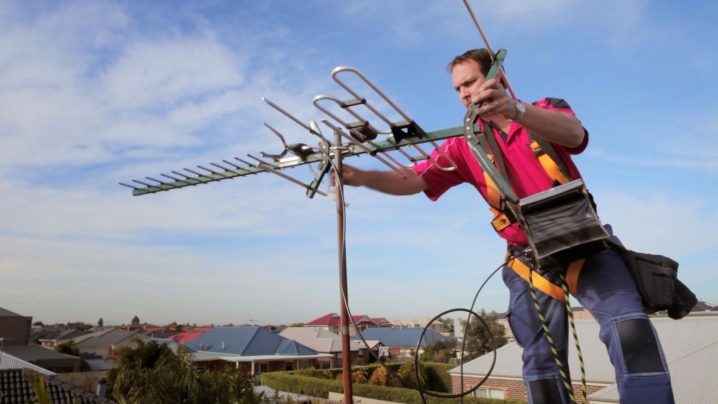
The answer to the question regarding which antenna to choose in each specific case is relevant for almost everyone who connects to digital TV. The key factor here is the distance to the repeater (tower). With a slight distance from the signal source, you can install the simplest and cheapest indoor antenna. Otherwise, you will have to purchase and install an outdoor model.
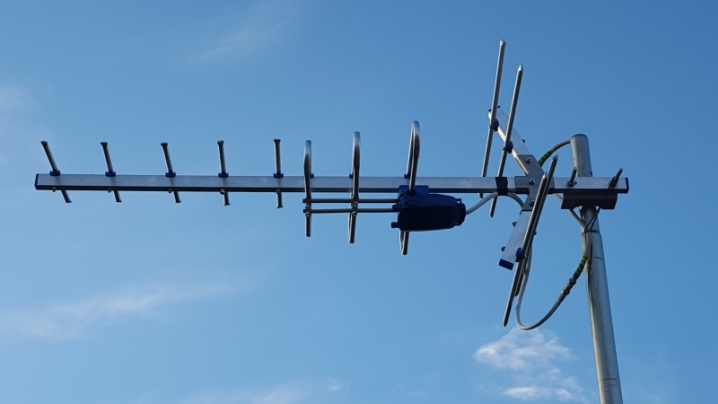
It is important to remember that regardless of the mentioned distance to the transmitter, the antenna used must operate precisely in the decimeter range, that is, receive at frequencies of 470-860 MHz.
Today, there are no problems with the selection and purchase of antennas of the required models with the appropriate characteristics. In any specialized store, both land-based and online, you can easily buy everything you need, and at the same time get expert advice on installation and operation. Often, owners of television equipment use homemade antennas, which, by the way, often work no worse than purchased ones.

Taking into account all the technical and a number of other nuances, at the moment there are three main ways of receiving a TV signal on the territory of the Russian Federation, for which different types of antennas are used:
- Working in the meter range and are standard devices for receiving analog broadcasting. It should be noted that there is still demand for it, since PTRS-translators are not yet functioning everywhere. It is also important to take into account that in some remote areas, no more than a dozen channels are available to residents.
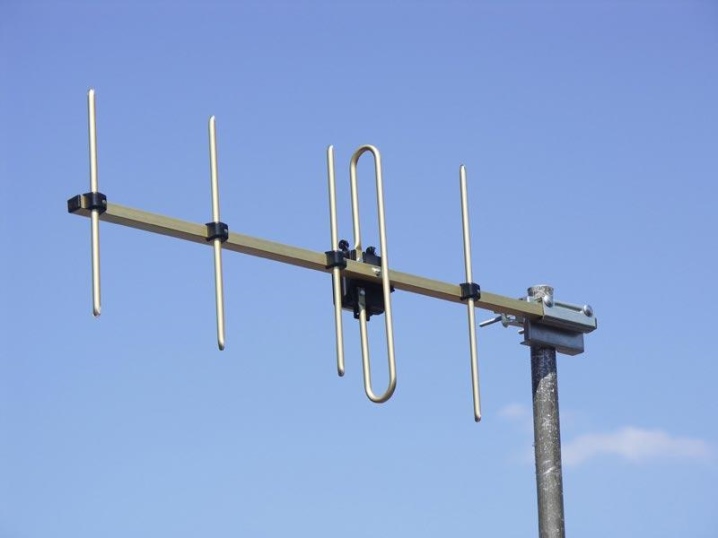
- Decimeter devices, designed specifically for receiving a digital television signal. Often externally and structurally, such antennas are similar to their meter analog "counterparts". At the same time, they allow you to receive a high-quality signal completely free of charge. However, it must be borne in mind that not all digital TV channels are available in some places, and therefore it is necessary to additionally use special amplifiers.
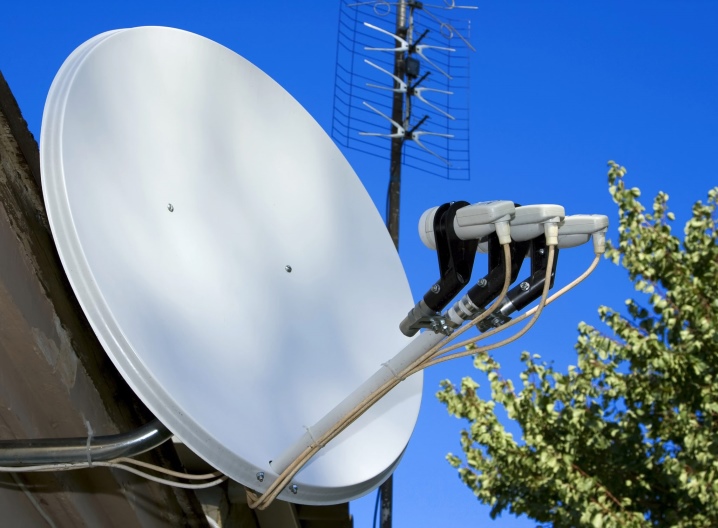
- Satellite dishesthat can be used to watch channels in DVB-S2 format. The main advantage of such antenna structures is their versatility. To receive and process different types of broadcasting, you just need to connect the corresponding head to the reflector, taking into account the characteristics of the signal. It is also important to remember that cymbals have the ability to receive virtually anywhere and regardless of infrastructure.
Naturally, everyone personally chooses a specific model of the receiver and signal receiver (antenna), taking into account certain criteria. Now manufacturing companies specializing in the development and production of the described equipment are trying to satisfy the needs of the widest possible range of potential customers. As a result, in specialized salons there are whole lines of set-top boxes and decimeter antennas, as well as "dishes", as they say, for every taste and wallet. However, before buying it will be useful to consult with specialists.
Connection
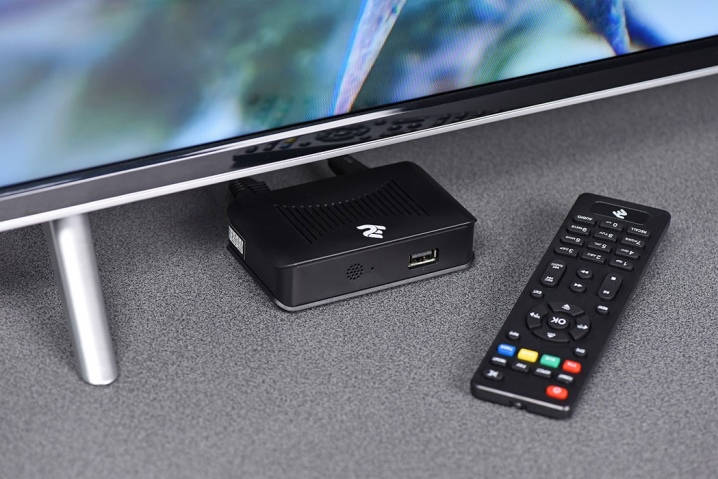
On the vastness of the World Wide Web, now you can easily find a sufficient amount of materials in different formats. We are talking about, among other things, about step-by-step instructions on how to properly connect a digital set-top box to a particular TV or even to a mobile phone. The latest generation models of technology have built-in television receivers (tuners) for the desired signal. In situations with set-top boxes, manufacturers have provided the ability to connect to both new plasma and conventional TVs.
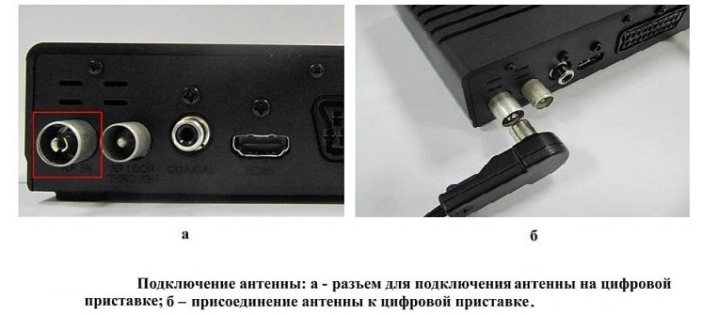
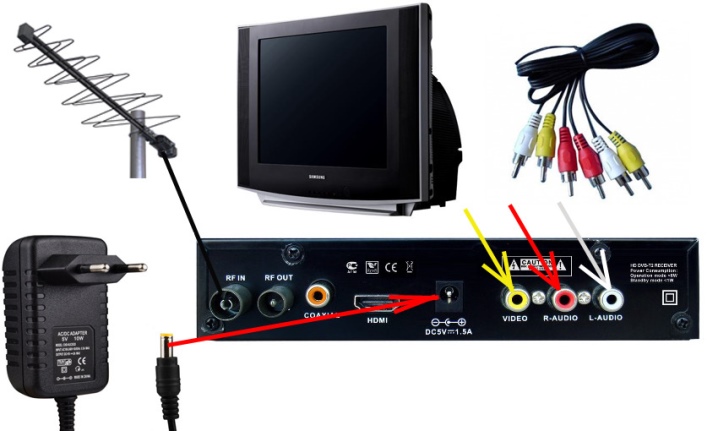
In general terms, the procedure is the same in all cases. First of all, when installing all the elements and pairing them using different types of wires, depending on the TV model, it is necessary to disconnect the equipment from the mains. After that, connect the cable connecting the antenna and the set-top box to the RF IN connector. The next step is to connect the wires to the receiver and TV.
When pairing equipment, the following types of cables can be used:
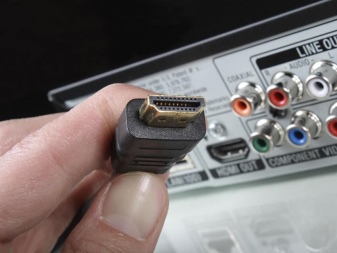
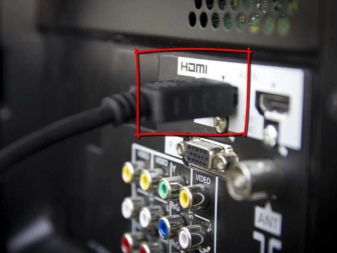
- HDMI - an option that is relevant for new TV models that have a corresponding port. With this connection, the user can count on the highest possible picture quality for digital TV.
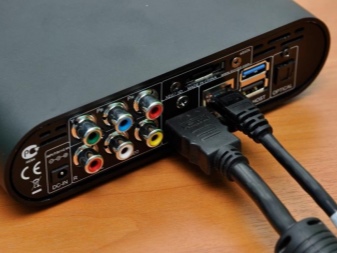
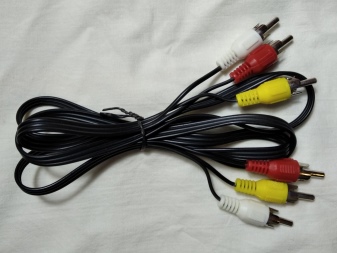
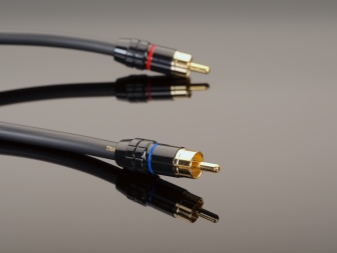
- Wires with so-called tulips, which most often have three plugs. At the moment, this option is relevant for old models of television equipment. It is important to take into account that such a connection cannot guarantee the maximum picture quality (especially important with a large screen diagonal) and sound.
- Coaxial wire, which is an alternative in the absence of the previous two types of connectors. This refers to connecting the set-top box using a conventional antenna cable.

After connecting all the wires according to one of the provided schemes, it is necessary to turn on all the devices involved. The next step is to set up equipment and search for TV and radio channels.
By the way, more than one TV can be connected to one receiver.
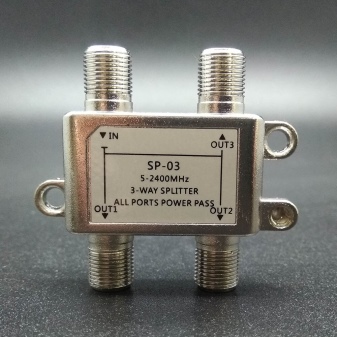
So, the second and third TV sets are switched on through free interfaces or using special adapters. The second option is relevant for old models and involves the use of splitters, that is, splitters.
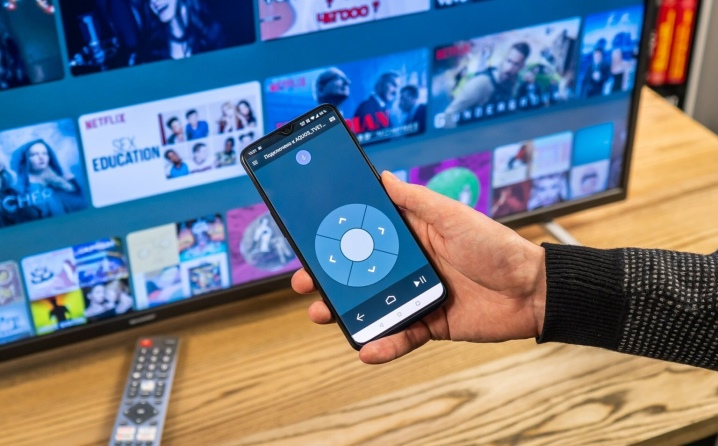
It should be noted that the control of the prefix and the entire resulting system for receiving "numbers" can be carried out in several ways... This refers to devices such as a remote control, computer keyboard, mouse, and even a game joystick. In addition to all of the above, commands can be given via a smartphone or tablet.
CRA
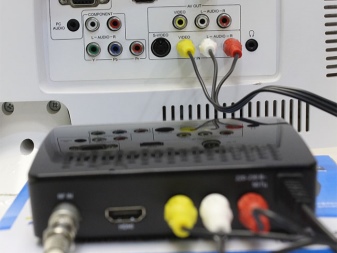
In the absence of a special digital input, the equipment is interfaced through one of the analog interfaces. The easiest option is to use the previously mentioned "tulips". Some models are equipped with large and bulky Scart connectors. As a rule, adapters are purchased for them. But with the help of "tulips" now you can connect almost any TV.

The algorithm of actions in this case includes the following steps:
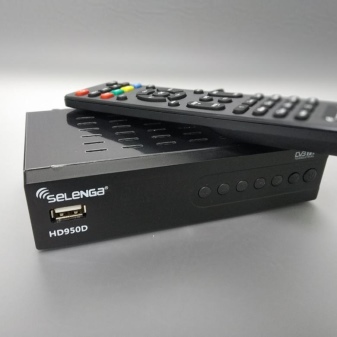
- Checking for the presence of the appropriate cable, which is most often included with the receiver. In the absence of such, it can be purchased at any specialized store.
- Removing the protective film from the set-top box and installing it in a pre-selected place.
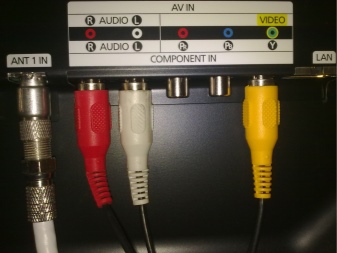
- Directly connecting the cable to two devices. To simplify this procedure as much as possible, manufacturers designate both the plugs themselves ("tulips") and the sockets under them in different colors (yellow, red and white). This approach minimizes the risk of incorrect connection.
- Connecting the antenna cable or wire from the satellite dish or the provider's network cable to the corresponding input on the set-top box.
- Connecting the receiver to the mains, as well as starting it and the TV.
If all the steps were performed correctly, then you can proceed to setting up the equipment.
HDMI
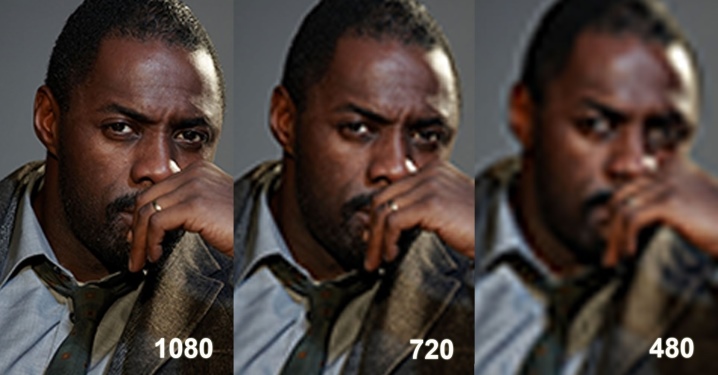
One of the important features of this interface is that both a picture and a sound signal are transmitted using one wire. But the key is their maximum quality. So, the resolution eventually reaches 1080 pixels, while the audio signal can be transmitted at a frequency of up to 192 kHz. By the way, these indicators are considered the highest when broadcasting media content.
When using a more or less modern model of TV equipment equipped with a corresponding input, HDMI will be the most rational solution.And the connection procedure itself is extremely simplified, since one wire with two connectors at the ends is used.

Through antenna cable
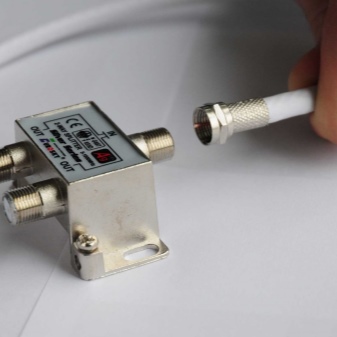
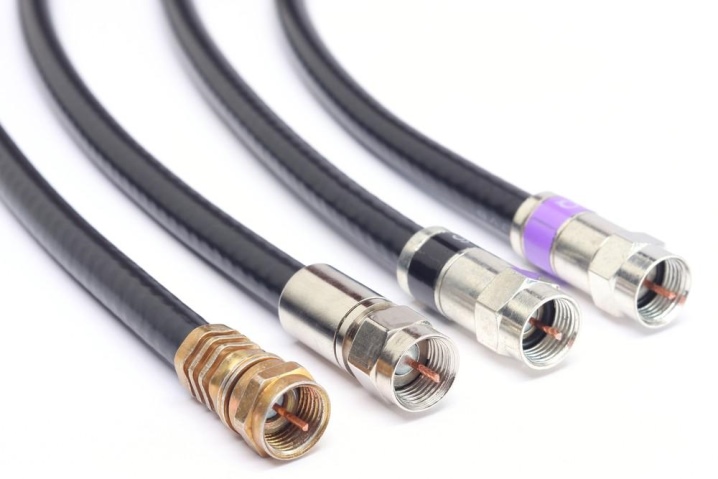
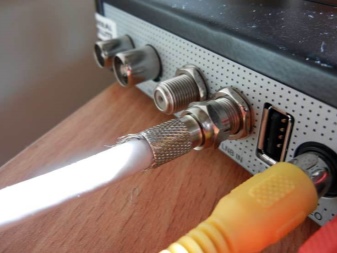
Converters of the described type of signal presented now on the market can function in tandem with old television receivers. In such situations, a conventional antenna input and cable are used for interfacing. At the two ends of the latter, you will need to install the appropriate plugs. Today, this can be done in the traditional way using a soldering iron or by purchasing more modern F-connectors. Their installation is as simple as possible and requires minimal time expenditures without compromising the quality of the connections.
The procedure in question is as follows:
- The outer insulation at the end of the cable is removed (approx. 1.5 cm). It is important to perform all actions carefully so as not to damage the braid.
- The loose braid is folded.
- The insulation of the central core, 1 cm long, is removed so that it does not break.
- The connector is screwed onto the cable with clockwise rotation. As a result, the central core should protrude beyond its limits by about 2 mm.

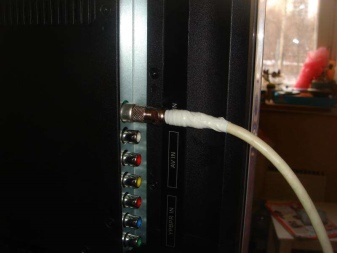
Similarly, the second end of the wire is equipped with a plug. After completing all the above manipulations, it remains only to connect the antenna cable to the corresponding connectors on the set-top box and the TV itself. Such an installation will be relevant for any model of equipment. However, you shouldn't count on the high quality of the picture.
Customization
There are two ways to search for free digital television channels: manually and automatically.
The second option, of course, is as comfortable and simple as possible, and you will need to switch to the first if autosearch does not give the desired results.
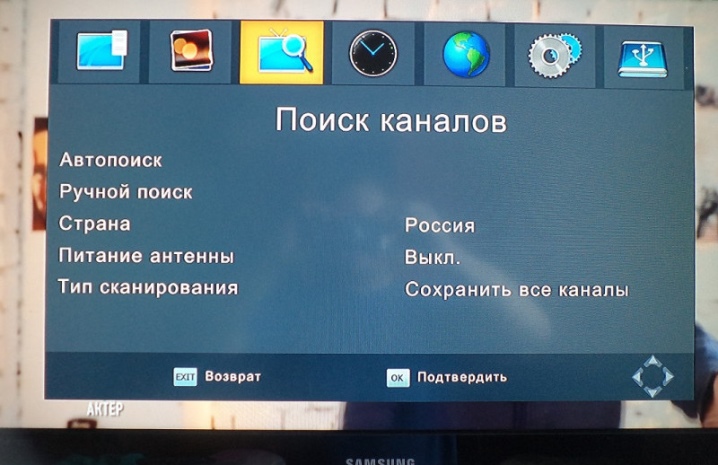
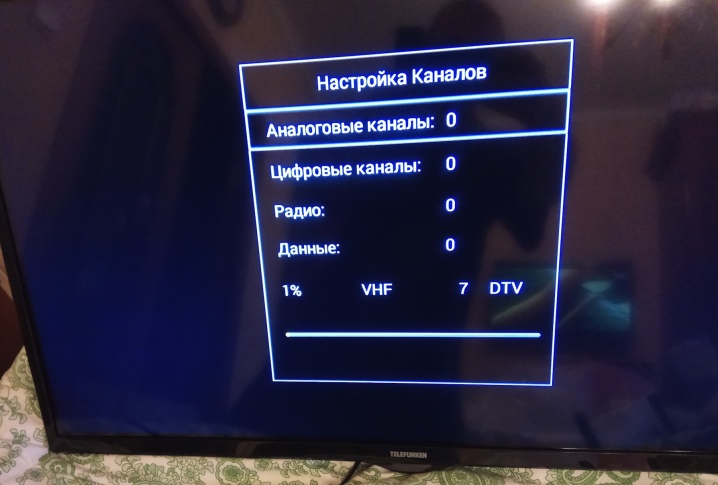
Automatic channel tuning provides the following procedure:
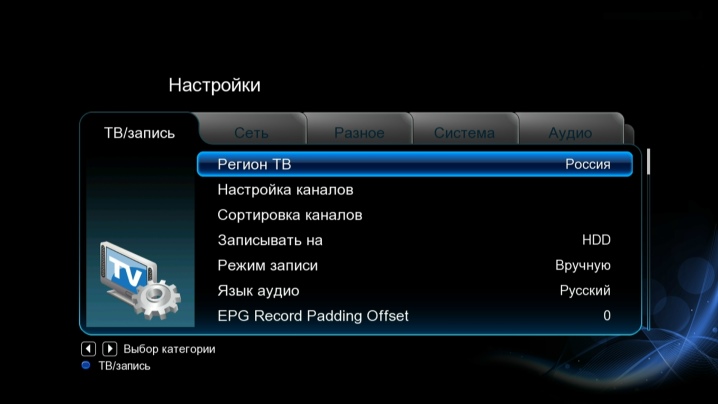
- The TV is switched to the video signal reception mode. In this case, the menu of the set-top box paired with it should appear on the screen, and, in particular, the setup wizard, if the device is connected for the first time.
- They select the country and interface language, that is, Russia and Russian. If there is such a need, then the broadcast format is chosen, namely DTV-T.
- They go to the third item of the working menu and activate the autosearch function, confirming their actions by pressing "OK".
- They are waiting for the completion of the settings and the appearance of the list of available channels, save the changes made to the equipment parameters.
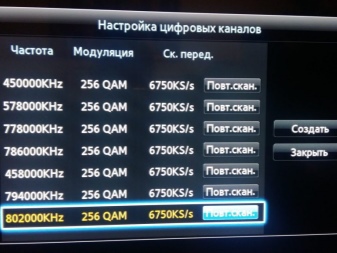
If, after completing all the described processes, it was not possible to achieve the required results, then it is necessary to switch to manual mode:
- Go to the search section and select the appropriate item.
- By clicking "OK", start channel tuning.
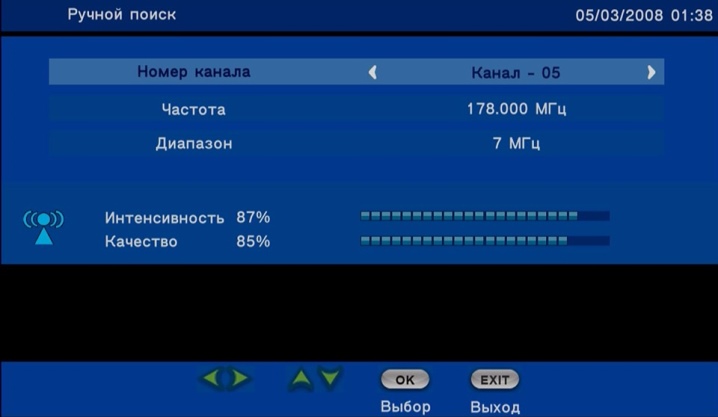
- If necessary, at the request of the system, enter the data on the frequency and range. It is important to take into account that the search for channels is carried out not separately, but in packages, each of which has its own parameters. The necessary indicators can be found on the Internet at specialized regional sites and forums.
- After completing the search for all channels, save the settings.

Often, after switching to digital, users have to face the disappearance of local channels, which were previously present in analog format. This can be avoided by selecting two types of search at once (digital and analog), indicating in the corresponding line of the menu DTV-T / DTV-T2.
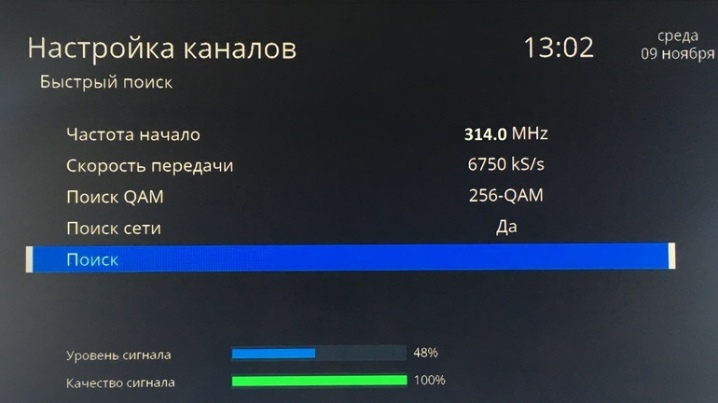
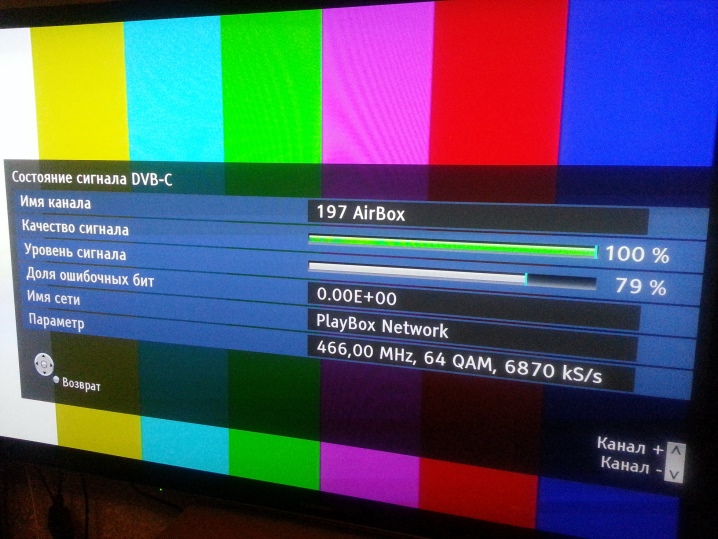
Signal check
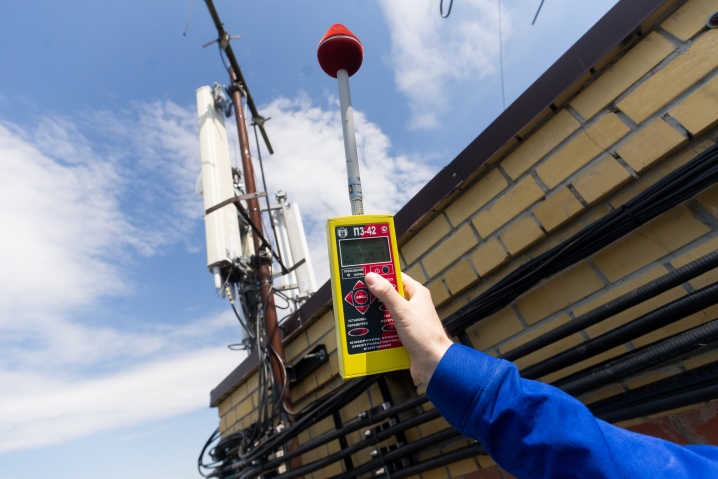
If there is interference and poor picture and / or sound quality after pairing the antenna, digital set-top box and TV, you must first pay attention to the incoming signal. This will allow you to determine which of the nodes in the system is the source of the problem. Depending on the device model, you need to press Info several times. In this case, two scales should appear on the screen, demonstrating the desired indicators.
A value of 70% or more is considered normal. If the indicator falls below this mark, then the signal is weak.In such situations, the first step is to change the position of the receiver.
If a room model is used, then it is quite possible to cope on your own. But when installing an outdoor antenna, it will be more convenient to solve such a problem together.
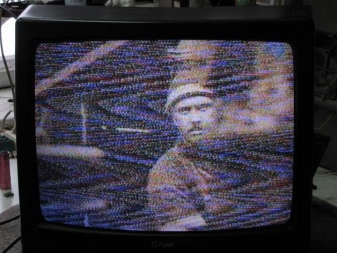
In some cases, the intensity of the received television signal exceeds 70%, but there is still interference or, for example, the image has become black and white. This indicates the need to reconfigure the STB itself. Often the cause of problems is accidental changes to the receiver parameters.
Possible problems and solutions
As in the situation with any, even the most reliable equipment, various failures and malfunctions are possible when operating digital television set-top boxes. Most often, users have to face the following problems:
- Significant degradation of picture quality and appearance of noise. The reasons for such problems are a weak signal and poor contacts.
- The image is black and white. These are often the consequences of mistaken cabling. It is also worth going to the set-top box settings menu and make sure that the PAL or Auto mode is selected.
- Some of the available digital TV channels are missing. The solution may be to change the position of the antenna and rescan in automatic or manual modes.
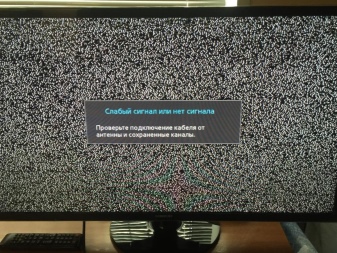
- All channels disappeared at once or the device writes that there is no signal. Sometimes it helps to check that the cables are connected correctly and securely. You can also reset all settings to factory defaults and restart the search.
In some cases, the receiver, when searching for channels from the very beginning, could not find all of them. One of the reasons may be the weak signal already mentioned above. In this case, you will need to go to the Info section and make sure that the indicator exceeds the 70% mark. The solution to the problems will also be to try to change the position of the signal receiver, connect the antenna amplifier and re-scan the channels.
In practice, a sharp deterioration in the quality of the image or sound, as well as an arbitrary reset of settings, often indicate a malfunction of the equipment used.
It is important to take into account that only an experienced specialist can determine the very fact of a failure of the antenna, its amplifier or the receiver itself. He, having carried out diagnostics, will determine the scale of the tragedy and its causes.
In other words, if the troubleshooting methods listed above do not lead to the desired result, then it is most rational to call the wizard. This approach will maximize the life of the device, as well as reduce financial costs. It is no secret that timely repair and maintenance is a guarantee of equipment durability.
You can learn how to connect a digital set-top box to a TV in the following video.


The comment was sent successfully.