How to connect a printer to a laptop?
Connecting a printer to a laptop is easier than ever as we enter the information age. But the number of different wires can confuse both the advanced PC user and the novice. Let's analyze the various options in the article.
Connection methods
In business, it is very important to have great flexibility in the choice of methods of working with office equipment. Previously, offices usually used one device for all, which was located somewhere in the center of the room. To use it, you had to go to a special computer, which often had a whole queue.
Now it has become possible to organize a large working network to connect several PCs at once and even smartphones or tablets to laser, inkjet, color or black and white printers.
And all this without the need to install a separate print server, you can simply link all PCs to one printer. First of all, you need to properly assemble the printer so that all of its parts are in place. Then you can plug the power cord into a nearby outlet. The equipment will either turn on automatically, or you will have to press the start button.
Two PCs to one
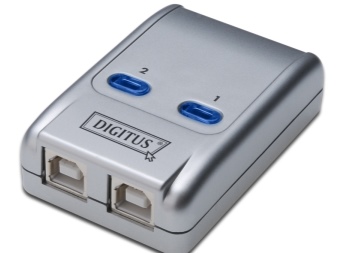
New MFPs often have several ports at once (network RG-45, USB, LPT, COM), so to connect to two PCs at the same time, you just need to find the appropriate cables and adapters. That is this method does not provide for the creation of a local network between your devices, it is limited to a simple physical connection. You can also use a KVM switch or a dedicated printer splitter. On the one hand, it has one USB input, and on the other, it has two outputs to computers. The disadvantage of such a device is that it only works on one channel, which means that each time you have to manually switch it to start printing from the desired PC.
If your model has only one connector or you do not want to bother with adapters, then you will have to synchronize computers with each other.
The procedure is possible only if there are network cards in both system units. Now all motherboards are equipped with them, if they were released no more than 20 years ago. By creating a working group, we will organize the correct print settings. To connect, you only need twisted pair or patch cords, which have RJ-4 connectors on both sides. In general, everything is very simple, here are the step-by-step instructions.
- Create a homegroup on a local network in Windows OS through the "start" menu or "control panel" in the "networks and the Internet" section.
- Further in the "Network and Sharing Center" will display all available connections.
- You are looking for the type of connection - "local network".
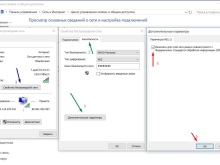
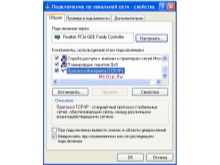
- In the context menu "properties" expand the item "TCP / IP protocol" (choose IPv4, there will be also v6, but it is rarely used).
- It also has a "properties" item where you will need to configure the network parameters.
- The first computer will be the main one, so enter 255.255.255.0 in the "subnet mask" field, and 192.168.0.1 in the "IP address" field.
- The second computer will be respectively 192.168.0.2 and 255.255.255.0
- Then you need to again in the "Network and Sharing Center" select the item located on the left - "change advanced sharing settings" and check all the "allow" checkboxes.
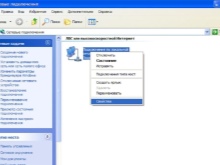
- If you right-click on the "my computer" icon, you can find the "system properties" menu.
- It has an item "computer name", which must be set separately for each PC, so as not to confuse them when printing.
After that, reboot all devices so that the home network is ready to use.
Now all that remains is to set up printing. Such an organization is often used in small offices, but the most correct way to combine a large number of computers with an MFP would be to create a print server, a special network device with a software application.
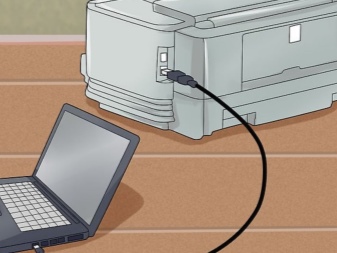
To the network connector
The power cord is still very popular for tying a computer to a printing device. Due to the ease of installation and low cost, they are widely used to directly connect office equipment. Find an internet port on the back of both devices and print a configuration report. To do this, press the special button with the Latin letter i depicted on the sheet with the printer turned on. It will contain a digital code starting with 192.

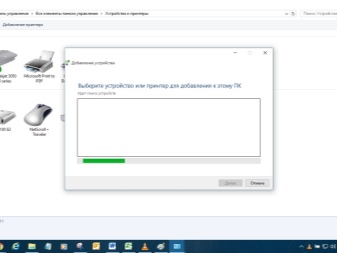
Using the "start" button or through the "control panel" section, open the "devices and printers" menu and click "add". A window with the connected devices or the "setup wizard" program with the "add a local printer" button will be launched. After that, click "create a new port", where you need to select the item "TCP / IP". An address like 192.168.0.1 is also entered there, but it is necessary to indicate exactly what was previously printed in the configuration report. In the printer settings, open shared access for the local network.
Through adapter
Although modern printers no longer use such connections, some are connected through older connectors, such as parallel (LPT - Line Printer Terminal) and less commonly serial (RS-232C) ports.
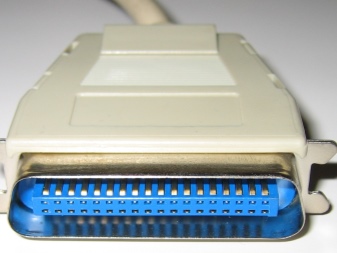
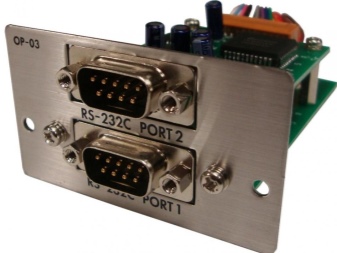
Computers that do not have a corresponding socket are connected using an inexpensive adapter - an adapter from USB to the parallel or serial connector you need.
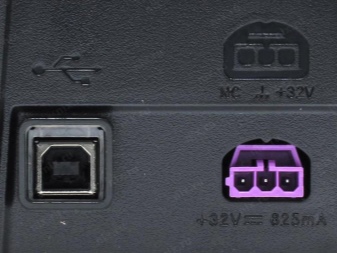
You may need to install drivers from the installation disc that comes in the box with the printer or is downloaded from the manufacturer's website, because PnP (Plug and play) automatic driver installation standard does not work on some rare adapters, unlike almost any USB-A (male or input) and B (female or female) cords. Parallel adapters support speeds over 12 Mbps and work with most operating systems, including Windows 7.
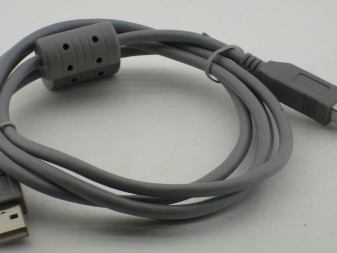
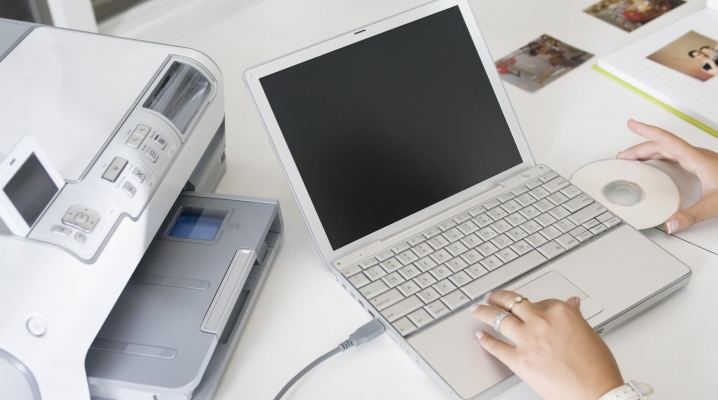
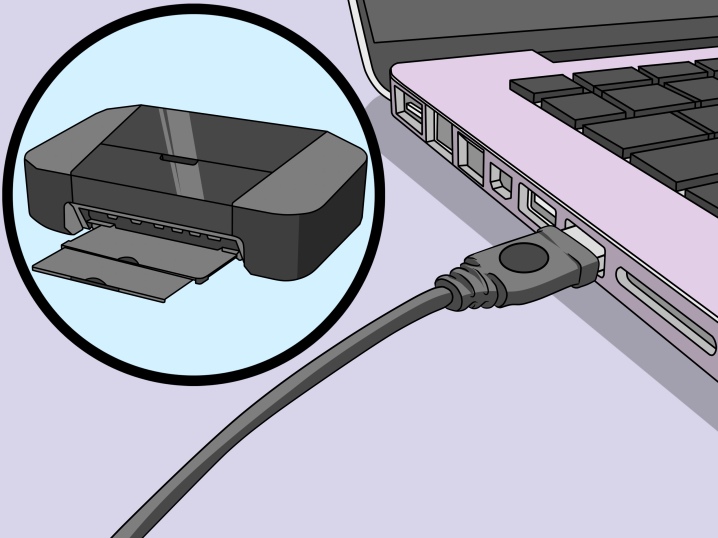
To set up regular printing via a USB wired cable, simply plug the cable into the desired connectors on both sides. Depending on the operating system, a notification about the discovery of new hardware will appear to confirm the permission to install the driver (either the Internet must work, or the installation disk must be present in the drive). Follow the intuitive prompts of the installation wizard. If the automatic configuration does not start, try doing it yourself.
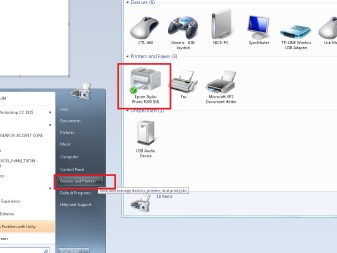
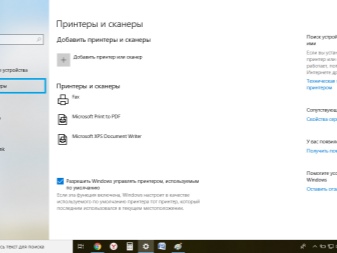
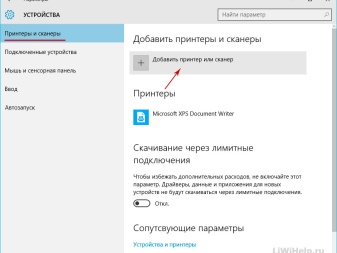
- Open Start from the "Printers and Scanners" menu.
- Need an add option (don't forget to turn on the printer).
- When the model name appears, click on it and complete the installation following the instructions in the Found New Hardware Wizard.
Thus, it is possible to organize a sufficiently strong and reliable connection thanks to the USB cable, which comes in two versions: 2.0 and 3.0. If the first option will provide a data transfer rate of up to 380 Mbit, then for the second this parameter is significantly increased - up to 5 Gbit. High quality cords are covered with a shielding film. The length, depending on the manufacturer, can vary greatly, but usually it does not exceed 5 meters, which is quite enough for home use.
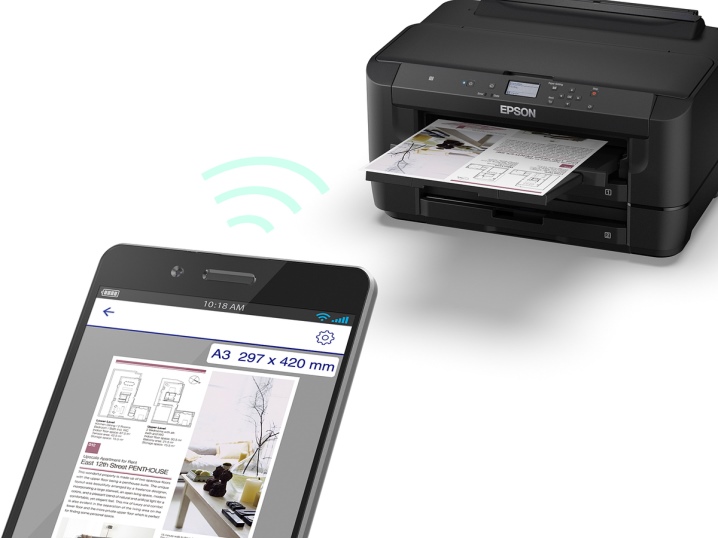
Via Wi-Fi
If you want to get rid of the wires entangling everything, then the air connection is the best option. In this case, you can search for printers with already built-in adapters, or connect them to portable network cards and routers. Using Bluetooth wireless technology, gadgets can only connect to each other within a radius of up to 10 meters, which is not always convenient even at home, when walls and furniture interfere with fast data transmission.
Interesting! To connect a more reliable (up to 30 meters) and high-speed connection between the printer and the laptop, many devices have Wi-Fi support.
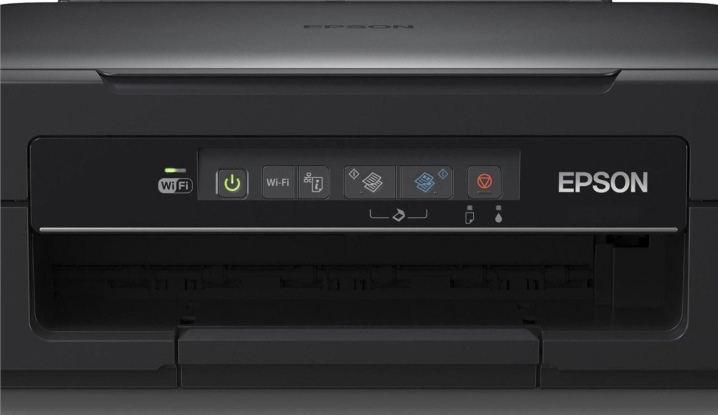
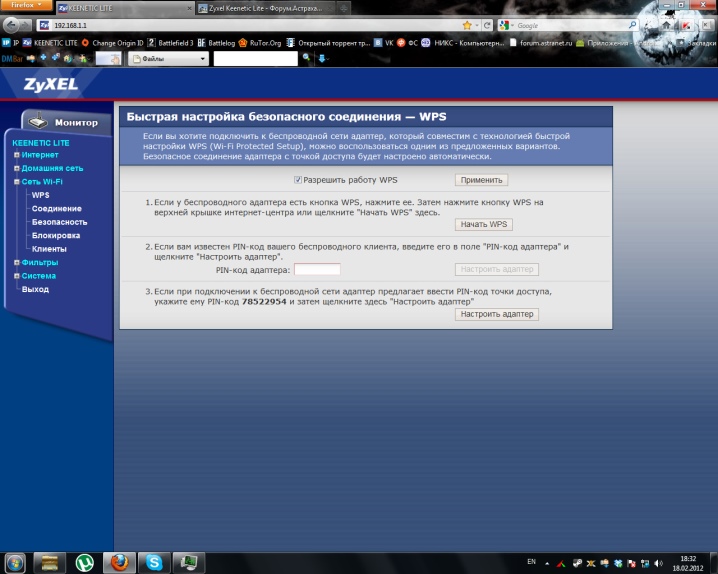
It is easy to configure it through the "Control Panel" - "Hardware and Sound" tab. You must first remove the printer from the list in Device Manager (if it was), and then go back and under the list of "devices and printers" click the button "add a wireless or network printer". The connection wizard will tell you how to finish the rest of the installation, sometimes the program asks for the access code or the WPS pin code, which is provided with the printer in the documentation, or it is printed using a hidden button on the control panel with a Wi-Fi icon (to press it, you need a thin solid rod or a needle).
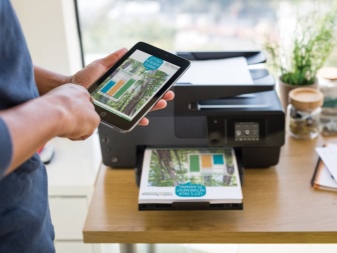
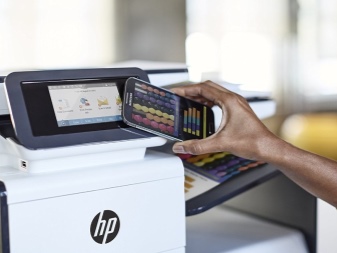
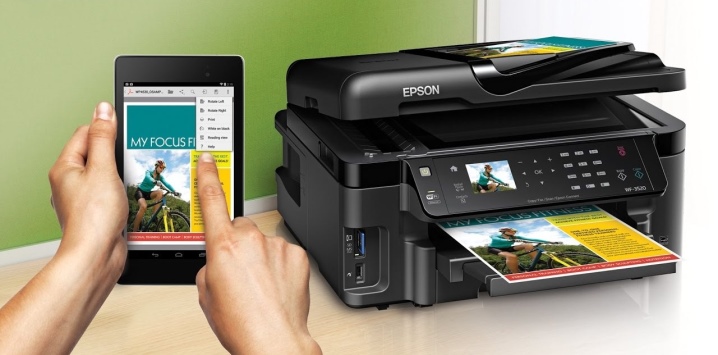
This method does not apply to all manufacturers, most often it happens with HP, other methods can be found on the official website of the required company. Some modern MFPs have the option of pairing even with portable devices such as a smartphone or tablet.
Customization
Adjusting the printer's configuration does not end with synchronization with a computer or local network. The fun begins next, to customize printing directly to your current needs. That is, unlike a connection, print settings can change frequently, depending on the type of documents you have to work with.
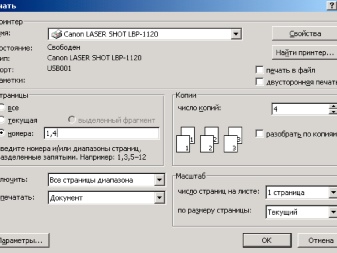
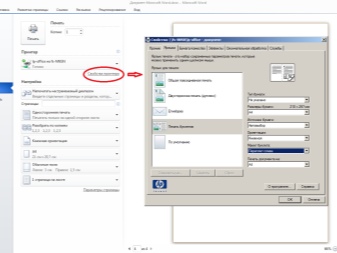
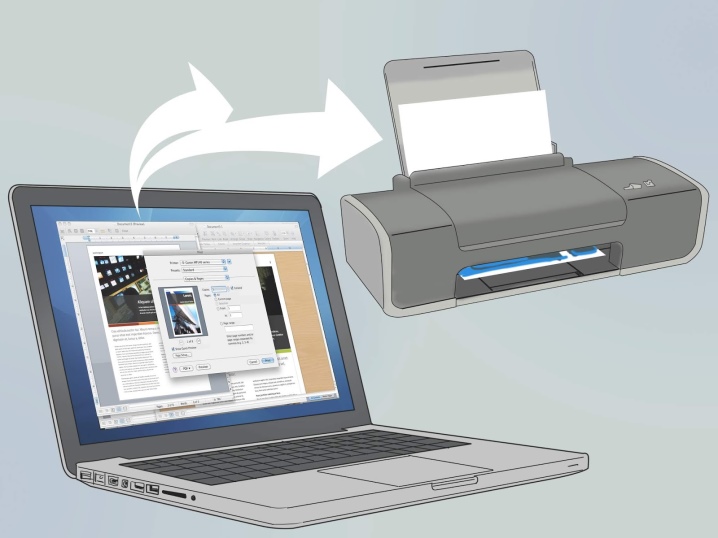
First, select the desired document and, by right-clicking in the opened window, click "print", or open the file in any suitable editor and find the appropriate command in the upper left corner of the menu. This can be done even faster using the "Ctrl + P" key combination. By default, the settings indicate "all pages of the document", but you can select either one or certain desired ones (even and odd, which is convenient for sequential printing of pages on both sides of the sheet, as in books), or in general only part of the text and pictures , having previously selected them by holding down the left mouse button.
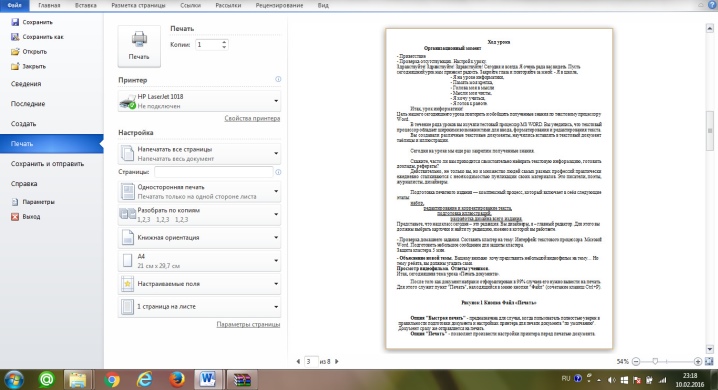
Next comes the setting of the page orientation, which is carried out in the same place in the preparation for printing window through the "properties" in the "main" tab.
The orientation is portrait (vertical) and landscape (horizontal). In addition, there is a graphics setting to conserve ink or toner. A test print will show the resulting image quality. Depending on the device model, there may still be a lot of different settings options, which will take a little longer to deal with than can be described in one article. Therefore, connecting a PC with a printer is the easiest thing that can be during its operation.
Possible problems
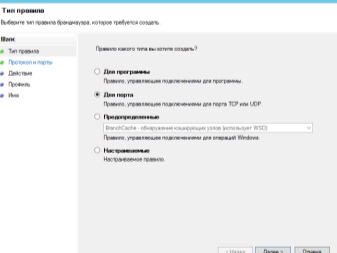
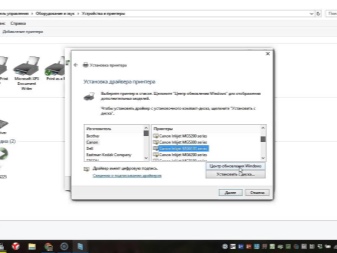
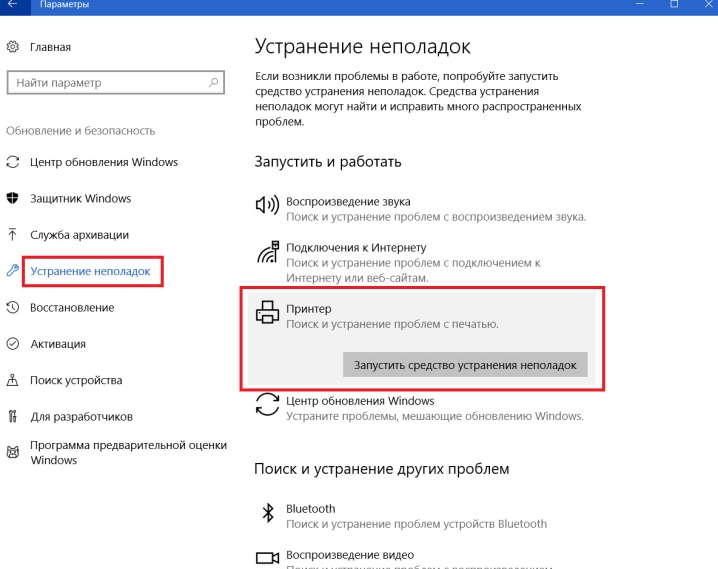
If for some reason the operating system does not see the printer (most often this is due to the termination of support for old models or the unavailability of drivers), then you can reinstall it by adding the device to the "Devices and Printers" menu. Sometimes the PC sees it as a different device, for example, if the printer is mistakenly identified as a software device and does not allow the installation of drivers. To solve this problem in Windows, you can simply roll back to the previous settings using the key combination on the keyboard "CTRL + R", then press the enter button and select System Restore from the list that opens. In addition, there is a troubleshooting wizard that can automatically find the right solution.
Fact! Windows 10 automatically installs the drivers required for all connected devices to work. If this does not happen, you can manually install directly from the website of your printer manufacturer.
All in the same Windows OS control panel there is a tab "change settings for installing devices", where you can put a tick on the automatic search for updates. As a last resort, if all else fails, then you can contact the technical support of your MFP or feedback from Microsoft developers. Sometimes it happens that the device is incompatible with some operating systems. If in the software part you are sure that everything should work correctly, then a breakdown in the hardware of the system unit itself is possible.Cables / adapters are broken or the connectors themselves are dirty, sometimes it helps to disconnect and reconfigure the network card through the "control panel".
Fact! A fairly common situation (which has become an anecdote over time), when the cause of the "breakdown" lies in the banal pulling out of the cord from the computer, which ceases to see the printer.
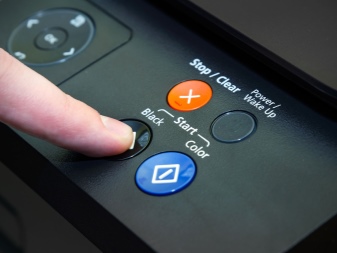
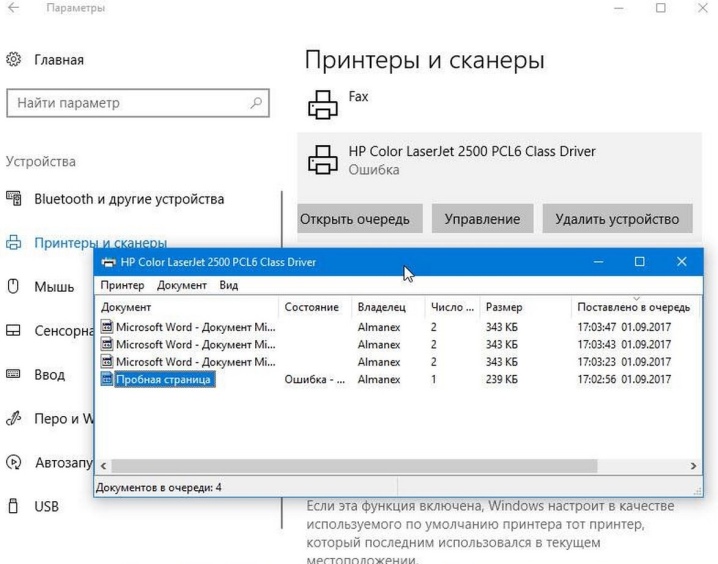
Similarly, if you have not printed anything for a long time, then some models may go into sleep mode or turn off, hence, to resume work, simply press the power button. Also, during a failure, the print queue may freeze, which is also eliminated by setting the printer through the computer menu, each model may have its own characteristics of canceling or suspending the printing of a document. Then try turning the printer off and on and resending something to print.
Recommendations
General recommendations for setting up and connecting the printer depend not only on the laptop and MFP model itself, but also on the type of operating system, so in each case the steps will be slightly different. Before buying a new device, try to find all the information about the compatibility of your laptop with certain models, so that later you do not have to sell it or resort to inconvenient and complicated connection methods.
If we talk about the preferred type of connection, then at home they usually try not to bother too much with the additional purchase of a rather expensive server. After all, the area of an apartment is usually small, and a local network consists of a maximum of 2-5 devices, which means that a twisted pair may need a maximum of 10 meters, which is much more profitable and more reliable than a wireless network.
In the office, on the other hand, the cost and complexity of direct routing of communications between offices is too labor-intensive and unreliable compared to Wi-Fi. Many modern MFPs have built-in wireless functionality, but they are more expensive than conventional models. The choice is yours!
How to connect a printer to a computer, see below.


The comment was sent successfully.