How to make a playground with your own hands?
Children bring joy until they become overly active. It is impossible to forbid them, it remains only to direct the energy into a reasonable channel. The best way to do this is to equip your playground with your own hands.
Basic safety requirements
As strange as it sounds, the key to ensuring safety is the ability to change and improve the site. The fact is that children grow up very quickly, and their priorities change even faster. What inspires and delights at 2 or 3 years old is not suitable for older preschool years. And schoolchildren even look at such games with a slight shadow of their own superiority. If something does not satisfy the children, they will simply go to other places, and no careful equipment of the playground will help here.
For this reason, it is recommended to prefer making everything with your own hands. This step allows you to maximize the individual needs of a child or several children. But although fantasy is very necessary in such a matter, still one cannot ignore the defense.

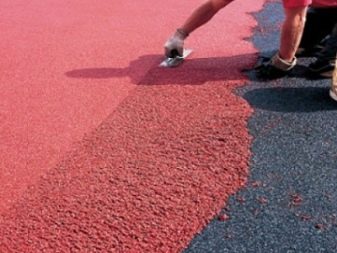
So, any descent from the slide, any place where the kids will go down or jump, must be equipped with a rubber coating. Sharp corners and burrs, untreated wood are unacceptable.
All slides and swings must be firmly secured. If any structure is equipped with handrails, they must be placed correctly and neatly. It is categorically unacceptable to equip a playground with concrete curbs. Only soft rubberized elements should be used to cover the steps. It is useful to look at the site as if in an abstract way, with a childish gaze: are all potential dangers clearly visible at the appropriate age.
If children find themselves inside play equipment and other elements, adults should be able to help them easily without additional tools. A situation in which water accumulates on the surface is categorically unacceptable. It must drain from everywhere and dry quickly. This consideration directly affects the desired angles of inclination and forces to abandon a number of design solutions. For your information: it is required to abandon the use of toxic paints of any kind.
Any weld seams must be smooth, even a small protrusion or depression in this place is dangerous. It is prohibited to use equipment and decorative structures, the corner or edge of which is not rounded or rounded with a radius of less than 0.3 cm. Do not fasten any parts so that they can be disassembled without the use of special tools. All closed structures are made with at least two mutually autonomous exits located on different sides. We need to make sure that some output cannot be blocked.
Both movable and non-movable parts must be such that no body parts, clothing and hats can get stuck in them. The width of the railing is limited to 60-85 cm.If children under 3 years of age are to play on the playground, the height of the barriers must be at least 70 cm.
Obstacles must not be made so that one can easily climb or sit on them. Round passages in solid parts should be 13 to 23 cm in diameter.
It should be said right away: it will not be easy to choose. The basic requirements are as follows:
- free view of the entire site from that part of the house where adults are most often present;
- removal from toilets, compost pits;
- minimum fertility (you should not allocate an area that can give a bountiful harvest).
The logical step is to place the play corner near walls or solid fences. Then it will turn out to use as much as possible the area that usually disappears idle. Even more, it is possible to optimally use the territory for organizing games. Many kids enjoy miniature climbing walls and rope ladders. It is useful to immediately foresee positions for placing slate boards and other useful structures.


A reasonable question: how to choose the appropriate option for equipping the site. There is a great solution here - you need to put certain attributes of children's leisure in different places and see what the baby likes best. A very important point is the level of illumination. It must provide balance: both darkening and blinding hot rays of the sun are unacceptable. It is recommended to place about 65% of the site in the shade, and place the rest where there is plenty of sunlight.
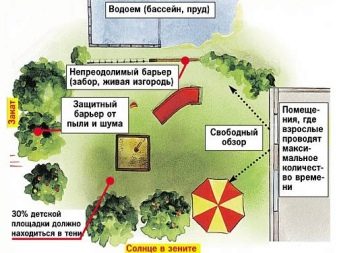
Usually, the most illuminated area is reserved for active games. If there are no ready-made sources of shade, you need to put a canopy, a fungus or a large umbrella. But there should be no drafts on the playground. This kind of "tempering experiments" will not lead to anything good. In addition, you need to watch that there are no electrical appliances and electrical networks nearby.
It is imperative that the area for the site is level or has only a slight slope. Any steep transitions are categorically unacceptable, because such changes in the relief create a great danger.
Attention: there should be no dilapidated trees and bushes nearby, and ideally, trees in general are unacceptable. Recommended options for surface arrangement are as follows:
- sand (layer from 2 to 5 cm);
- rubber crumb laid in self-leveling mats;
- chopped bark;
- lawn based on persistent varieties of grass.

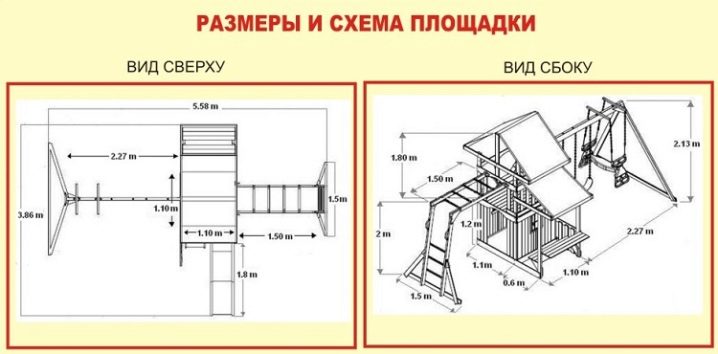
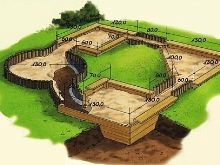
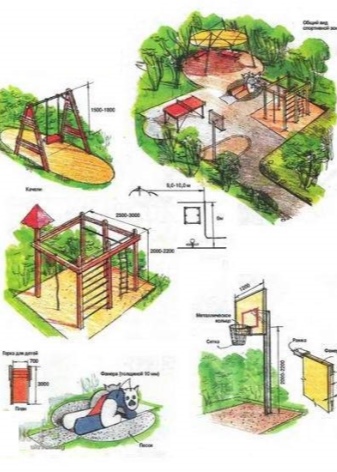
Drawings and dimensions
The quantitative parameters of projects and playground schemes must be selected very carefully. Very young children need a small area, where there will be only a sandbox, the simplest shells. Even the need for a miniature pool is not always there. It is much better to pay attention not to it, but to the lawn or surface with a coating that allows you to lie freely on the ground.
All this can be realized in a space of 4 or 5 square meters. m. But when assessing the required area, the size of the children's corner, you need to pay attention to other circumstances. So, more or less attractive for the game will be only that site, the size of which starts from 8 square meters. m. This is important even for the smallest children. At the same time, it is recommended to remove them from internal highways and utility facilities by 10-12 m.
When marking the device of the future children's corner on the drawing, it is not necessary to give preference to the classic rectangular version. Territories of randomly chosen geometry are now gaining in popularity. We need to immediately think about how the play area will be combined with planning and decoration solutions near a private house. All paths encircling the site or entering its territory must be made either straight or with the most smooth turns.
Targeted control of natural terrain is not recommended. It is much wiser to use the already existing configuration of the terrain for your own purposes. So, steep slopes allow you to form steps for climbing.
And it is logical to turn the most convenient descent into a slide. Often, in drawings prepared by experienced designers and planners, dug stones and fallen trees turn into play areas.
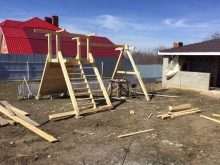
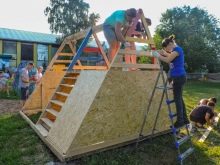
Manufacturing of basic structures
When the drawings are ready, and the dimensions are finally determined, it's time to get to work.And first of all, you need to make a fence with your own hands. There is no need to form an impenetrable wall, it will be much better if the fence is relatively low and as aesthetically pleasing as possible. Designers even recommend using rich colors. If this condition is met, the type of material is no longer very important.
As for the height of the barrier, a balance must be observed: it is bad when children can easily climb in or out, but it is also wrong when adults cannot look over the fence. The optimal spacing is from 70 to 100 cm. Experts recommend making the barrier from mesh, which makes it easier to observe and reduces the sailing effect in comparison with monolithic blocks. Even if a relatively strong wind blows, the risk of the fence falling is reduced to zero; and even if it collapses, there is no particular danger to children. It is advisable to use vertical connecting elements (pillars, supports); their exit in the horizontal plane beyond the size of the fence itself is fraught with injuries.
At the moment of play, children think least of what is in front of them. The only place where horizontally oriented elements can be used is at the bottom of the barrier. And even there they are needed solely to increase the rigidity and block the access of animals. The upper cut is necessarily made smooth with a rounding. The ingenuity of even babies knows no obstacles, and any unevenness will almost inevitably result in injury.
It is necessary to arrange the details of the fence in increments of at least 0.1 m. In this case, the risk of getting the head and other parts of the body stuck is guaranteed to disappear. Selecting and installing any material, it is required to check whether it will withstand the load.
Almost always, a fence in a children's corner is made of plastic, metal or wood. Plastic is the least practical because it has a low strength and breaks easily.

Wood is the simplest and most affordable option. For your information: in order for the children to definitely like the approaches to the site, it is best to involve them in painting the fence, in decorating it with drawings. The catchy and unusual plots borrowed from cartoons, fairy tales and similar works will be quite attractive. If you have the skills to perform welding, you can make a fence out of metal. But you also need to strictly observe the technology of painting a metal surface.
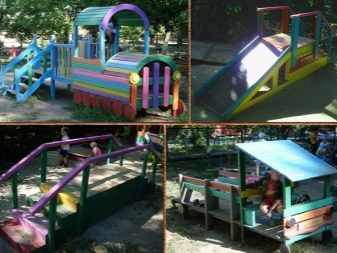
To decorate a playground in the yard or in the country, you can build a locomotive out of wood with your own hands. Such a toy composition has enjoyed well-deserved popularity for many decades. And making it does not require any special professional skills. It is recommended to take a spruce or pine edged board for work. It is better to focus on two sizes at once: 4x10 and 2.5x15 cm. The optimal length for work is 6 m, but it is more convenient to transport three-meter boards.
The base frame is made of smaller planks. In order for the parts to be pressed tightly and held tightly, trimming is required.
Important: before assembling this part, you must already have a ready-made drawing on hand in order to eliminate errors. It is best to connect the parts with wood screws that do not corrode. So that the locomotive does not lose its attractive appearance in the coming months, it is necessary to impregnate all the blanks with antiseptic compounds.
Having prepared and mounted the vertical frame, they start laying the floor. The closure of the gaps is achieved by the use of extensions. Boards are dispersed along. The sides of the booth are sewn up with a board 2.5x15 cm, the length of which is 95 cm. Usually, to make one side, 8 whole and 1 dispersed along the board are enough, more halves can be screwed on top.
Important: when the roof is sewn up in the booth, you need to fit the boards as tightly as possible, otherwise the rain will chase the children away. Window sills are made with armrests inside and outside. The total width is 5 cm. Additional reinforcement of the windows implies the installation of a pair of racks from the inside on each side.This is necessary so that short parts do not stagger arbitrarily after opening the openings.
It is imperative to put it inside the bench. Dobors are covered with a casing. They make and fix the racks supporting the "steam locomotive" - so that later it would be possible to cover them with wheels. The racks must be installed symmetrically. After them, small (30 cm) and large (50 cm) wheels are made.
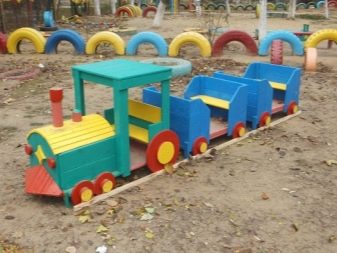
The sleepers are set exactly under the posts, the imitation of the rails is done using a 4x10 cm board. Usually the track width is 98 cm, and 1 rail reaches 2.5 m in length. ... When all this is done, each of the wooden parts are passed with a grinder, and then with sandpaper, after which the surfaces are painted.
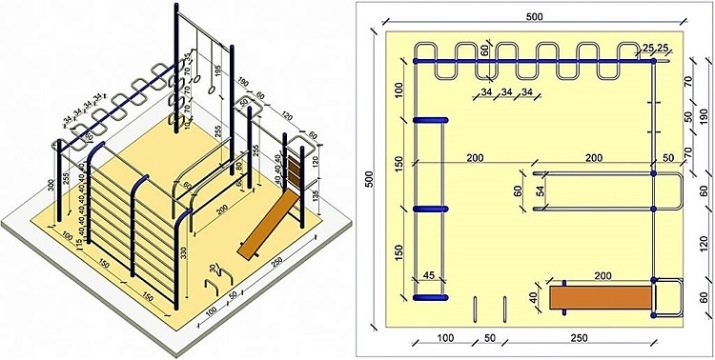
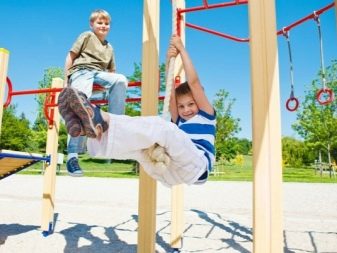
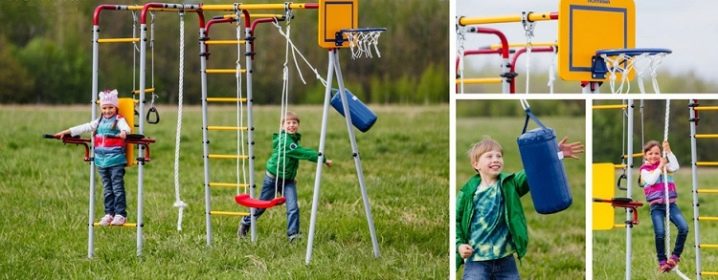
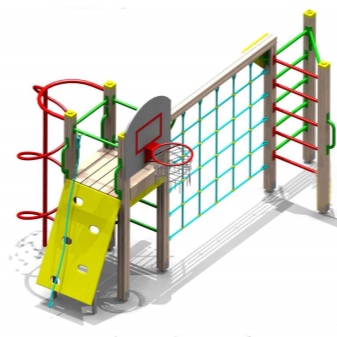
The toy train for preschool age is almost perfect, but in the older group it is no longer serious enough. Therefore, for children, along with this wooden play composition, it is required to prepare a sports area. It is quite logical if it is carried out with the expectation of both young people and even adults.


Attention: there are no trifles in the selection of training equipment, or in their placement, or in safety measures. For the manufacture of crossbars with rings, both wood and steel pipes are used.
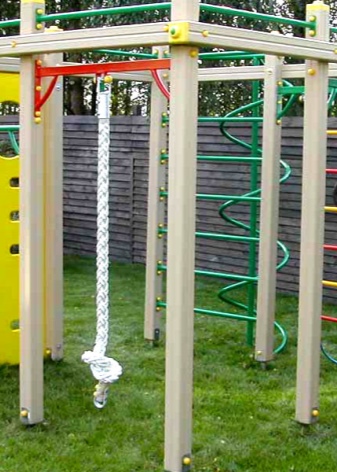
The height of the rings is made variable, and a rope is placed for adjustment. For almost all ages, metal stairs will come in handy, where it is easy to do a variety of exercises. Most often, a chain of such elements is built, the last in a row is calculated for adults. You cannot ignore the traditional components of physical culture corners - a crossbar on which you can pull yourself up.
Recommendation: in case of an acute shortage of space or money, you need to combine a ladder and a crossbar.
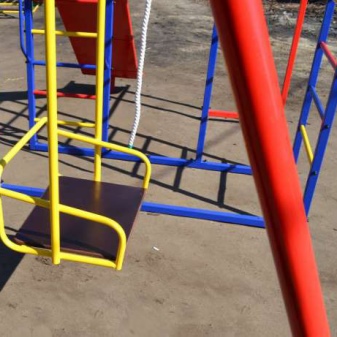
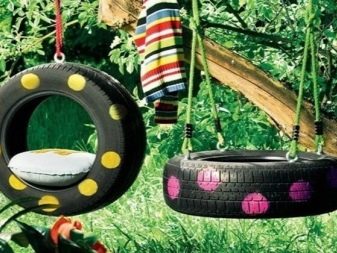
It is quite possible to use ropes and rope ladders. They do not even require the obligatory allotment of a specific area. Bars, other attractions and shells are used as additional elements. But there are no ready-made recipes here - you need to select everything individually. Contrary to the traditional stereotype, the swing may not be installed: the released funds are redirected to other purposes.
In addition to the listed structures, the sites are often equipped with:
- boxing pears;
- sandboxes;
- slides;
- auxiliary ladders;
- houses.
Stumps, bushes and trees are unacceptable throughout the playground. To minimize the risk of injury, the area around any projectile is covered with a powerful sand cushion. In some cases, they even form a lawn, even if it complicates and increases the cost of work.
For your information: it is worth considering in advance how the individual parts of the horizontal bars and other shells will be removed. In bad weather, it is best to move them under a roof.
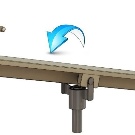
When the crossbar is being prepared, the bar located on top is first simply applied and then welded. In advance, each part is cut into fragments, the size of which is in harmony with the dimensions of the horizontal bar project. At the same time, corrections for deepening are introduced. The optimal size of the upper bar is selected so that children can grip it without unnecessary problems.
There are some subtleties when installing a punching bag trainer. An eyebolt is mounted for it, designed for increased load. On the reverse side, a small plate is placed, pressed by a nut. For the formation of the plugs, sheet steel 0.4 cm in thickness is used. Then the profile pipes are processed, preparing round channels for the crossbeams.
If you need to make ribs for pouring concrete, a steel corner 5x5 cm is used.
Important: support pipes are supposed to be marked with chalk, showing the depth of the entry into the ground. It is recommended to use corners of 0.4 m in length. They are attached to posts under a layer of concrete.In fact, these parts are designed to fulfill the tasks of the valves, to increase safety.
It is advisable to use magnetic squares: they make the work easier and more accurate. Round beams are welded both from the inside and outside of the tubular profile.
Attention: all parts need to be welded at the seams in order for them to hold better. When the welding is completed, the metal parts are coated with anti-corrosion mixtures. Everything that is located underground should be lubricated with mastic on both sides.
Decoration
It is not enough just to put even very reliable elements and sports equipment on the playground. It is also important to equip it, to make it as beautiful and pleasant as possible. Children and adults alike need this. You can create a lot with your own hands: this is not only a cheaper way to decorate, but also to do all the work "with a soul." Even if there is an opportunity to buy very expensive ready-made accessories, it is still “not quite right”.
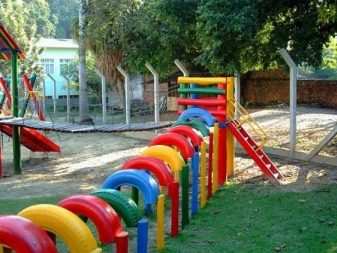
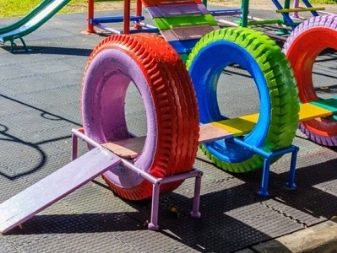
A common idea is to use unnecessary car tires. But they are so easily transformed that it is not difficult to create a completely original design. Most often, tires are prepared:
- flower beds;
- obstacles for exercising children;
- decorative figures.
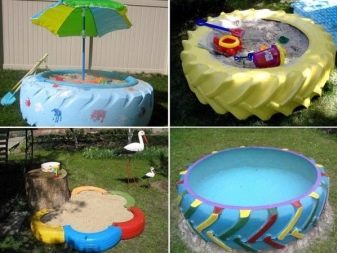
You can't just bury the wheel. It is washed and dried in advance. Tires buried vertically can form a finished makeshift bench. There are many options for arranging sites using plastic bottles. It is recommended to use bottles of various sizes, from which you can decorate the figures of exotic plants, outlandish animals, and so on.
Flat decoration designs are often made of plywood. To make them more elegant, you just need to apply building paints. An original, unbroken move is the use of polyurethane foam. It is blown into a custom paintable shape. Another great way to get things done is to visit the banks of a river or lake, where you can pick up pebbles and gravel of different colors and sizes.
Beautiful examples
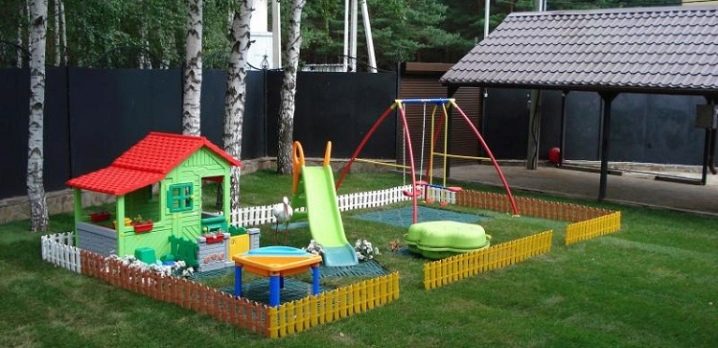
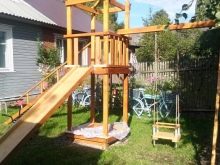
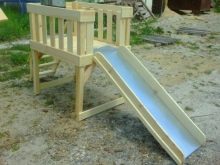
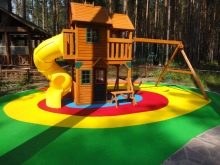
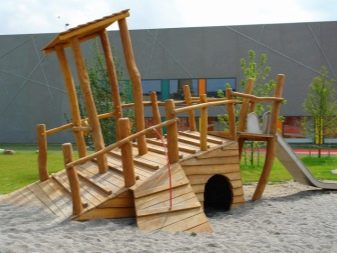
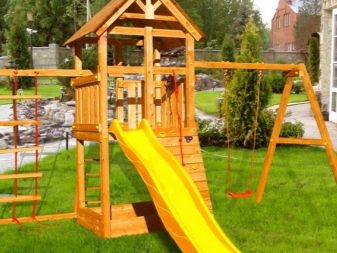
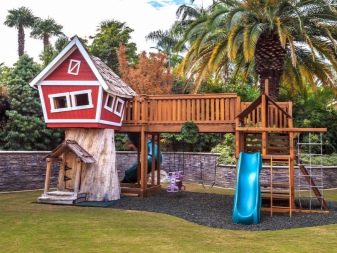
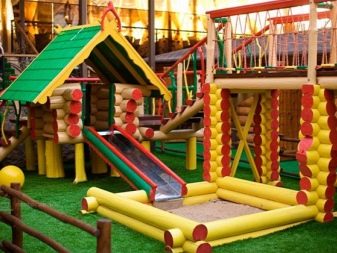
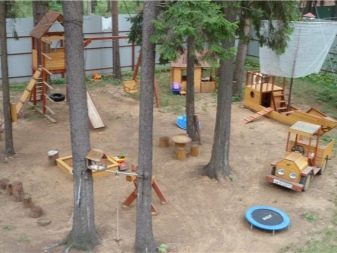
- It really looks like a luxurious site, in which a lot of work has been invested. But the result is worth it. The original "train" made of dark wood, ending with a steel slide, and a multi-colored coating make the view unforgettable for children. A bench complements this impression of an extraordinary shape. However, this is not the only option to create something unusual, eye-catching.
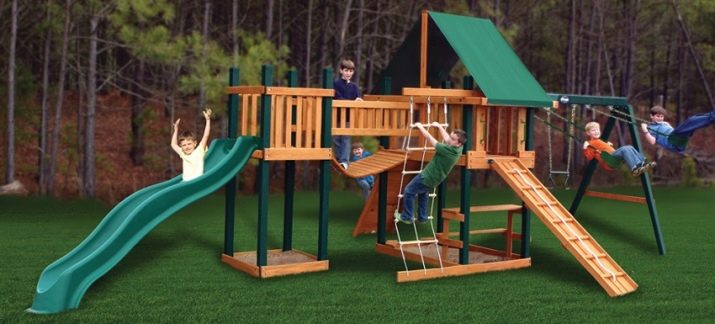
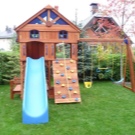
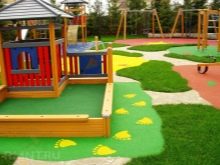
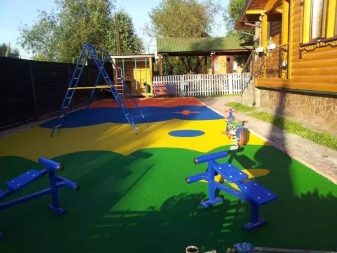
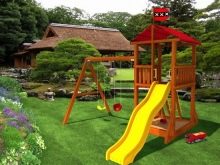
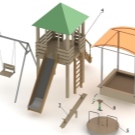
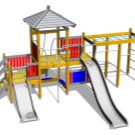
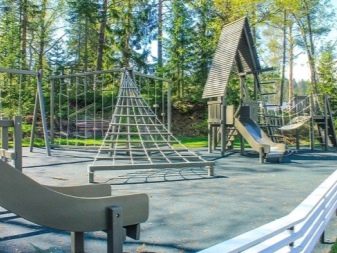
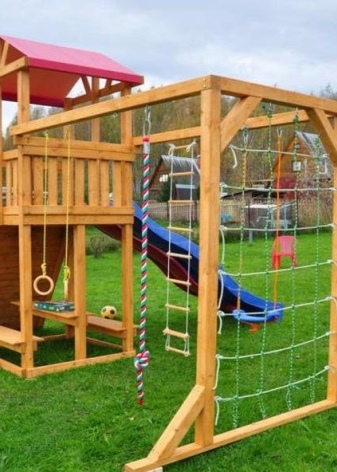
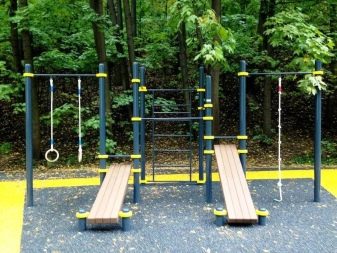
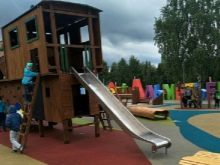
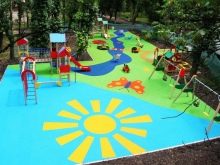
- This photo shows a playground for preschoolers and high school students alike. The latter will like a variety of sports equipment. Kids will love the design concept, which seems to reproduce the "sky", "river" and similar details.
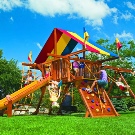
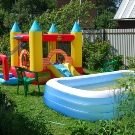
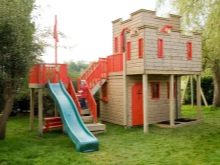
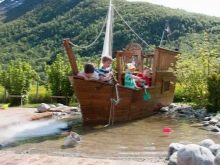
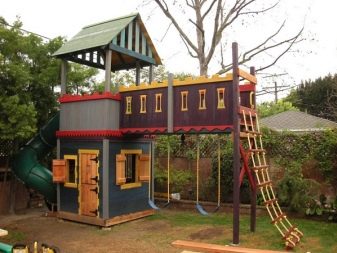
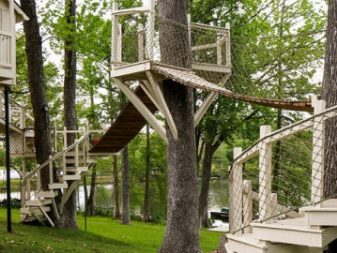
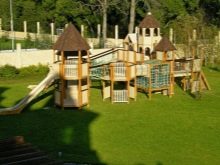
- We approached the work here differently: the designers tried to "merge" the diverse elements into one whole. "Medieval" turrets act as a romantic addition to the composition.
For information on how to make a playground with your own hands, see the next video.


The comment was sent successfully.